AppleII FujiNet Quickstart Guide
- Status of the AppleII FujiNet
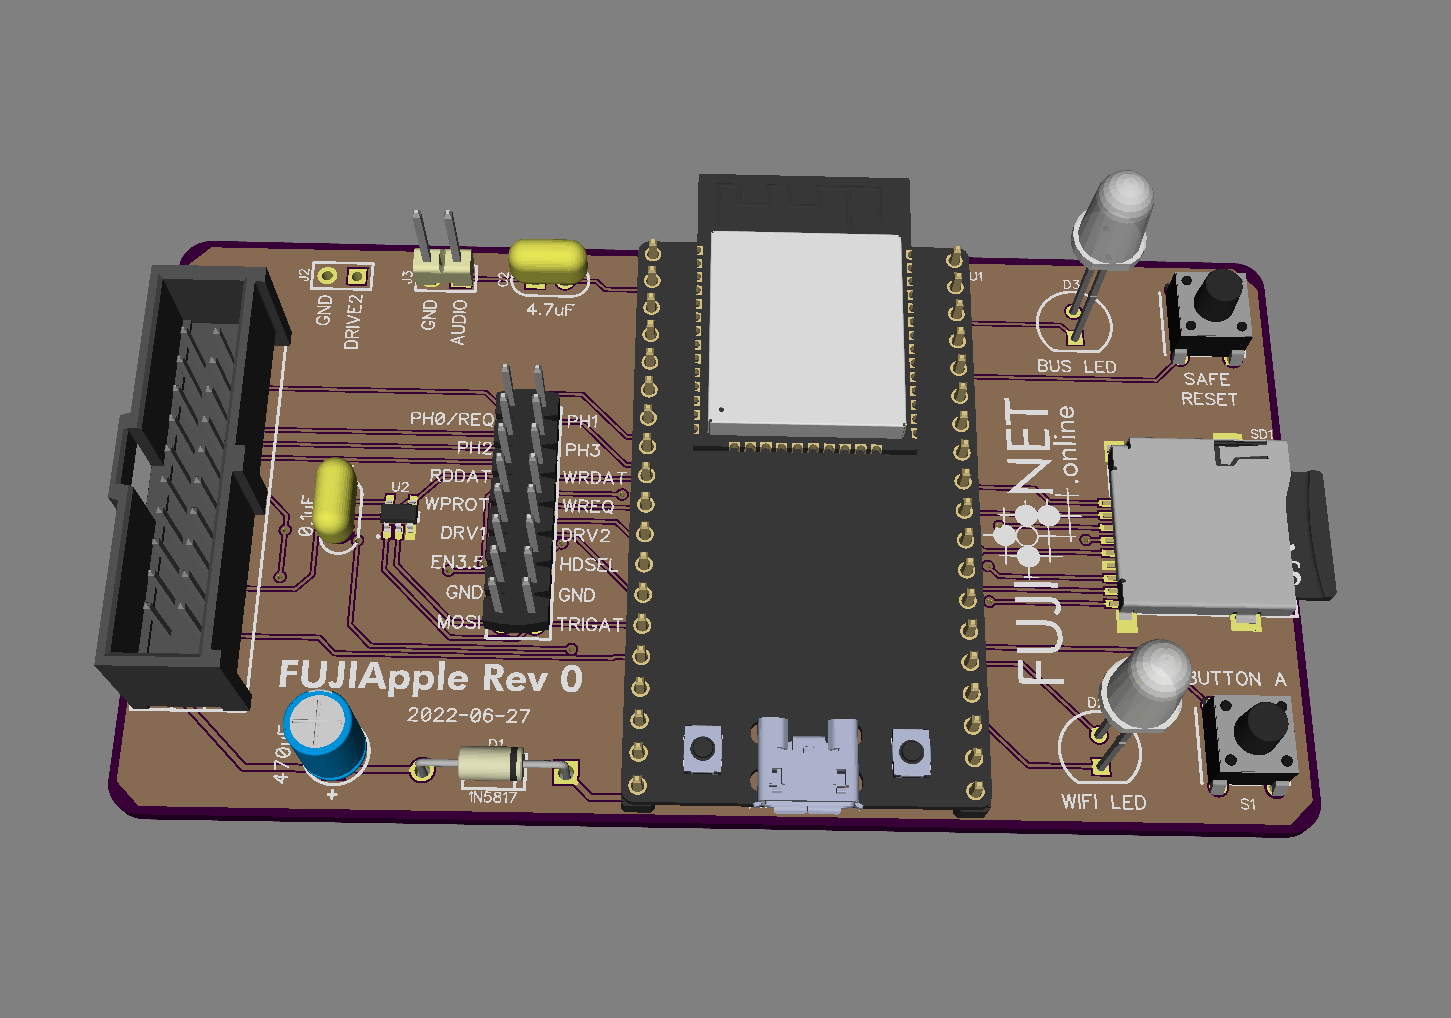
- Getting to Know Your FujiNet Proto Rev0 or 00
- Which Apples?
- Hooking Up FujiNet
- Bootup Notes and First Boot
- Navigating CONFIG
- Web User Interface
- Updating Firmware
- Finding and Loading Software
- Apple Disk Image Formats
Summer is here and so is the first Apple II FujiNet hardware: the Rev0 proto boards. These boards take a ESP32 Devkit-c and have an IDC-20 male connector which can be used currently with a DB19 to IDC20 adapter.
The Apple FujiNet is powered from the Apple II SmartPort or the MicroUSB port! You only need USB to flash firmware or capture debug output.
- Timing issues can cause corruption in SmartPort packets
The CONFIG app has issues traversing into sub-directories. Select images on the root of a TNFS server or use the web GUI to select images inside directories for now.
- The Apple IIGS can autoboot currently: just turn it on and with a properly wired and firmware-loaded FN it should load the CONFIG screen.
- Apple IIc cannot autoboot. To boot it ensure there is no disk in the internal drive (you can leave the drive connected). Then power on the Apple IIc. Hit CTRL-Reset to get to the ] prompt. Type
PR#5and the FN should load the CONFIG app. After you select a host and load a virtual slot you use ESC to boot. You must again CTRL-Reset and thePR#5to 'boot' that virtual drive and the disk should load. Check your logs if it doesn't (keep the USB connected and watch the logging output real-time)
- There is no power switch for your FujiNet. It will obtain power from the SmartPort cable and power itself when the Apple it turned on.
- The right side has a push/push MicroSD socket; inserting a SD card will force the FujiNet to reboot itself.
- There are 2 status LEDs; BOTTOM (white) is WiFi connection, TOP (YELLOW) is BUS (SmartPort) activity status.
- There are 2 buttons; TOP (S2) is Safe Reset, BOTTOM (S1) is To Be Determined
- The left side has one IDC20 port for SmartPort connections (via a DB19 connector to the back of your Apple II)
- In the center is a 0.1" double row header for debugging purposes (eg, logic analyzer)
The Apple II FujiNet currently only implements the SmartPort protocol from Apple. It works on a number of Apple II devices.
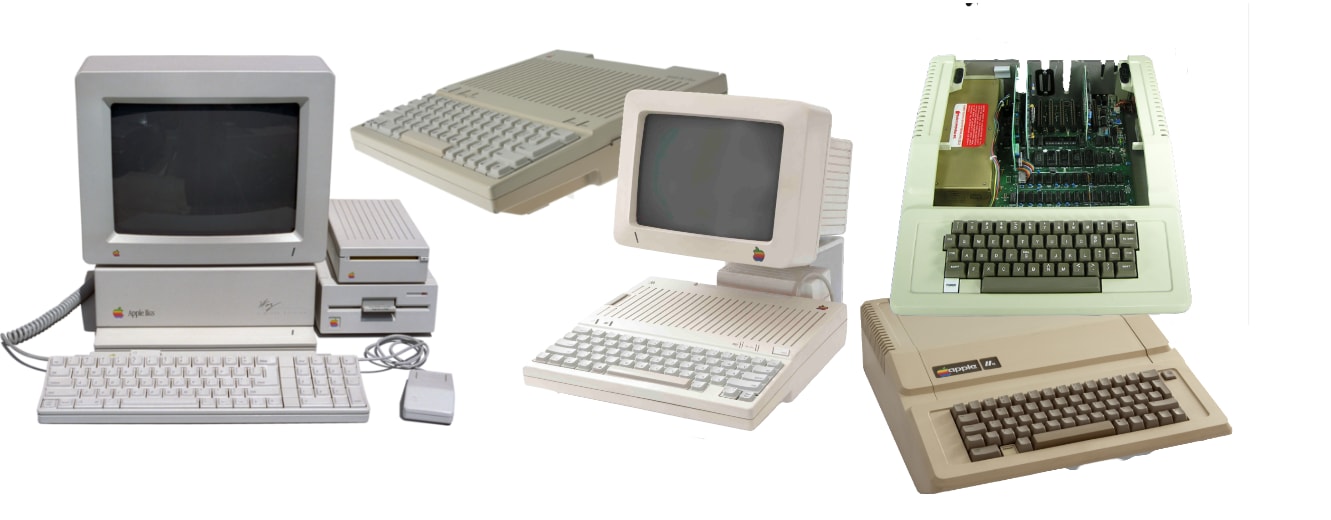
- Apple IIGS
- Apple IIc+
- Apple IIc
- Apple IIe
- Apple IIe Enhanced
- Apple II Plus
- softSP
- Apple Liron (AppleIII)
- Grappler w/ SoftPort ROM
- SuperSerial w/ DIY SmartPort (E)EPROM
- Yellowstone

You need two things to use the FujiNet on the Apple II. First is the physical disk port adapter. Usually they are IDC-20 ribbons that go into the DB-19 male adapter that connects to the female port on the back of the Apple. You also of course need a FujiNet device!
You will need a DB-19 disk adapter - to get those FN pins into the SmartPort on the Apple.

You can get adapters from the locations below:
- Apple FujiNet Rev0 or Rev00 Board
- These are available in very limited supply currently to people actively working on FN

FujiNet is powered directly from the Apple II bus and no external power is required. You can, however, optionally power the FujiNet from the MicroUSB port on the back. If external power is applied, the power switch will not function to turn ON or OFF the FujiNet since power is being supplied directly to the ESP32-DEVKITC module. The MicroUSB port is also used to upgrade firmware and provides debug output messages to a serial monitor on a computer.
When you turn on the Apple2 with FujiNet connected it may ask to attach a drive. This can happen because the FujiNet is not fast enough to completely boot and be ready before the Apple2 boots. You can do a Ctrl-OA-Reset to reset the Apple2. You can alternatively power the FujiNet from it's MicroUSB port (see Hooking Up FujiNet) and it will always be ready.
- On Apple IIGS you can set boot device as Port 5 (smartport) by entering into the Control Panel at boot (Ctrl-OA-ESC). Choose Disk and set startup disk to slot 5. Now your Apple IIGS won't miss the FujiNet and ask you to attach a drive.
Keys                               function
-----------------------------------------------------------------
Ctrl-OA-Reset                      Reboot
Ctrl-Shift-OA-Reset                Reboot and re-load BRAM (ROM 03)
Ctrl-OA-OPT-Reset                  System test (OA-OPT to repeat)
Option while power-on              Menu to Reset standards
Ctrl-OPT-Reset                     Reboot and give menu
Ctrl-OA-ESC                        Go to control panel
Ctrl-OA-Shift-ESC                  More direct to control panel
Shift 5 times                      Enable sticky keys (ROM 03 or Sys 6)
Shift-OA-Clear                     Enable keyboard mouse (ROM 03 or Sys 6)
Ctrl-OA-Del                        Clear keybard type-ahead buffer
Hold OA, then Ctrl-Del             Auto fire Button 0
Shift-Period on keypad             Comma
Ctrl-OA-2 in GS/OS desktip app     Select "About.."
Control-6, then <key> in BASIC     Set cursor to <key>
Ctrl-OA-OPT-N  at sliding Apple    Credits
          (i.e "Check Startup" screen)
When you turn on the Apple II with FujiNet connected it will load the CONFIGuration disk from FujiNet. If it's the first time you booted the FujiNet or if the saved WifI access point is not available you will be prompted to setup a wireless connection. Select your access point and enter it's passphrase.
 The config screen for Apple II
PLEASE NOTE: FujiNet is powered by the Espressif ESP32 chipset, which works on 2.4GHz WiFi networks ONLY. If you are using a "mixed" 2.4GHz/5GHz WiFi network (using both radio bands with the same SSID), you MAY have problems connecting your FujiNet device with other devices on the network.
CONFIG was designed to be intuitive and reminiscent of Apple2 programs like ProDos. On the main CONFIG screen you will see host slots on top and disk slots on bottom. You can jump between the host slots and disk slots with [TAB]. Selecting a host slot ([RETURN]) will begin the process of selecting and mounting a disk image from the host to a disk slot.
Host slots can be an IP address or hostname of a TNFS server (eg, adam-apps.irata.online, fujinet.diller.org). Any host slot can also be named SD which points to the onboard SD card socket. With a host slot selected, press [E] to edit it.
Your #FujiNet makes available a simple web-based configuration interface when you visit your device's IP address while it's powered on.
To find its IP address, use the [C] "Show Config" option, available in the main screen of the CONFIG program. You can also find the #FujiNet in your router's list of connected devices, by its hostname (default: "FujiNet").
For example, if your #FujiNet's IP address on your local network is "192.168.0.123", you would visit http://192.168.0.123/ in a browser connected to that same network.

Note: not all components of the web ui work with Apple II at this point.
You can download the FujiNet-Flasher (for Windows, macOS, or Linux), from https://fujinet.online/download/. For more information, see FujiNet-Flasher
There are some Apple2 disk images available on various tnfs servers:
- FUJINET.ONLINE
- FUJINET.DILLER.ORG
- atari-apps.irata.online (apple images are on this server)
The Host names can be entered in lower-case on the Apple II, however they will appear in UPPER CASE when the CONFIG app is re-loaded. This is normal.
Currently the Apple2 implementation only works with HDV and PO images, so ensure you have those. More disk image formats for the apple will be added later.
APPLE
.
├── A2OSX.PO
├── APPS
├── GAMES
│ ├── beyond_wolfenstein.po
│ ├── CHOPLIFTER.PO
│ └── DONKEYKONG.PO
├── hello.po
└── IIGS
    ├── DragonsLair.po
    ├── lemmings.hdv
    └── Print_Shop_1987_Broderbund.2mg
There is a lot more here to digest than on the Atari and Adam. Some good links to read are below:
- Apple II Disks and Images
- What's the difference between DOS-ordered and ProDOS-ordered disk images?
- How can I programmatically determine whether an Apple II .dsk disk image is a DOS .do image or a ProDOS .po image?
As work continues on the Apple II CONFIG implementation (led by JeffP) more formats will be supported!