| title | seoDescription | datePublished | cuid | slug | cover | ogImage | tags |
|---|---|---|---|---|---|---|---|
A Step-by-Step Guide to Installing Pre-Configured Cloudcannon Themes for Your Jamstack Project |
This guide will walk through the steps required to get your Next.js pre-built Cloudcannon site ready to configure and deploy to Cloudcannon. |
Tue Mar 21 2023 09:56:43 GMT+0000 (Coordinated Universal Time) |
clfi2zu2r000309jvfpm3e7rl |
a-step-by-step-guide-to-installing-pre-configured-cloudcannon-themes-for-your-jamstack-project |
templates, nextjs, static-site-generation, jamstack, cloudcannon |
As a website developer, you are always on the lookout for ways to create beautiful, functional websites quickly and efficiently. One way to do this is by using pre-configured Cloudcannon themes.
This guide will walk through the steps required to get your Next.js pre-built Cloudcannon site ready to configure and deploy to Cloudcannon.
If you intend to run this lab on your system, please ensure you have the following:
-
A basic understanding of working with the terminal.
-
A Laptop or PC with Windows installed
-
A Internet connection
-
Git installed on your local machine (optional). For more details on accomplishing this, review Installing & Setting Up Git on Windows.
-
A GitHub account. For more details on accomplishing this, review How to get started with Git and GitHub
-
The latest version of Visual Studio Code is installed on your machine.
-
Benefits of using pre-configured Cloudcannon themes
-
Cloning a pre-built Website Template repository from GitHub
-
Setting up your Jamstack project using the Terminal
-
Instructions for running the project
-
Accessing the development site
-
The folder structure of the template
-
Editing the components and the overall theme
-
Deploying the project on Cloudcannon (external resource)
Cloudcannon themes are pre-built website templates that come with all the necessary files and plugins to create a complete website. This means that you don't have to start from scratch every time you create a website. Instead, you can use a pre-configured Cloudcannon theme as a starting point.

Here are some benefits of using pre-configured Cloudcannon themes:
One of the biggest benefits of using pre-configured Cloudcannon themes is that it saves you time and effort. With a pre-built theme, you don't have to spend hours designing and coding a website from scratch. Instead, you can simply customize the theme to suit your needs.
Cloudcannon themes are designed by professional web designers, which means they are visually appealing and user-friendly. These themes are designed using best practices and are optimized for performance, which means your website will look great and load quickly.
More and more people are using mobile devices to browse the internet, which means your website needs to be mobile-friendly. Cloudcannon themes are designed to be responsive, which means they will look great on any device.
Another benefit of using pre-configured Cloudcannon themes is that they are easy to customize. You can customize the theme to match your branding, add your own content, and make any necessary changes.
Creating a website from scratch can be expensive, especially if you hire a web designer or developer. Using a pre-configured Cloudcannon theme is much more affordable since the cost of the theme is much lower than hiring someone to create a website from scratch.
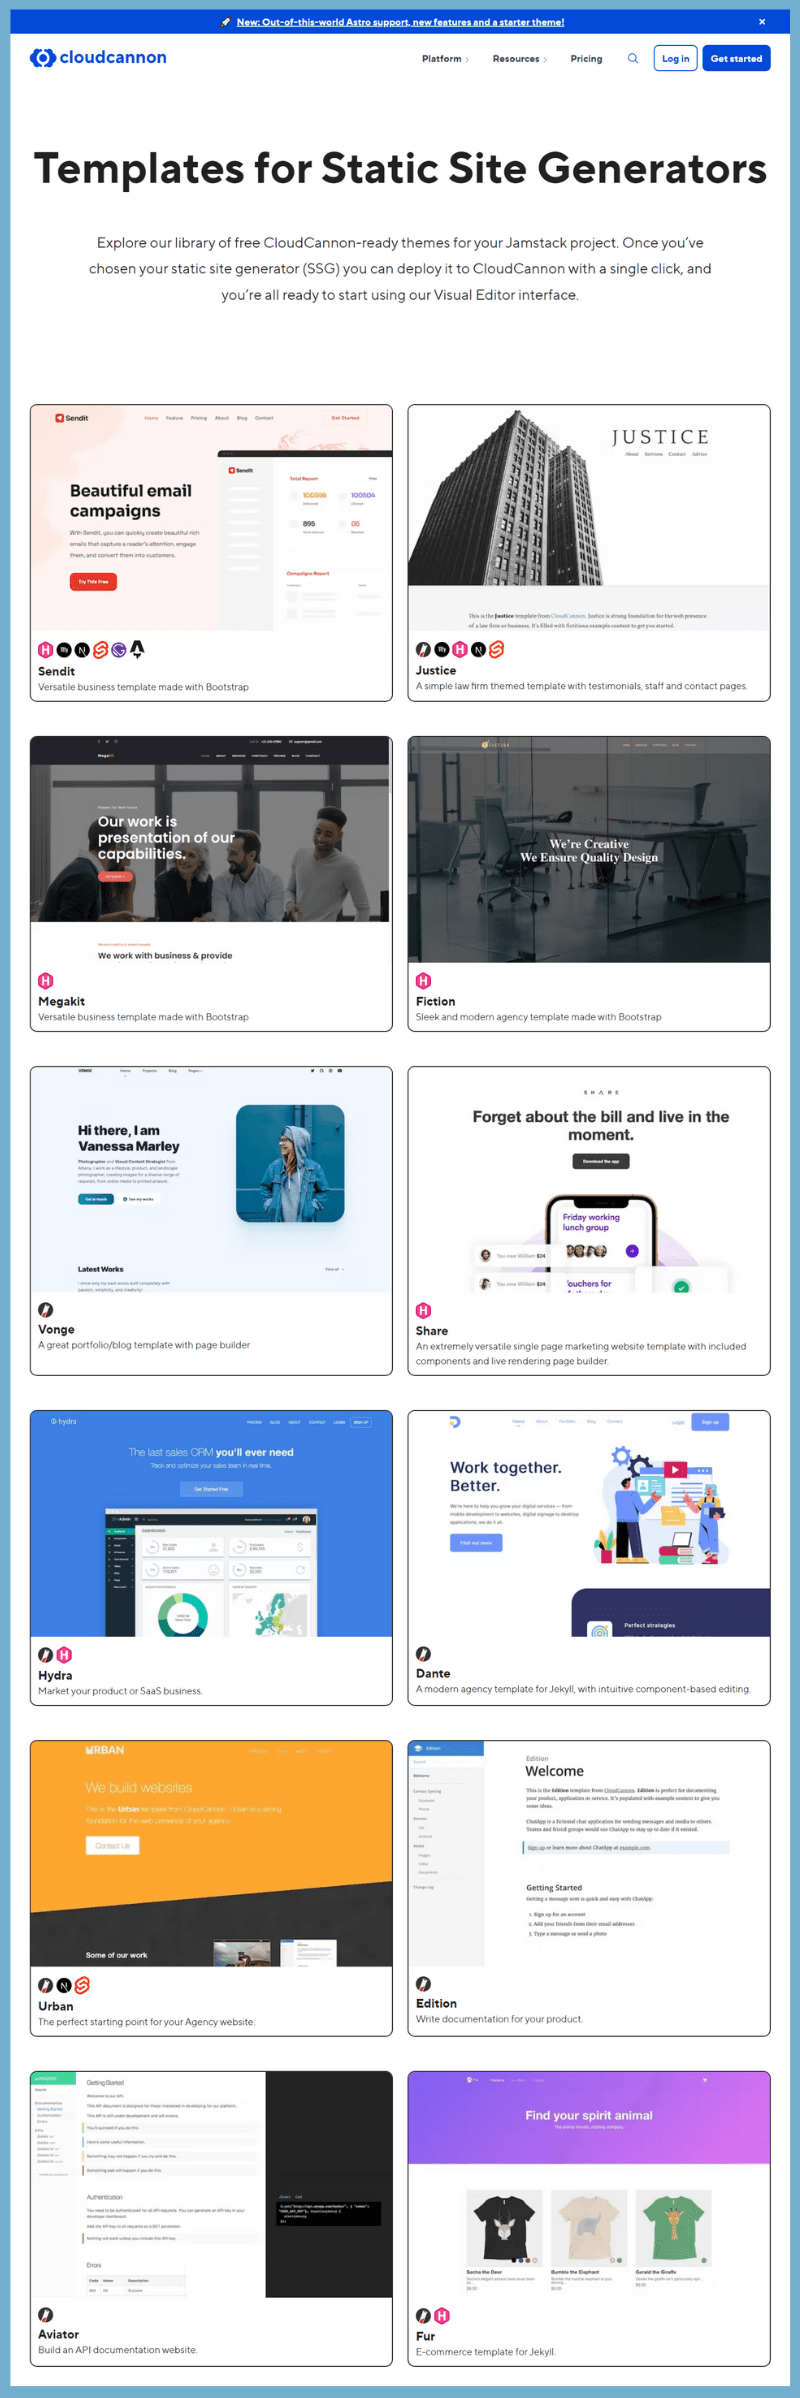
The pre-built website template Justice provides an easy starting point for building a Law firm themed business template for Next.js. Browse through a live demo. Increase the web presence of a law firm or business with this configurable theme. You can also check out the live demo of this template.
-
Contact form
-
Pre-built pages
-
Pre-styled components
-
Blog
-
Post category pages
-
Disqus comments for posts
-
Staff and author system
-
Configurable footer
-
Optimised for editing in CloudCannon
-
RSS/Atom feed
-
SEO tags
-
Google Analytics
Effort: 10 mins
To create a new project, we'll use the justice-nextjs-template from Cloudcannon's Github repository.

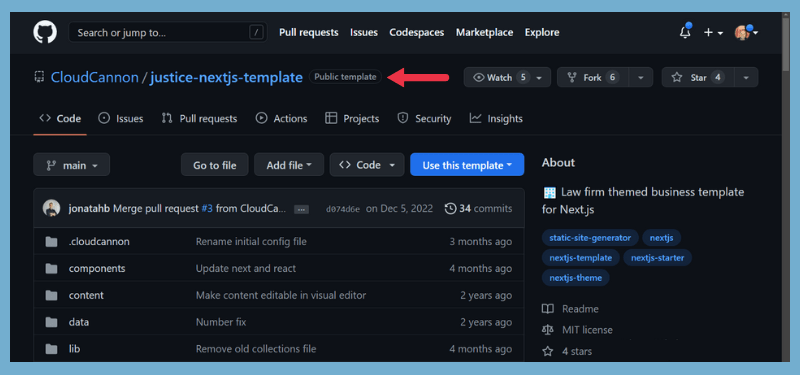
1 - Access Cloudcannon's justice-nextjs-template Github repository.
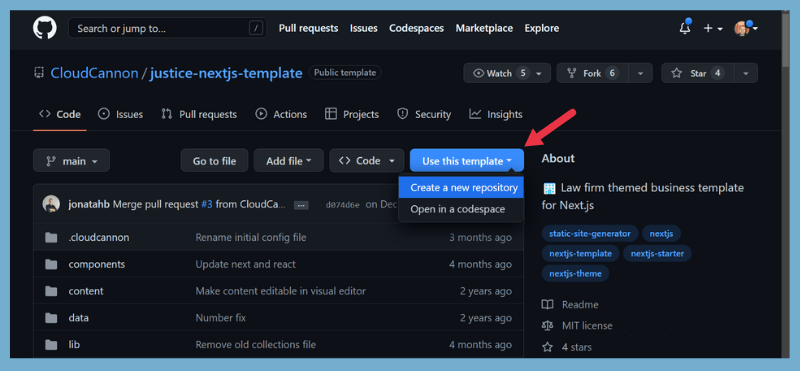
2 - Click Use this Template, then
3 - Click Create New Repository

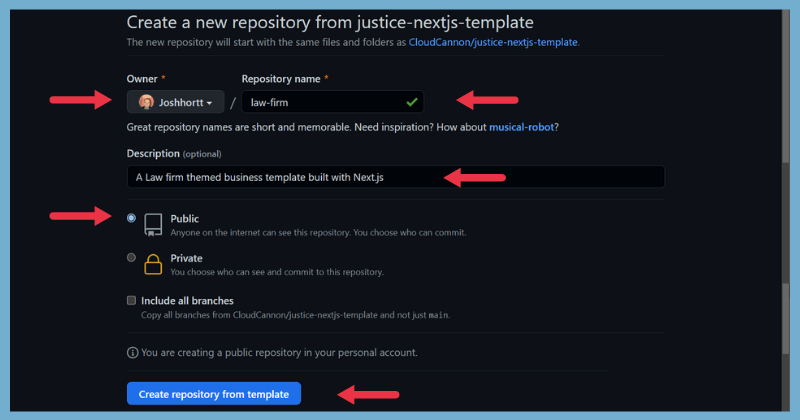
A new Window will open.
4 - Enter a repository name. For example law-firm. Optionally, add a description of your repository & choose the Owner. That should be you!
Then click Create Repository from template.

This will generate a Repository on your Github account. You just become the owner of this template.
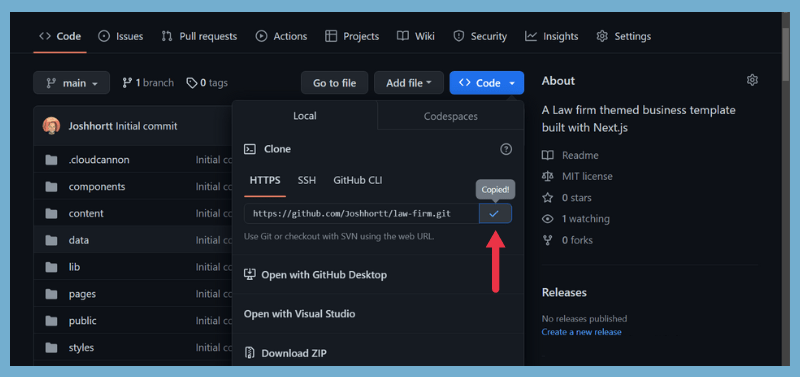
A clone is a local copy of a remote repository. Before you can clone the repository, you first need its HTTPS URL, which provides secure access to it.
To clone the repository, complete the following steps:
1 - Click the button Code on the repository's main page.
2 - Click the clipboard icon to copy the URL. Make sure the HTTPS tab is active.

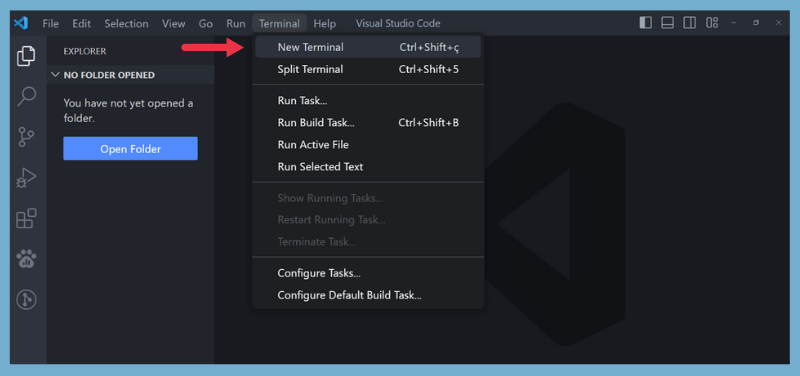
3 - Open the terminal in your IDE environment by using the menu in the editor: Terminal > New Terminal.

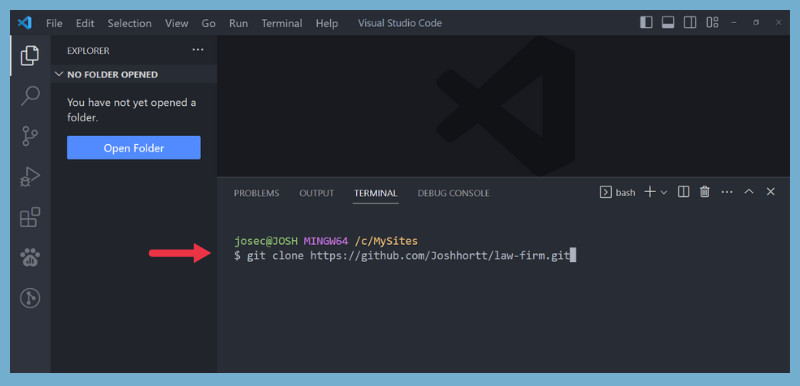
4 - Head over your Projects Directory in your Terminal

5 - Paste the following command with the HTTPS URL you copied earlier:
git clone <your repository HTTPS URL>
For example: Click the clipboard icon to copy the code, but change the repository User.
git clone https://github.com/Joshhortt/demo-website-starter.git6 - Hit ENTER

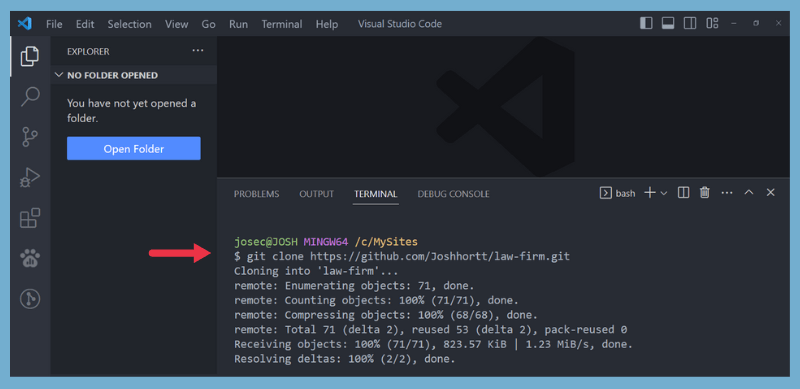
7 - Now change cd into that directory and open up your project directory by typing the following commands:
cd law-firm
code .
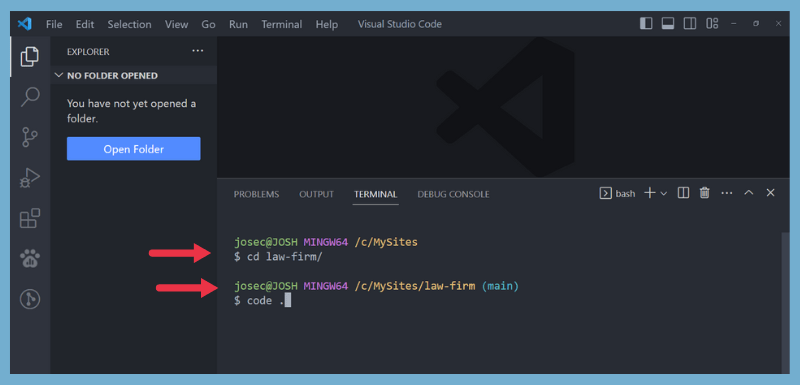
Running the project in development is very straightforward. To run the project, head over to the ‘website’ folder and run the following commands:

1 - In your terminal, run yarn install or npm install which is going to install the dependencies.
npm install
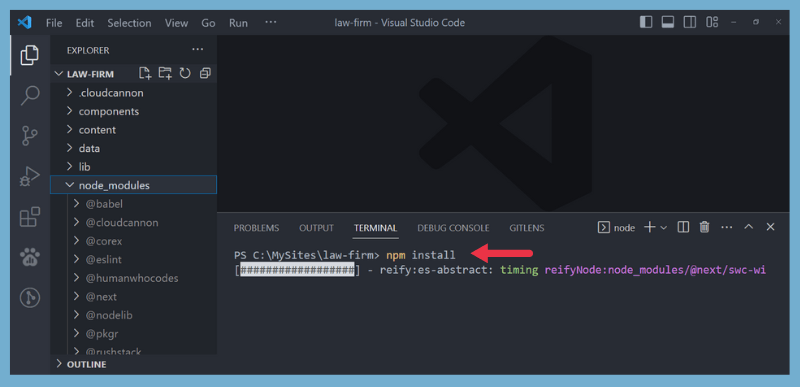
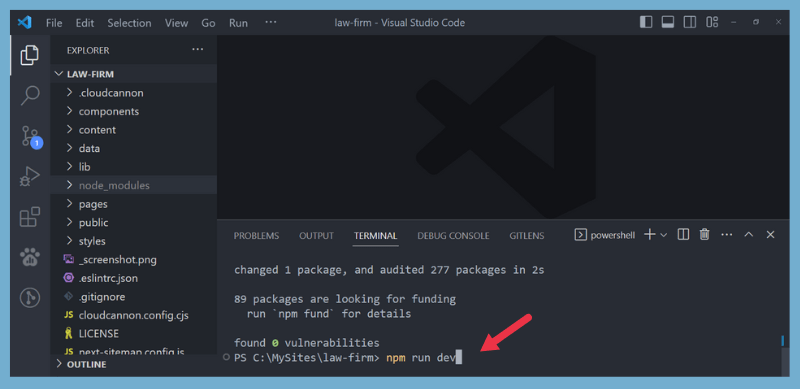
2 - After that, run yarn dev or npm run dev which is going to start up a local development server, which you can open up in a new tab.
npm run dev
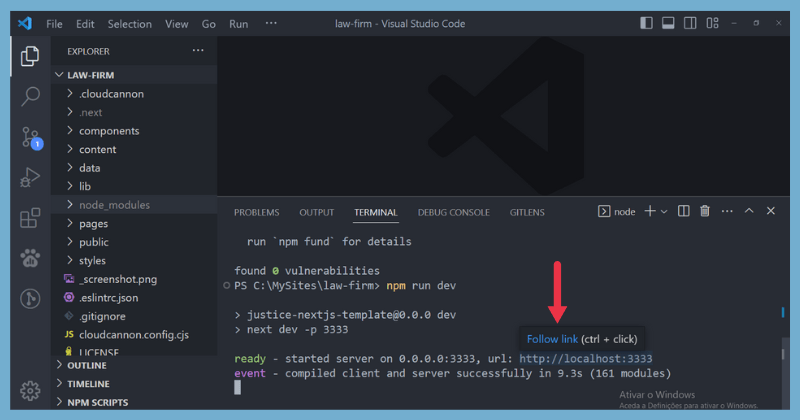
Once the development server is running, you will be able to browse to http://localhost:3000 or maybe http://localhost:3333
1 - Click on Follow Link which you can open up in a new tab. (url: localhost:3333).

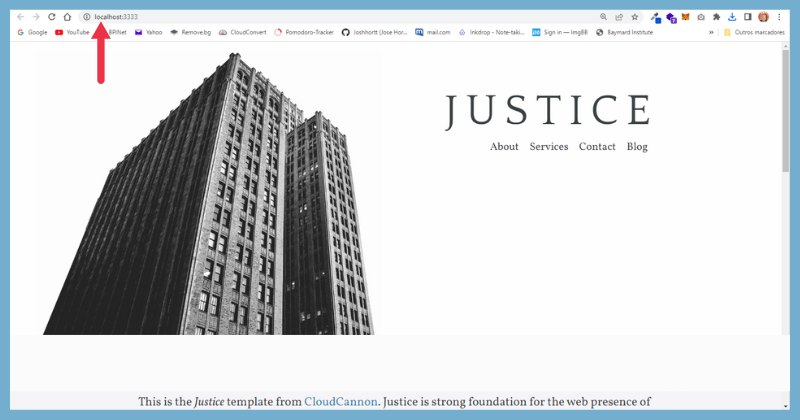
2 - Once it's loaded, Voilá! you can see your new website, where you have a complete website with a home page, an about page, a services page, a contact page a blog page with some blog posts that you can edit and configure the way you want.

Now I am not going to dig too much into the code, but if you have a look at the Folder structure of this Ready Website you can see that this looks like a pretty awesome Business Website ready to use.
This section provides you with a better understanding of the folder structure.
law-firm
|
|-- .cloudcannon
|   |-- initial-site-settings.json
|-- components
|   |-- layouts
|   |   |-- default.jsx
|   |   |-- page.jsx
|   |   |-- post.jsx
|   |-- icon.jsx
|   |-- staff-member.jsx
|   |-- post-summary.jsx
|   |-- post-summary-details.jsx
|-- content
|   |-- pages
|   |   |-- about.md
|   |   |-- blog.md
|   |   |-- contact-success.md
|   |   |-- contact.md
|   |   |-- index.md
|   |   |-- services.md
|   |   |-- terms.md
|   |-- posts
|   |   |-- business-mergers.md
|   |   |-- real-estate-flipping.md
|   |-- staff-members
|   |   |-- jane-doe.md
|   |   |-- john-doe.md
|   |   |-- _defaults.md
|-- data
|   |-- company.json
|   |-- footer.json
|   |-- seo.json
|   |-- site.json
|-- lib
|   |-- data.js
|   |-- rss.js
|-- pages
|   |-- blog
|   |   |-- [slug].jsx
|   |   |-- index.jsx
|   |-- 404.jsx
|   |-- [slug].jsx
|   |-- about.jsx
|   |-- contact.jsx
|   |-- index.jsx
|   |-- _app.jsx
|   |-- _document.jsx
|-- public
|   |-- uploads
|   |   |-- building.jpg
|   |-- apple-touch-icon.png
|   |-- favicon.png
|   |-- touch-icon.png
|-- styles
|   |-- forms.scss
|   |-- _layout.scss
|   |-- _typography.scss
|   |-- cloudcannon.scss
|   |-- main.scss
|-- .eslintrc.json
|-- .gitignore
|-- LICENSE
|-- README.md
|-- _screenshot.png
|-- cloudcannon.config.cjs
|-- next-sitemap.config.js
|-- next.config.js
|-- package-lock.json
|-- package.json
|-- siteicon.png.cloudcannon Initial config file
components This folder includes another folder called layouts and four files:
-
layouts
-
icon.jsx
-
staff-member.jsx
-
post-summary.jsx
-
post-summary-details.jsx
components/layouts - Within layouts, are three files. Where you can update the Call to action description, Navbar names, Footer links, Add the privacy policy link to your footer, update the posts author title and much more..
-
default.jsx
-
page.jsx
-
post.jsx
content - Within content, are three folders with markdown files.
-
pages
-
posts
-
staff-members
content/pages - These are all the Template pages.
content/posts These are the template Blog Posts.
content/staff-members - These are the posts authors, But you can make them your Company team members If you prefer.
data - Within data, are four JSON files.
-
company.json - Where the company's details are.
-
footer.json - Where the Footers' pages links & social icons are.
-
seo.json - Where the site and author details are.
-
site.json - Where you can add your Google Analytics and Disqus.
lib - Within lib, are two files. Normally You don´t need to change anything on these files.
-
data.js
-
rss.js
pages Within pages, are one folder and seven files.
-
blog
-
404.jsx
-
[slug].jsx
-
_app.jsx
-
_document.jsx
-
about.jsx
-
contact.jsx
-
index.jsx
pages/blog - Within blog, are two files.
-
slug].jsx
-
index.jsx
public - Within public, are one folder called uploads and three PNG files.
-
uploads
-
apple-touch-icon.png
-
favicon.png
-
touch-icon.png
public/uploads
- building.jpg - This is the Home page Banner Image.
styles - Within styles, are five SCSS files.
-
forms.scss
-
_layout.scss
-
_typography.scss
-
cloudcannon.scss
-
main.scss
root directory - The other project file are:
-
.eslintrc.json
-
.gitignore
-
LICENSE
-
_screenshot.png
-
cloudcannon.config.cjs - Important Global configuration file
-
next-sitemap.config.js
-
next.config.js
-
package-lock.json
-
package.json
-
siteicon.png
-
Add your site and author details in
content/data/seo.json. -
Add your Google Analytics and Disqus keys to
content/data/site.json. -
Get a workflow going to see your site's output (with CloudCannon or Next.js locally).
Justice is already optimised for adding, updating and removing pages, staff, posts, company details and footer elements in CloudCannon.
-
Add, update or remove a post in the Posts collection.
-
The Staff Author field links to members in the Staff collection.
-
Change the defaults when new posts are created in
content/posts/_defaults.md
-
Preconfigured to work with CloudCannon.
-
Sends email to the address listed in company details.
- Reused around the site to save multiple editing locations.
-
Exposed as a data file to give clients better access.
-
Set in the Data / Footer section.
Reused around the site to save multiple editing locations. Set in the Data / Company section.
If you want to read my latest article explaining How to configure and Edit Jamstack sites on cloud cannon please click here.
If you want to deploy this template or your own edited Website to cloudcannon, I'll explain in detail how you can achieve this step. Please read this article How to deploy Jamstack sites to cloudcannon
Ask the Cloudcannon team or leave a comment. I' 'll try to get back to you as soon as I can.
Using pre-configured Cloudcannon themes can save you time and effort, provide you with a professional design, ensure your website is mobile-friendly, and be easily customized to suit your needs – all while keeping your budget in check. So the next time you need to create a website, consider using a pre-configured Cloudcannon theme as a starting point.
If you want to follow along with more advanced stuff in the next article. I'll talk about How to add a new site to enable branching workflows on cloudcannon?
Thanks for the read! Now go practice & build something awesome!