Status: Maintained
OpenCore Version: 1.0.2
Download now »
Report Bug
·
Recent Changes
·
YouTube Review
·
Original Repo
Recent Changes ⌚️
03.27.2024 : Updated to OpenCore 0.9.8, added the 2020 macOS Boot Chime, and added some minor patches.
11/28/2023 : Updated to OpenCore 0.9.6, added support for macOS Sonoma, and fixed Bluetooth.
05/17/2023 : Updated the OpenCore Bootloader to Version 0.9.2 and updated the AppleALC kext for improved headphone jack support.
04/12/2023 : Created folders EFI (macOS Ventura) and EFI (macOS Monterey).
04/11/2023 : Updated the OpenCore Bootloader to Version 0.9.1 and added the ECEnabler kext for improved power management.
03/19/2023 : Updated the OpenCore Bootloader to Version 0.9.0 and updated all kexts.
03/18/2023 : Intial Release.
My ThinkPad T470 Hardware Specs 💻
| Model | Lenovo ThinkPad T470 |
|---|---|
| Processor | Intel Core i5-7300U (2C, 4T, 2.6GHz / 2.71GHz) vPro (The best compatibility with macOS) |
| Graphics | Integrated Intel HD 620 Graphics with 4 GB of VRAM |
| Memory | 12 GB DDR4 (1x 4 GB DDR4 SODIMM + 1x 8 GB SODIMM) |
| Display | 14" HD (1920x1080) IPS, Non-Touch |
| Storage | 1 TB Pioneer SATA SSD |
| Ethernet | Intel Ethernet |
| WLAN + Bluetooth | Intel Wifi 18265 + Bluetooth 4.0 |
| Camera | 720p resolution, low light sensitive, fixed focus |
| Audio support | HD Audio, Realtek ALC3245 codec, stereo speakers 1Wx2, dual array microphone, combo audio/microphone jack |
| Keyboard | 6-row, spill-resistant, multimedia Fn keys, LED backlight |
| Battery | Internal Li-Polymer 3-cell (61) and External Li-Ion 3-cell (61) |
Hardware Compatibility 🧰
- CPU Undervolting
- Dual Battery (X220 Battery patch)
- All function keys working with yoga SMC
- Intel HD 620 Graphics
- Fan control (Fan stops at low temp below 60 and starts working above 55 automatically, not to worry)
- Touchscreen (VoodooI2C) - disabled it because it works like a f**king gaint touchpad!
- Power management (CPU friend data)
- Wi-Fi (Intel Wi-Fi 18265 & Broadcom BCM94360NG)
- Bluetooth 4.0 (Intel Wi-Fi 18265 & Broadcom BCM94360NG)
- USB C & Thunderbolt 3
- Apple HD Audio (ALC id=29 but not 47, because 47 gives unwanted buzzing noise when 3.5mm jack connected)
- Sleep (works perfect!)
- wake works (no issues with resuming services like BT and wifi etc)
- SD Card slot
- Handoff and Continuity (Intel Wi-Fi 18265 & Broadcom BCM94360NG)
- AirDrop (Broadcom BCM94360NG Only)
- FingerPrint Reader
- HDMI (Will work through USB C / Thunderbolt Hub pass-through)
⚠️ Anti-Piracy Warning / Disclaimer ⚠️
I do not endorse or condone the use of pre-configured Hackintosh Distros because not only they cause unnecessary harm to your machine but it is considered to be a form of Software Piracy. Software Piracy is a serious crime according to copyright law and is punishable for up to 10 years in prison.
⚠️ Anti-Liability Disclaimer ⚠️
Hackintoshing may be dangerous and can damage your device and I am not responsible for bricked devices, dead devices, thermonuclear war, or you getting fired because your system failed. Please do some research if you have any concerns about hackintoshing before you proceed.
Getting Started
To start you'll need the following:
You must have the following items:
- Lenovo ThinkPad T470 (Obviously 😁).
Please note that it is recommended your ThinkPad T470 has an Intel Core i5-7300U or at the very least an Intel Core i5-7200U in order for macOS to boot.
- Access to a working Windows machine with Python installed.
- A pendrive with more than 4 GB (Keep in mind, during the preperation we will format the disk to create the install media).
- an Internet connection via Ethernet.
- 1-2 hours of your time.
Creating the USB Installer
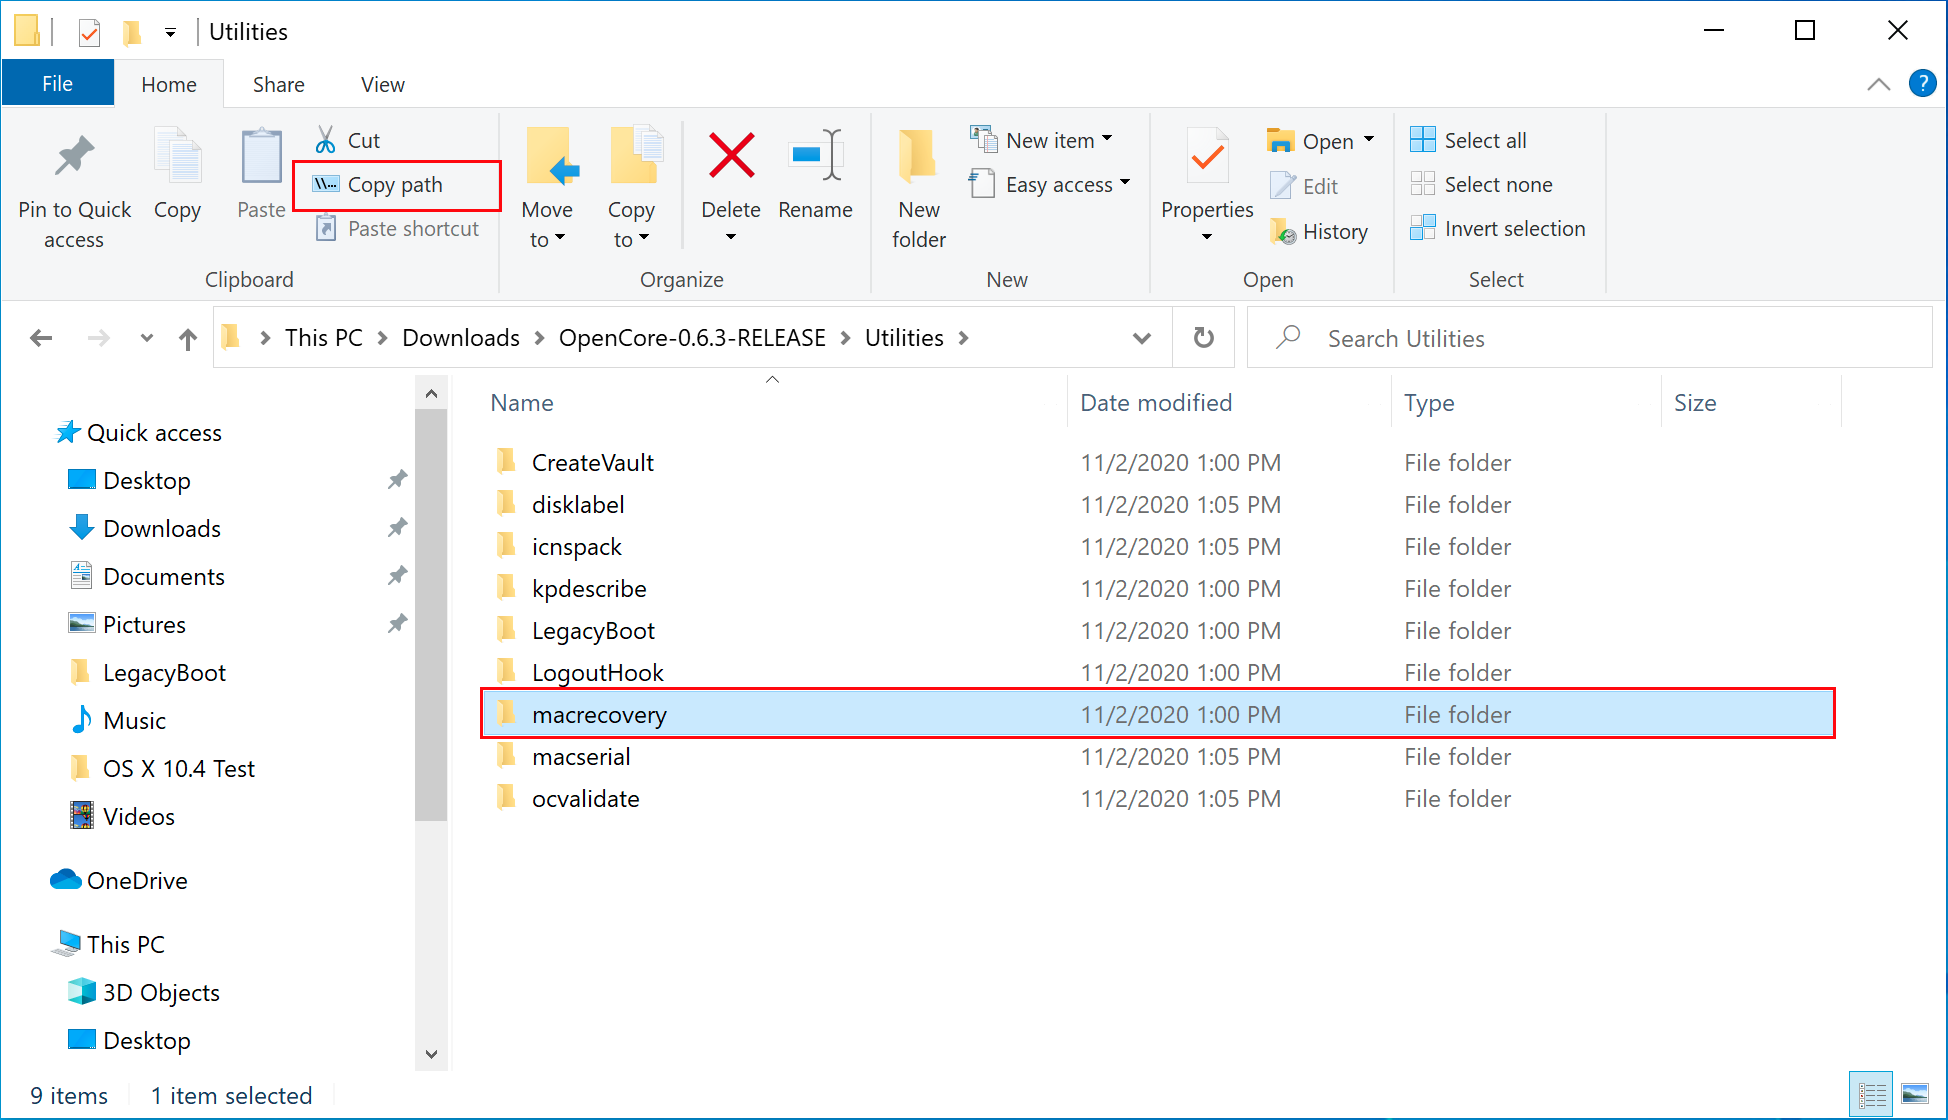
- To grab legacy installers is super easy, first grab a copy of OpenCorePkg and head to /Utilities/macrecovery/. Next copy the folder path for the macrecovery folder.

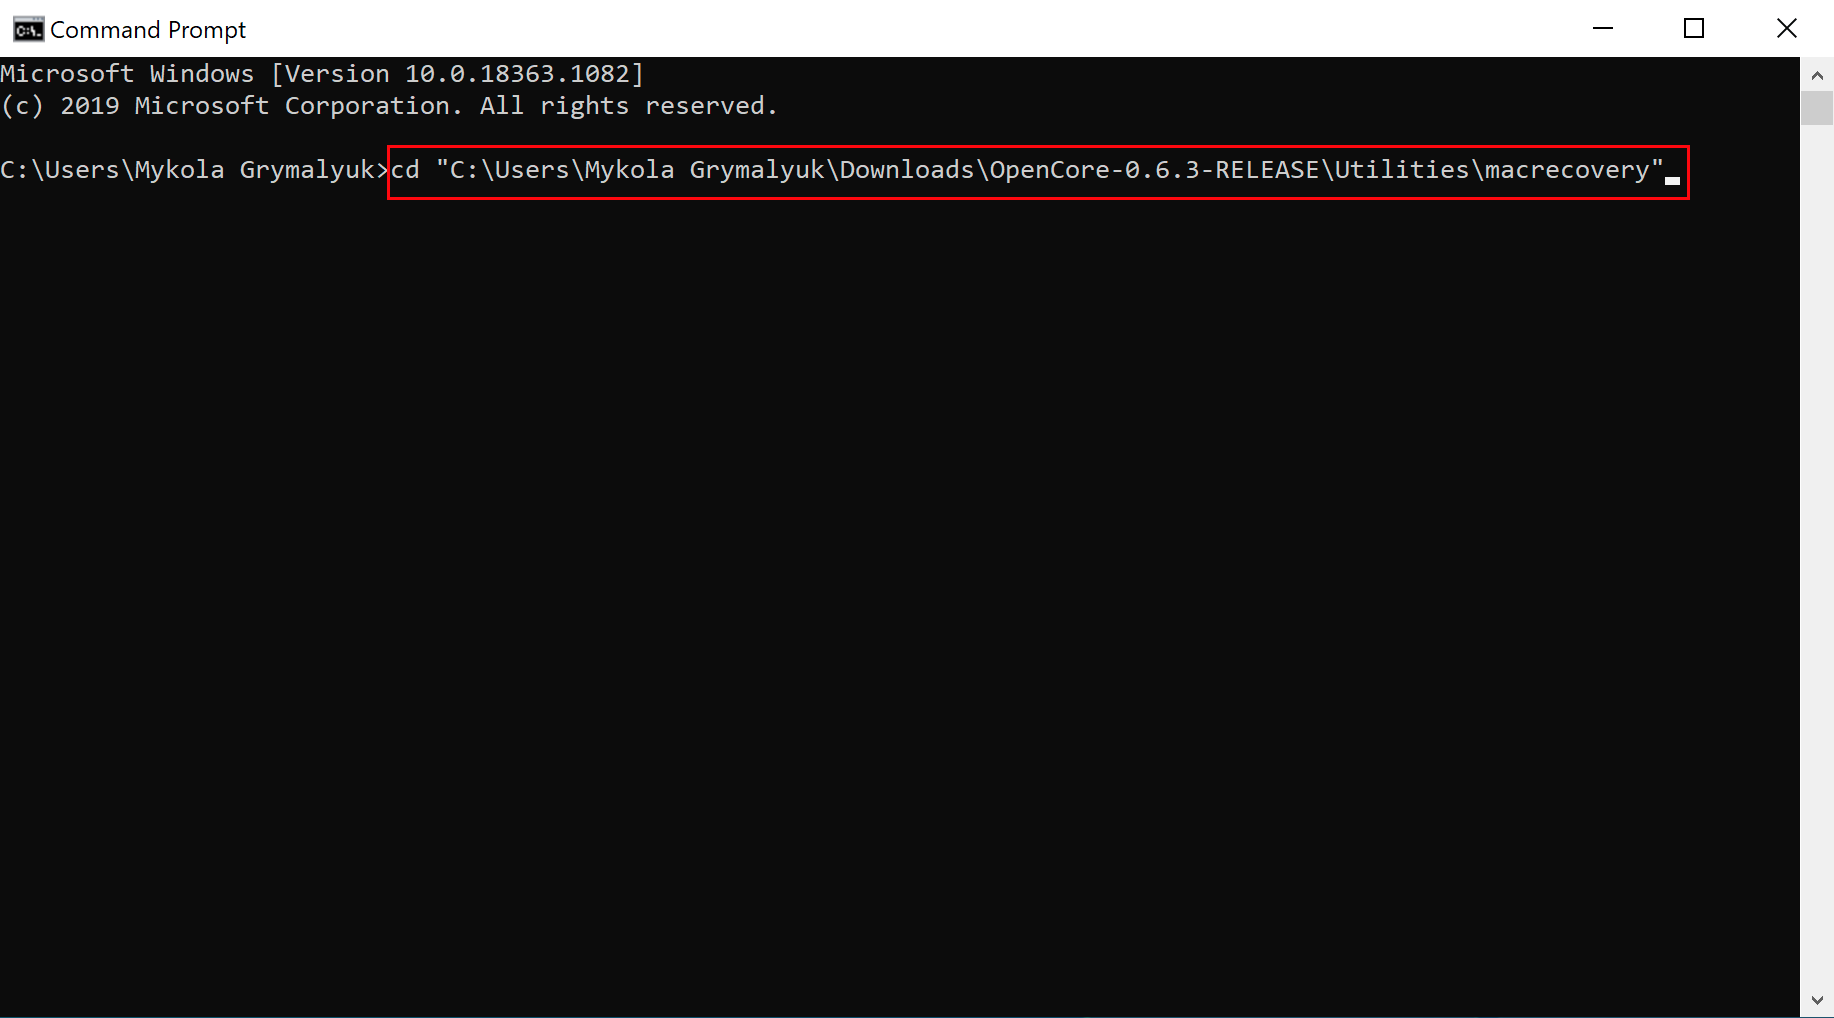
- From here, you'll want to open up a Command Prompt and cd into the macrecovery folder that we copied earlier:
cd Paste_Folder_Path

- Now run one of the following depending on what version of macOS you want(Note these scripts rely on Python support, please install if you haven't already):
# Big Sur (11)
python macrecovery.py -b Mac-42FD25EABCABB274 -m 00000000000000000 download

# Monterey (12)
python macrecovery.py -b Mac-E43C1C25D4880AD6 -m 00000000000000000 download

# Ventura (13)
python3 macrecovery.py -b Mac-4B682C642B45593E -m 00000000000000000 download

# Sonoma (14)
python3 macrecovery.py -b Mac-7BA5B2D9E42DDD94 -m 00000000000000000 download
macOS 12 and above note: As recent macOS versions introduce changes to the USB stack, it is highly advisable that you map your USB ports (with USBToolBox) before installing macOS.
This will take some time, however once you're finished you should get either BaseSystem or RecoveryImage files:
- Download Rufus, set the BOOT selection as not bootable, set File System as Large FAT32, click Start, and delete all file autorun in USB Drive partition.
- Next, go to the root of this USB drive and create a folder called com.apple.recovery.boot. Then move the downloaded BaseSystem or RecoveryImage files. Please ensure you copy over both the .dmg and .chunklist files to this folder:

-
Open up and extract the EFI folder archive you downloaded earlier.
-
Copy the folder named, "EFI," to the root of your USB Drive.
-
Restart your computer.
Installing macOS
-
Open the BIOS and disable all the security options. (Security Chip, Intel (R) AT Module Activation, and Computrace Module)
-
Boot via your Flash Drive.
-
Boot the macOS installer.
-
Now open Disk Utility and format your internal or external Hard Drive or SSD as APFS.
-
Follow the on-screen prompts and install macOS.
-
Your system might reboot during the installation.
-
Now after install again boot into your usb drive and then select the drive that you installed macOS on.
-
Download and install OpenCore Configurator.
-
Open OpenCore Configurator and Mount the EFI partition of the drive you want to boot off of.
-
Now copy the EFI Folder to the EFI Partition and overwrite it with the one system created.
-
Now try booting macOS without the USB drive.
-
Congratulations, you've successfully hackintoshed your Lenovo ThinkPad T470.
Post-Install Tweaks
Disable hibernation, since it doesn't work properly on hackintoshes
sudo pmset autopoweroff 0
sudo pmset powernap 0
sudo pmset standby 0
sudo pmset proximitywake 0
sudo pmset tcpkeepalive 0
- Use itlwm/Airportitlwm for wifi and bluetooth firmware & injector kexts if you are on an intel wifi card, no kexts needed for bcm94360ng. //Note: for Monterey and above use bluetool fixup instead of bluetooth injector kext.//
- Temperature management is decent and backup depends on how you use and on what task the system is running
- Battery performance is same as windows
- Sleep works fine with approx 8% for 6 Hrs loss (Which is neglegible)
- Enable HiDpi by using this beautiful tool at "https://github.com/xzhih/one-key-hidpi", Set 2048x1152x32 [16:9] as best screen resolution using RDM(Retina Display Menu) from here -> "https://github.com/avibrazil/RDM".
- If you are using FakeSMC fan rpm shows up natively, if you are using VirtualSMC then use YogaSMC.kext for fan rpm.
- unifiedmem values for vram
00000040 = 1024MB
00000060 = 1536MB
00000080 = 2048MB
000000A0 = 2560MB
000000C0 = 3072MB
000000E0 = 3584MB
FFFFFFFF = 4096MB
The Lenovo ThinkPad T470 is a very powerful and efficent piece of hardware. However, it is also considered to be somewhat power hungry meaning the fans could rev up under full load. so its important to calm down him so he can be cool enough.. which is where we need to undervolt the machine. Undervolting is safer than overclocking. If you undervolt the CPU too much, your system will most likely become bricked.
- Go to recovery and open terminal, now follow the below instructions..
- type now :
sudo csrutil enable --without kext
Now, reboot to your desktop and download voltage shift from "https://github.com/sicreative/VoltageShift/blob/master/voltageshift_1.25.zip" and extract the contents to your Documents folder, also move the VoltageShift.kext to your EFI/OC/Kexts and update your info.plist and use proper tree to take a snapshot too.
- Now open a terminal at this folder and run
sudo ./voltageshift info
- This should look like this if your overclocking unlock was successful:
CPU voltage offset: 0mv
GPU voltage offset: 0mv
CPU Cache voltage offset: 0mv
OC mailbox cmd failed
System Agency offset: 0mv
Analogy I/O: 0mv
OC mailbox cmd failed
Digital I/O: 0mv
CPU BaseFreq: 1200, CPU MaxFreq(1/2/4): 3400/3400/3400 (mhz)
CPU Freq: 1.4ghz, Voltage: 0.6499v, Power:pkg 2.29w /core 0.22w,Temp: 53 c
- Now you can run (Values that match to your machine)
./voltageshift offset -60 -50 -60
- -60 offsets cpu voltage by -60mv, then -50 the gpu voltage and -60 again offsets the cpu cache voltage
- Test a range of values for all. For me, -155 -80 -155 caused a crash so I stayed at -130 -75 -130 which was stable.
- Once you have found a stable set of values run the following which will save the changes and rerun then on reboots when they would otherwise be disabled:
sudo ./voltageshift buildlaunchd -130 -75 -130 0 0 0 0 0 1 10 12 1 160
- Here the values 10 and 12 are your PL1 and PL2s, since my CPU's TDP is 12w, I set the PL1 to 10W and PL2 to 12W. The 160 simply reruns the command every 160min since Hibernation resets your undervolts.
- The remaining values do this:
sudo ./voltageshift buildlaunchd <CPU> <GPU> <CPUCache> <SA> <AI/O> <DI/O> <turbo> <pl1> <pl2> <remain> <UpdateMins (0 only apply at bootup)>
- Now the T470 never heats up and the fan is on 0rpm most of the time even when 3-4 applications are running simultaneously and the temprature wouldnt exceed 46°C on normal browsing + Music + Mail + Messages tasks. The Fan would automatically start when the temperature rises above 55°C and drops down to normal again after closing the high CPU usage task which is completely normal
- Download and install the OpenCore Updater.
- When the app opens, press Get Started. A dialog will appear asking you to select the EFI directory.
- Mount the EFI Partition on your drive using OpenCore Configurator.
- Select your EFI directory. It's usually /Volumes/EFI/EFI. It should have BOOT and OC directories inside.
- If your OpenCore version is detected, your OpenCore version and list of kexts you are using will be displayed. If your OpenCore version is not detected, you will be asked to select the OpenCore version you are using. Select the version you are using and press Select this version.
- If you are not using the latest version of OpenCore, the app will ask you to update. Press Update to update OpenCore.
- The app will start to download OpenCore, kexts, and Binary Data. this might take some time and you might see the spinning beach ball. DO NOT CLOSE THE APP.
- When the app finishes downloading, it will create a backup of your old EFI and will swap files with the new ones.
- Then, it will update config.plist. When it's done, it will display that it's done. It will also display the list of not updated kexts, the backup directory, and that OpenCore Vault is disabled(if it was enabled). You need to reboot your computer to see the changes.
If you enjoyed this project — or just feeling generous, consider donating to my Patreon page or becoming a member of my Patreon.
Special Thanks to...
- Acidanthera
- Dortania OC guide
- Rehabman's battery patch guide and Rehabman's ACPI hotpatching guide
- CorpNewt's tools
- VoodooRMI
- YogaSMC
- Daliansky's OC-little repo
- ommerus and momszx for making this project possible.


