 The workspace (or admin panel) is the place where you can create and manage your pages, apis, devices, etc. This panel is a Next.js app that runs on port 8000, but can be also accessed through the port 3000, going to /workspace/. The workspace is only accessible by users with admin privileges.
Remeber that you need to have a user with
admintype to be able to access the workspace.
The workspace has two main sections: Sidebar and Section Preview.
Here you will have all the available sections to manage your project. You can add new pages, apis, devices, etc. If you feel with the sufficient knowledge you can also edit the code of the project to add new features to this sidebar.
On this sidebar you will find the following sections:
-
System
- Users: Manage users and user types.
- Groups: Manage groups.
- Objects: Create domain related objects.
- Pages: Create and manage pages.
- Apis: Create and manage apis.
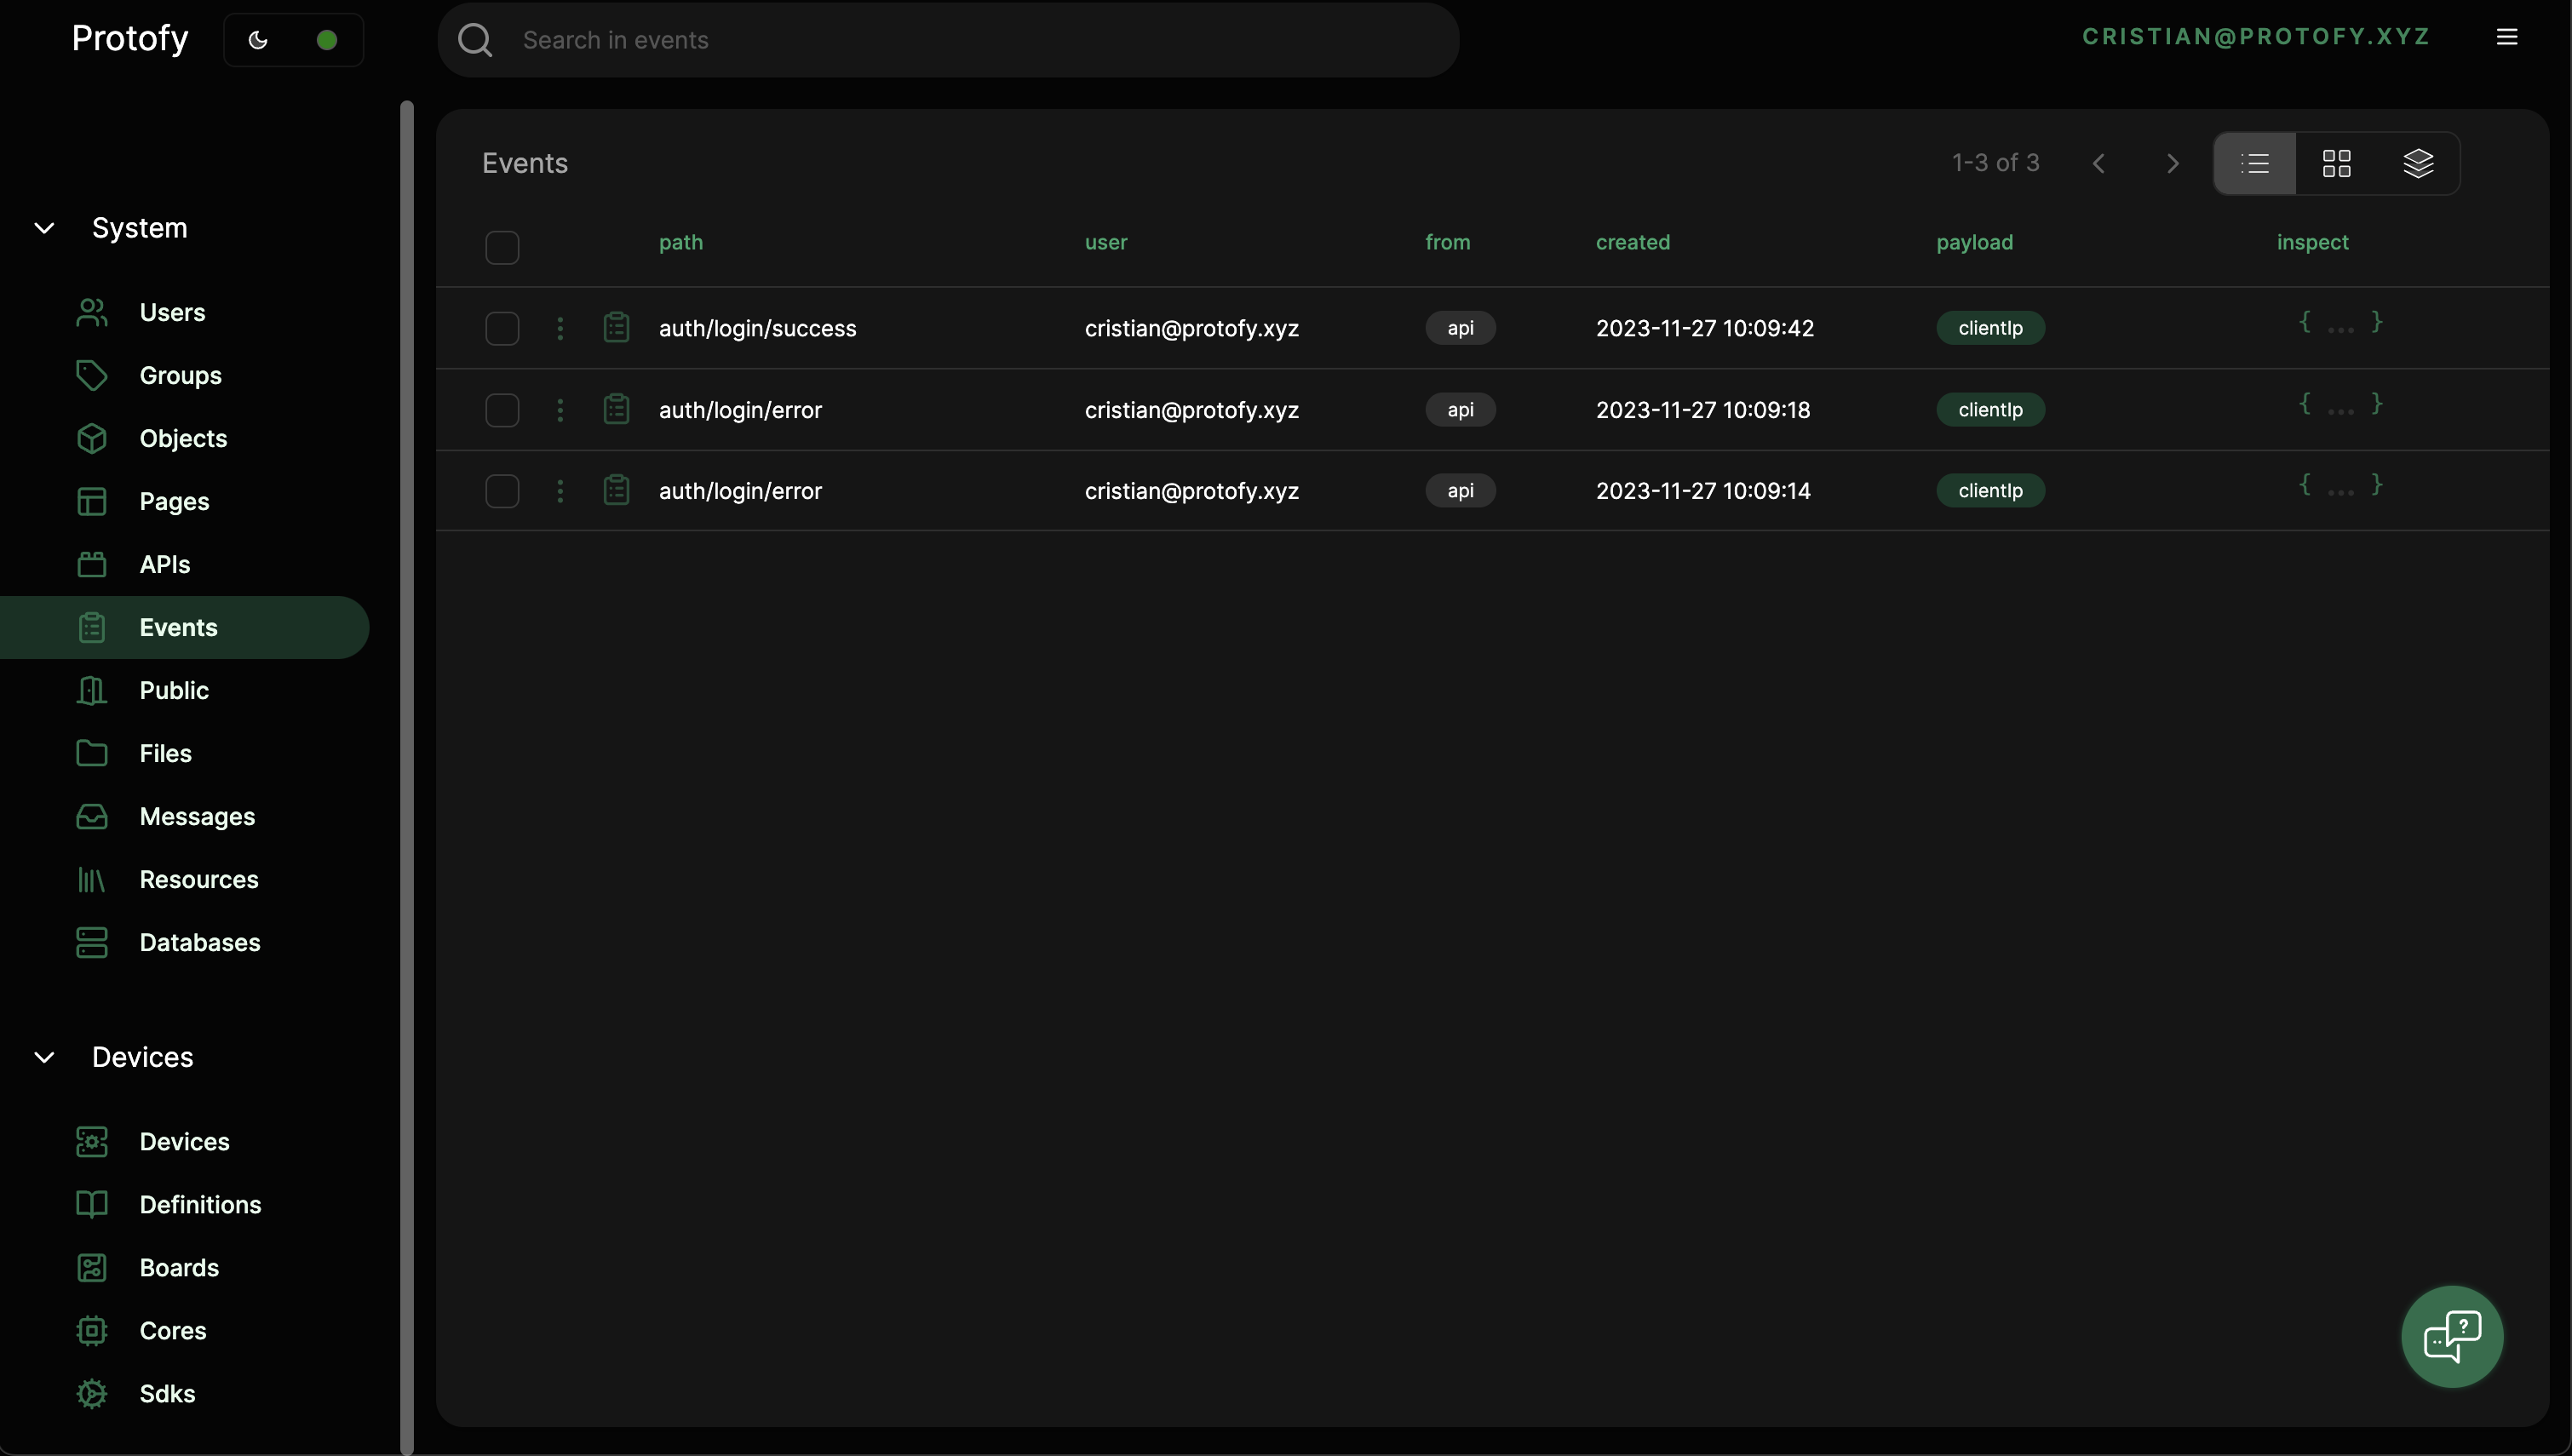
- Events: Visualize events occurred in the system.
- Public: Manage public files.
- Files: Filesystem manager for the project.
- Messages: Visualize messages arrived to the system (mqtt).
- Resources: Create a resource for the project (Tutorial, invoice, etc).
- Databases: Manage you project persistent state management.
-
Devices
- Devices: Manage devices (HomeDevice 1, Protofy office iot, etc).
- Definition: Create definitions for a board (Sound sensor, temperature sensor, etc)
- Boards: Create boards that your devices will use (ESP32 DevKit, Arduino UNO, etc)
- Cores: Create cores that your boards will use (Arduino, ESP32, etc)
- Sdks: Create availables sdks for your project devices (ESPHome, Platformio).
This sections are the default ones, but you can add new ones or remove them if you want. See extending protofy for more information.
The section preview will show you the content of the section to manage it.
Users section is the place where you can manage users, see their information, change their password, etc.
users.mov
Every user is part of a group. The groups are used to manage permissions in the system. For example, you can create a group called manager and give it permissions to manage the whole system. Let's see how to create a group.
groups.mov
The objects section is the way to create domain related objects. For example, if you want to create a message object you can do it using the workspace.
object.mov
Here in APIs section you will be able to create an API for almost everything you want. You can select a default API type like Automatic CRUD and IOT Router or create your own type by using an empty template.
apis.mov
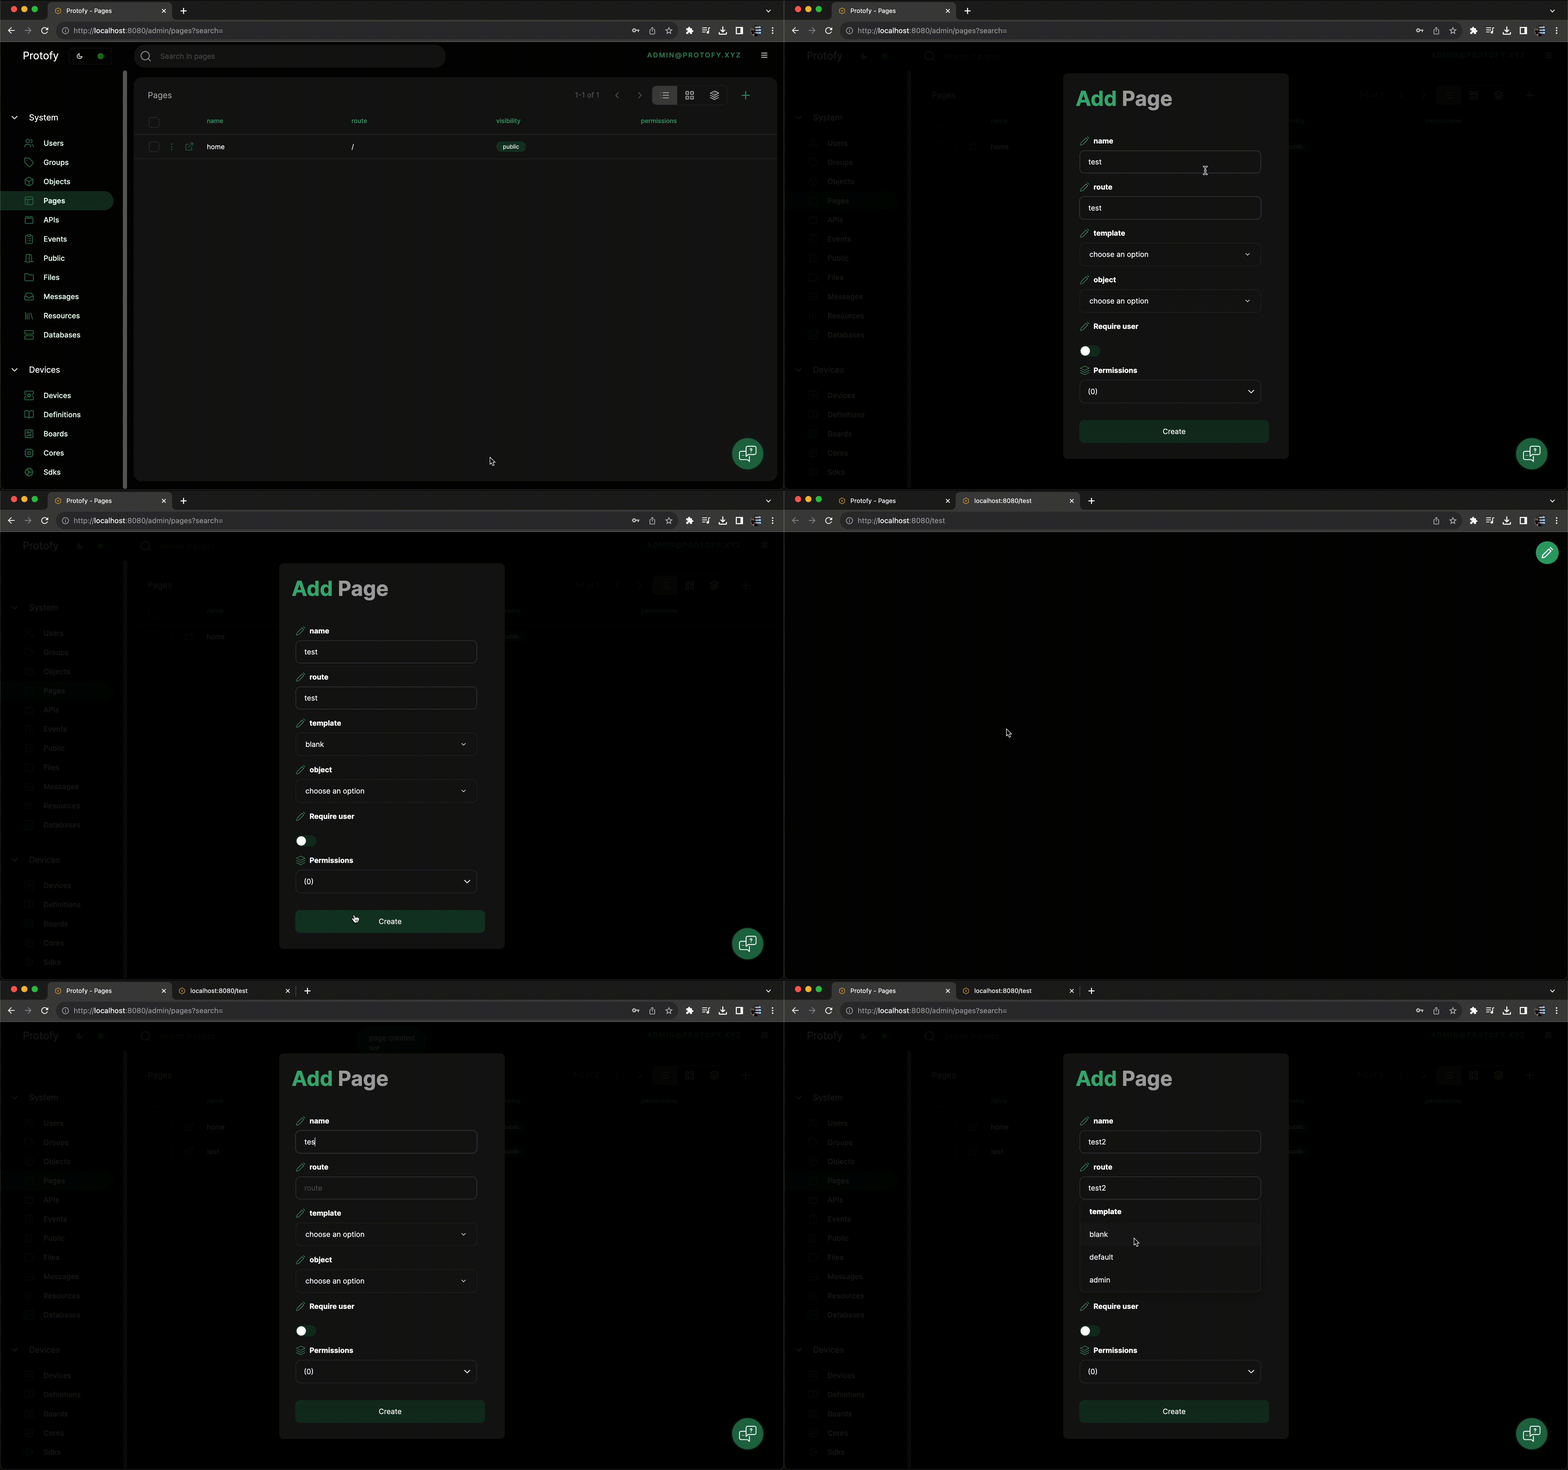
As we said before, the pages are the way to manage pages in Protofy. Above you will see the steps to create a new page using the workspace.
We have some fields to fill in order to create a new page.
- Name: The name of the page. This will be used to create the file in the project.
- Route: The route of the page on the client.
- Template: The template that will be used to create the page.
- Object: Comming soon.
- Require user: If the page requires admin user to be accessed.
- Permissions: Comming soon.
The pages are created in the path packages/app/pages/pageName.tsx of the project. This means that you can manually create a page without using the workspace.

