Ximdex CMS requires a Linux host, a Database server (MySQL or MariaDB) and the Apache Web Server with PHP or NGINX with PHP-fpm.
To run XCMS on a docker container you can see docker_deployment_guide.md
Follow this guide to install XCMS on your Linux server...
To use XCMS you need an updated web browser as Firefox, Google Chrome, ... with Javascript and cookies enabled.
To install XCMS you need a Linux server with:
- Recommended version: 5.7 (or greater)
- Linux install:
sudo apt-get install mysql-server
- Recommended version: 10.2 (or greater)
- Alternative versions: prior versions, like 10.1, reported some errors.
- Linux install:
sudo apt-get install mariadb-server
-
Install Apache web server and PHP:
sudo apt-get install apache2
sudo apt-get install php
-
PHP Modules:
sudo apt-get install php-xml
sudo apt-get install php-cli
sudo apt-get install php-curl
sudo apt-get install php-gd
sudo apt-get install php-mysql
sudo apt-get install php-pear
sudo apt-get install php-mbstring
sudo apt-get install php-enchant
sudo apt-get install php-zip
To install composer please visit this link and follow the instructions.
To use email notifications Postfix or Sendmail are needed. You can install postfix with sudo apt-get install postfix and Sendmail with sudo apt-get install sendmail.
To install XCMS:
Download it from github (develop branch) at https://github.com/XIMDEX/xcms/tree/develop or use curl or wget:
wget --no-check-certificate https://github.com/XIMDEX/xcms/archive/develop.zipcurl -L https://github.com/XIMDEX/xcms/archive/develop.zip > develop.zip(Install wget with sudo apt-get install wget)
Unpack the package (Manually or using unzip):
unzip develop.zipYou need to move the ximdex-develop folder to the server documents root. You can use mv ximdex-develop /YOUR/ROOT/ADDRESS/myximdex to move it and rename the instance from 'ximdex-develop' to 'myximdex'.
In this example, our root is located at www and our instance is renamed myximdex.
We need to set file owners and permissions adequated to our web server. So, if apache runs as 'www-data:www-data' we can run:
cd /var/www/html/
sudo chgrp -R www-data myximdex
sudo chmod -R a+rx myximdex
cd myximdex
sudo chmod -R ug+rw data
sudo chmod -R ug+rw logs
sudo chmod -R ug+rw conf
Optionally, if the owner is not the apache unix user, you have to set the sticky bit to assign the right group owner to new files:
sudo chmod -R g+s data
sudo chmod g+s logs
sudo chmod g+s confMove to the XCMS root folder (myximdex in this case) and run composer to configure additional packages:
cd /var/www/html/myximdex
composer install --no-devOnce XCMS is installed at the Web Server, point your browser to http://YOURHOST/myximdex (In this case http://localhost/myximdex) and follow the suggested steps to load the DataBase, create the XCMS admin user and install additional XCMS modules.
The landing page will greet us with a button to check if all requirements have been satisfied:
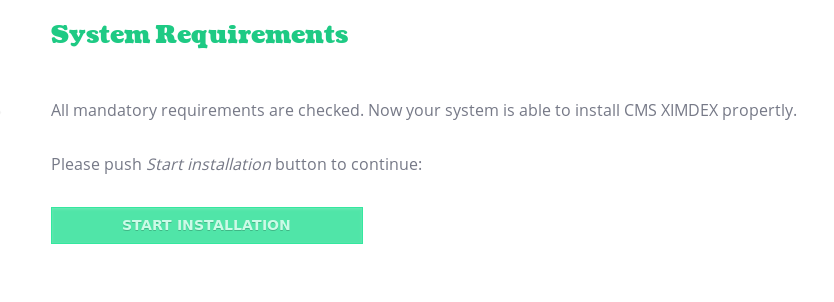
Once clicked, if all the requirements are fullfiled, the browser will show a success notification:
The "start installation" button will launch the DB configuration screen where we will be prompted for a user and pass for the database (we must provide the previously created ones)
Press the create database button (select "yes" if it shows a overwrite warning)
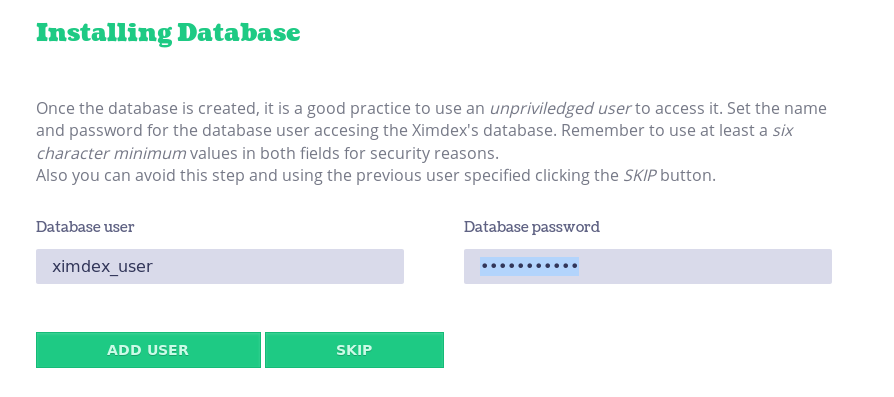
In the following step, an unprivileged user to access the DataBase from XCMS can be created. It is highly recommended to create it and do not skip this step. In this case, we will create one called ximdex_user with password ximdex_user:
In the following screen, we assign the password for XCMS superuser (the priviledged user is called "ximdex").
Next, additional components (as XML editors, publishing reports, semantic tag management, ...) will be installed when pressing the install modules button:
The last screen configures the semantic service to enrich your content and data automatically. If you click continue, a default key will be in use. Visit my.ximdex.net to generate your private key.
Remember that XCMS is an omnichannel headless CMS that transform and publish your documents in remote locations. To do it, add the following crontab job to your root user:
* * * * * php /var/www/html/myximdex/bootstrap.php src/Sync/scripts/scheduler/scheduler.php
Thank you for installing Ximdex CMS. Please, contact us at help@ximdex.org if you need further assistance.


