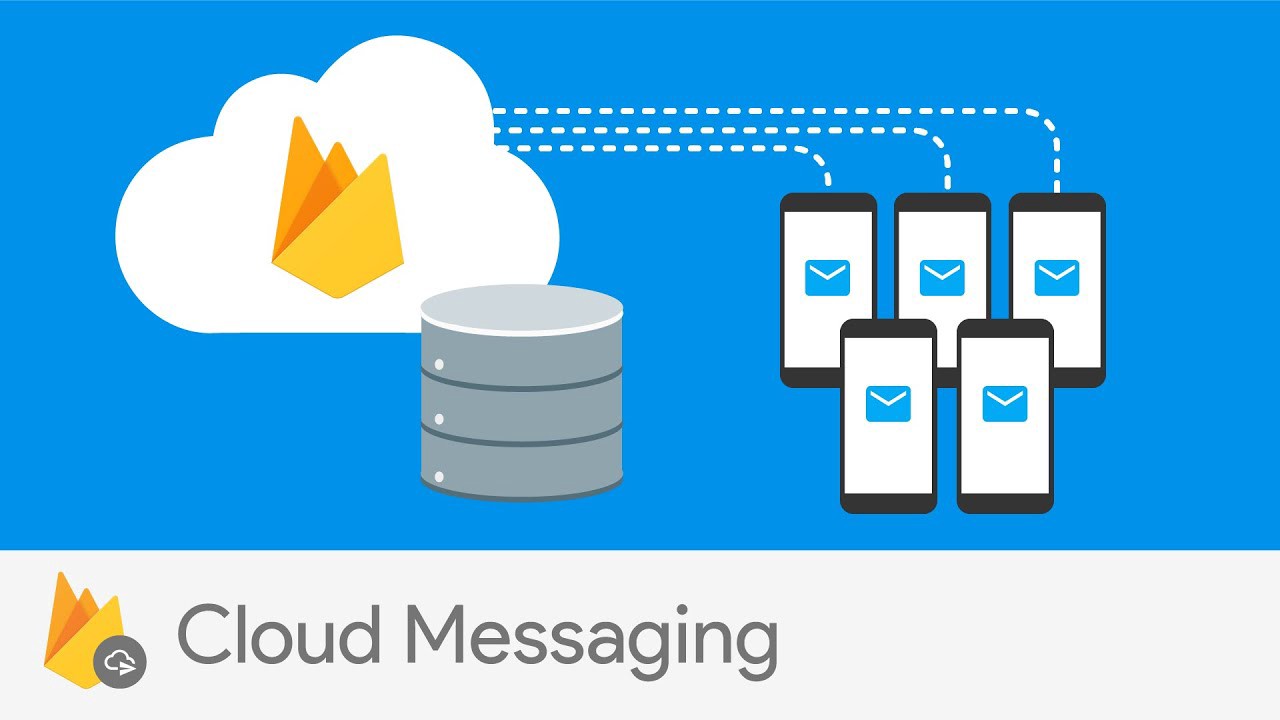
React front-end application uses the firebase push notifications to display real-time push notification whenever events are fired. firebase provides real-time push notifications or database interactions. Therefore, whenever we required any such kind of functionality we can use firebase service.
Firebase Cloud Messaging Platform (formerly named as GCM) is a no-cost free notification service provided by Google which enables (third-party or cross-platform) app developers to send notifications from GCM (Google Cloud Messaging) servers to their users.
FCM requires sending and receiver services to share cross-platform notification service.
An iOS, Android, or any web (JavaScript) client app which will receive messages via transport service from the corresponding platform-specific. A trusted environment is a cloud function for firebase on which applications are being built, targeted, and help us to sent and received messages.
There are 4 kinds of scenarios in which Push Notifications get fired or triggered for all cross-platform applications.
-
Immediate or Real-time notifications As the name suggests, notifications get triggered after any certain operation or event or action gets fired. For example, Real-time chat with your colleagues
-
Scheduled notifications Whenever any job or batch or CRON scheduled for a certain time, this kind of notifications service is used to acknowledge by triggering a notification. For Example, Any News update or a scheduled article update scheduled on the next day will get acknowledge by using FCM scheduled notification service.
-
Scheduled notifications as a result of an action Whenever any action triggered using a scheduled CRON job, after that action triggered in case of user wanted to fire notification after a certain time to be fired, then this kind of notification service is used. For Example, John wanted to trigger push notification after 5 min once his salary credited to account.
-
Local notifications As the name suggested, this is the notifications which work as scheduler JOB in the local device, like in case of you wanted fire local notifications, then firebase will set up a CRON job in your local device and notifications are being triggered when any certain actions are fired without any help of internet connection. For Example, Any reminder notification, for that we don't required any internet connection, so using firebase service we can set a CRON job in the local device so that we can fire a push notification on the desired time as a reminder.
-
Create your firebase project from firebase console: https://console.firebase.google.com/
-
Register a new account or try to log in with existing account
-
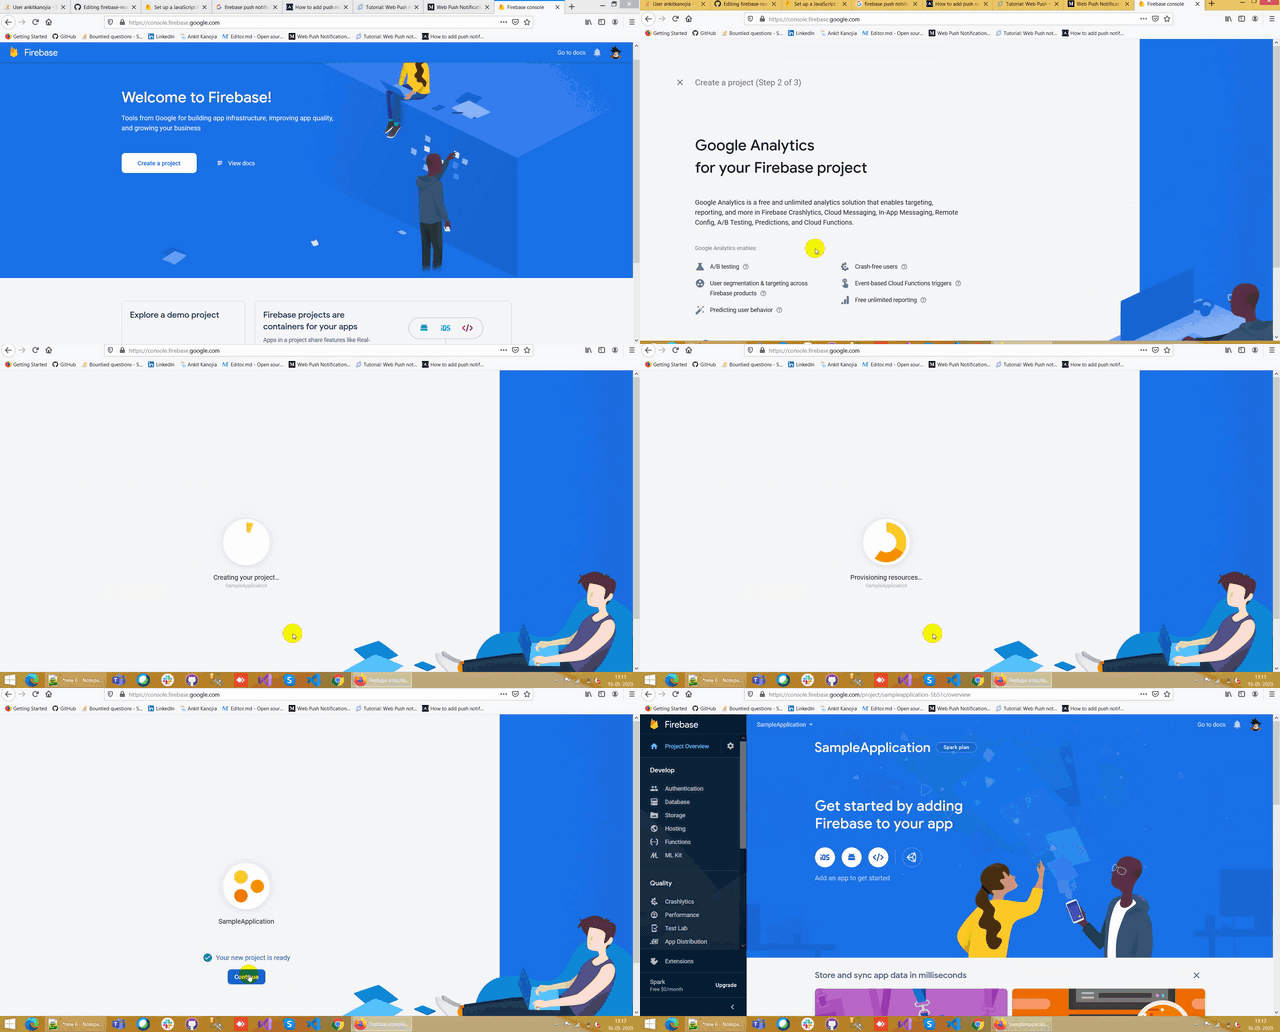
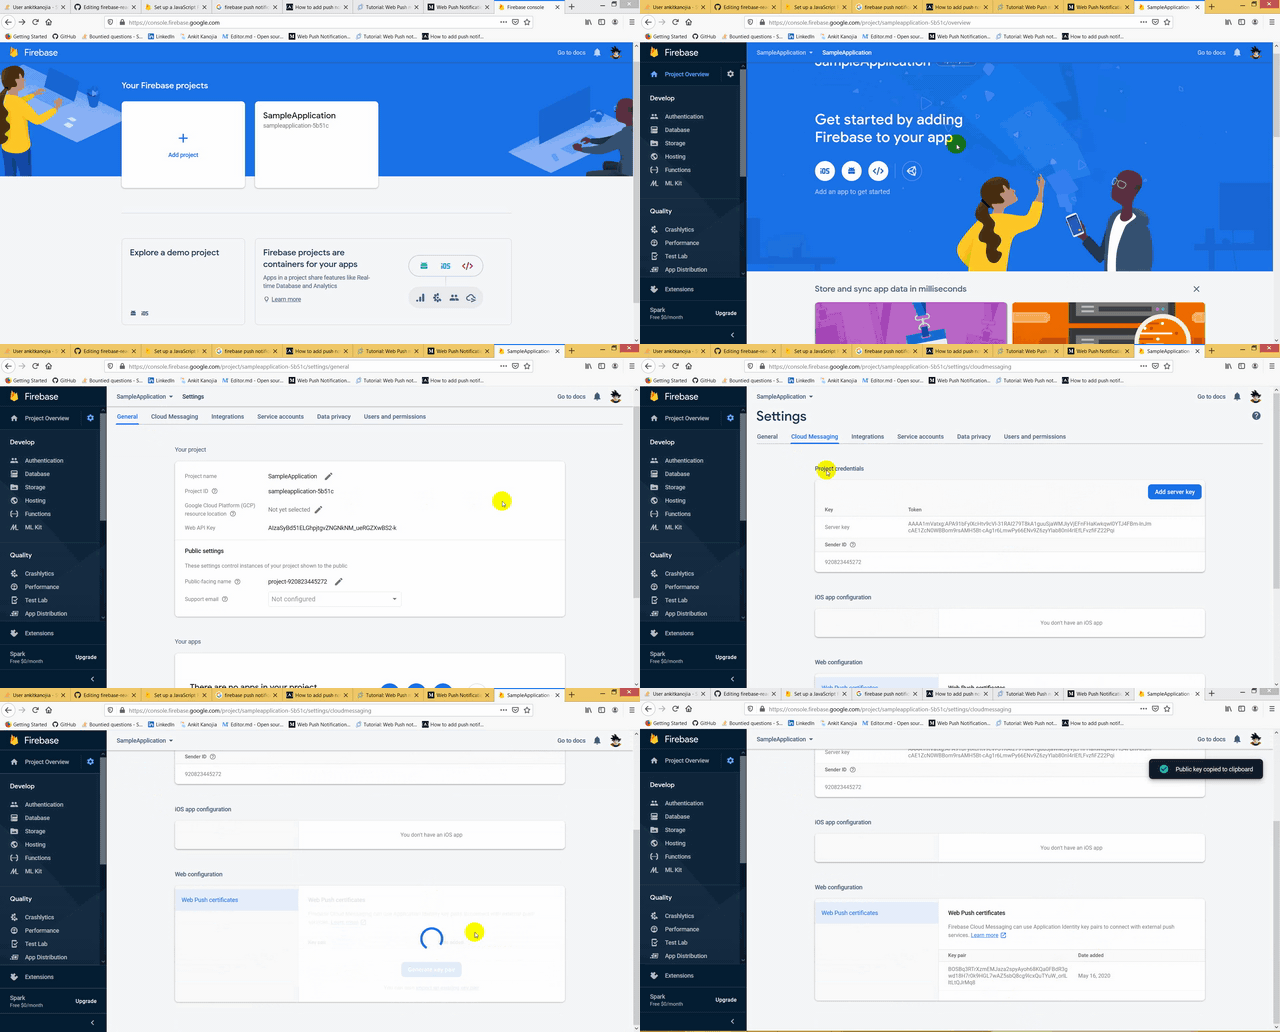
Once logged-in, You can see firebase console dashboard, Click on Add Project. Provied a project name, and then select country and then after click on Create Project. For example, see the below image.
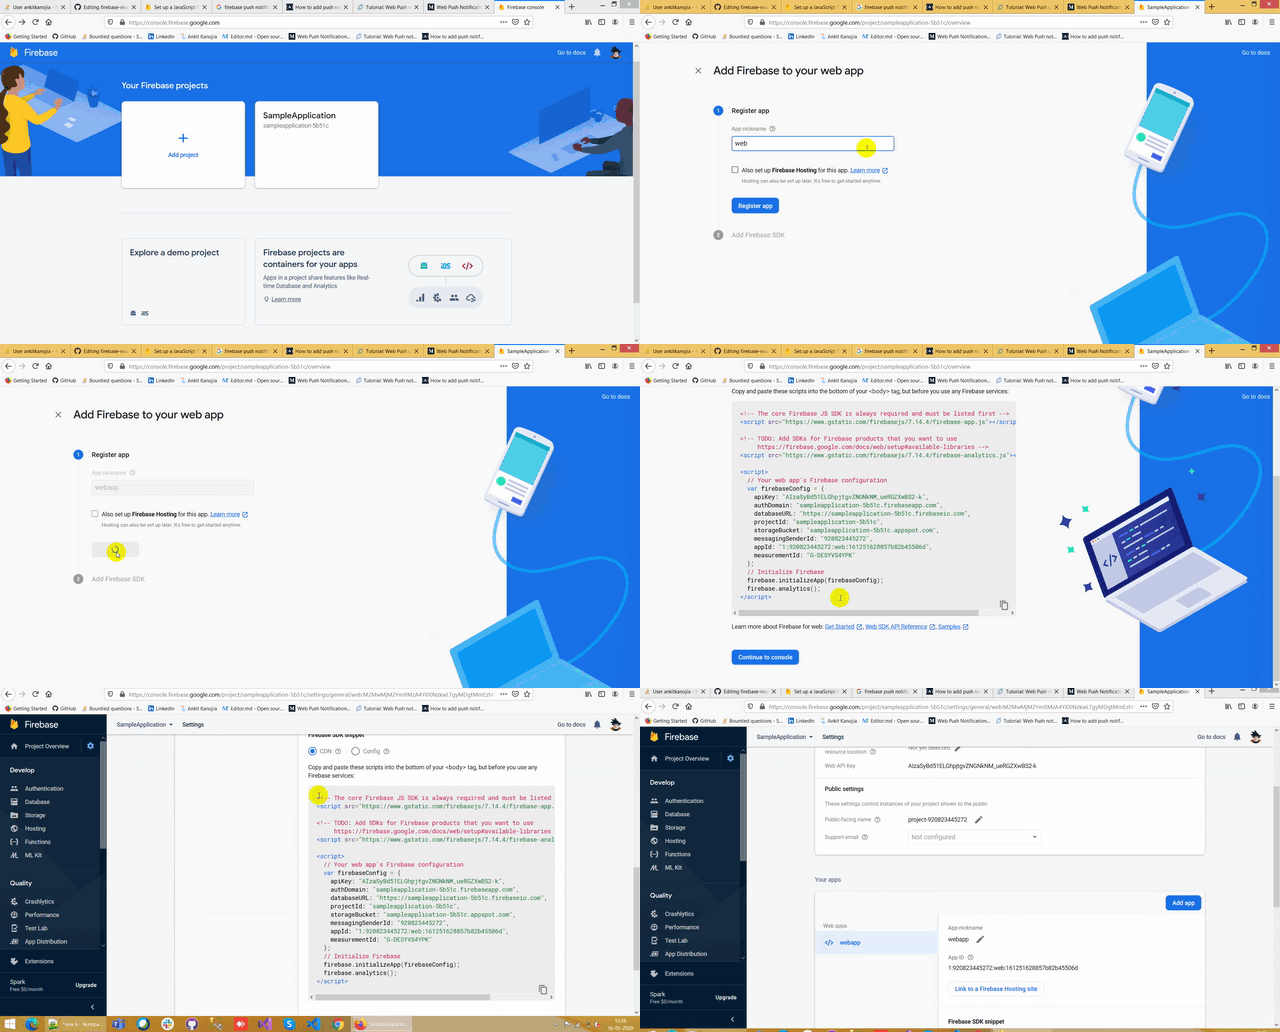
- As React application is web project, so you need to add web project/application to firebase project, so that whole settings/credentials related to firebase will be configured from that section, see the below image.
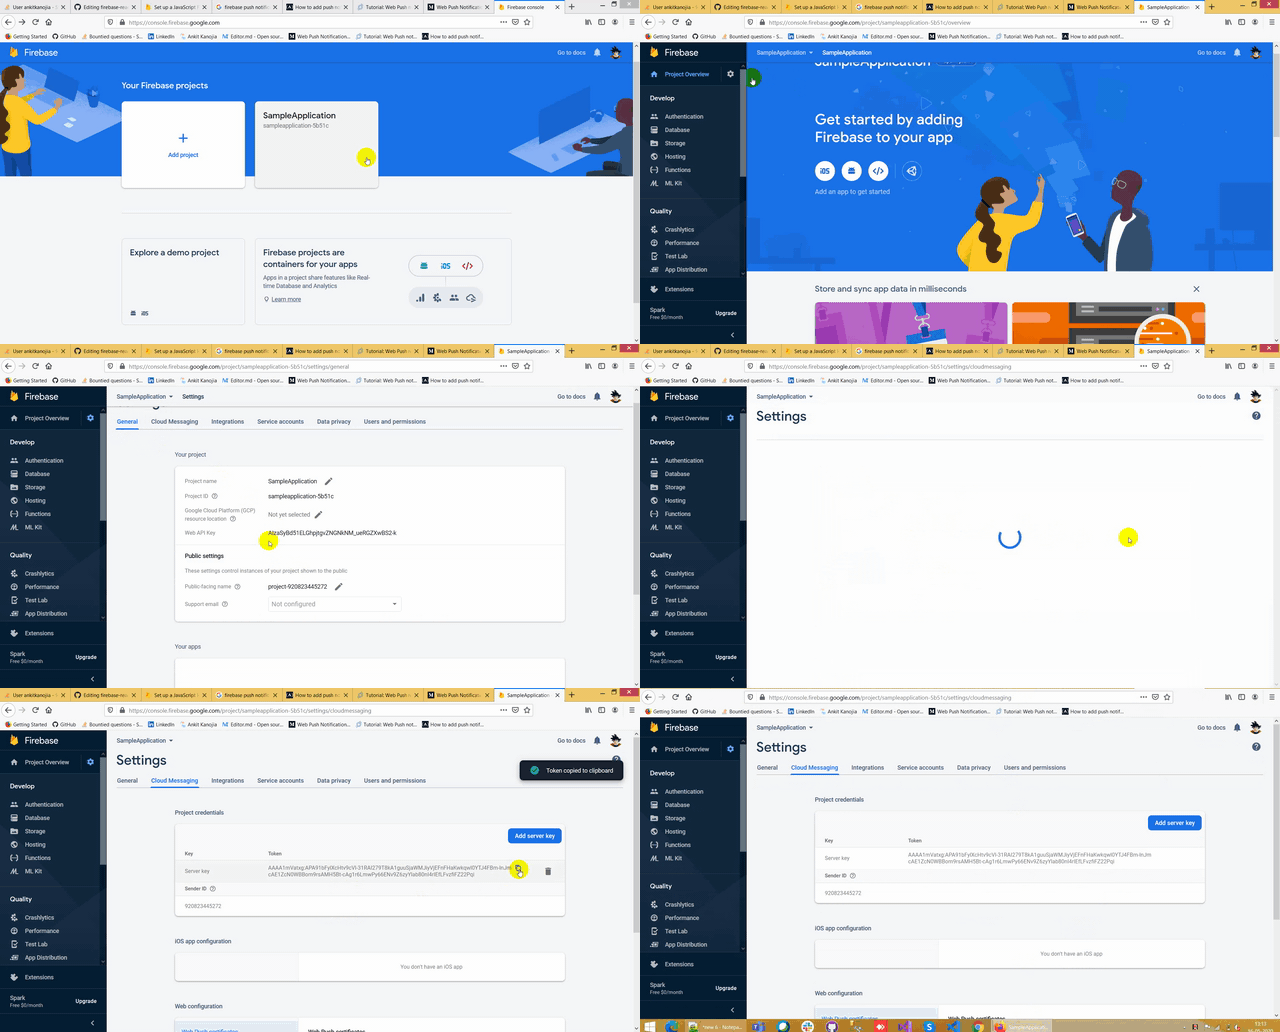
- Once firebase project is created, you can get your Server_Key from project setting section, Using Server_Key we can able to connect React Web application with firebase application, see the below image
- Public_Key you can get from project setting section and then you need to generate that Public_Key, for that see the below image
For this demo setup, user create-react-app command to create react application. Once packages are installed and application is ready to run, you need to add firebase package in the react application.
Using below commands you can add a firebase package npm install firebase --save or yarn add firebase
after installation of firebase package we have to follow few steps to configuration of firebase push notification in react app. Let me explain step by step.
A service worker is a script that your browser runs in the background, separate from the web page, enabling features that do not require a web page or user interaction.
Then you have to include the firebase.js. Remember to replace your "sender ID" as the value for messagingSenderId field. After that, you can initialise Firebase.
var config = {
        messagingSenderId: '<replace-with-your-sender-id>'
 };
firebase.initializeApp(config);

Copy following to firebase-messaging-sw.js and place it to the root of the web folder, this will create the service worker. (note on update for Firebase v7.0.0 and above)

importScripts('https://www.gstatic.com/firebasejs/3.9.0/firebase-app.js');
importScripts('https://www.gstatic.com/firebasejs/3.9.0/firebase-messaging.js');

// Initialize the Firebase app in the service worker by passing in the
// messagingSenderId.
firebase.initializeApp({
   'messagingSenderId': 'YOUR-SENDER-ID',
   'apiKey': 'YOUR_API_KEY',
   'projectId': 'YOUR_PROJECT_ID',
   'appId': 'YOUR_APP_ID',
});

// Retrieve an instance of Firebase Messaging so that it can handle background
// messages.
const messaging = firebase.messaging();`
Note: you can get all this informations from step 4 which is already defined in project setup in firebase console section, or else refere this link for better understand.
In your project fire structure, you can see register-sw.js
const registerServiceWorker = () => {
  if ("serviceWorker" in navigator) {
    navigator.serviceWorker
      .register("./firebase-messaging-sw.js")
      .then(function(registration) {
        console.log("Registration successful, scope is:", registration.scope);
      })
      .catch(function(err) {
        console.log("Service worker registration failed, error:", err);
      });
  }
};

export { registerServiceWorker };
This service worker will basically import the script needed to show the notifications when your app is in the background. We need to add firebase-messaging-sw.js to the location where your files are served.
FirebaseError: Messaging: We are unable to register the default service worker. Failed to register a ServiceWorker: A bad HTTP response code (404) was received when fetching the script. (messaging/failed-serviceworker-registration).
import * as firebase from "firebase/app";
import "firebase/messaging";

firebase.initializeApp({
  apiKey: "AIzasaSyANY0HQrMH06NmXeDFdgdssasoIJQtoUyDuwbiKX0",
  authDomain: "freelancer-project-458f2.firebaseapp.com",
  databaseURL: "https://freelancer-project-458f2.firebaseio.com",
  projectId: "freelancer-project-458f2",
  storageBucket: "freelancer-project-4538f2.appspot.com",
  messagingSenderId: "",
  appId: "1:1053691098913:web:0ba18adba127366f2d135b060"
});

let messaging = firebase.messaging();

messaging.onMessage(function (payload) {
  try {  //try???
    console.log('Message received. ', payload);

    const noteTitle = payload.notification.title;
    const noteOptions = {
      body: payload.notification.body,
      icon: "typewriter.jpg", //this is my image in my public folder
    };

    console.log("title ", noteTitle, " ", payload.notification.body);
    //var notification = //examples include this, seems not needed

    new Notification(noteTitle, noteOptions).onclick = function (event) {
      // console.log(event);
      // console.log(payload.notification.click_action);
      if(payload && payload.notification &&  payload.notification.click_action &&  payload.notification.click_action.length > 0)
      {
        window.open(payload.notification.click_action, '_blank');
      }
      this.close();
    };
  }
  catch (err) {
    console.log('Caught error: ', err);
  }
});

messaging.usePublicVapidKey(
  "BFCkN5mESZ8PW1Ll5nL07RsSxtrblgeQtHpCbyWUpnYsmAR_ZS-HjJeZ4WIZg0UHDV2aHd3mAdrg6BfScErJlJ0");

export { messaging };const messaging = firebase.messaging();
messaging
.requestPermission()
.then(function () {
const token = await messaging.getToken();
console.log("Notification permission granted.");
console.log("Device Token: " + token);
})
.catch(function (err) {
ErrElem.innerHTML = ErrElem.innerHTML + "; " + err
console.log("Unable to get permission to notify.", err);
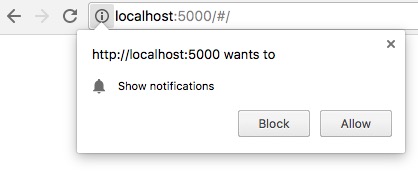
});If you start a local server and serve the code above, you will get the request prompt like the following screenshot.
| TYPE | VALUE(s) |
|---|---|
| Method | POST |
| Endpoint URL | https://fcm.googleapis.com/fcm/send |
| Header Parameter(s) | |
| Authorization | key=XXXXXXX |
| Content-Type | application/json |
| Body Parameter(s) | { "notification": { "title": "Firebase Notification Title", "body": "Firebase Notification Body", "click_action": "http://localhost:3000", "icon": "http://url-to-an-icon/icon.png" }, "to": "xxxxxxx" } |
