I worked on this project in my spare time, but unfortunately I no longer work with mikrotik devices and don't have the free time anymore, so consider it as discontinued. Feel free to fork this project and create your own spin.
This is a client wrapper for node-routeros api for doing common tasks and making the api easier to use for small and large NodeJS projects.
These instructions will help you install and use some of the client features, you can get a complete documentation in the wiki.
You must be familiar with Promises, how to chain it, how to catch errors and etc.
You can install by using npm:
npm install routeros-client --save
Note: you are not required to install node-routeros since it's already a dependency of this lib.
Everything you get from the node-routeros is still here, plus:
- You can save the menu and reuse it for multiple operations.
- There is a "Model" feature where you can fire commands on each entry of a menu individually (check the examples).
- Easy to read and write reusable code.
Here are some short examples of usage, head to the wiki for a complete documentation.
const RouterOSClient = require('routeros-client').RouterOSClient;

const api = new RouterOSClient({
    host: "192.168.88.1",
    user: "admin",
    password: "123456"
});

api.connect().then((client) => {
    // After connecting, the promise will return a client class so you can start using it

    // You can either use spaces like the winbox terminal or
    // use the way the api does like "/system/identity", either way is fine
    client.menu("/system identity").getOnly().then((result) => {
        console.log(result.identity); // Mikrotik
        api.close();
    }).catch((err) => {
        console.log(err); // Some error trying to get the identity
    });

}).catch((err) => {
    // Connection error
});api.connect().then((client) => {
client.menu("/interface").where("type", "vlan").get().then((results) => {
// results is an array of all the vlan interfaces
}).catch((err) => {
// error getting interfaces
});
}).catch((err) => {
// Connection error
});api.connect().then((client) => {
const filterMenu = client.menu("/ip firewall filter");
filterMenu.add({
chain: "forward",
action: "accept",
protocol: "tcp",
dstPort: 80
}).then((response) => {
// response should be an object like { ret: "*3C" }
return filterMenu.where("id", response.ret).update({
srcAddress: "192.168.88.5"
});
}).then((response) => {
// response should be an empty array [] since,
// if there is no error, updates return nothing, meaning success
api.close();
}).catch((err) => {
// error adding or eiditing
});
}).catch((err) => {
// Connection error
});api.connect().then((client) => {
client.menu("/ip proxy access").getModel().then((results) => {
// Suppose we want to disable acl #2 on the access list
results[2].disable(); // this returns a Promise too
// If we want to remove acl #5
results[5].remove().then(() => {
// removed successfully
}, (err) => {
// error trying to remove
});
// Or if we want to update acl #0
results[0].update({
comment: "Updated through Model"
}).then((result) => {
// result is the updated version
}).catch((err) => {
// error updating
});
}).catch((err) => {
// error getting proxy access list
});
}).catch((err) => {
// Connection error
});api.connect().then((client) => {
client.menu("/interface").where({ interface: "ether1"}).getOnly().then((result) => {
const ether1 = client.model(result);
ether1.update({
comment: "WAN"
}).then((updatedEther1) => {
// Should return an updated version of the ether1,
// but since it is the same object...
console.log(ether1 === updatedEther1); // true
console.log(ether1.comment); // WAN
}).catch((err) => {
// error updating
});
}).catch((err) => {
// error getting proxy access list
});
}).catch((err) => {
// Connection error
});api.connect().then((client) => {
// The stream function returns a Stream object
// so you are able to pause, resume or stop
const torch = client.menu("/tool torch")
.where({interface: "ether1"})
.stream((err, data, stream) => {
if (err) return err; // got an error while trying to stream
console.log(data); // the data from the stream itself
// Will start the countdown after the
// first stream of data is received
stopTorching();
});
// Variable to store the timeout
let finalCountdown;
const stopTorching = function(){
// If the timeout wasn't set yet
if (!finalCountdown) {
// Start counting 5 seconds to stop the stream
finalCountdown = setTimeout(() => {
torch.stop();
}, 5000);
}
};
}).catch((err) => {
// Connection error
});Note that, if are cloning this repo, you must be familiar with Typescript so you can make your changes.
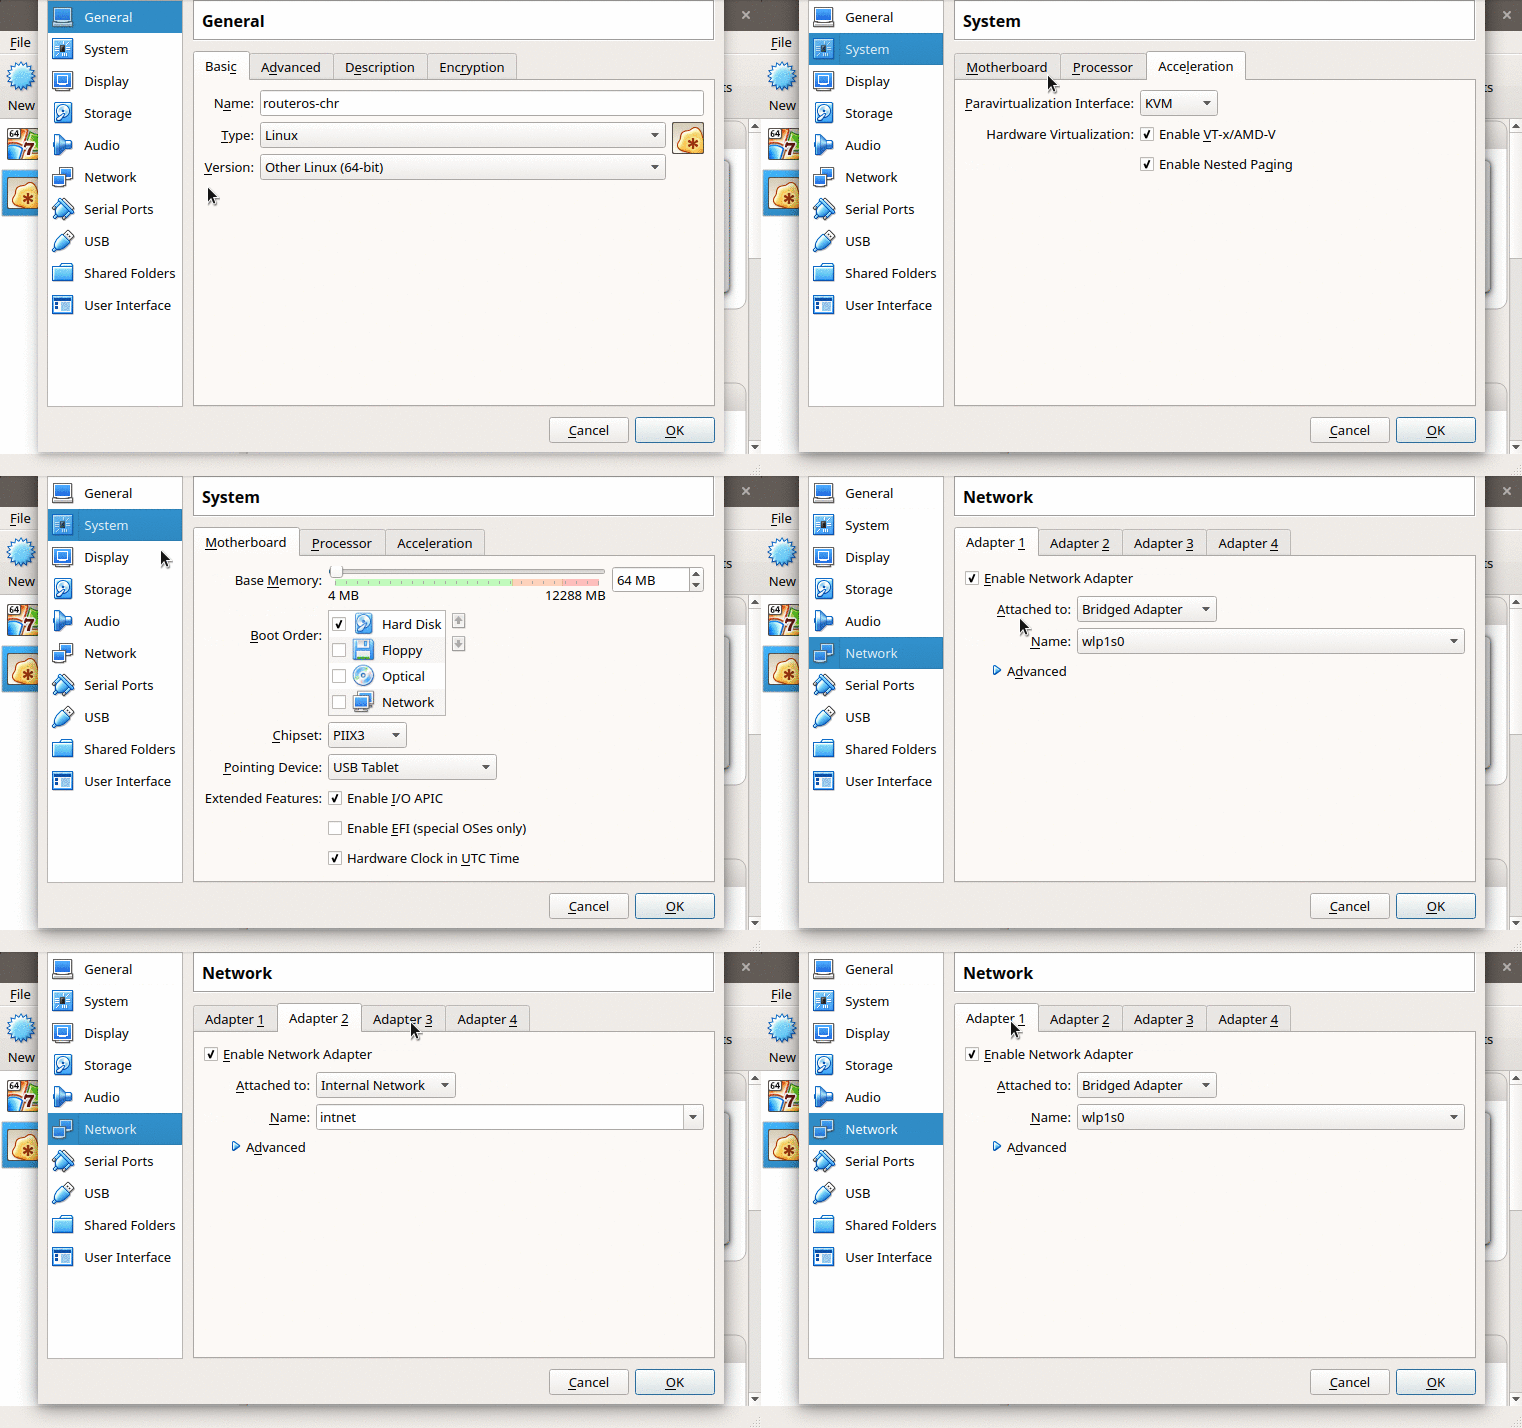
There aren't that many tests, but in order to run them, I used RouterOS CHR (look for the Cloud Hosted Router if you aren't familiar with it yet) on a virtual machine with 4 interfaces, where the first interface is a bridge of my network card:
Also, the vm gets the 10.62.0.25 ip address, you might want to change that in the test files according to network. The user and password was set to admin and admin respectively.
Run the tests using:
npm test
The testing was created using mocha and chai.
- Write more tests
MIT License
Copyright (c) 2017 Aluisio Rodrigues Amaral
Permission is hereby granted, free of charge, to any person obtaining a copy of this software and associated documentation files (the "Software"), to deal in the Software without restriction, including without limitation the rights to use, copy, modify, merge, publish, distribute, sublicense, and/or sell copies of the Software, and to permit persons to whom the Software is furnished to do so, subject to the following conditions:
The above copyright notice and this permission notice shall be included in all copies or substantial portions of the Software.
THE SOFTWARE IS PROVIDED "AS IS", WITHOUT WARRANTY OF ANY KIND, EXPRESS OR IMPLIED, INCLUDING BUT NOT LIMITED TO THE WARRANTIES OF MERCHANTABILITY, FITNESS FOR A PARTICULAR PURPOSE AND NONINFRINGEMENT. IN NO EVENT SHALL THE AUTHORS OR COPYRIGHT HOLDERS BE LIABLE FOR ANY CLAIM, DAMAGES OR OTHER LIABILITY, WHETHER IN AN ACTION OF CONTRACT, TORT OR OTHERWISE, ARISING FROM, OUT OF OR IN CONNECTION WITH THE SOFTWARE OR THE USE OR OTHER DEALINGS IN THE SOFTWARE.
