The toolbar contains the following buttons (from left to right):
-
Show the main menu (for loading, saving the board, options)
-
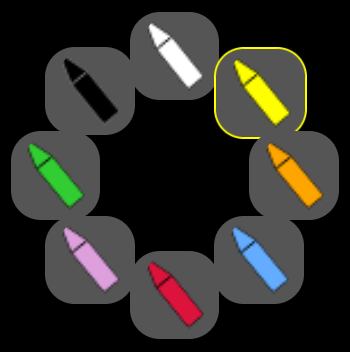
Change the color of the chalk
-
Switch between the chalk and the eraser
-
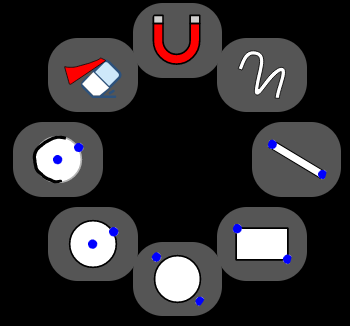
Show the tool menu (for drawing shapes, etc.)
-
Add text to the board
-
Undo the last operation
-
Redo the next operation
-
Divide the board with a vertical line (very useful for teaching in maths)
-
Move left in the board
-
Move right in the board
-
Show the entire full board and navigate into it
-
Show the animation progress bar for making slides
-
Share the board with colleagues
Nothing special to say: choose your color!
From top to top (clockwise):
- the first button is cut around the last contour that was drawn. The icon of the button is a magnet because moveable objects on the board in Tableaunoir are magnets
- draw freely (the default mode of Tableaunoir)
- draw lines
- draw rectangles
- draw ellipses
- draw ellipses from center
- compass, in order to draw arcs. How to use the compass?
- clear the board (it also creates a new clear slide)
From left to right:
- Go to the previous slide in your presentation
- Go to the next slide in your presentation
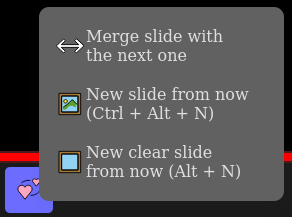
- Open the menu for adding/merging slides
Then each small square represents an action. The first clear square is the beginning of the slide. Each following square are the actions executed in the current slide. In the picture, they are drawing actions.
From top to bottom:
- Merge the slide with the next one. The actions current slide will at the beginning of the new merged slide.
- Create a new slide from now.
- Create a new clear slide from now. The new slide will start with an action that clears the board.


