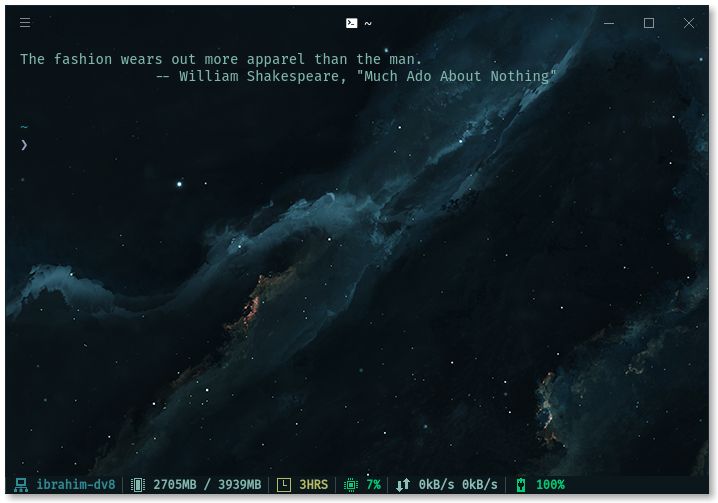
🌌 Change the background of your hyper terminal!
Tip: Make hyper-background the first plugin in your plugins list for optimal performance (it won't disrupt the speed of other plugins due to its performant and small size).
Technically the first plugin and the whole and sole easy way to do this 😝 Fun fact: We boilerplated and wrote hyper-background in 2 hours. And it worked the first time.
NOTE: This plugin is small, which might cause it to seem unmaintained. If you see the plugin seem so, I assure you that this plugin is actively maintained and if you wish to propose a new feature, report an issue or you are submitting a PR, do not hesitate to do so under grounds of umaintainence. If you face issues, read the FAQ.
Supports Windows, macOS and Linux. If you have any issues, report them at the repository's issue tracker.
Run the following command in your Hyper terminal:
hyper i hyper-backgroundEdit .hyper.js and add "hyper-background" to the plugins array in the beginning (preferably) which should be near the end of your file.
If you have hpm-cli installed, run
hpm install hyper-backgroundHow should I specify the path?
Either you can provide an absolute path such as /path/to/image.png or a relative path from your home directory which hyper-background will resolve automatically.
You can provide an array of paths ["/path/to/image.png", "/path/to/second_image.png"] and then it will randomly select one of them at the start.
** How do I change the opacity or the backgroundColor for an image?**
To change the opacity or background color for an image you should pass an object instead of a string for the array:
Note: The default value for the color is black
backgroundImage: [
"/path/to/image.png",
{
	"url": "/path/to/image_with_opacity.png",
	"opacity": 0.5
},
{
	"url": "/path/to/image_with_opacity2.png",
	"opacity": 0.5,
	"backgroundColor": "pink"
}
]
Does this support Hyper 2?
Yep, this plugin supports Hyper 2.x.
What about a slideshow feature?
This feature is in the works and coming soon.
In your .hyper.js file, which probably looks something like this at this point:
module.exports = {
  config: {
    // font config
    fontSize: 14,
    fontFamily: 'Menlo, "DejaVu Sans Mono", Consolas, "Lucida Console", monospace',
    // cursor config
    cursorColor: '#EBCB8B',
    cursorShape: 'BLOCK',
    cursorBlink: true,
    // color config
    foregroundColor: '#fff',
    backgroundColor: '#000',
    borderColor: '#333',
    // hyper-background can handle any value of the CSS key, whether populated manually or populated by a plugin, and will not overwrite it.
    css: '',
    termCSS: '',
    // window and color config
    showHamburgerMenu: true,
    showWindowControls: '',
    padding: '12px 14px',
    colors: {
      ...
    },
    // shell config
    shell: '/bin/bash',
    shellArgs: ['--login'],
    env: {},
    // behaviour config
    bell: false,
    copyOnSelect: false,
  },
  plugins: [
    "hyper-background"
  ]
};
You will need to add the path to your selected background in the config object as backgroundImage after which your .hyper.js should look like:
module.exports = {
  config: {
    // font config
    fontSize: 14,
    fontFamily: 'Menlo, "DejaVu Sans Mono", Consolas, "Lucida Console", monospace',
    // cursor config
    cursorColor: '#EBCB8B',
    cursorShape: 'BLOCK',
    cursorBlink: true,
    // color config
    foregroundColor: '#fff',
    backgroundColor: '#000',
    borderColor: '#333',
    // css config
    css: '',
    termCSS: '',
    // window and color config
    showHamburgerMenu: true,
    showWindowControls: '',
    padding: '12px 14px',
    colors: {
      ...
    },
    // shell config
    shell: '/bin/zsh',
    shellArgs: ['--login'],
    env: {},
    // behaviour config
    bell: false,
    copyOnSelect: false,

    // Here lies our background image.
    backgroundImage: "/path/to/your/image",

    // If you want to add more than one image you need to do it this way.
    backgroundImage: ["/path/to/your/image.png", "/path/to/your/second_image.png"],
  },
  plugins: [
    "hyper-background"
  ]
};
After this, you should have your background image ready to go!
The recommended Node version required in development is Node 12+ at the time of writing. This is likely out of date when you read this, so use the latest version of Node.js available. The plugin itself works on versions as old as Node.js 6, but this is irrelevant.
- Run tests via
yarn test - You can bundle the plugin via
yarn build

