-
Notifications
You must be signed in to change notification settings - Fork 97
Custom Cutscenes 101
Welcome to the Cutscene section of this wiki!
Introduction
I would to let everyone know before this starts that this Tutorial Is advanced compared to other entries In this wiki and you will need a little bit of experience with other programs and a decent amount of storage Is needed!
Getting started
Download your video as an mp4 (for this project I used bbpanzu's ara ara animation https://www.youtube.com/watch?v=folmCJDZkNw)
If you already have your video saved that's even better! Download blender (I use 2.83 LTS https://www.blender.org/download/releases/2-83/) and open the video editing section

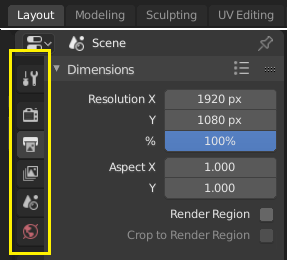
Ctrl + F12 or pressing the render animation button In the render tab
Adobe animate preparation
Go into the folder where you rendered all the Images and copy those Images and paste them Into your flash file, It's easier If you put them In a folder but anything works fine! After that's done hold "shift" key and click all the Images And right click and press "Generate Sprite Sheet" once that's done you can go onto the final step
Edit the template file
Like the title says fill out all the Information I gave you In that template file and put everything In the right folder (put the temp file In the custom cutscenes folder and the rest should be said In that hscript) If this Is wrong I apologize since this Is pretty new and not very documented Let me know In the discussions tab If I'm wrong or you can message me on discord :)
Optional tips
I recommend having your video file as webm with the size being like "856, 480"


