-
Notifications
You must be signed in to change notification settings - Fork 412
Frequently Asked Questions (FAQ)
By default the assistant will be hidden and minimized to tray when launched. You will need to follow either steps to launch the assistant after running the application:
- Try launching the assistant with the keyboard shortcut
Super + Shift + A - Right-click on the Google Assistant tray icon and click on "Launch Assistant"
PS: The assistant will take some time to initialize (indicated by grayscale Google Assistant icon). Executing any of the above steps during this time will not launch the assistant. You will have to wait until you see the colorful Google Assistant Icon in the tray and then try to launch the assistant.
If you encounter this issue, you probably have not configured the consent screen. You can get help with setting up consent screen using this link. Make sure that you follow all the steps correctly. Skipping any steps or ignoring parts of any steps would trigger the above error.
Also, make sure you are using the same Google account to authenticate whose Gmail address was specified under "Test Users".
-
If you get "Failed to get tokens" error, you might have one of the following issues:
- Saved Tokens Path might point to a privileged location (like C: in windows or /usr/local in *nix based systems) requiring Admin/Superuser access. In this case, try to change the Key File path and Saved Tokens File path to a location which might not require escalated privileges to access.
- Exhausted the daily limit of requesting the tokens in which case trying it the next day might work.
-
[Applies to versions below
1.0.0] If you encounter "Error: Tried calling start() before the ready event!" and click on ignore and then try to paste authentication code followed by clicking on "Submit", nothing would happen (only as of version1.0.0-rc.2).Until the next version is released with the bug fixed, you can either clone this project and build it yourself or if you do not want to build it yourself, you can temporarily disable Settings > Conversation > Enable microphone on application startup, relaunch assistant and let the assistant save the tokens after which you can enable the setting again.

This could be due to using the Desktop type OAuth Credential (as per the old documentation). You must now instead use Web client credentials. You may refer to Configure Credentials Guide
You may also refer to this linked issue: #671: Authentication Failure
Applicable only when using Web client credentials

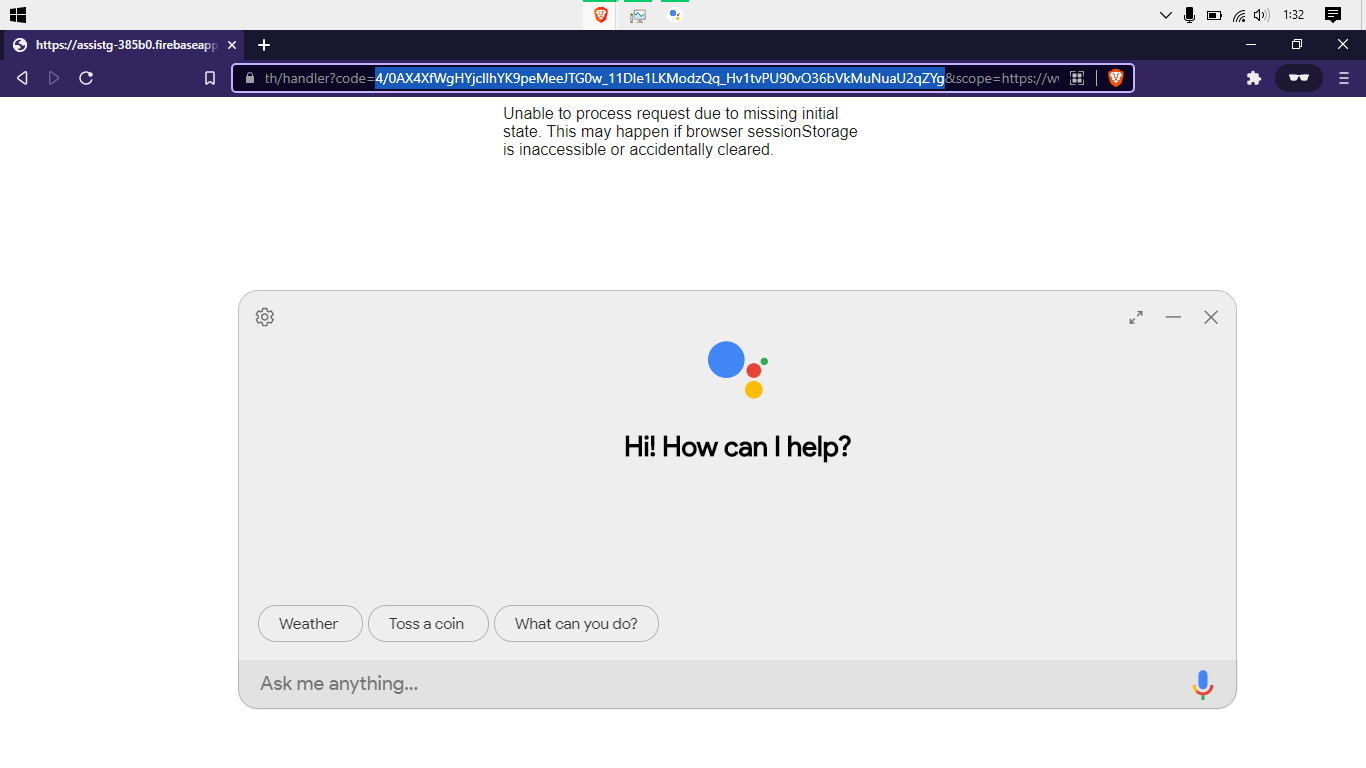
If you are trying to request Authorization Code to be pasted in the "Get Token" screen but instead get "Unable to process request due to missing initial state" or "localhost refused to connect" error in the page instead, you would need to perform a minor workaround by grabbing the Auth code from the URL. You may refer to #671: Authentication Failure (comment)

This could be because the redirect URI set in Google Cloud uses https instead of http for localhost. Although in some cases it works, it would cause issues in other cases. In order to fix this issue, head on to Cloud Console and navigate to "Credentials" within your project. Now, under "OAuth 2.0 Client IDs" select "Web Client". Now replace the redirect URI under "Authorized redirect URIs" to http://localhost:5754/auth/handler and save it. After that you must re-download your OAuth credentials by navigating to "Web Client" credentials and clicking on "Download JSON". You may refer to the updated Configure Credentials guide.
This applies to versions below
v1.0.0

This is a bug which occurs due to passing a floating-point number to the setPosition() function, which is calculated based on your screen resolution. The fix to this issue has not been released yet. Thus, the only way to get around it for the time-being would be to change the display resolution (which would not be ideal) or clone this repo (via git clone) and build it yourself (see How to Build) since it has been fixed within the source but not released yet.
This applies to versions below
v1.0.0
Just delete the Tokens file (as specified by Saved Tokens Path) and in the next launch, you will be presented with "Get Token!" screen. After pasting and submitting the authorization code, you are good to go :)


If you are in the Welcome screen as below, you will have to click through "Get Started" and "Proceed" button before you can access the settings. The reason being when you launch the app for the first time, no config file is created causing errors when saving settings. Thus, the settings button is intentionally disabled.

I would encourage you to find if anyone already encountered the same issue as you here. To narrow down the list to any issues frequently encountered by others, click here.
Didn't find any issues that reflect your problem? Create a new issue
📖 Contribute to this wiki:
If you want to make improvements to this wiki, consider making a contribution to gaudc-wiki repo ✨