WebChatApp is a full-stack, real-time messaging application designed for seamless communication. It offers features such as real-time messaging, online status indicators, user authentication, and a modern user interface with a glassmorphism effect.
- Real-Time Messaging: Instantly send and receive messages with live updates.
- User Authentication: Secure sign-up and login using JWT.
- Online Status Indicators: Know who's online with real-time status updates.
- User-Friendly Interface: Beautiful, modern design with glassmorphism effects.
- Error Handling: API handles errors gracefully and provides clear feedback.
- Conversation History: Access to past messages in a conversation.
- Express.js: Server-side framework.
- MongoDB with Mongoose: Database management and schema modeling.
- JSON Web Tokens (JWT): Authentication and session management.
- bcrypt: Secure password hashing.
- Socket.IO: Real-time communication.
- React with Vite: Fast and responsive web applications.
- Tailwind CSS: Modern styling framework.
- Shadcn: Sleek and reusable UI components.
- Zustand: State management library.
- Lucide and Radix UI: Icons and emojis for a vibrant UI.
- React Context and Custom Hooks: Manage state and logic cleanly.
This app uses Cloudinary to store and manage user-uploaded images.
-
Create a Cloudinary Account:
- Go to Cloudinary and create a free account.
-
Get Your Cloudinary Credentials:
- After signing up, you’ll receive a Cloud name and Cloud_preset_name, Keep these handy.
-
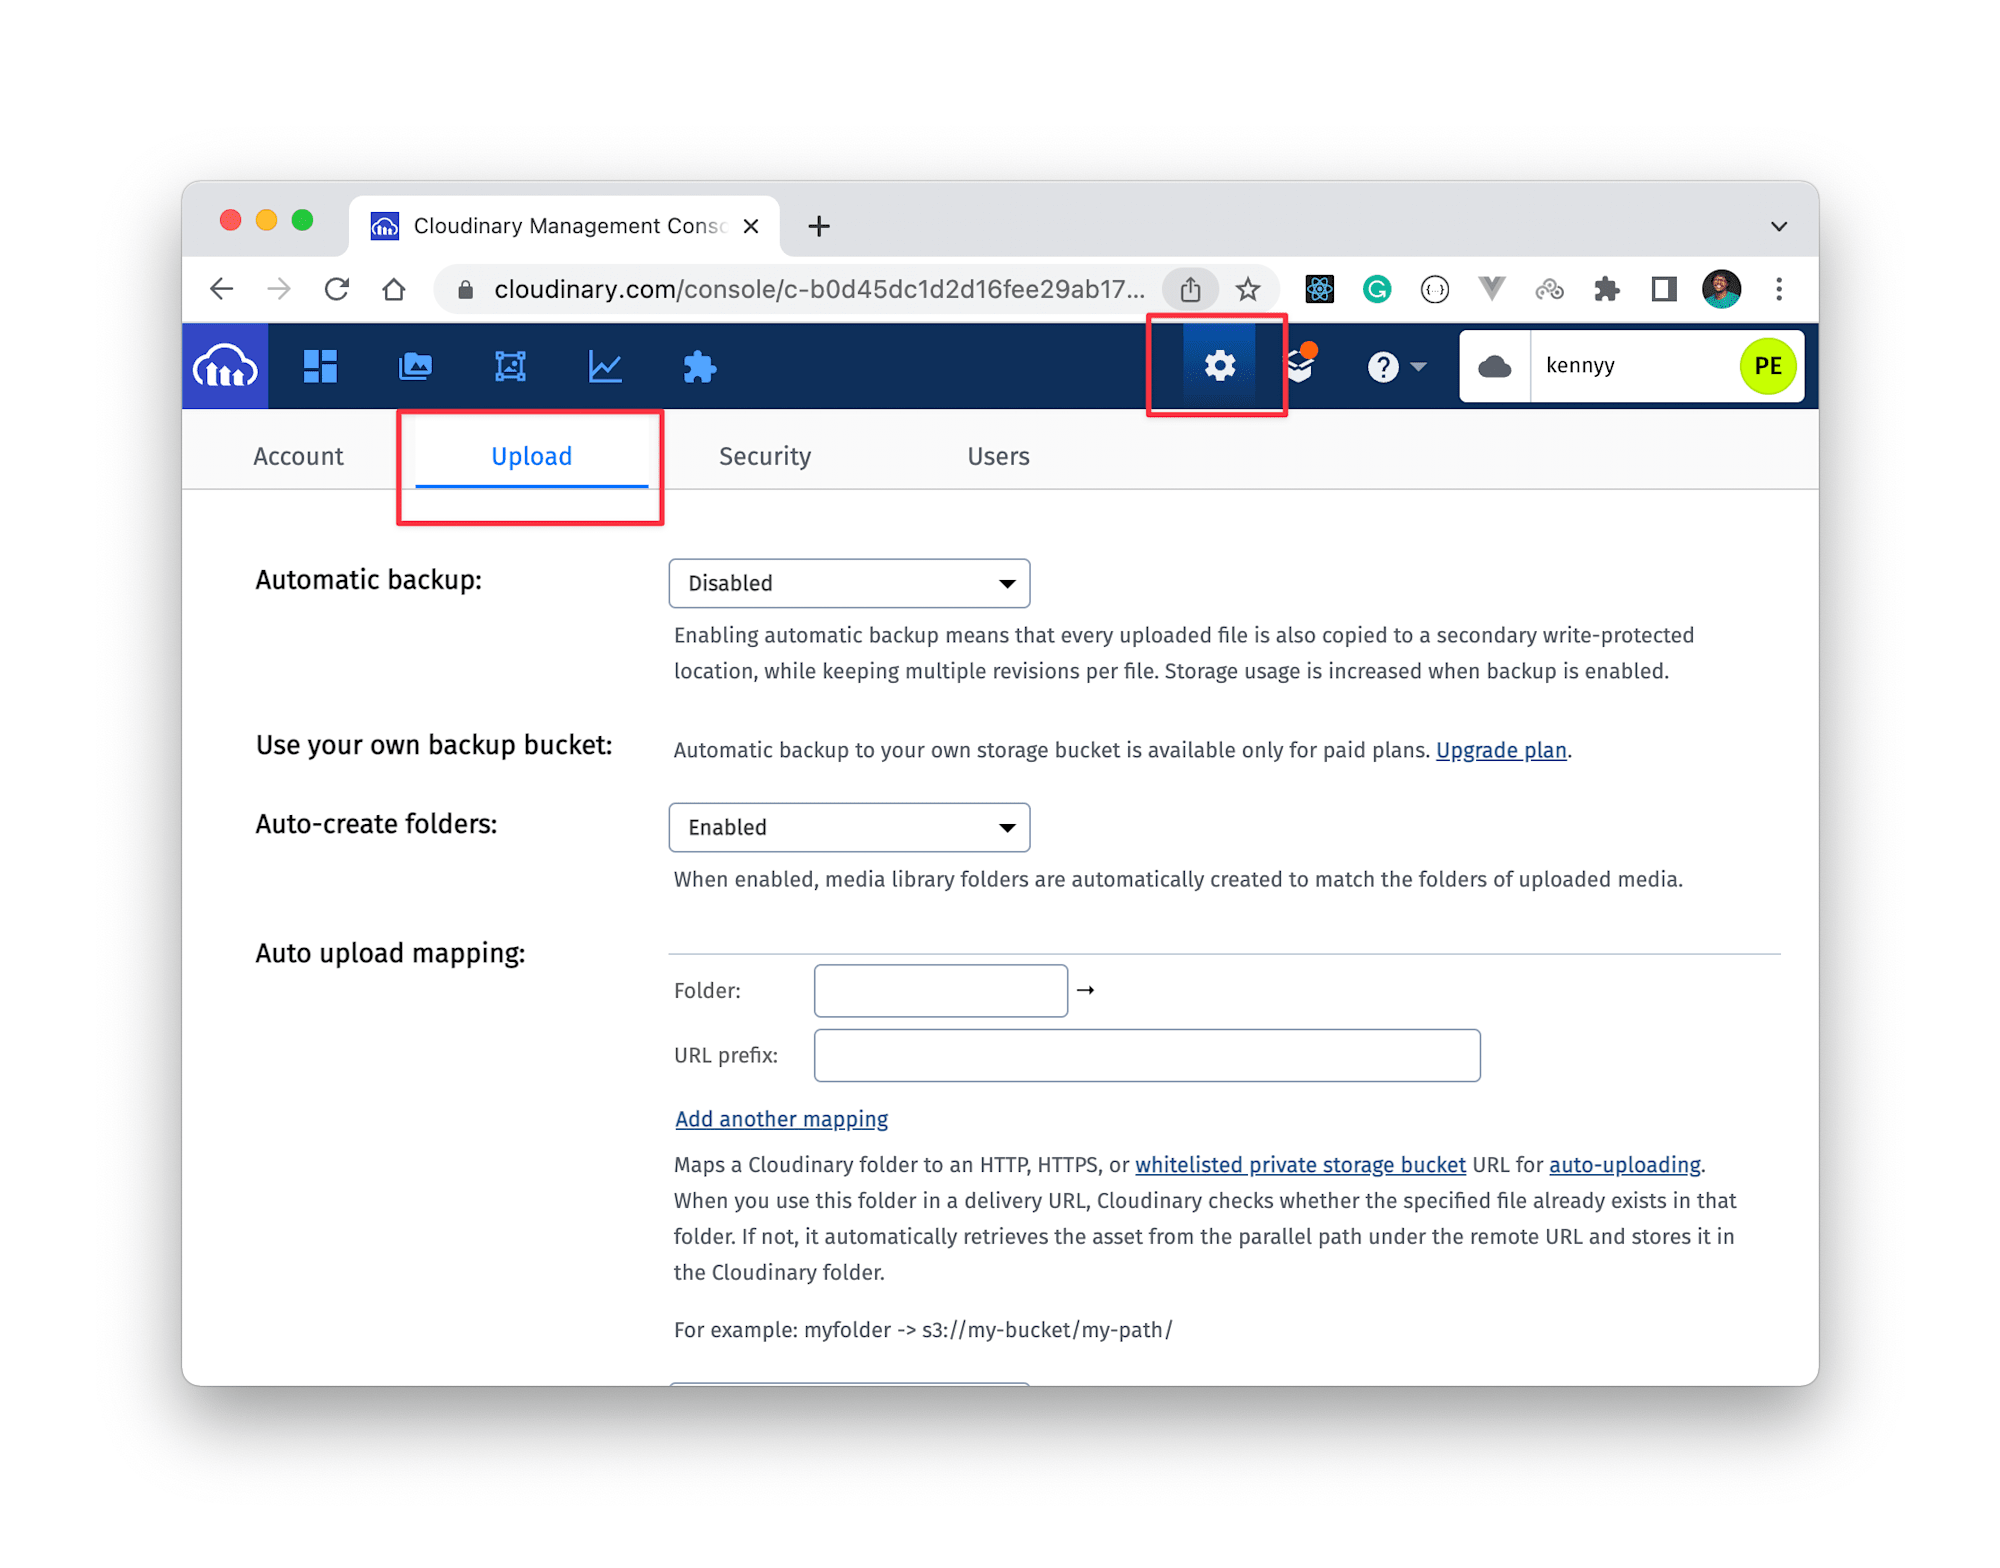
- Setting up CloudinaryCopy link to this heading As we are going to upload images to Cloudinary, we need to create an upload preset and set the upload mode to unsigned. To do that, log into your Cloudinary account and click on Settings > Upload.
Now, scroll down to upload presets and click on Add upload presets. Then:
Provide an upload preset name. Set Signing Mode to unsigned, and Set a desired folder to hold the image uploads (optional).
-
create .env file in frontend folder and paste.
VITE_CLOUD_NAME=your_cloud_name
VITE_UPLOAD_PRESET_NAME=cloud_preset_name
-
Install Cloudinary SDK:
- In your frontend, install the Cloudinary package using npm:
npm install cloudinary
1 .Cloning the Repository
cd https://github.com/himanshu-tyd/WebChatApp.git
cd WebChatApp
2. Install Dependencies:
Install packeges
# Install backend dependencies
cd backend
npm install

# Install frontend dependencies
cd frontend
npm install
3. Set Up Environment Variables :
Create a .env file in the root directory of your project and add the necessary environment variables, including your Cloudinary credentials.
PORT=your_port
MONGO_URI=your_mongodb_uri
NODE_ENV=devlopment
4. Run the Application:
# Run backend
cd backend
npm start

# Run frontend
cd frontend
npm run dev
5. Open in Browser:
Open http://localhost:3000 in your browser to start using WebChatApp.
📜 License
This project is licensed under the MIT License. See the LICENSE file for details.
🛠 Contributing
Contributions are welcome! Please fork the repository and create a pull request for any features, bug fixes, or improvements.
🌐 Deployments
- frontend and backend render.com
💬 Contact
For any questions or suggestions, feel free to reach out to me at code.himanshu93@gmail.com.


