A Non-Cryptocurrency Public Chain is a transformed public chain framework based on an existing public chain. Gas Credit transfers are not permitted between standard wallets. There are no cryptocurrency incentives for mining or participating in consensus. On Spartan Network, there are three Non-Cryptocurrency Public Chains at launch. We except to add more in the foreseeable future.
As a clear demonstration, all commands in this document are run with root permission. These commands can also be run under normal user permissions, please set the file storage and configure the parameters properly.
This document is a guide to install, configure and run a full node in the Spartan-II Chain (powered by NC Cosmos) . Cosmos-based networks have two identifiers, a network ID and a chain ID. Although they often have the same value, they have different uses. Peer-to-peer communication between nodes uses the network ID, while the transaction signature process uses the chain ID.
EVM module: Network ID = Chain ID = 9003
Native module: Network ID = Chain ID = starmint
Before joining the mainnet/testnet, it should be noted that running a node can be quite resource-intensive.
It's recommended that you run Spartan-II Chain (Powered by NC Cosmos) nodes on Linux Server with the following minimum requirement.
Below is the instruction for Linux system.
- 2 CPU
- Memory: 6GB
- Disk: 256GB SSD
- Bandwidth: 20Mbps
- Allow all incoming connections on TCP port 26656 and 26657
- 4 CPU
- Memory: 12GB
- Disk: 512GB SSD
- Bandwidth: 20Mbps
- Allow all incoming connections on TCP port 26656 and 26657
In this chapter, we will build a full node by commands. If you prefer to build the node by Docker Images, please go to chapter 4 Full Node Installation by Docker.
| Software | Version |
|---|---|
| Golang | 1.15+ |
| GCC | latest |
| Git | 1.8.3.1+ |
| tree (optional) | 1.6.0 |
::: tip Go 1.18 is recommended for building and installing the Spartan NC Cosmos software. :::
Install go by the following steps:
Download and untar the installation file
wget https://go.dev/dl/go1.18.5.linux-amd64.tar.gz

tar -C /usr/local -zxvf go1.18.5.linux-amd64.tar.gz
Modify environment variables, for example in bash
vim /etc/profile

# insert at the bottom of the file
export PATH=$PATH:/usr/local/go/bin:/opt/gopath/bin
export GOPATH=/opt/gopath
Then, make the /etc/profile file take effect after modification
source /etc/profileNow, check whether go is correctly installed:
go version
Install gcc by the following command:
yum install gcc
Check the version
gcc -v

Install gcc by the system command
yum install git
Check the version
git version

Now, you can compile and run the full node of Spartan-II Chain.
Make sure that your server can access Google because the Spartan project depends on some libraries provided by Google. (If not, you can also try to add a proxy in /etc/profile: export GOPROXY=https://goproxy.io)
git clone https://github.com/BSN-Spartan/NC-Cosmos.git
cd NC-Cosmos
git checkout v1.0.2
make install
Have you set up the Environment Variables correctly, you will get no error during Spartan Network installation.
Now check the spartan version.
spartan version
Create a directory /spartan/ for node installation and the sub directory config/ and data/ to store the configuration file:
mkdir -p /spartan/config
mkdir -p /spartan/data
Copy genesis.json, app.toml and config.toml from spartan/ directory to /spartan/config/ directory.
cp ./spartan/* /spartan/configNow the structure of /spartan is like below:
/spartan
├── config
│   ├── app.toml
│   ├── config.toml
│   └── genesis.json
└── data

2 directories, 3 files
You can edit the ports in app.toml and config toml. Some important ports are shown below:
Json RPC:EVM module:http://<ip_address>:8545Native module:http://<ip_address>:26657
WebSocket:EVM module:ws://<ip_address>:8546Native module:ws://<ip_address>:26657/websocket
gRPC:- <ip_address>:9090
:::tip NOTE By now, you can run the node as a Full Node with this last step to join the mainnet. No extra steps are required. :::
The final step is to start the node. The node will then start producing blocks:
spartan start --home /spartan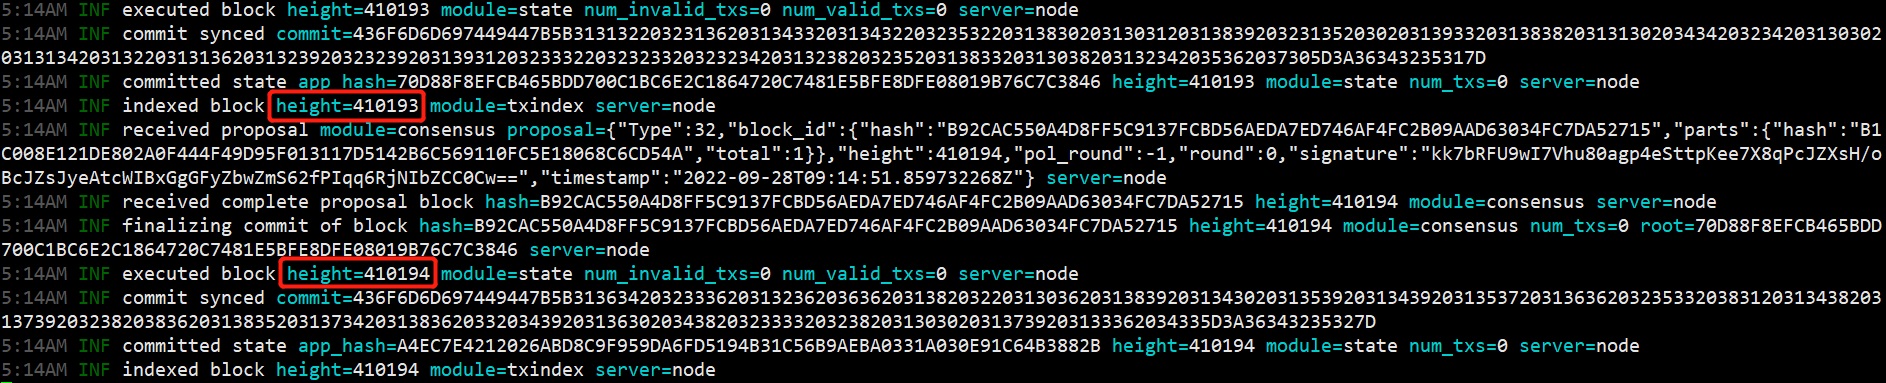
Or you can start the node in the background via nohup command:
nohup spartan start --home /spartan >./output.log 2>&1 &You can check the process of block synchronization from the log:
tail -f output.log
In this chapter, we will build a full node by docker images. If you have built a node by commands, you can skip this chapter and move forward.
| Software | Version |
|---|---|
| Docker-ce | 18+ |
Run the following command to install Docker:
wget -qO- https://get.docker.com/ | shGrant your user permission to execute Docker commands:
sudo usermod -aG docker your-userNow, check the docker version:
docker version
Start Docker:
systemctl start dockerOfficial Docker images are hosted under the hub.docker.com registry. Run the following command to pull them to the server:
docker pull bsnspartan/nc-cosmos:latestCreate a directory /spartan/ for node installation and the sub directory config/ and data/ to store the configuration file:
mkdir -p /spartan/config
mkdir -p /spartan/data
Copy genesis.json, app.toml and config.toml from spartan/ directory to /spartan/config/ directory.
cp ./spartan/* /spartan/configNow the structure of /spartan is like below:
/spartan
├── config
│   ├── app.toml
│   ├── config.toml
│   └── genesis.json
└── data

2 directories, 3 filesRun command below to start the node:
docker run -d -p 9090:9090 -p 26656:26656 -p 26657:26657 -p 8545:8545 -p 8546:8546 -v /spartan:/spartan --restart=always --name spartan-nc-cosmos bsnspartan/nc-cosmos:latest spartan start --home /spartanJson RPC:EVM module:http://<ip_address>:8545Native module:http://<ip_address>:26657
WebSocket:EVM module:ws://<ip_address>:8546Native module:ws://<ip_address>:26657/websocket
gRPC:- <ip_address>:9090
You can check logs by command below:
docker logs -f spartan-nc-cosmosWhen joining the Spartan Network as a Data Center, the Data Center Operator will be rewarded a certain amount of NTT Incentives based on the quantity of the registered node. To achieve this, the Data Center Operator should first provide the signature of the full node to verify the node's ownership.
Execute the following command in the node's data directory after the node is started.
spartan node sign-info --home /spartan--homeis the data directory of the node. You need to specify this directory to store the data file of the node.
Execute below command:
docker exec spartan-nc-cosmos spartan node sign-info --home /spartan The node signature is like below:
{
      "node_id":"3b1e874ae98c36cdd5da32f9623fa0a4586b4445",
      "pub_key":"{\"@type\":\"/cosmos.crypto.ed25519.PubKey\",\"key\":\"3ggBZ5e7lJCoGsRE3CdNESSDv1fU8mbGDK4k8oNzJZQ=\"}",
      "signature":"Za1mHGzMXdYFs6RAmIr9Nge7P5Zw6k1m/eOW9iMzP9qhnaBMQEZ+LMoYxy+BqmZuJVxJALs2vKXcMXt5eHLtBQ=="
  }
Please submit it to the Data Center System when registering the node. Note that the value of "pub_key" filled into the "Node Address" blank needs to be unescaped like below:
{"@type":"/cosmos.crypto.ed25519.PubKey","key":"3ggBZ5e7lJCoGsRE3CdNESSDv1fU8mbGDK4k8oNzJZQ="}
When joining the Spartan Network as a Data Center, the RPC URL is also needed. It is configured in the config.toml file, the default configuration is:
RPC URL:http://<ip_address>:26657
You can use the following command to stop the running node and delete it, and also clear the node data by deleting the data directory.
If the node has been registered in the Data Center, you can back up the node_key.json file stored in /spartan/config directory, so that you can recover this registered node when needed.
Use the following command to stop the running node:
pkill -INT spartan
Use the following command to stop the running container and delete the container and the image file:
docker stop spartan-nc-cosmos
docker rm spartan-nc-cosmos
docker rmi bsnspartan/nc-cosmos:latest
If you need to completely delete all data of the node, you can use the following command to delete the data directory.
rm -rf /spartan
To find out more information about Spartan-II Chain (Powered by NC Cosmos), please visit here