-
Notifications
You must be signed in to change notification settings - Fork 86
Tutorial: Running Smart City on a Windows* Laptop
The tutorial works through the steps to run the Smart-City sample under a Linux* VM on your Windows laptop. Hyper-V is used to create and launch the Linux VM. Most of the steps apply to other Open Visual Cloud samples as well. The tutorial is tested with Microsoft Windows 10 v1809 build 17763.
- Follow the instructions to enable Hyper-V. A restart is needed to complete the Hyper-V setup.
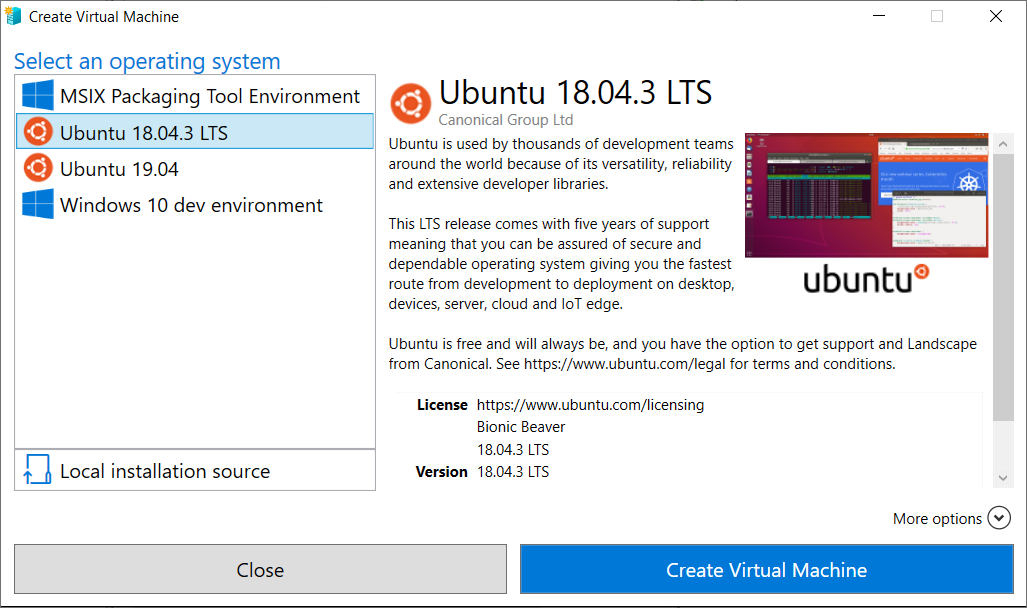
- Launch the Hyper-V Manager and select to Quick Create Ubuntu 18.04 LTS.

- After the setup, click Connect to launch the VM and go through the Linux setup. You will end up with a running Linux Ubuntu 18.04 LTS distribution.
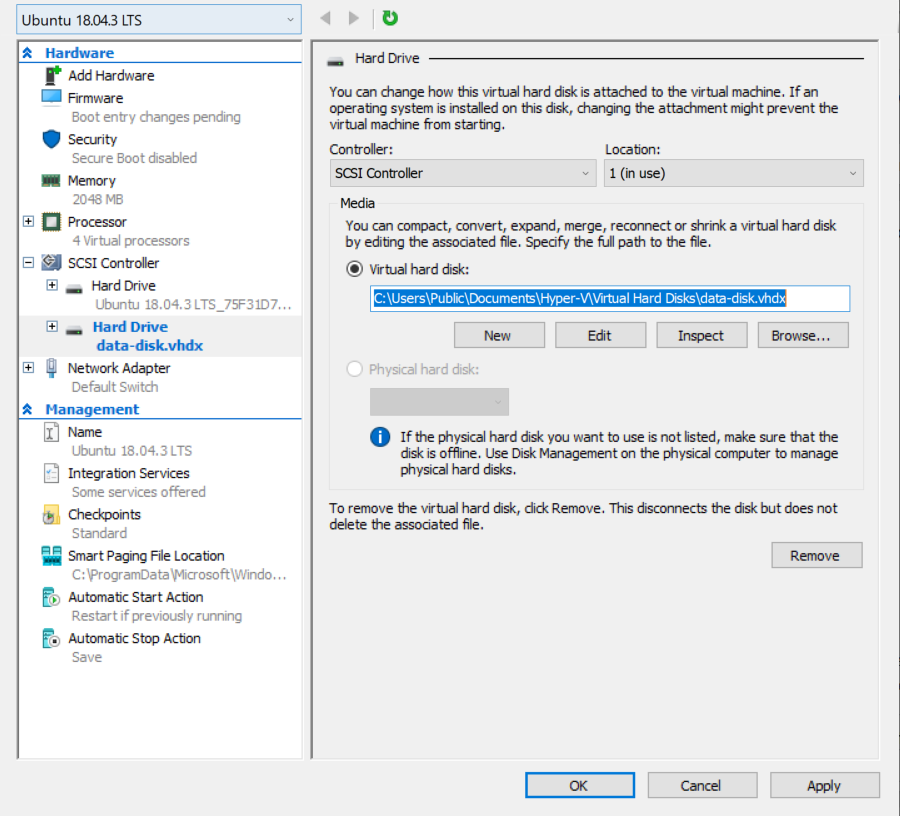
- The default VM disk size is about 12GB. We need to add additional disk space to the VM to be useful. Go to Hyper-V Manager and select to edit the Ubuntu 18.04 LTS settings. Click on the SCSI Controllers and then Add Hard Drive. Create a virtual hard drive of about 128GB.

Login to the Linux VM, and right click to Open Terminal. We will need to perform the following Linux setup:
- Partition, format and mount the newly added data disk:
printf "n\np\n1\n\n\nw" | sudo fdisk /dev/sdb
printf "\n\n" | sudo mkfs.ext4 /dev/sdb1
sudo mkdir -p /mnt/dockerdisk
echo "/dev/sdb1 /mnt/dockerdisk ext4 defaults 0 0" | sudo tee -a /etc/fstab
sudo mount -a- If you are behind a firewall, we need to configure the proxy settings as follows (replacing the text with your proxy settings):
export http_proxy=”your proxy setting”
export https_proxy=”your proxy setting”
export no_proxy=”your proxy setting”
printf "http_proxy=\"$http_proxy\"\nhttps_proxy=\"$https_proxy\"\nno_proxy=\"$no_proxy\"\n" | sudo tee -a /etc/environment
printf "Acquire::http::Proxy \"$http_proxy\";\n" | sudo tee -a /etc/apt/apt.conf.d/proxy.conf- Patch a xrdp bug in Ubuntu 18.04 LTS to properly populate system variables as follows:
sudo sed -i '2s/^/session required pam_env.so readenv=1 envfile=\/etc\/environment\nsession required pam_env.so readenv=1 envfile=\/etc\/default\/locale\n/' /etc/pam.d/xrdp-sesman- Find out your Linux VM IP address:
hostname -IThere might be multiple IP addresses at the output. Usually the first one is the external IP address (something like 172.17.240.119.)
- Follow the instructions to install the docker engine. The instructions are summarized as follows:
sudo apt-get update
sudo apt-get install -y apt-transport-https ca-certificates curl gnupg-agent software-properties-common
curl -fsSL https://download.docker.com/linux/ubuntu/gpg | sudo apt-key add -
sudo add-apt-repository "deb [arch=amd64] https://download.docker.com/linux/ubuntu $(lsb_release -cs) stable"
sudo apt-get install -y docker-ce docker-ce-cli containerd.io
sudo usermod -aG docker $USER
At this time, you need to log out and re-login to allow the permission to take effect.
- Setup the docker firewall proxy as follows if you are behind a firewall:
sudo mkdir -p /etc/systemd/system/docker.service.d
printf "[Service]\nEnvironment=\"HTTPS_PROXY=$https_proxy\" \"NO_PROXY=$no_proxy\"\n" | sudo tee /etc/systemd/system/docker.service.d/proxy.conf
sudo systemctl daemon-reload
sudo systemctl restart docker- Finally configure the docker engine to use the data disk as follows:
echo '{"exec-opts":["native.cgroupdriver=systemd"],"graph":"/mnt/dockerdisk"}' | sudo tee -a /etc/docker/daemon.json
sudo systemctl restart docker- Install prerequisite software and setup docker-swarm:
sudo apt-get install -y cmake m4
docker swarm init- Clone and build the Smart-City sample as follows:
git clone https://github.com/OpenVisualCloud/Smart-City-Sample.git
cd Smart-City-Sample
mkdir build
cd build
cmake -DNANALYTICS=1 ..
make
The cmake option NANALYTICS=1 runs a single analytics instance on the laptop. Adjust as needed if you got a powerful laptop.
- Run the sample:
make start_docker_swarm-
Go back to Windows. Launch your Windows browser and points
https://linux-vm-ip-address. See the Setting up Linux section for how to retrieve the Linux VM IP address. You should see the sample UI. If you see a browser warning about self-signed certificate, please accept it. -
Stop the sample:
make stop_docker_swarmIf you don't see the sample behaves, check the following settings:
- Check the database logs:
docker service logs -f smtc_db. Make sure the database is up and running. The most common issue of a database not running is that there is not enough memory. Shutdown the Linux VM and adjust memory size in the Hyper-V Manager. The sample requires a minimum of 2GB memory (1GB for the database).
If the above does not help, please submit a bug report.
Powered by Open Visual Cloud media and analytics software stacks.