This is a fork of http://github.com/dstegelman/django-mail-queue maintained by Privex Inc.
Derek passed on ownership of the original django-mail-queue PyPi package to Privex on 17 Sep 2019
Privex publishes the fork under the original PyPi package django-mail-queue (since v3.2.0).
This fork is considered to be actively maintained by Privex for both bug fixes and feature additions since December 2018.
If our fork has helped you, consider grabbing a VPS or Dedicated Server from Privex - prices start at as little as US$0.99/mo (yes that's 99 cents a month, and we take cryptocurrency!)
Mail Queue provides an easy and simple way to send email. Each email is saved and queued up either in real time or with Celery. As always, feedback, bugs, and suggestions are welcome.
django-mail-queue maintains high compatibility, from as old as Django 1.8 on Python 2.7, up to Django 2.2 on
Python 3.7
To check the compatibility, see Travis CI, which runs the unit tests on a variety of Python and Django versions.
pip3 install django-mail-queueOption 1 - Use pip to install straight from Github
pip3 install git+https://github.com/Privex/django-mail-queueOption 2 - Clone and install manually
# Clone the repository from Github
git clone https://github.com/Privex/django-mail-queue
cd django-mail-queue

# RECOMMENDED MANUAL INSTALL METHOD
# Use pip to install the source code
pip3 install .

# ALTERNATIVE MANUAL INSTALL METHOD
# If you don't have pip, or have issues with installing using it, then you can use setuptools instead.
python3 setup.py installFirst install the package into your project (see above).
Open settings.py and add mailqueue to your INSTALLED_APPS:
INSTALLED_APPS = (
    'mailqueue',
)
Add the below settings, and adjust as needed:
# If you're using Celery, set this to True
MAILQUEUE_CELERY = False

# Enable the mail queue. If this is set to False, the mail queue will be disabled and emails will be
# sent immediately instead.
MAILQUEUE_QUEUE_UP = True

# Maximum amount of emails to send during each queue run
MAILQUEUE_LIMIT = 50

# If MAILQUEUE_STORAGE is set to True, will ignore your default storage settings
# and use Django's filesystem storage instead (stores them in MAILQUEUE_ATTACHMENT_DIR)
MAILQUEUE_STORAGE = False
MAILQUEUE_ATTACHMENT_DIR = 'mailqueue-attachments'Once you've added mailqueue to your INSTALLED_APPS plus the basic config in settings.py, run the
migrations to create the tables needed:
python manage.py migrateSimply save an email to the database using MailerMessage, and the queue will pick it up on it's next run.
from mailqueue.models import MailerMessage

my_email = "dave@example.com"
my_name = "Dave Johnston"
content = """
Dear John,

This is an example email from Dave.

Thanks,
Dave Johnston!
"""

msg = MailerMessage()
msg.subject = "Hello World"
msg.to_address = "john@example.com"

# For sender names to be displayed correctly on mail clients, simply put your name first
# and the actual email in angle brackets
# The below example results in "Dave Johnston <dave@example.com>"
msg.from_address = '{} <{}>'.format(my_name, my_email)

# As this is only an example, we place the text content in both the plaintext version (content)
# and HTML version (html_content).
msg.content = content
msg.html_content = content
msg.save()
To send emails in the queue (without Celery), use the management command:
# Send up to MAILQUEUE_LIMIT emails now
python manage.py send_queued_messages

# You can use --limit / -l to override the settings.py limit for a specific run
python manage.py send_queued_messages --limit 10
python manage.py send_queued_messages -l 10
If not using Celery, simply add a cron to your system to run manage.py send_queued_messages every minute (or however
often you want).
http://readthedocs.org/docs/django-mail-queue/en/latest/
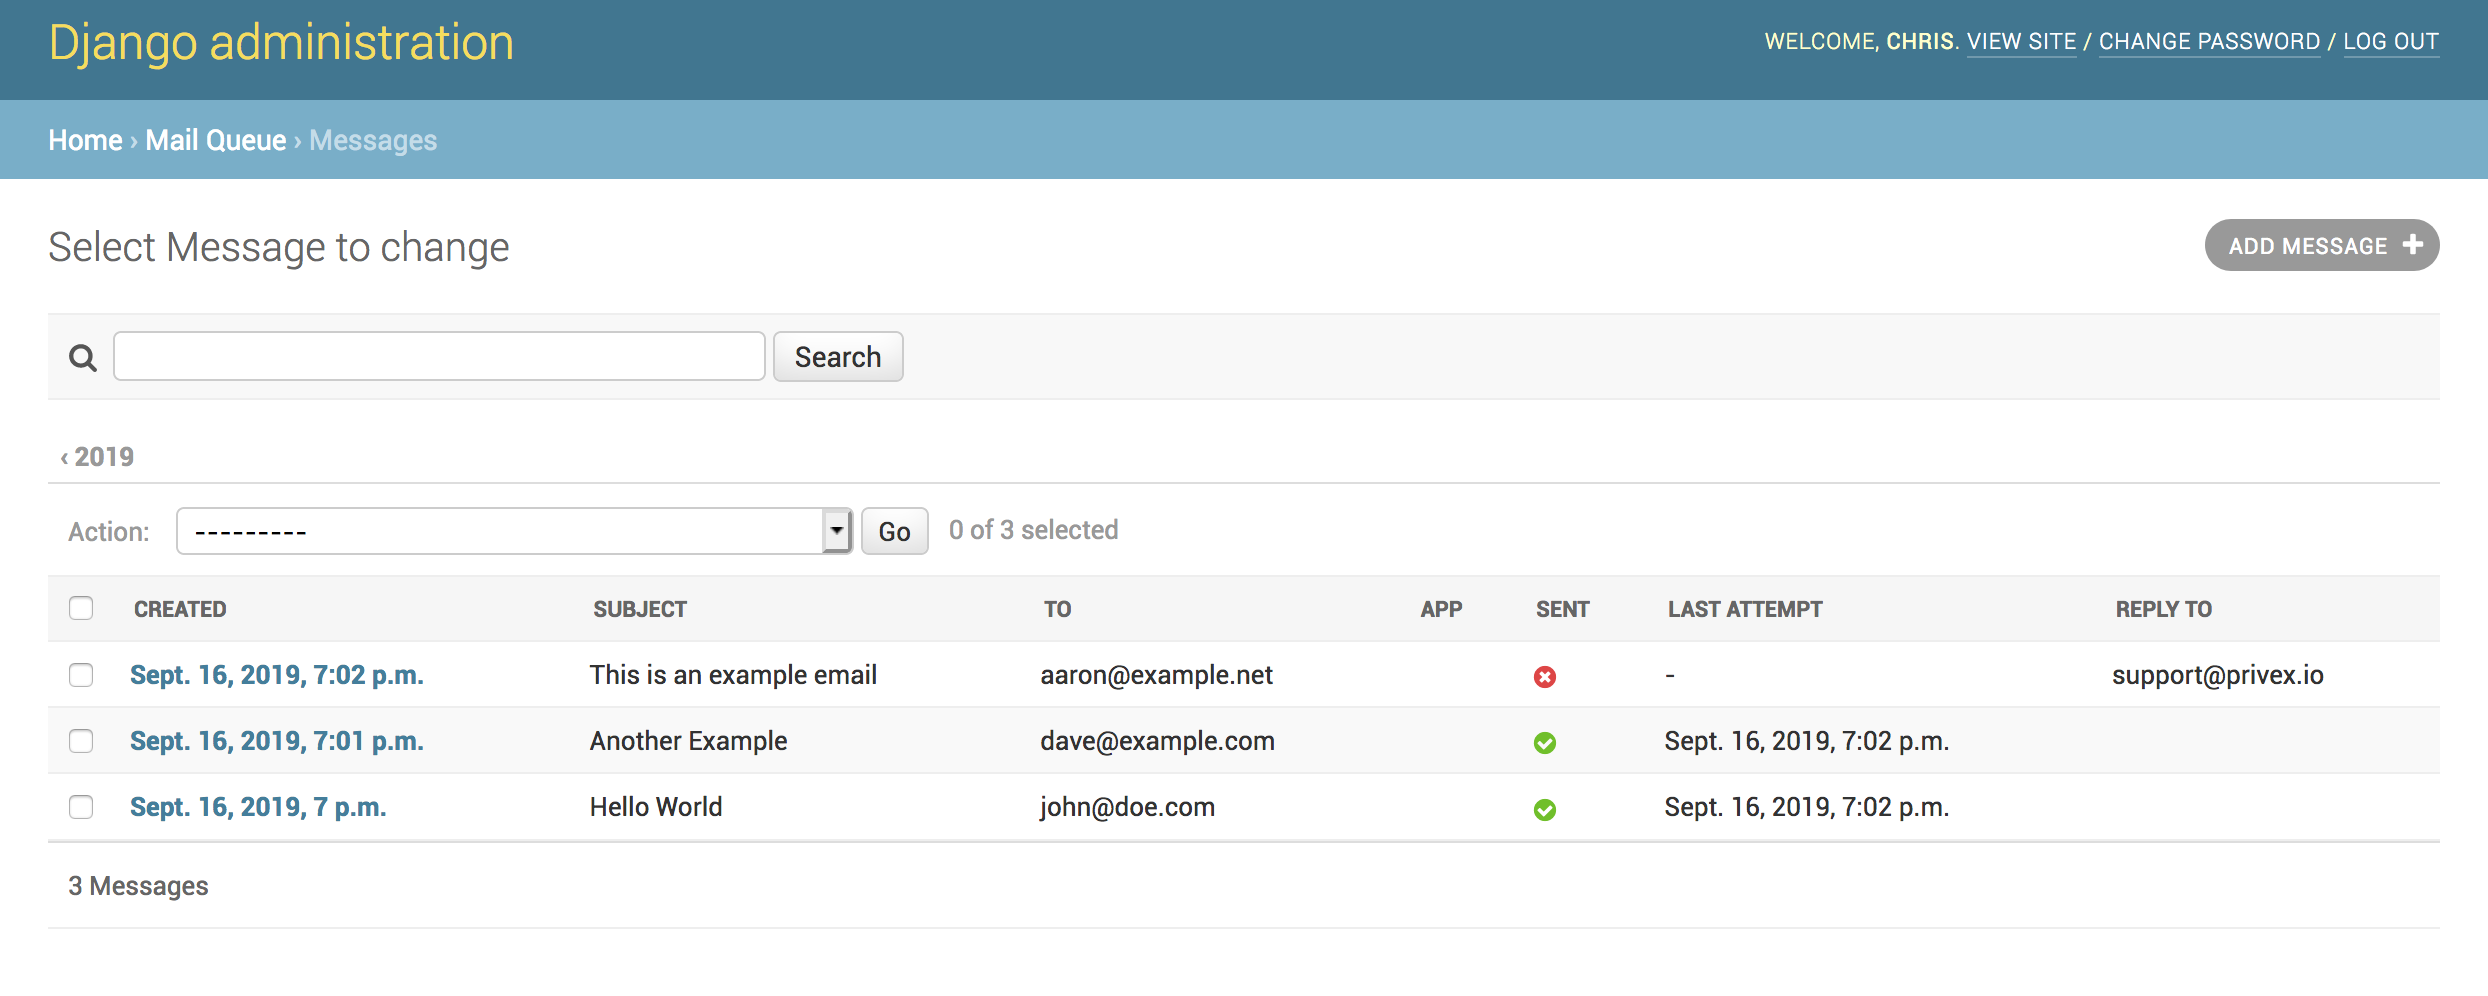
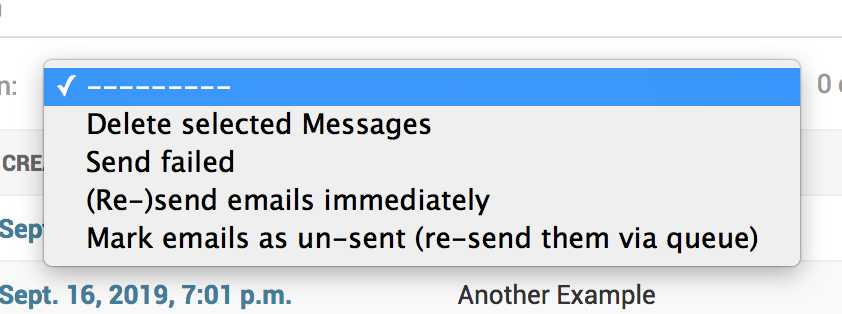
Mail Queue provides an admin interface to view all attempted emails and actions for resending failed messages.
If you have questions/problems/suggestions the quickest way to reach me to is simply add a GitHub issue to this project.
pip install django
pip install -r requirements.txt

py.test mailqueue


