-
-
Notifications
You must be signed in to change notification settings - Fork 1.1k
Gettings Started
Sonu Sharma edited this page Nov 27, 2022
·
10 revisions
Note: Flutter sdk version
3.3.8is recommended to run project
$ git clone https://github.com/TheAlphamerc/flutter_twitter_clone.git
$ cd flutter_twitter_clone/- You'll need to create a Firebase instance. Follow the instructions at https://console.firebase.google.com.
- Once your Firebase instance is created, you'll need to enable Google authentication.
- Go to the Firebase Console for your new instance.
- Click "Authentication" in the left-hand menu
- Click the "sign-in method" tab
- Click "Google" and enable it
- Click "Email/Password" and enable it
- Enable the Firebase Database
- Go to the Firebase Console
- Click "Database" in the left-hand menu
- Click the "Create Database" button
- It will prompt you to set up, rules, for the sake of simplicity, let us choose test mode, for now.
- On the next screen select any of the locations you prefer.
- (skip if not running on Android)
- Create an app within your Firebase instance for Android, with package name >
com.thealphamerc.flutter_twitter_clone_dev - Run the following command to get your SHA-1 key:
keytool -exportcert -list -v \
-alias androiddebugkey -keystore ~/.android/debug.keystore
- In the Firebase console, in the settings of your Android app, add your SHA-1 key by clicking "Add Fingerprint".
- Enable firebase storage (otherwise storing images will not work)
- Add "FcmServerKey" to Firebase Remote Config Follow below steps to get FCM server key.
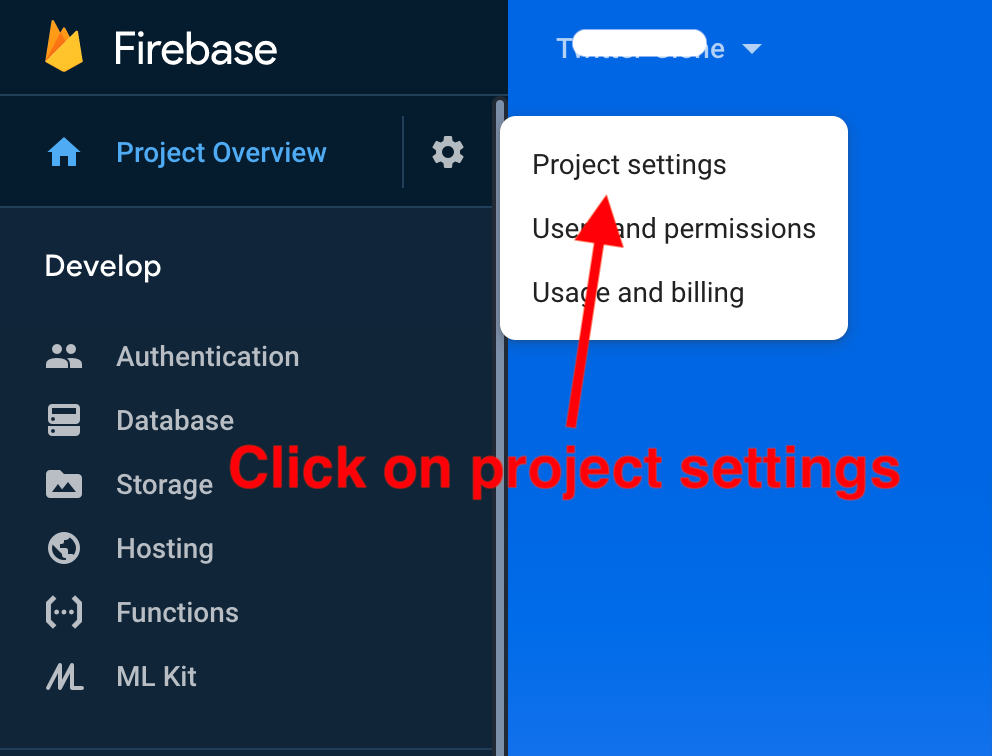
- Open your project in firebase.
- Click on gear icon in sidebar. A popup will open then click on
project settings
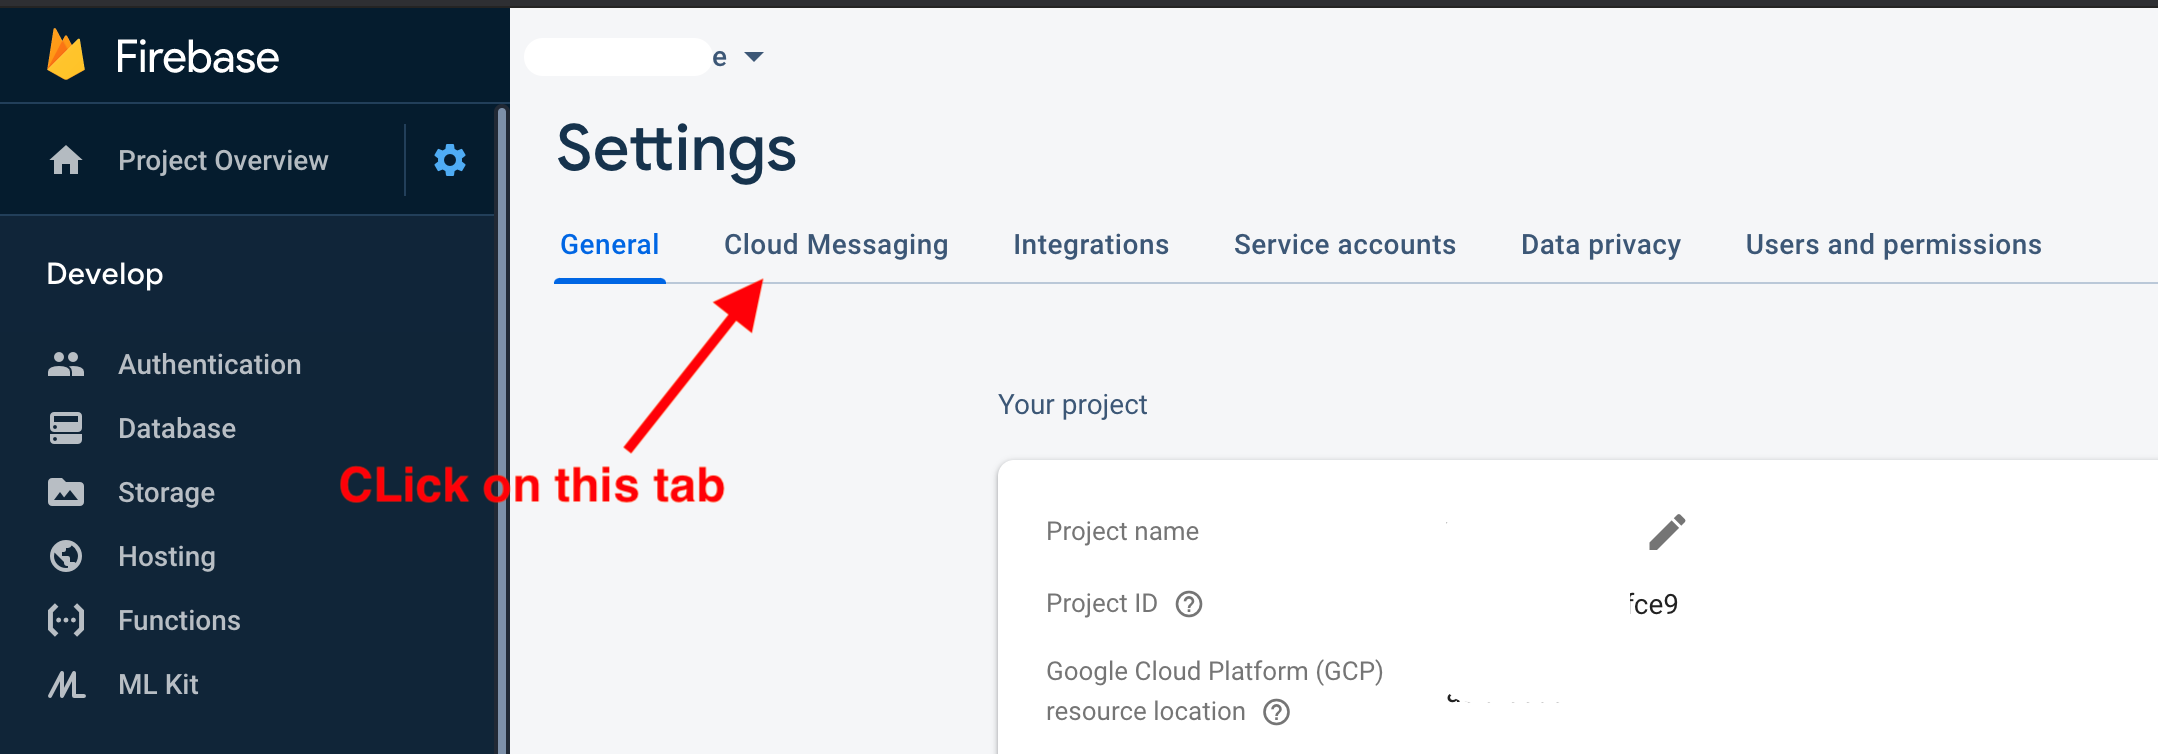
- Open
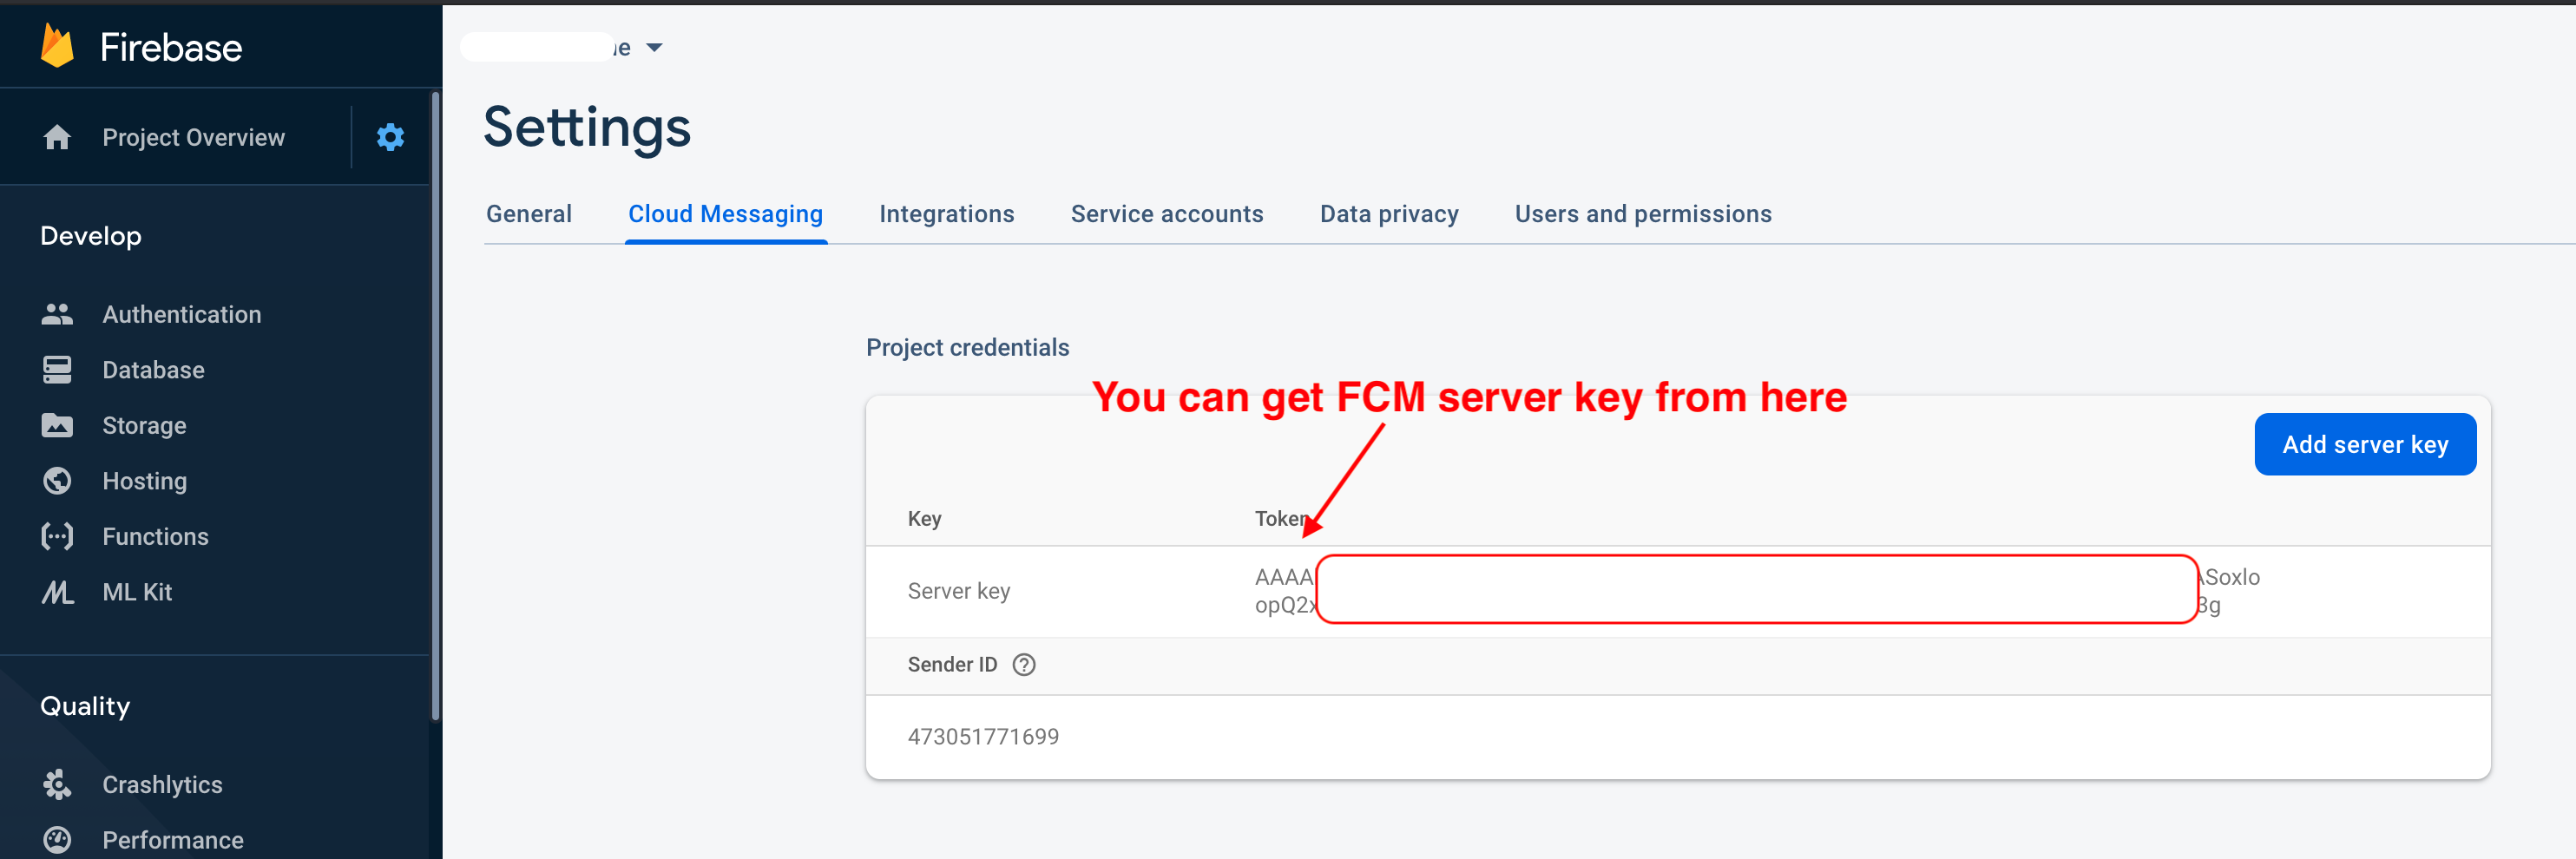
Cloud messagingtab
- You can get FCM server key from there
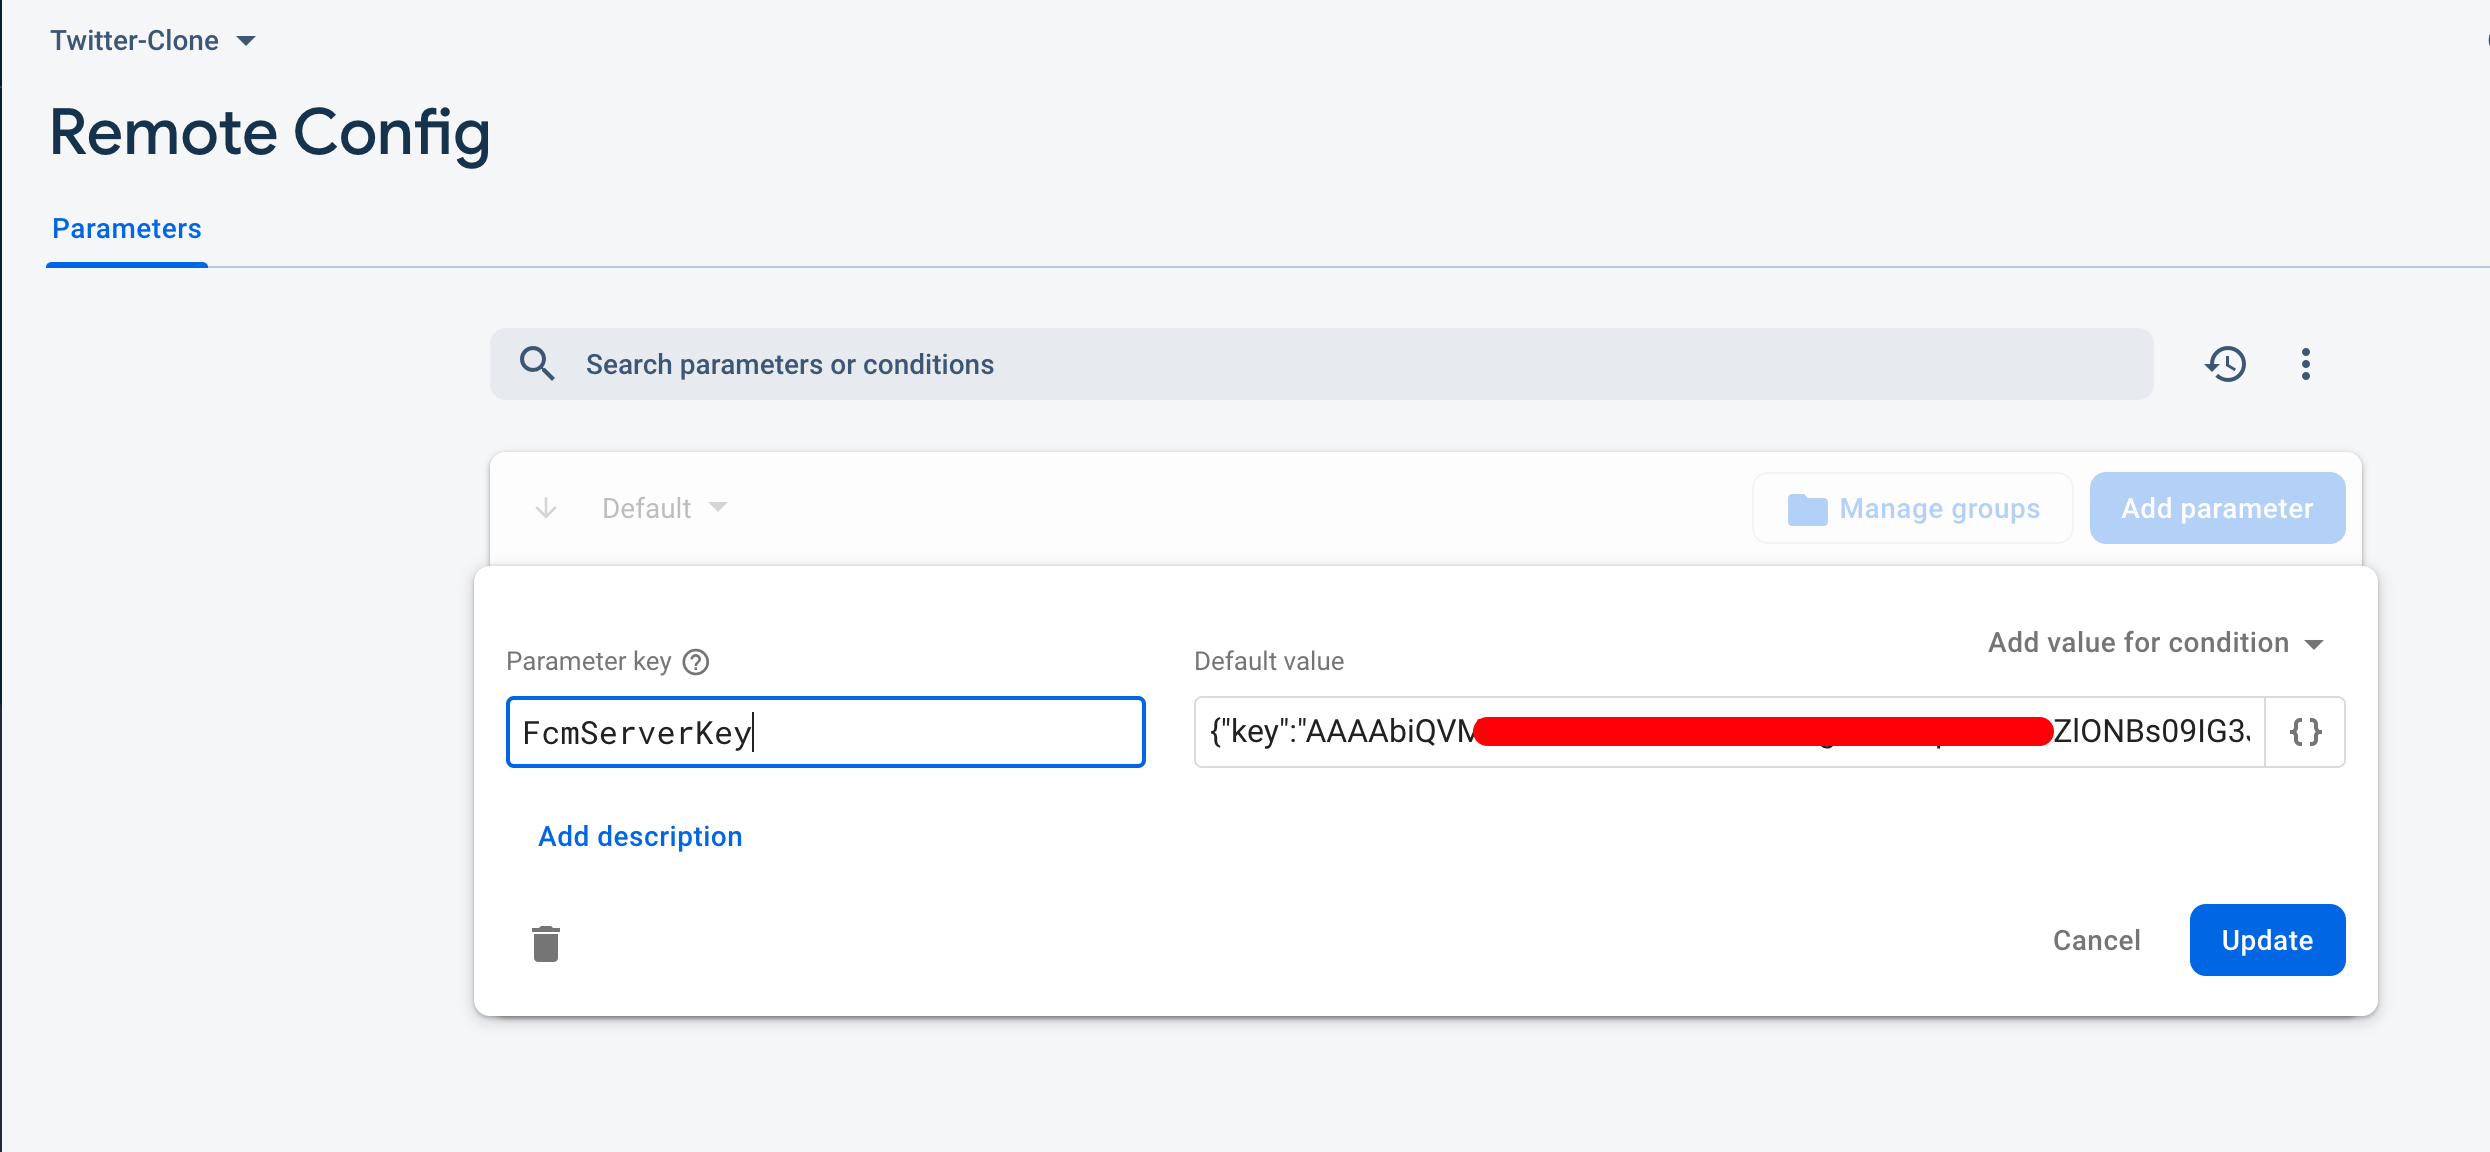
- Go to firebase remote config
- Create parameter with name
FcmServerKey - Add below json to default value field.
     {
          "key": "FCM server key here"
     }
Check below firebase config screenshot
7 Add another parameter in remote config to get the latest app version and supported builds
This step is optional for development mode.
- Open
Remote Configsection in fireabse. - Add
supportedBuildas parameter key and below JSON in Default value. - Copy app version and build no. from pubspec.yaml
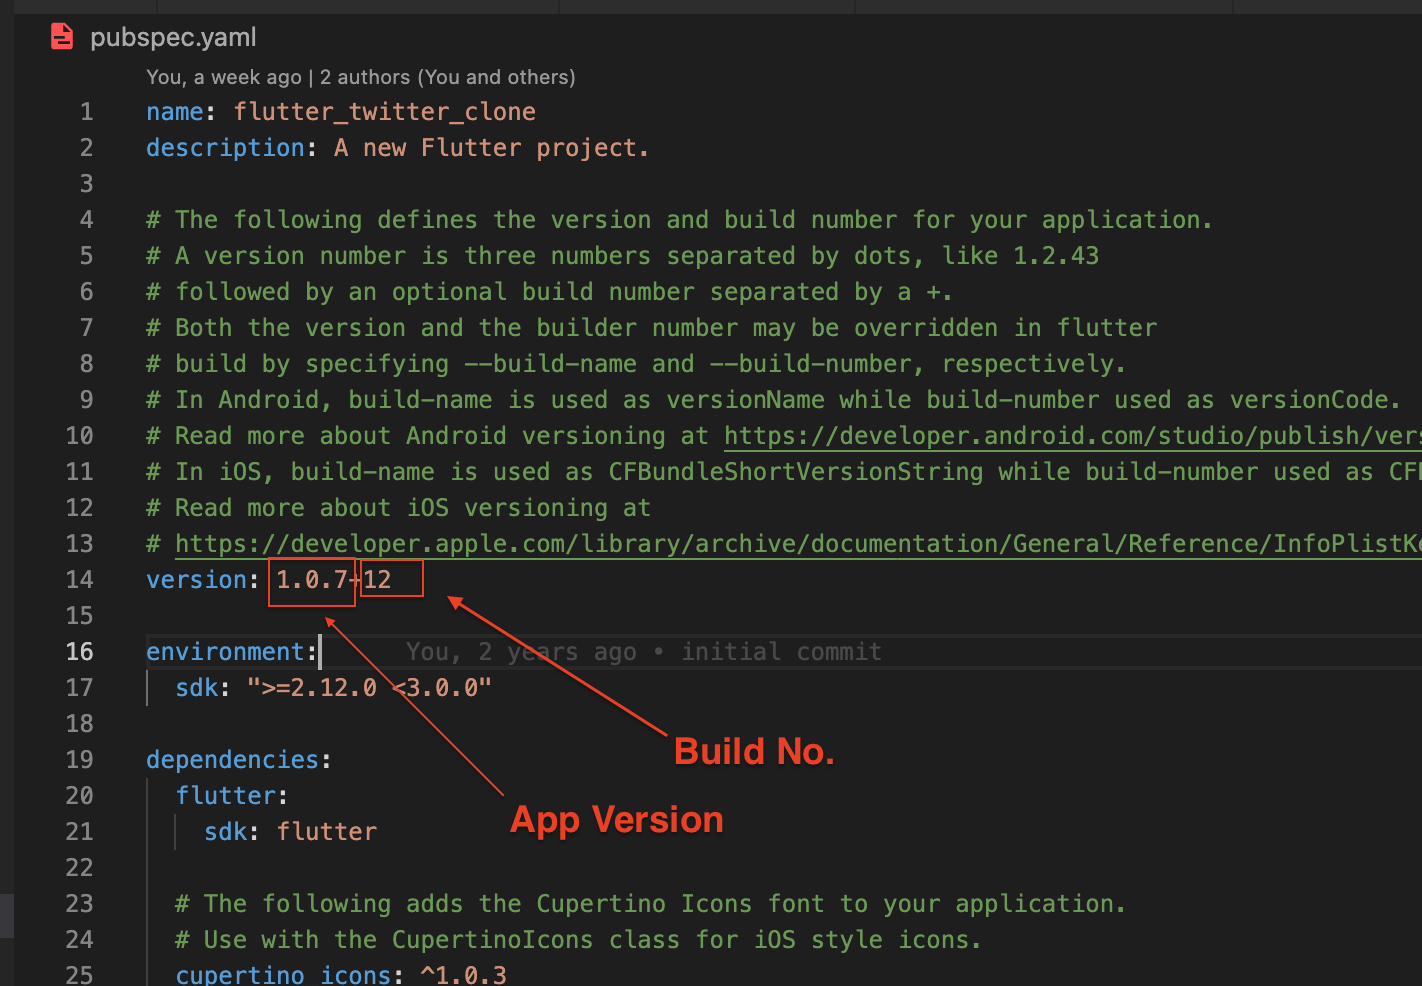
Replace <App version> and <Build no.> in below JSON content with actual value and add this in default value field as per below screenshot.
 {
   "name":"<App Version>",
   "versions":[<Build no.>]
  }
After adding supportedBuild key click on Publish Change button
- Download google-services.json
- place
google-services.jsoninto/android/app/.
- (skip if not running on iOS)
- Create an app within your Firebase instance for iOS, with your app package name
- Follow instructions to download GoogleService-Info.plist
- Open XCode, right click the Runner folder, select the "Add Files to 'Runner'" menu, and select the GoogleService-Info.plist file to add it to /ios/Runner in XCode
- Open /ios/Runner/Info.plist in a text editor. Locate the CFBundleURLSchemes key. The second item in the array value of this key is specific to the Firebase instance. Replace it with the value for REVERSED_CLIENT_ID from GoogleService-Info.plist