-
Notifications
You must be signed in to change notification settings - Fork 3
walkthrough
####Choosing a Starting Sample
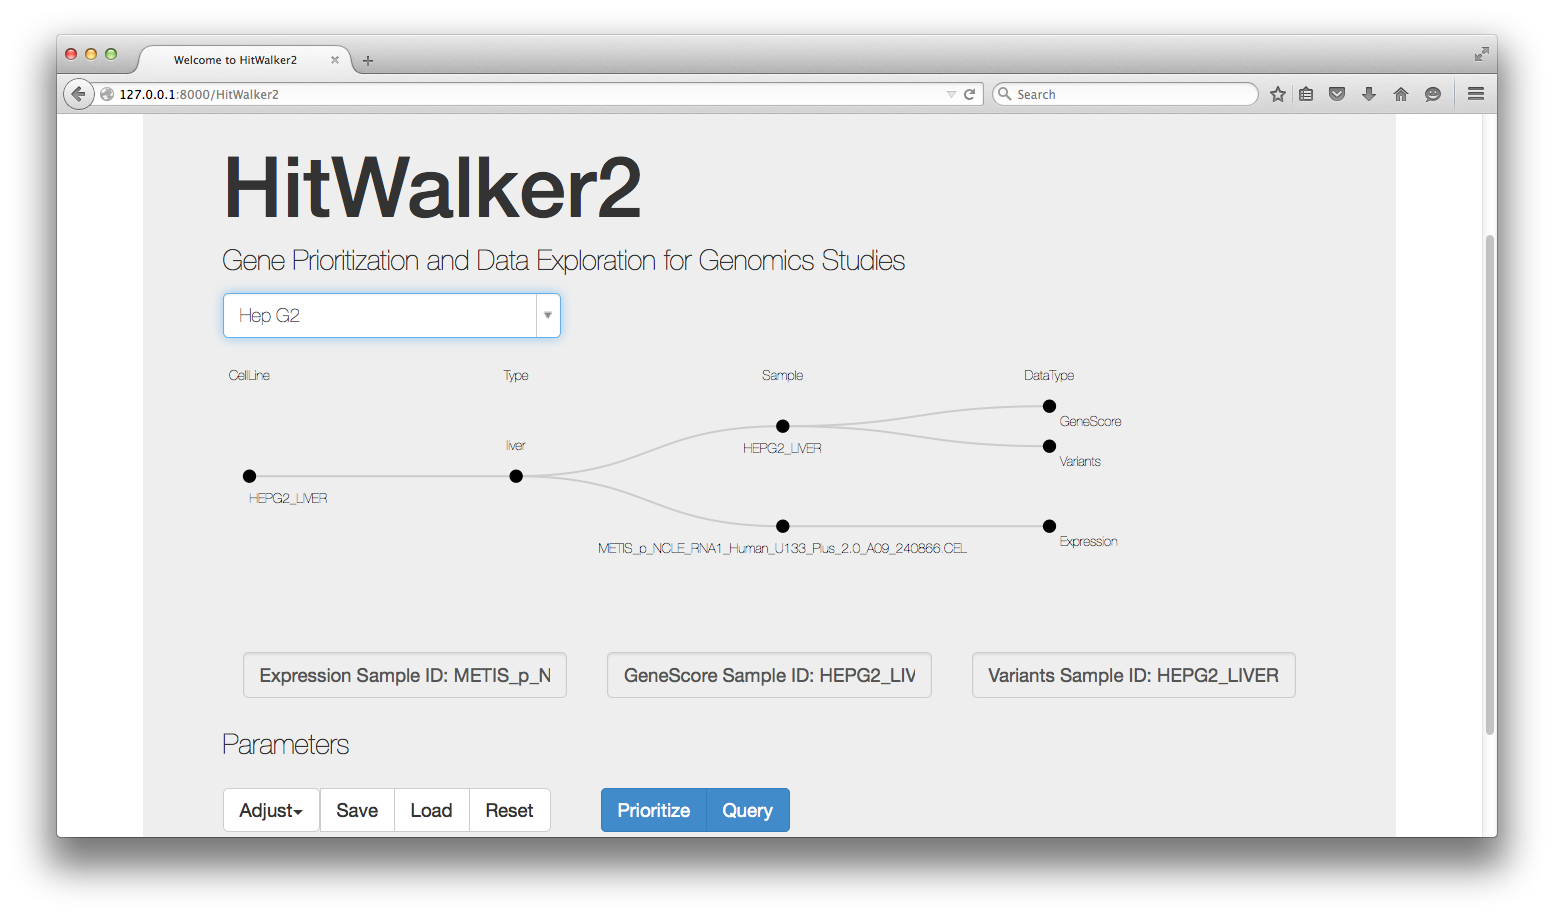
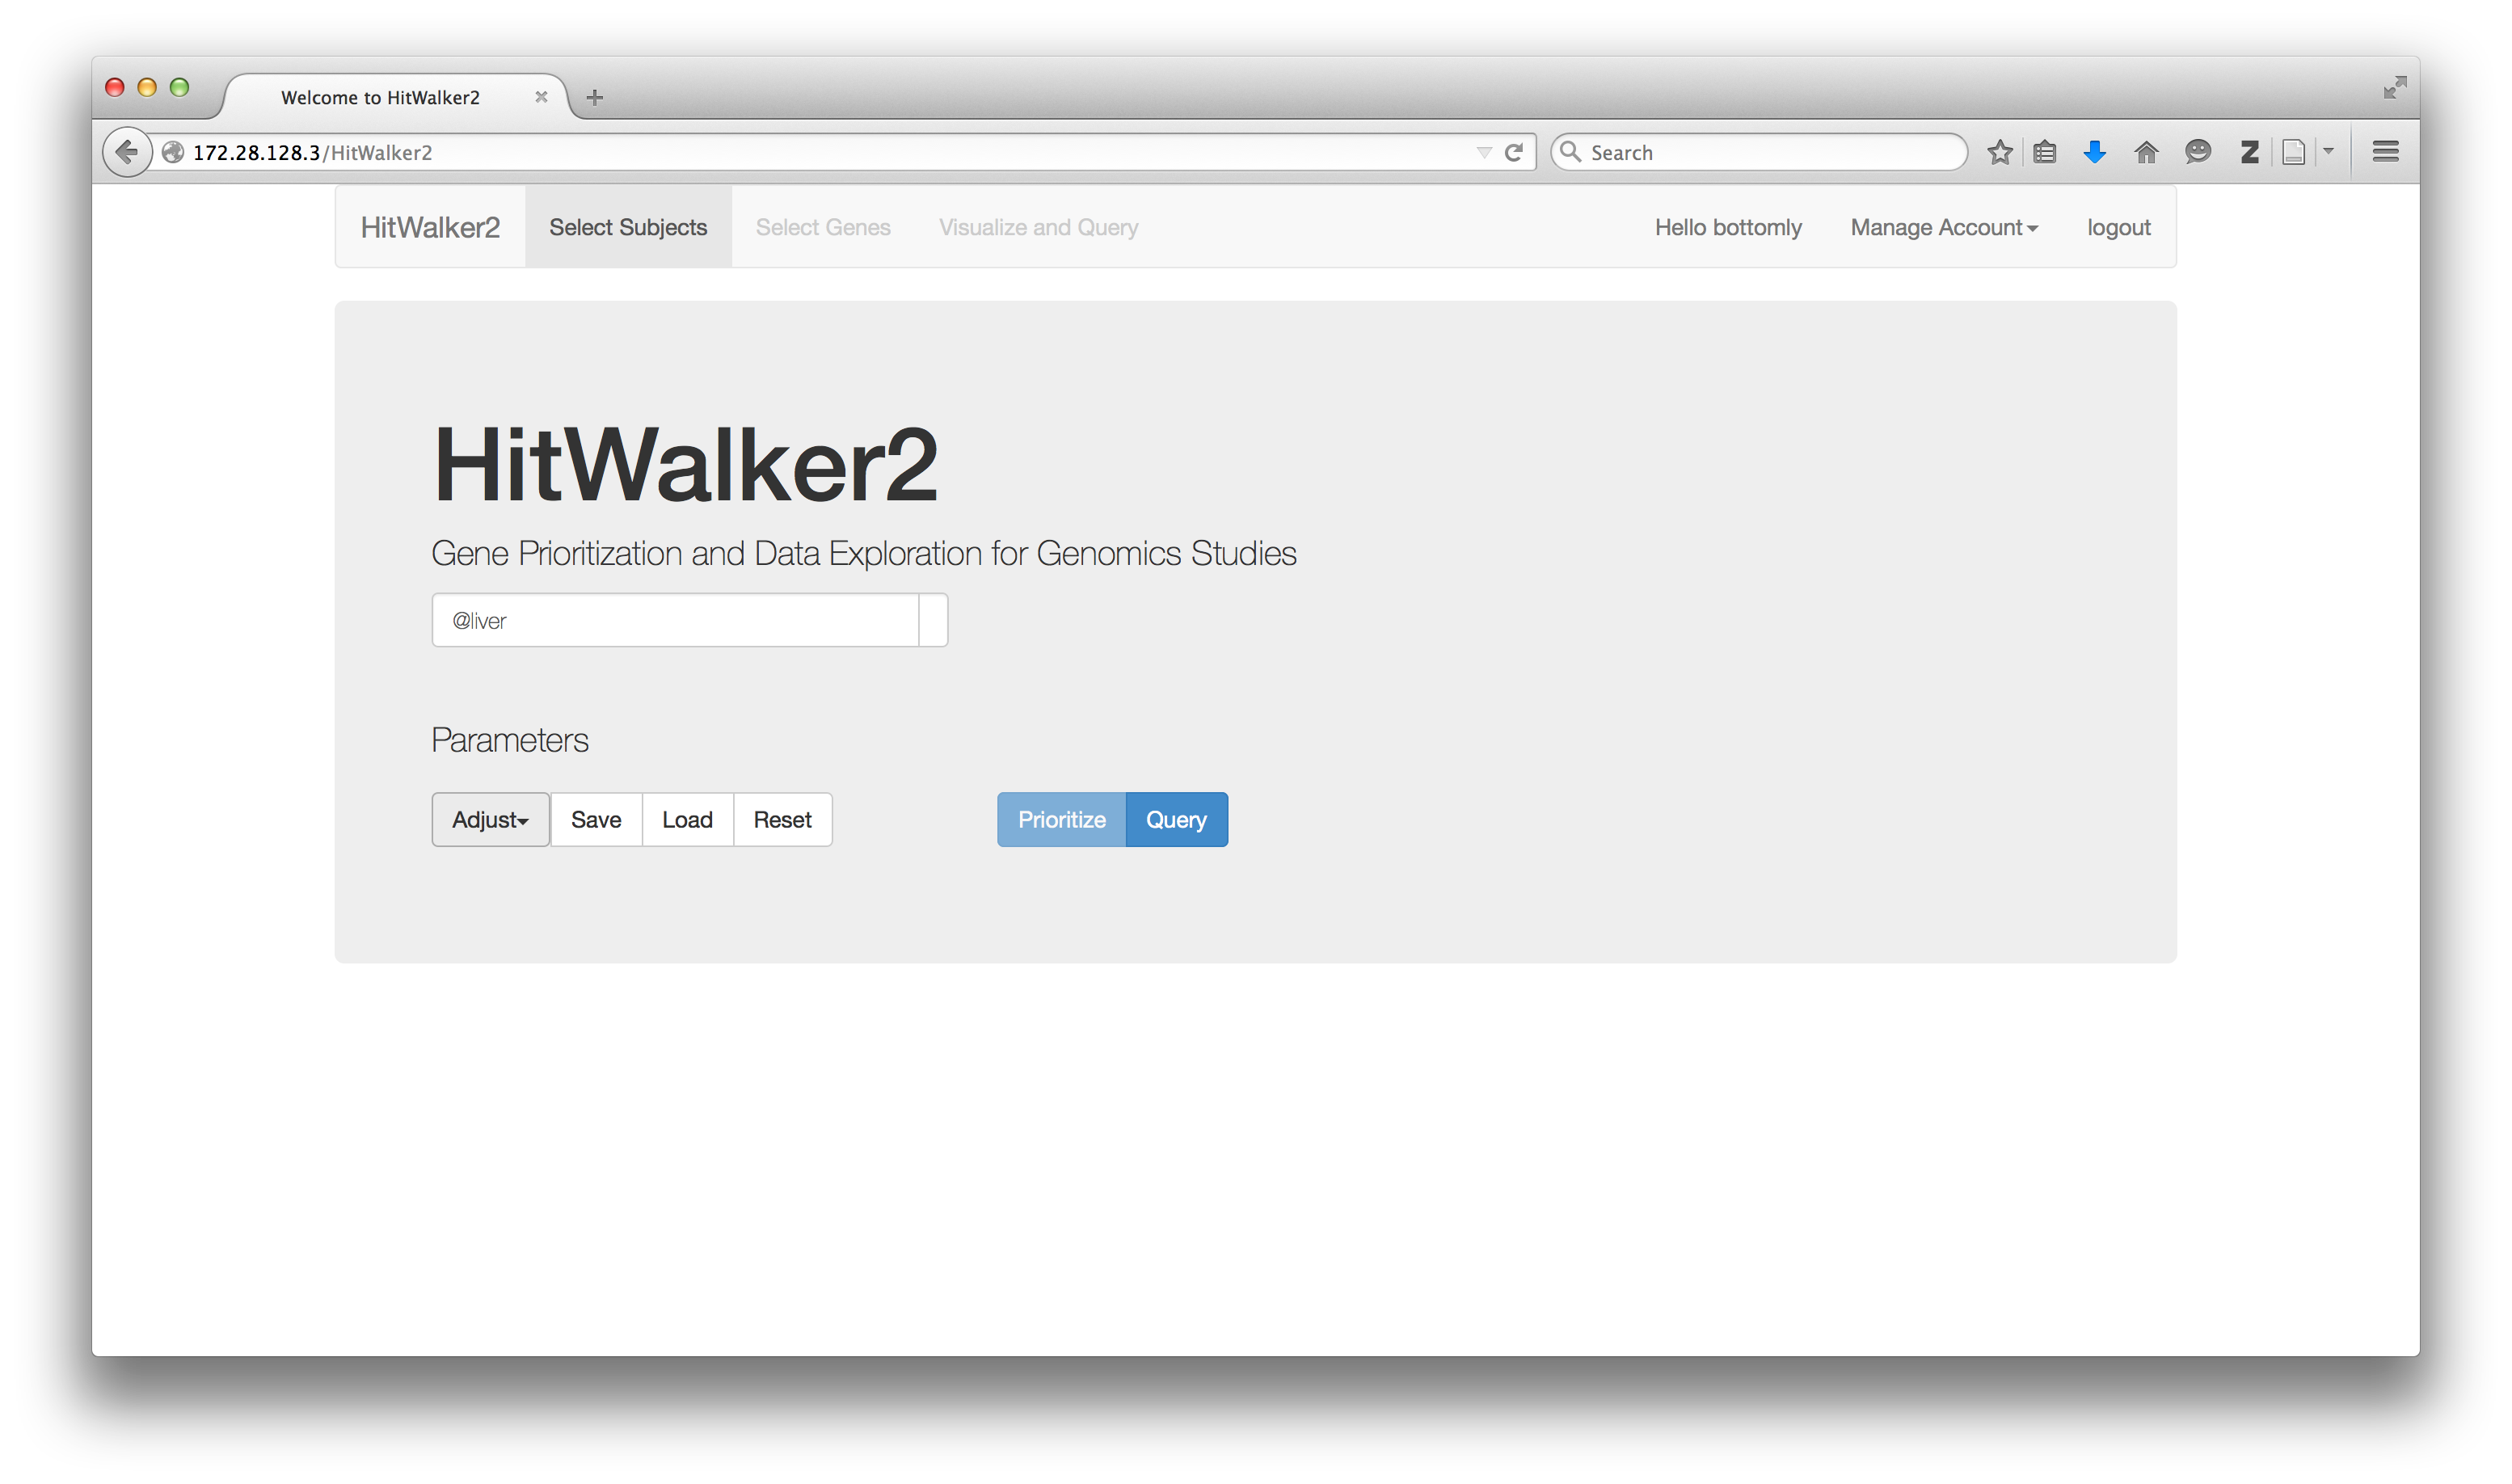
The first step to using HitWalker2 is to choose a subject, a cell line in this context. Subjects can be referred to by name or alias (if added to database). Each subject can be associated with multiple samples, one for each data-type and which may or may not have the same name as the subject. Below we choose the HEPG2_LIVER cell line by typing its alias Hep G2 name into the search box. After choosing the sample, HitWalker2 displays the relationships between the subject and its samples. At this point, if multiple samples are present for a given data-type, the appropriate one can be chosen. Note that these samples are only used to retrieve the data-types for the prioritization step for this subject.
####Adjusting parameters
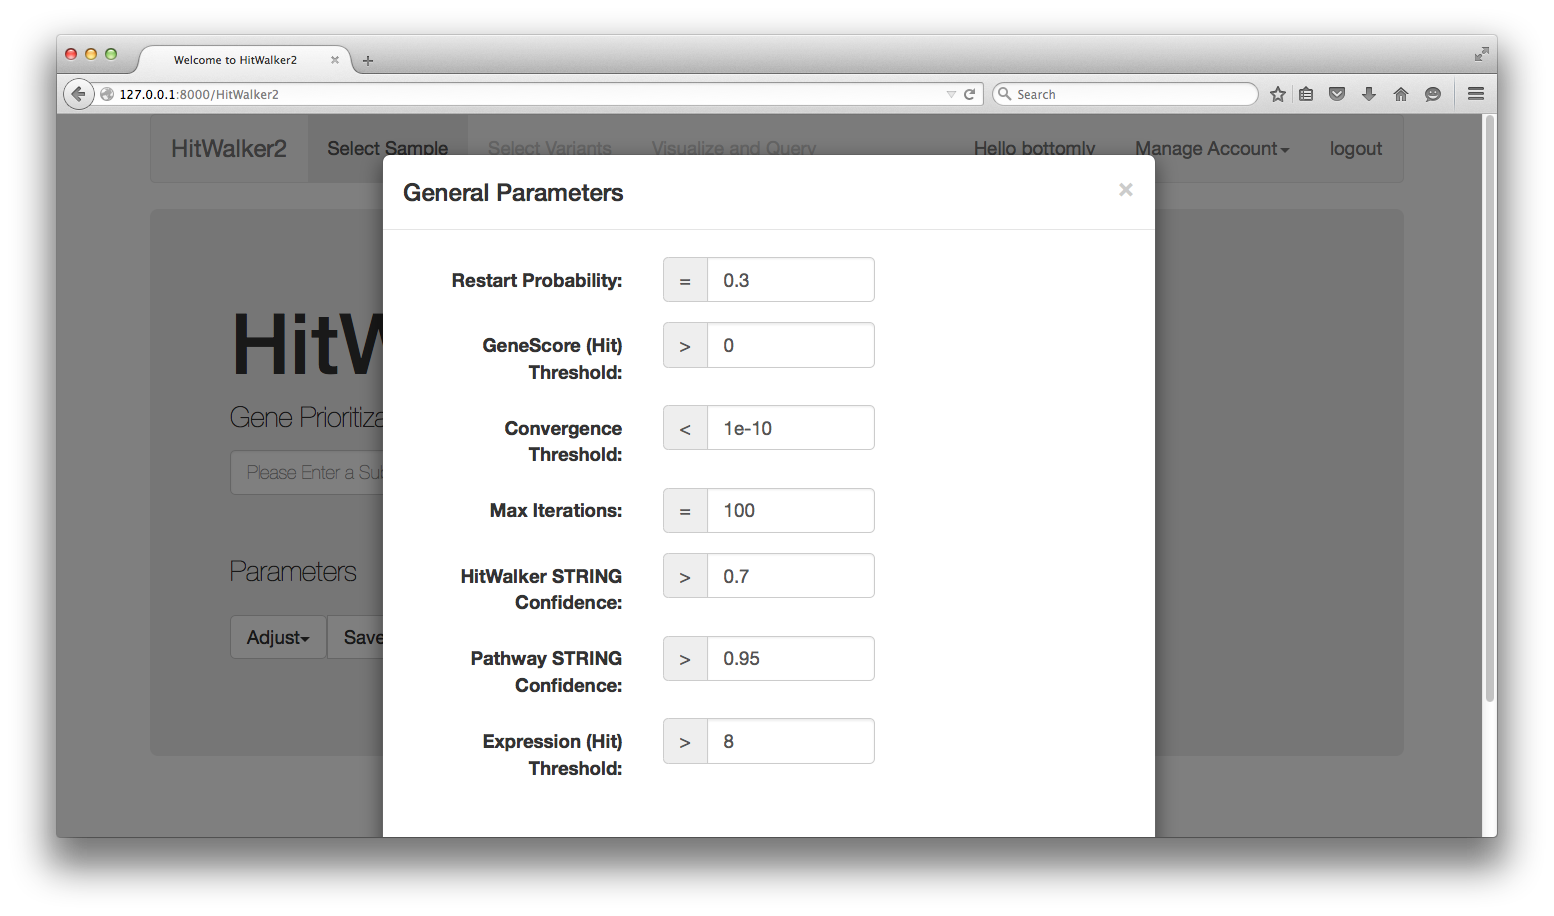
Before carrying out prioritization or querying, it is possible to adjust the hit choice criteria or the parameters of the prioritization algorithm by clicking on the Adjust button and choosing the category of parameters to adjust.
####Prioritization
After the adjusting any desired parameters, the variants for the HEPG2_LIVER cell line can be prioritized relative to the gene targets of the drug assay results. To do this click the Prioritize button. After 10-30 seconds a table summarizing the prioritization results is displayed as is shown below.
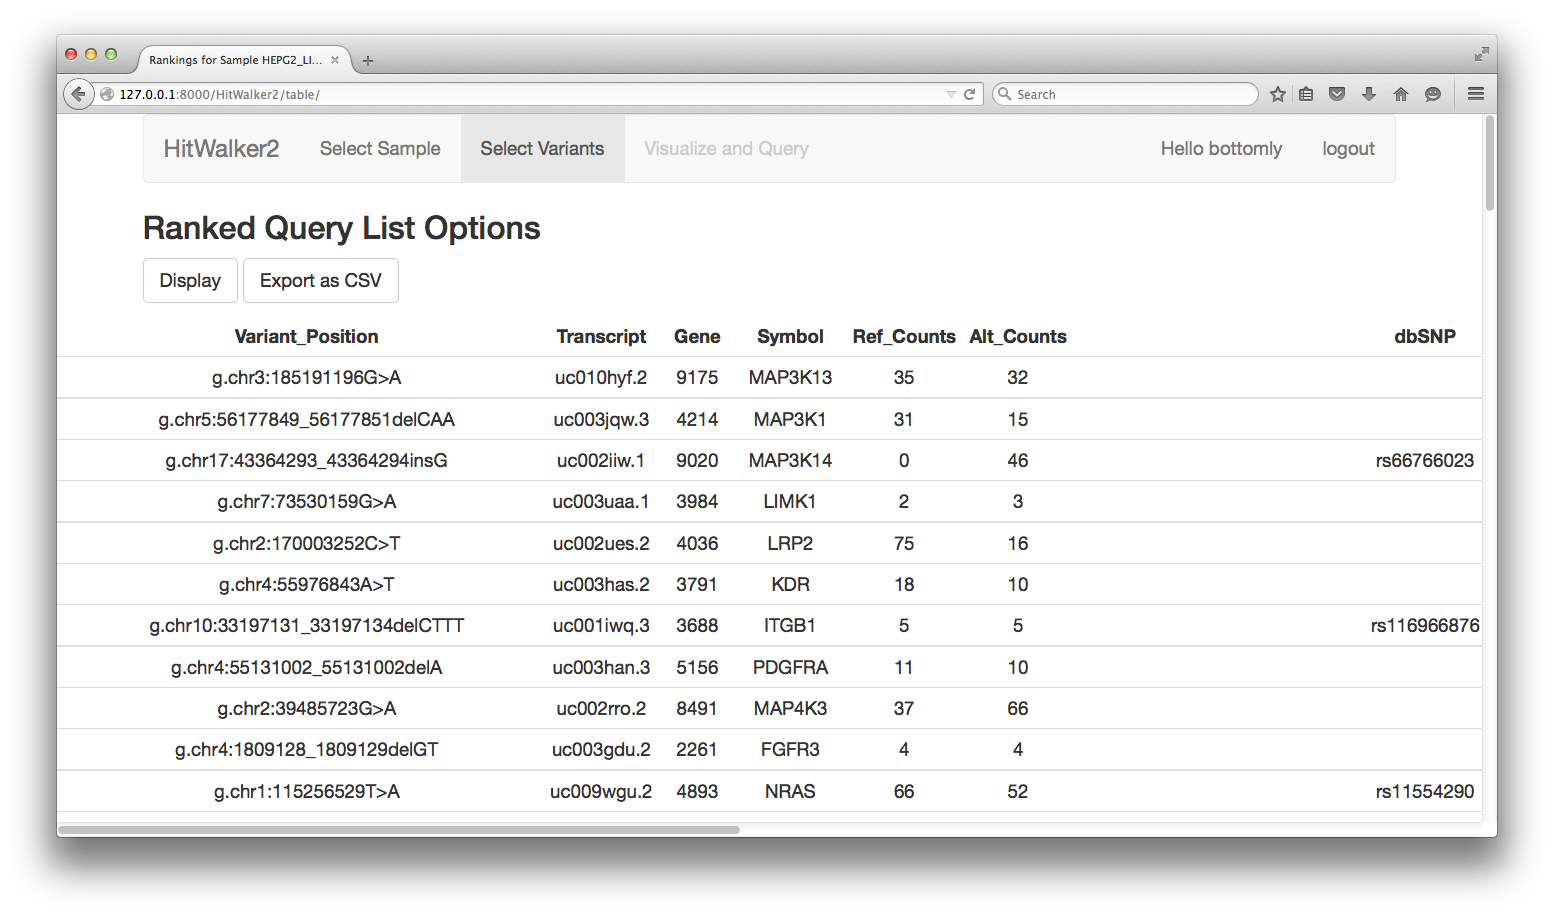
Several options currently exist to explore the results after the table is perused online.
- Download the results table as a CSV which can be imported into Excel.

- Choose genes which will form the basis of visualization and querying.

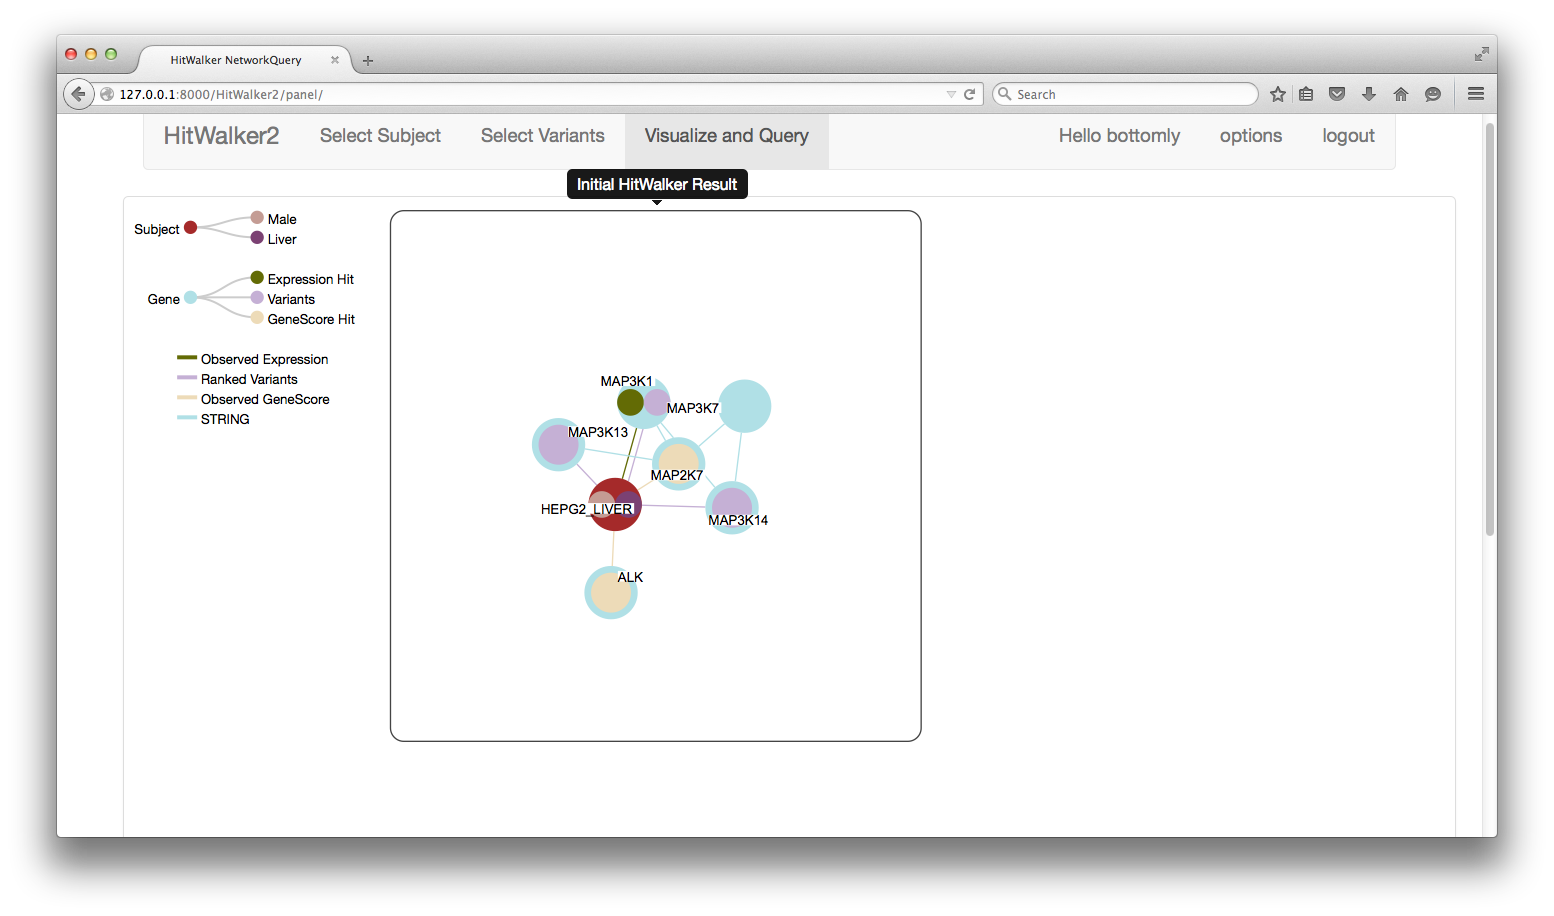
Clicking Submit will bring the user to the visualization panel screen and display the connections between the selected genes.
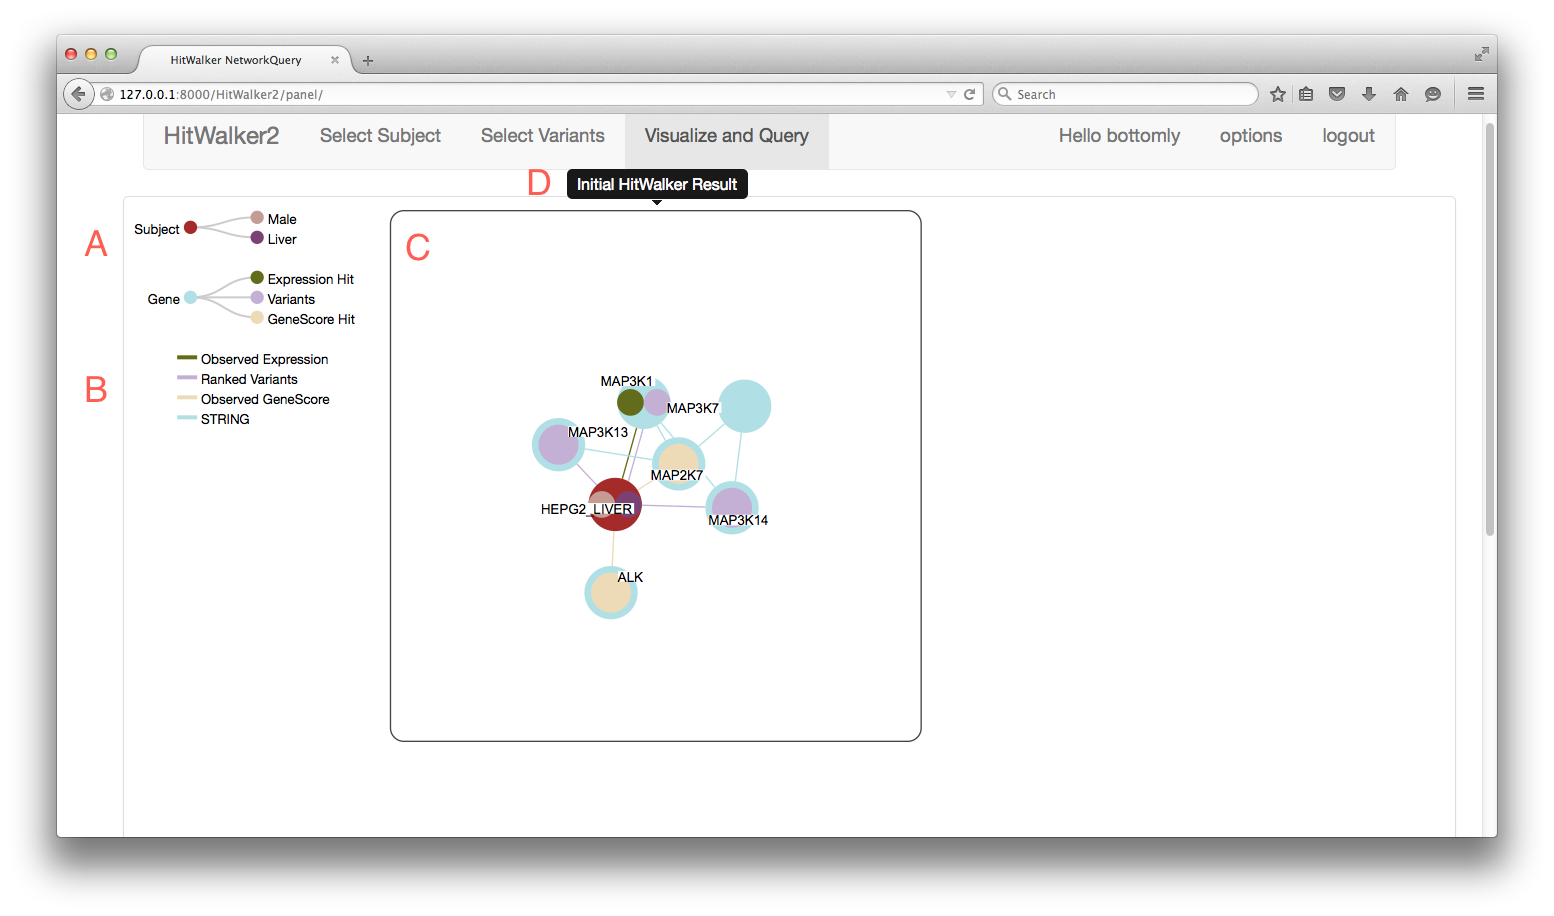
####Anatomy of the panel view
Legend
- (A) Nodes
- Hierarchical collections represented as circles within circles
- There are 3 main types of nodes currently implemented:
- Genes
- Collection of Hits, Queries and Overlays
- Hits are differentiated by whether they were/weren't seen to be a hit
- Subjects
- Collection of subject/sample attributes such as gender or phenotypes
- MetaNodes
- Represents a collection of genes or samples
- Not specifically represented in the legend
- Genes
- (B) Edges
- Indicate the type of relationship(s) between the nodes such as:
- Whether a sample has a hit in a particular gene.
- Gene-gene interaction in STRING.
- Indicate the type of relationship(s) between the nodes such as:
- (C) Panel
- Main image(s) to interact with, see below for how to interact.
- (D) Panel Description
- Title of a given panel, indicates the panel history.
####Panel Interaction
Each panel can be interacted with using the mouse and a few main keys.
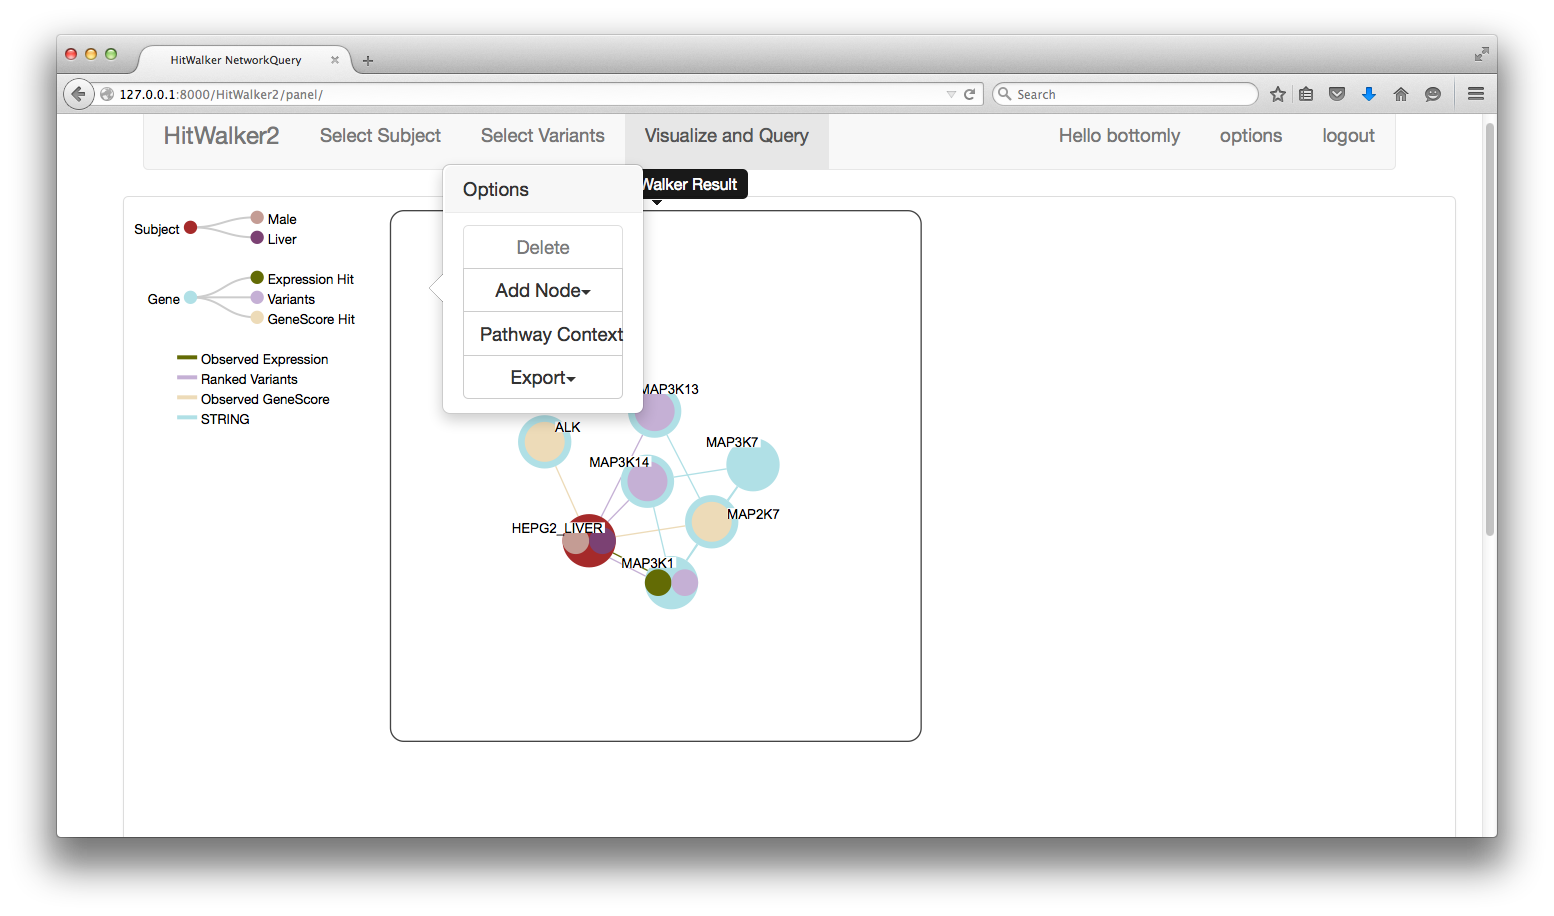
- Panel Right Click
- Brings up a 'Context Menu' with the following options:
- Delete
- Deletes a given panel, note the first panel cannot be deleted if it is the only panel.
- Add Node
- Creates a new panel and adds one or more nodes to the existing set of nodes. This procedure automatically groups the nodes into MetaNode sets with unique types of relationships.
- Pathway Context
- Allows the selection of a pathway by first entering in genes of interest. This pathway is used to choose a set of genes to be displayed with the STRING interactions in a network context. The resulting image is opened up in a new tab/window and does not contain the same features as the regular panel system.
- Export
- Allows the export of a panel to a PDF or CSV file.
- Delete
- Brings up a 'Context Menu' with the following options:
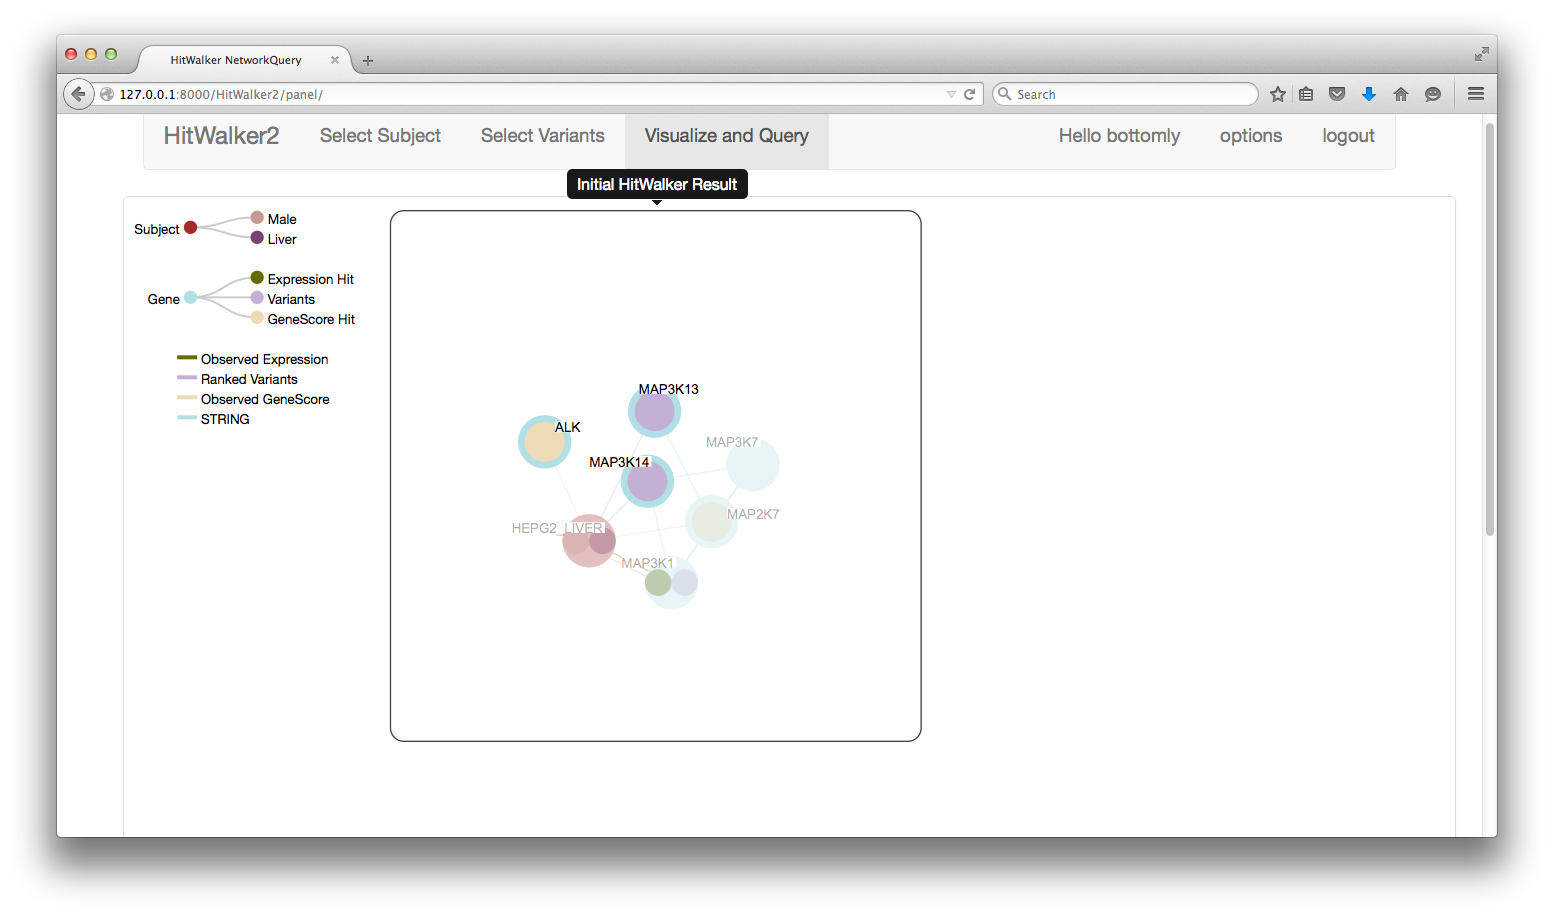
- Node Left Click
- Allows selection of one or more nodes.
- Selected nodes can be moved within a panel or between panels
- Node Left + Right Click
- Brings up a menu of available pre-specified queries.
- Clicking on a datatype brings up a table of the most frequent results
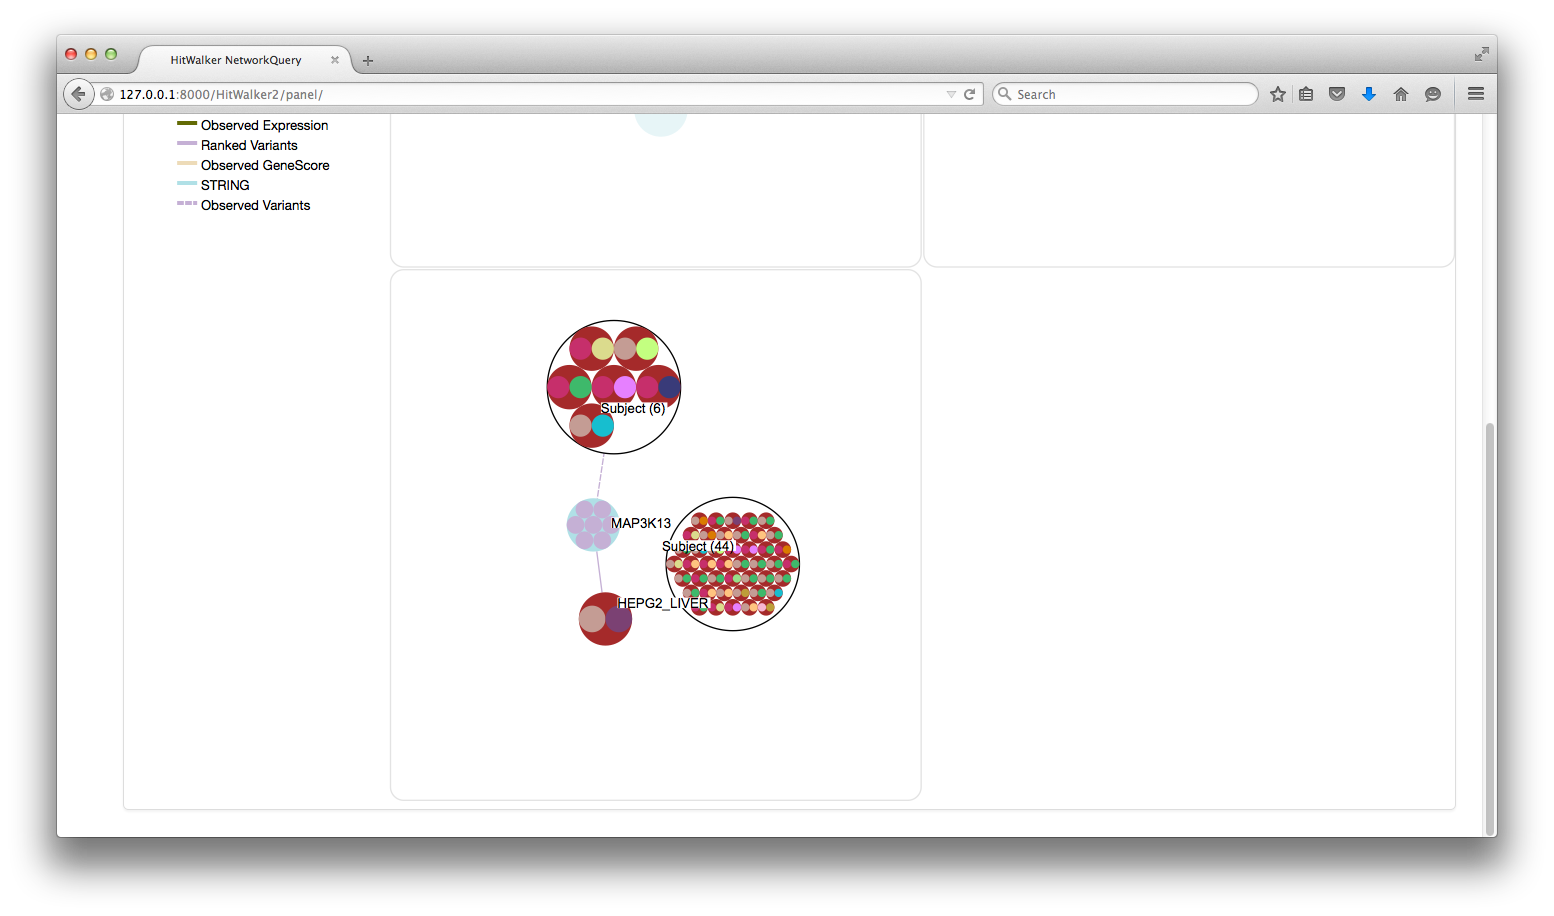
- Clicking on a View button returns a MetaNode with the results.
- Clicking on a datatype brings up a table of the most frequent results
- The Pathway Context option is a shortcut to Panel Right Click->Pathway Context
- Brings up a menu of available pre-specified queries.

- Node Right Click
- Brings up a summary of a Node/MetaNode
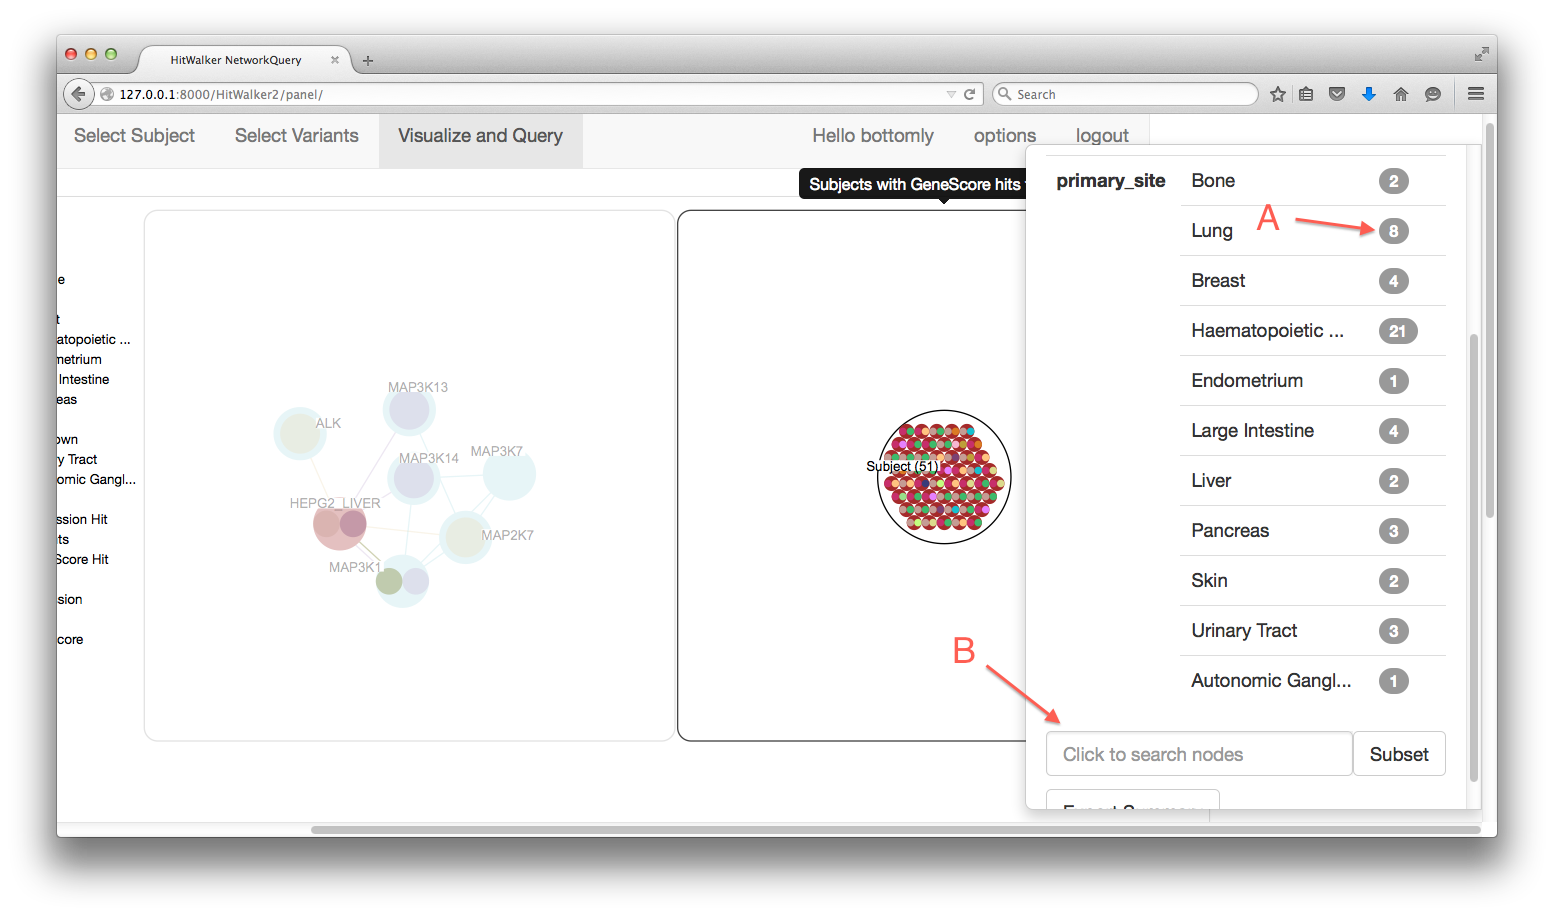
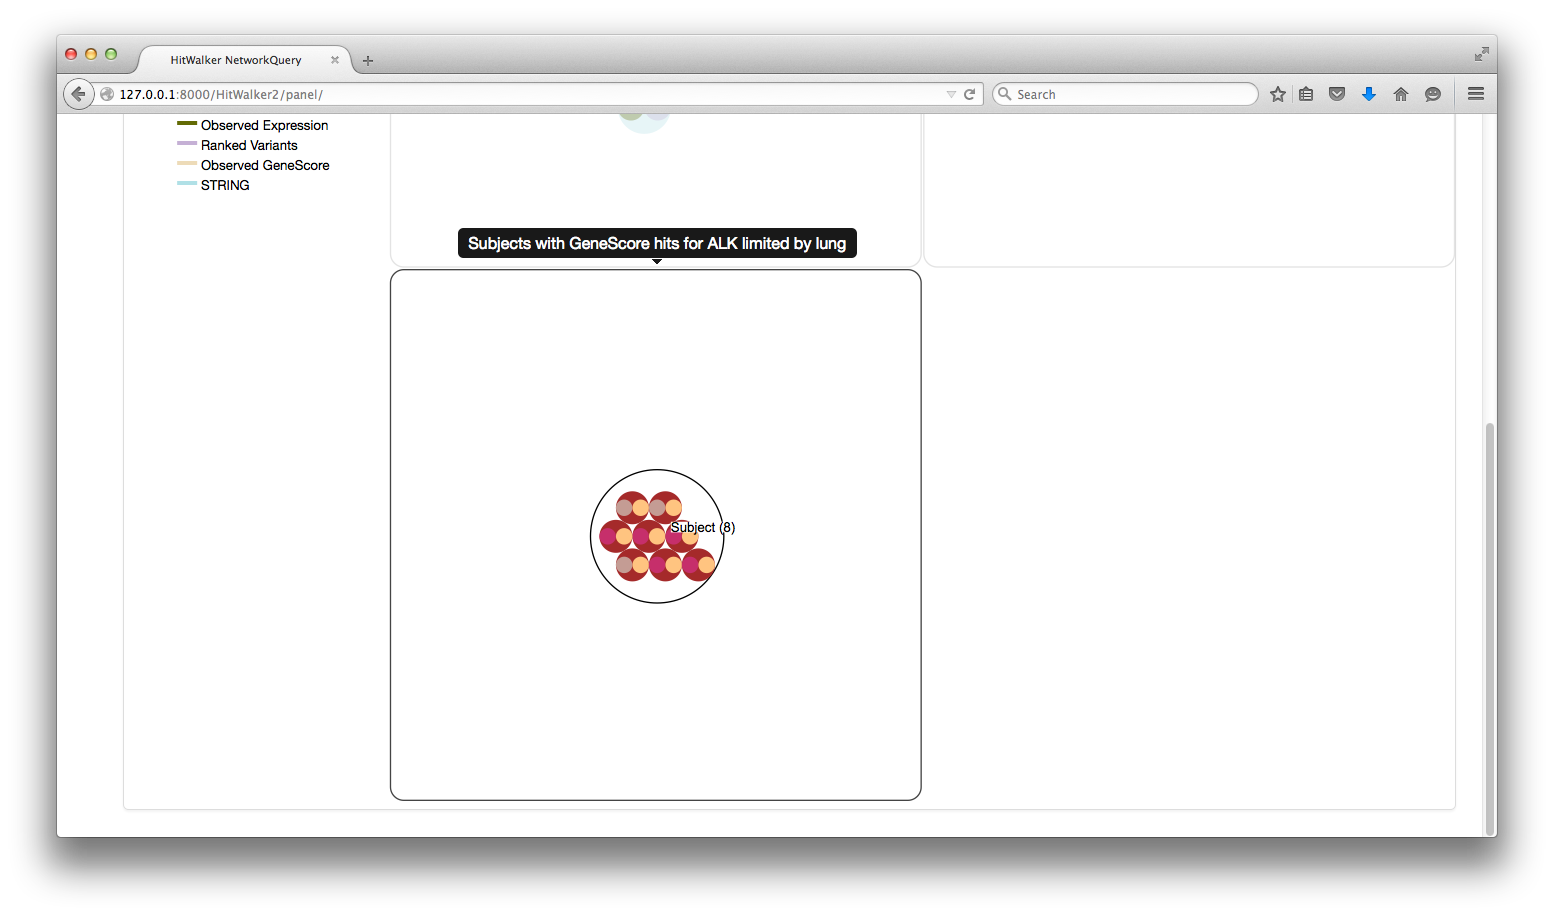
- (A) Each count can be clicked on to produce a MetaNode containing the specified subset
- (B) The MetaNodes can be searched to determine which subject/genes are contained within.
- Brings up a summary of a Node/MetaNode
- Node Dragging
- Nodes can be dragged between panels
- This is a shortcut to Panel Right Click->Add Node
- Nodes can be dragged between panels

####Querying based on one or more subjects
Even if prioritization is not available or not desired for your subject(s)/dataset you can still take advantage of HitWalker2's graph-based querying functionality. In the simplest case you can select a single subject as above and click the Query button.
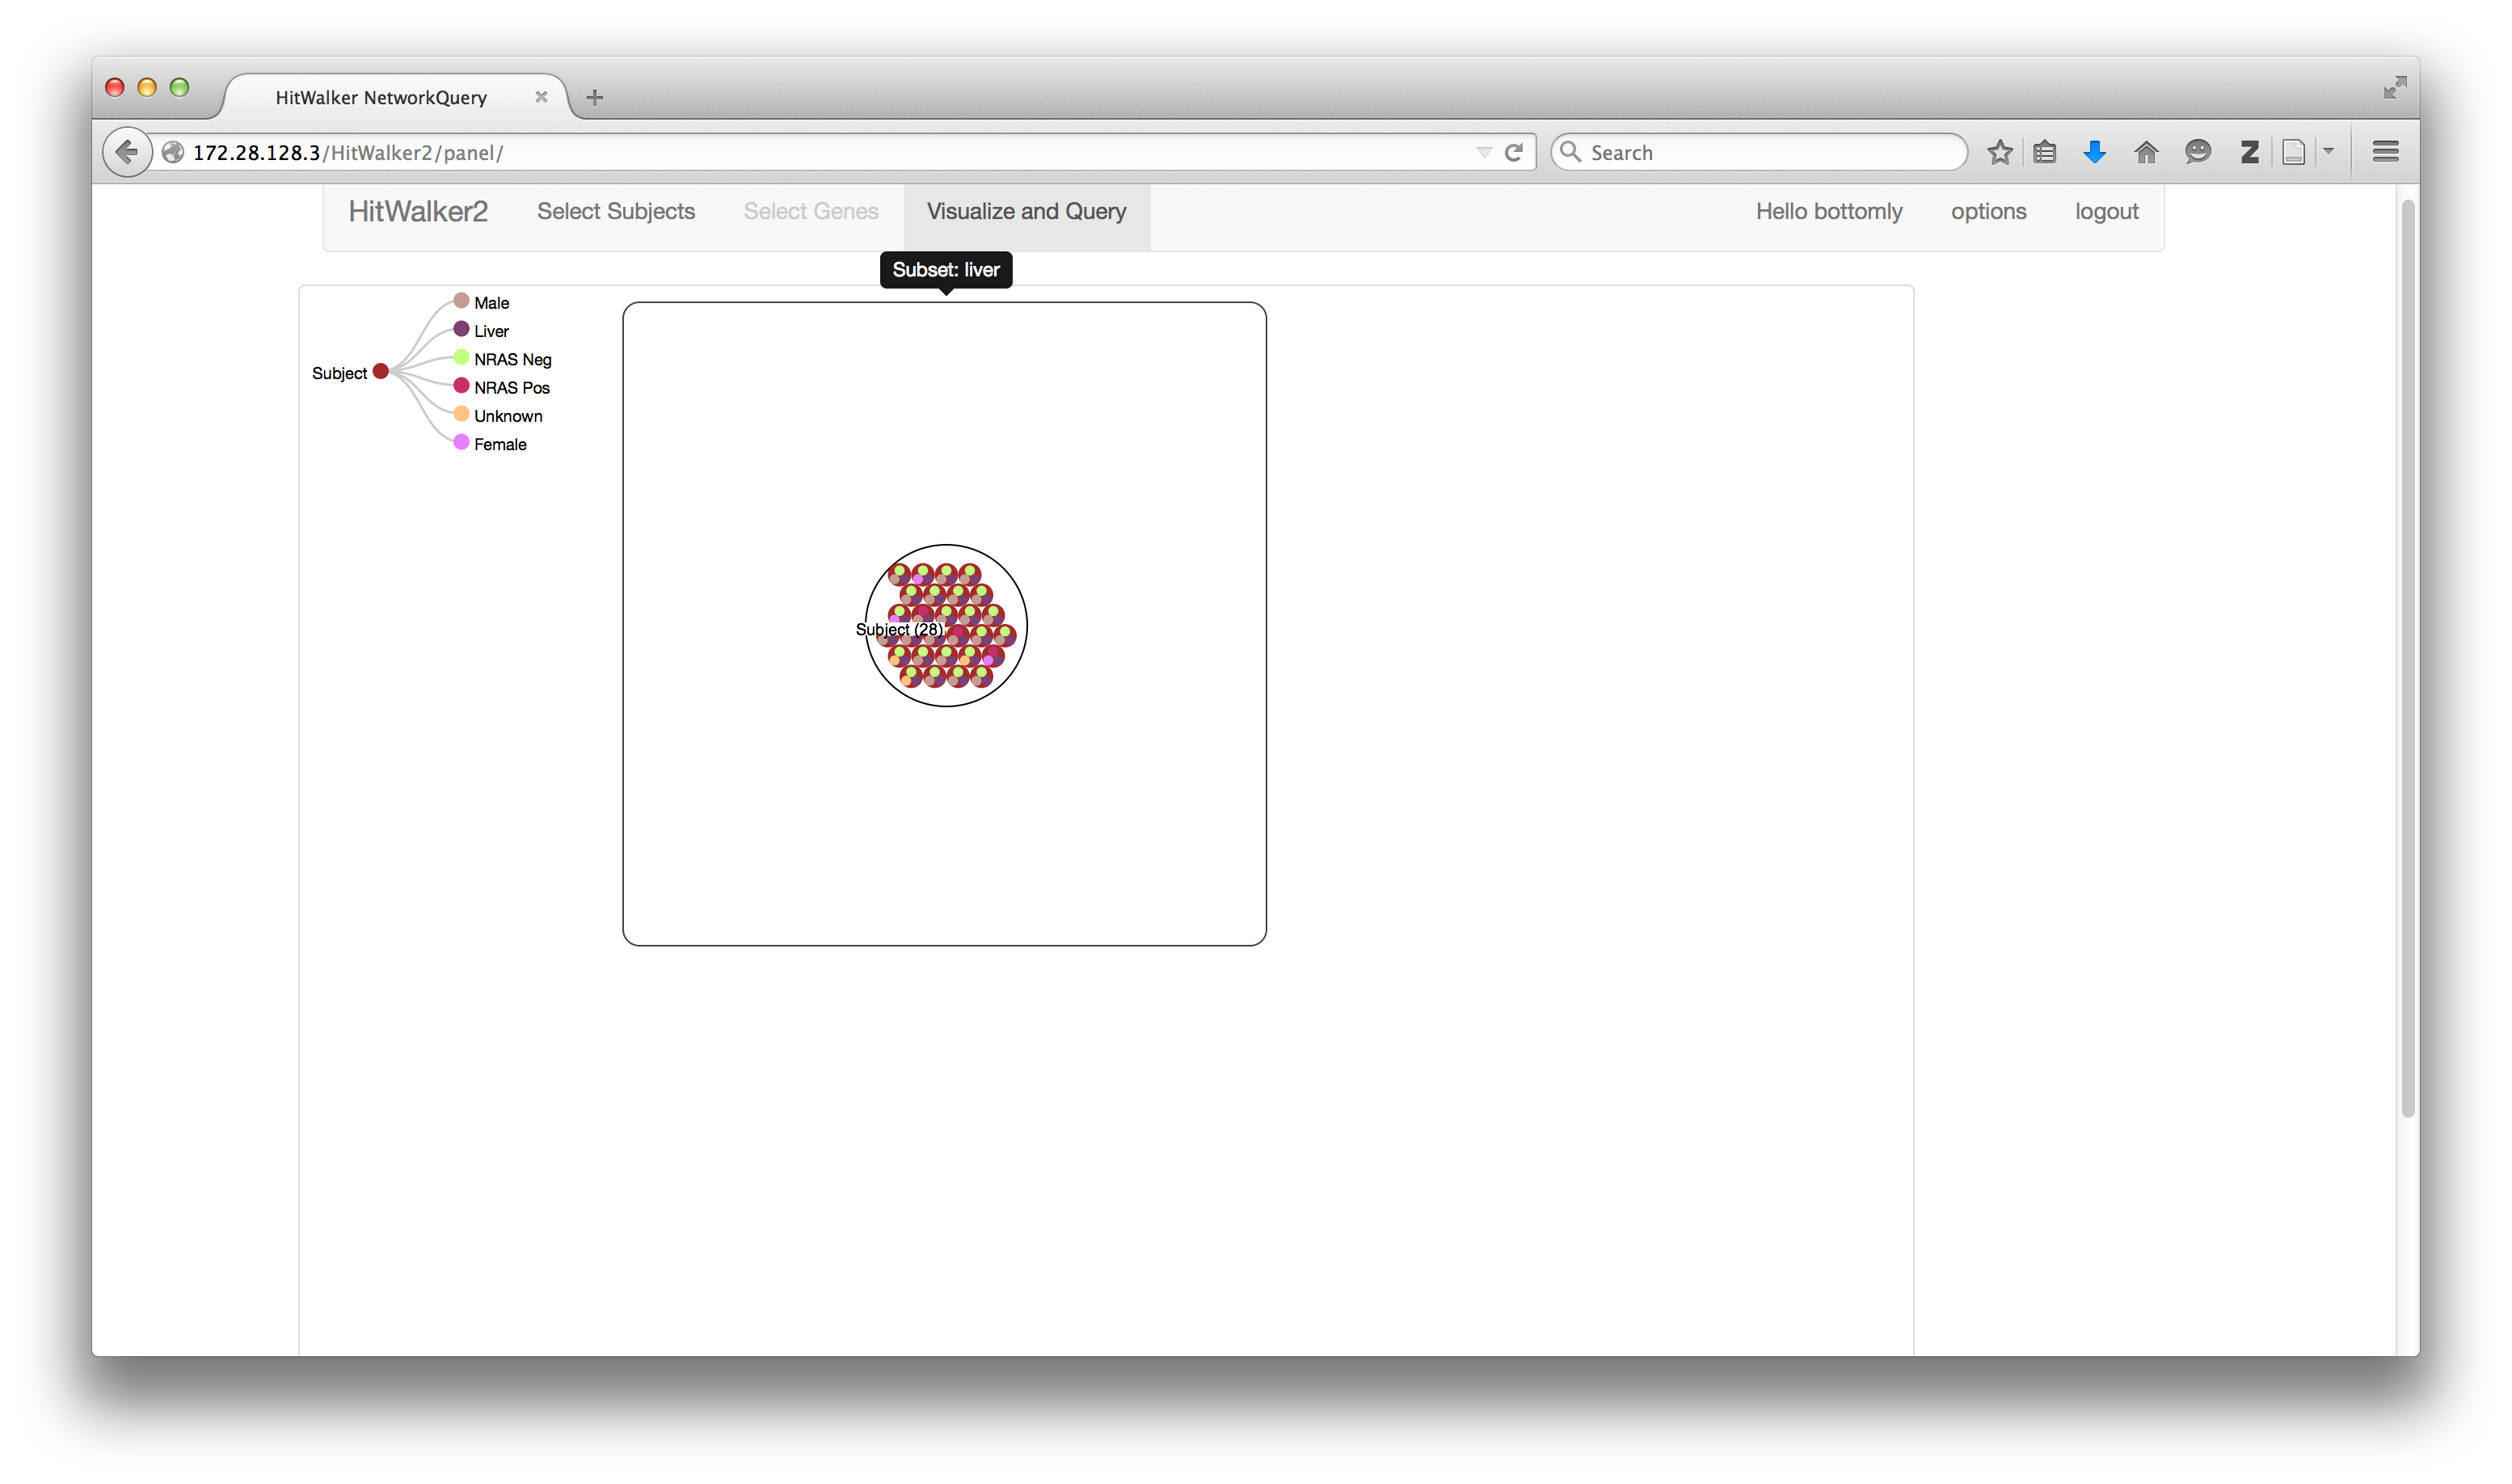
This enters you into the panel view with a single node for your selected subject.
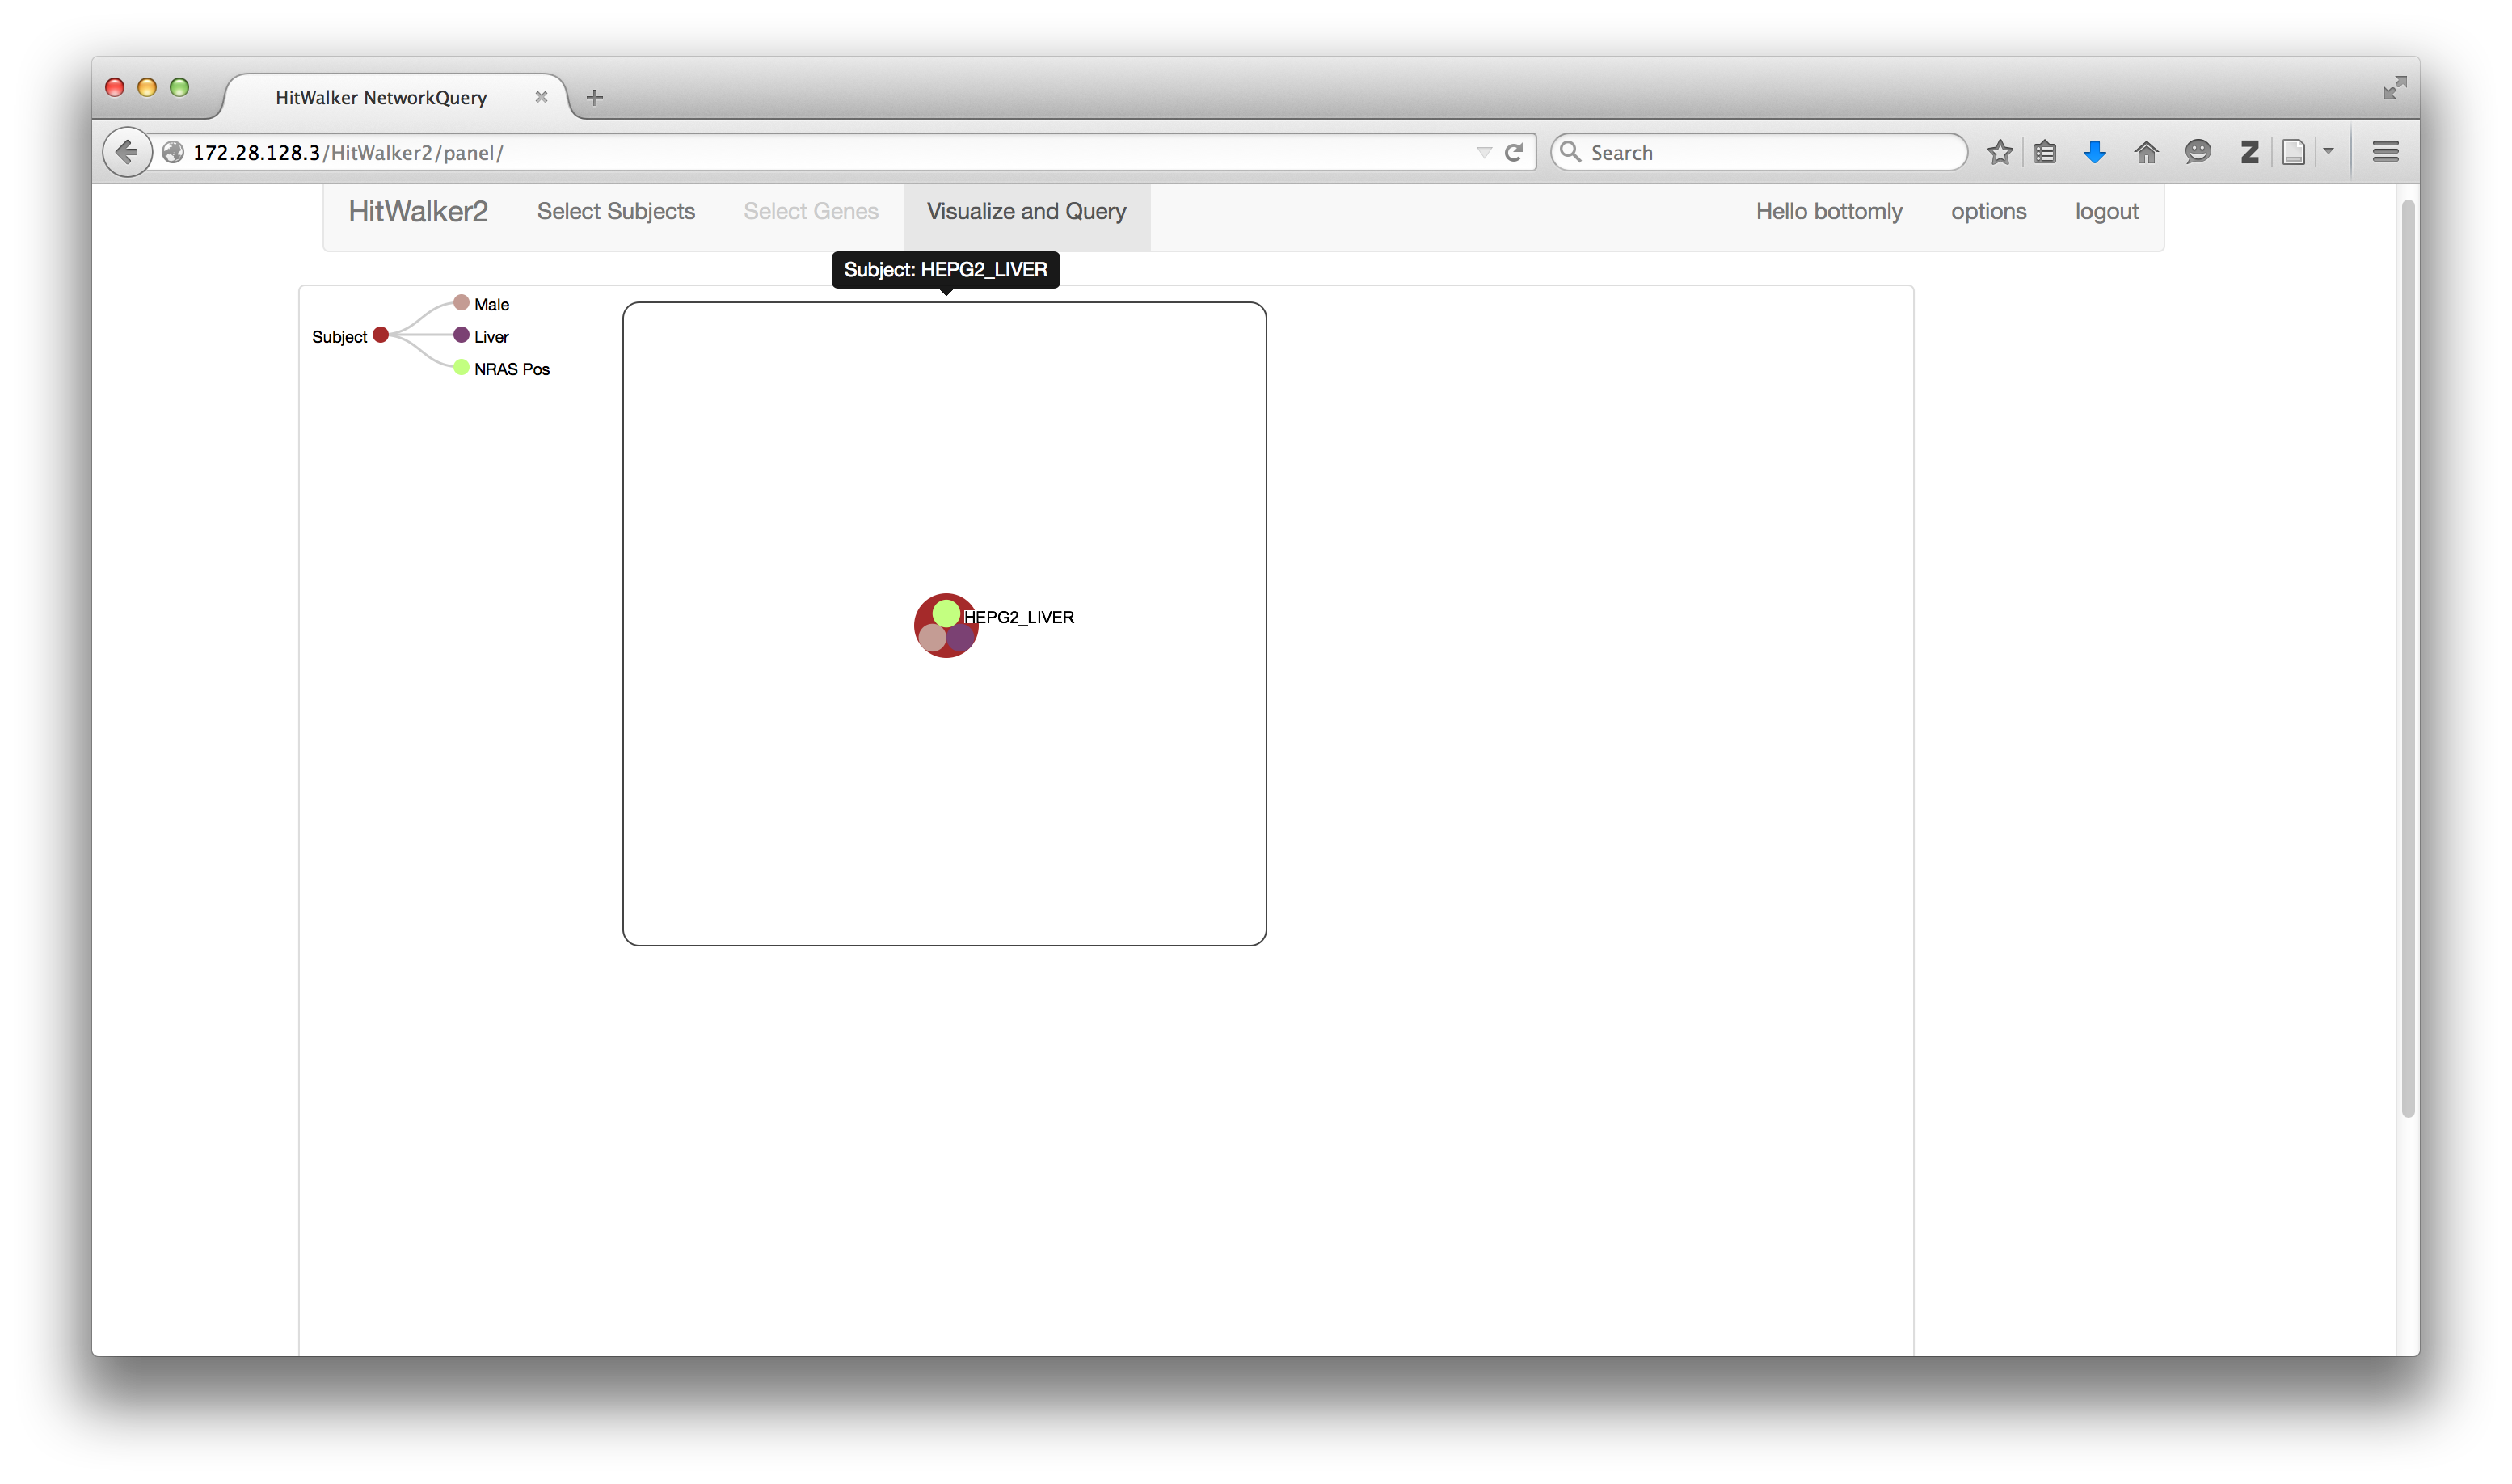
Groups of subjects can be retrieved in this manner by typing '@' followed by the name of a desired attribute such as @case, @control or even @male. Additional attributes can be added when data is loaded.
The result of these queries is a MetaNode which contains subjects with the desired attributes.
