how_to_CDK
You can supply resources in a wide range of ways using the AWS CDK. Using devon4net makes it possible to complete the task in a precise and standardized manner, speeding up the industrialization process. Through a configuration file it is possible to have the provision of different environments in the same place, in a scalable, standard and reusable form.
AWS Cloud Development Kit (CDK) is an open-source software development framework to define your cloud application resources using familiar programming languages. This framework allows you to define all your AWS infrastructure as readable code. This process is known as Infrastructure as Code (IaC) and consists in provisioning and managing infrastructure for your software solutions through code, instead of doing so manually.
This means that you can easily modify, distribute and reproduce configurations. In addition, by including infrastructure as code:
-
Facilitates the integration of infrastructure into version control systems for tracking changes and audit modifications.
-
Enables the introduction of significant automation for infrastructure management. All of these factors contribute to the SDLC’s IaC being fully integrated into CI/CD pipelines.
-
Eliminates the unnecessary manual management.
In a real project, we will use AWS services such as DynamoDB databases, S3 buckets, multiple lambdas, and so on. Similarly, we will be working in a variety of work environments.
Devon4Net, with the help of the CDK, allows us to treat these services as code (IaC), which allows us to take all of this service structure and replicate it in another environment that interests us, saving development time and treating this copy of your AWS services as a backup.
In Devon4Net, we can use a standarized json file to configure the AWS CDK service, this json will be translated into readable code for the CDK framework.
The AWS Command Line Interface (AWS CLI) is a unified tool to manage your AWS services. With just one tool to download and configure, you can control multiple AWS services from the command line and automate them through scripts.
You can download the installer here. Follow the next steps to install:
-
Download the correct installer for your Operating System.
-
Execute the installer and follow the steps of the setup wizard.
-
To see if the installation was successful, run the following command:
aws --version
Before deploying you will need to configure your AWS toolkit so is related to your AWS account. For that, you need to create a user with the necessary permissions to be able to deploy your infrastructure to your AWS account.
|
Warning
|
Using your root user access keys is not a good practice and could constitute a security risk. |
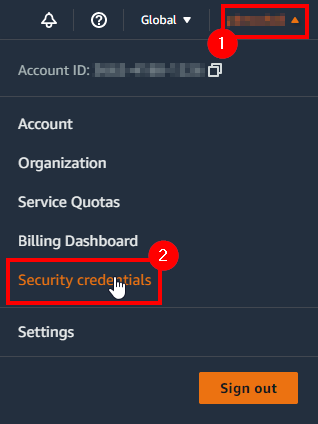
Go to your AWS dashboard and navigate to the Identity and Access Management (IAM) Service or by going to your profile on the top right corner (1) and accessing your security credentials (2) as shown in the next figure:
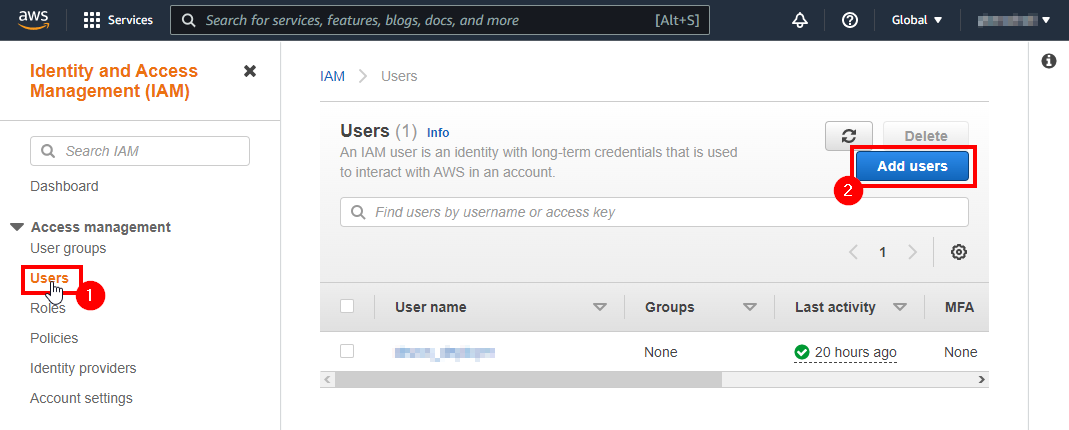
On the left side menu, select Users (1) and Add users (2) to start the process of adding a new user:
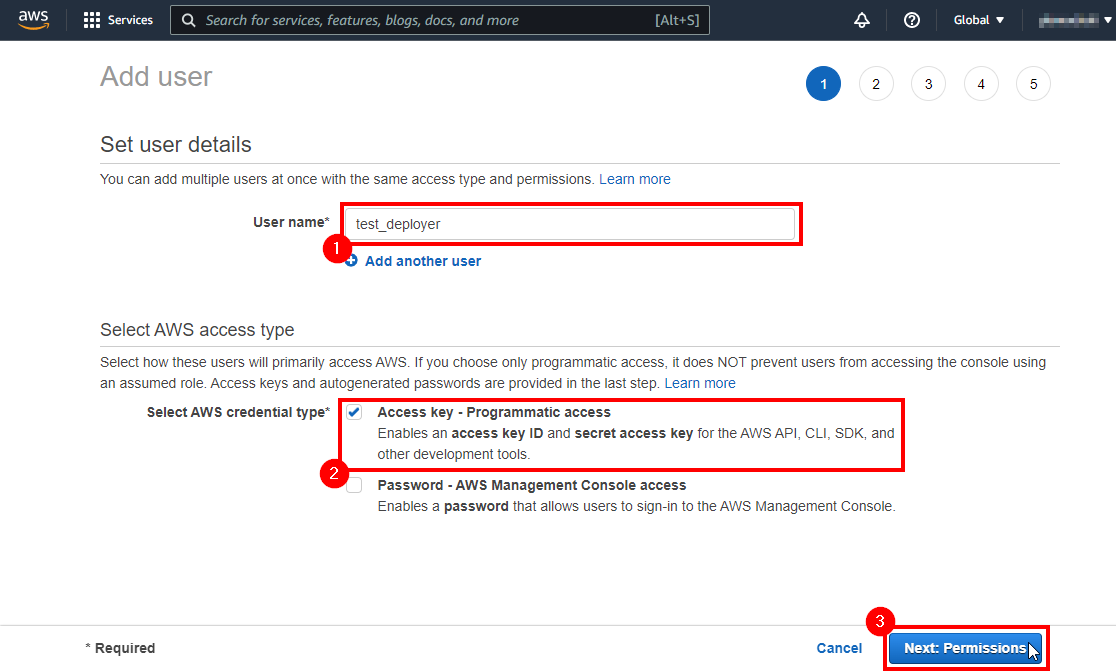
Choose a User name (1) and an Credential Access Type (2). For the CLI you will need to have Access Keys, so make sure you have that option selected before steping to the next section (3):
In the second step you will add the permissions to the user. You can either Add a user to a group (which already has permissions granted), Copy permissions of another user or Attach existing policies (1). For deployment, the user must have AdministratorAccess policy asigned (2):

The next steps are for adding tags to the user and reviewing your choices before finally creating the user-
|
Note
|
We recommend adding some tag to your user so you can find it easier and have it well classified. |
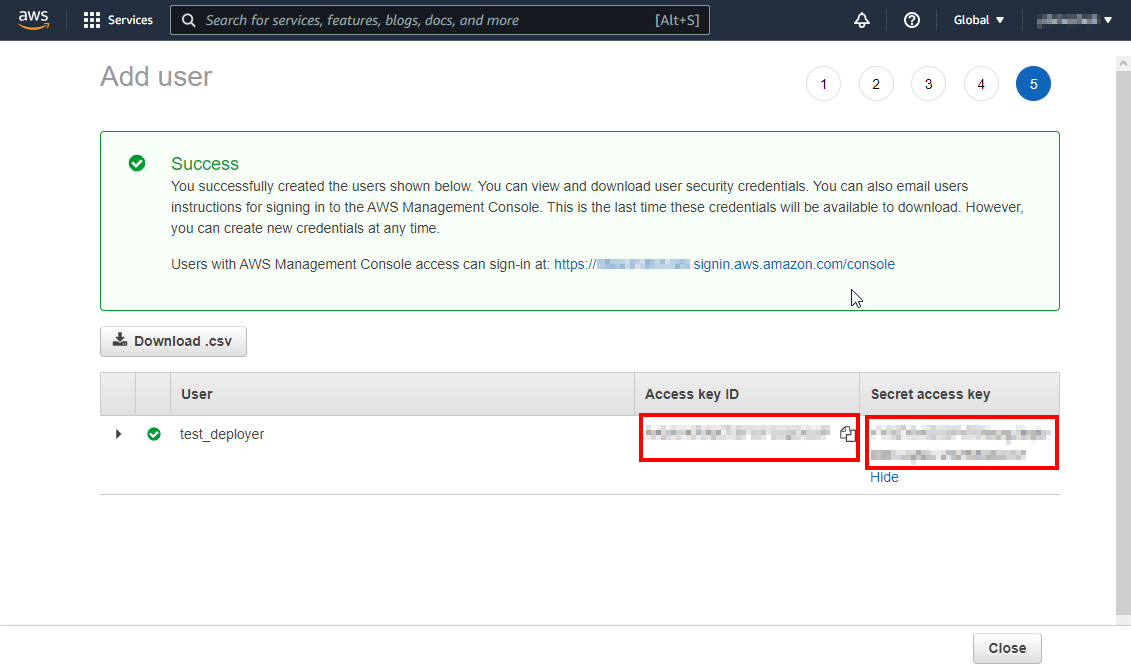
Once you create the user you will find your Access Id and Secret Key, copy them and save them, you will need them in the following steps for configuring your CLI:
Once we have created our user, we can use the Access Key Id and the Secret Access Key values to link your aws toolkit to your account. For that you can run the following command:
aws configureThe command will ask the following inputs:
-
AWS Access Key ID
-
AWS Secret Access Key
-
Default region name
-
Default output format
Paste the keys in their respective place and you have successfully configured your AWS CLI.
The AWS CDK Toolkit, the CLI command cdk, is the primary tool for interacting with your AWS CDK app. It executes your app, interrogates the application model you defined, and produces and deploys the AWS CloudFormation templates generated by the AWS CDK. It also provides other features useful for creating and working with AWS CDK projects.
In order to Install the AWS CDK Toolkit you have to run the following command in a shell via npm:
npm install -g aws-cdkAll the CDK Toolkit commands start with cdk, which is followed by a subcommand, as you can see in the following table:
| Command | Function |
|---|---|
cdk list (ls) |
Lists the stacks in the app |
cdk synthesize (synth) |
Synthesizes and prints the CloudFormation template for the specified stack(s) |
cdk bootstrap |
Deploys the CDK Toolkit staging stack; see Bootstrapping |
cdk deploy |
Deploys the specified stack(s) |
cdk destroy |
Destroys the specified stack(s) |
cdk diff |
Compares the specified stack and its dependencies with the deployed stack(s) or a local CloudFormation template |
cdk metadata |
Displays metadata about the specified stack |
cdk init |
Creates a new CDK project in the current directory from a specified template |
cdk context |
Manages cached context values |
cdk docs (doc) |
Opens the CDK API reference in your browser |
cdk doctor |
Checks your CDK project for potential problems |
For the project’s deployment, you must include a cdk.json file in your project.
This file will contain the path of your project and will run the program.
The file must contain the following information.
{
  "app": "dotnet run --project {PathToYourProjectSolution}.csproj",
  "watch": {
    "include": [
      "**"
    ],
    "exclude": [
      "README.md",
      "cdk*.json",
      "src/*/obj",
      "src/*/bin",
      "src/*.sln",
      "src/*/GlobalSuppressions.cs",
      "src/*/*.csproj"
    ]
  },
  "context": {
    "@aws-cdk/aws-apigateway:usagePlanKeyOrderInsensitiveId": true,
    "@aws-cdk/core:stackRelativeExports": true,
    "@aws-cdk/aws-rds:lowercaseDbIdentifier": true,
    "@aws-cdk/aws-lambda:recognizeVersionProps": true,
    "@aws-cdk/aws-cloudfront:defaultSecurityPolicyTLSv1.2_2021": true,
    "@aws-cdk-containers/ecs-service-extensions:enableDefaultLogDriver": true,
    "@aws-cdk/aws-ec2:uniqueImdsv2TemplateName": true,
    "@aws-cdk/core:target-partitions": [
      "aws",
      "aws-cn"
    ]
  }
}
You simply need to replace {PathToYourProjectSolution} with the path to your project in order to use the cdk commands.
You will also need to configure your infrastructure in your appsettings.{environment}.json. For example, the following configuration will create an S3Bucket in your AWS account:
{
  "CdkOptions": [
    {
      "ProvisionStack": {
        "Id": "devon-test",
        "ApplicationName": "devon-test",
        "EnvironmentName": "test",
        "AwsAccount": "000000000000",             // Input here your AWS Account Id
        "AwsRegion": "eu-west-1"
      },
      "S3Buckets": [
        {
          "Id": "testbucket",
          "LocateInsteadOfCreate": false,
          "BucketName": "testbucket4765183745",
          "ExpirationDays": 0,
          "Versioned": false,
          "EnforceSSL": true,
          "BlockPublicAccess": true
        }
      ]
    }
  ]
}|
Note
|
To learn more about how to configure your desired services in your settings file, please read the CDK package documentation. |
In the Startup class of your application, follow the nexts steps:
-
Load your
appsettings.{environment}.jsonconfiguration file. As an example, consider the Options Pattern:private static List<CdkOptions> LoadConfigurationFiles() { var file = FileOperationsHelper.GetFilesFromPath("appsettings.json")?.FirstOrDefault(); if (file == null) throw new ArgumentException("No appsettings.json was provided"); var configuration = new ConfigurationBuilder().AddJsonFile(file, true, true).Build(); var environmentFileName = Configuration.GetSection("Environment").Value; var environmentFile = FileOperationsHelper.GetFilesFromPath($"appsettings.{environmentFileName}.json")?.FirstOrDefault(); configuration = new ConfigurationBuilder().AddConfiguration(configuration).AddJsonFile(environmentFile, true, true).Build(); return Configuration.GetSection("CdkOptions").Get<List<CdkOptions>>(); }
-
Once your setup has been charged, you may create an instance of the
ProvisionStackclass and then call theProcess()method:var cdkOptions = LoadConfigurationFiles(); foreach (var stack in cdkOptions) { if (string.IsNullOrWhiteSpace(AwsAccount)) { AwsAccount = stack.ProvisionStack.AwsAccount; } if (string.IsNullOrWhiteSpace(AwsRegion)) { AwsRegion = stack.ProvisionStack.AwsRegion; } var defaultPsrovisionStack = new ProvisionStack(AwsAccount, AwsRegion, stack); defaultPsrovisionStack.Process(); }
The
Process()method is responsible for building the infrastructure that you specified in your configuration file.
|
Note
|
For more information about the configuration of the component itself, please, visit the component documentation. |
In this section you will learn how to deploy your previously configured application. Take a look at the AWS Deployment Tutorial
You must provision the resources the AWS CDK needs to carry out the deployment before you may deploy AWS CDK apps into an AWS environment (a federation of an AWS account and region). These resources include an Amazon S3 bucket for file storage and IAM roles with deployment-related permissions. The process of provisioning these initial resources is called Bootstrapping.
For bootstrapping your application you can run the folowing command in the project directory:
cdk bootstrapOnce you have your resources provisioned, you can continue with the following steps.
It is optional (though good practice) to synthesize before deploying.
To synthesize the infrastructure into an AWS CloudFormation template that AWS can use to prepare the infrastructure in our account, you will need to run the following command:
cdk synthYour app is run by the cdk synth command, which converts the resources it defines into an AWS CloudFormation template. This process also will generate a cdk.out directory containing a {name}.template.json file among others.
Using the diff command will allow you to see the changes that will be applied to your infrastructure. It basically retrieves the template from your AWS account and compares it with the template you have synthesized.
cdk diffAWS CloudFormation is a service that you can use for modeling and configuration of your AWS resources so tyou can focuse on your AWS-based applications and less time managing those resources. You can use this service dashboard to deploy and manage your infrastructure.
One way of deploying is by uploading your template:
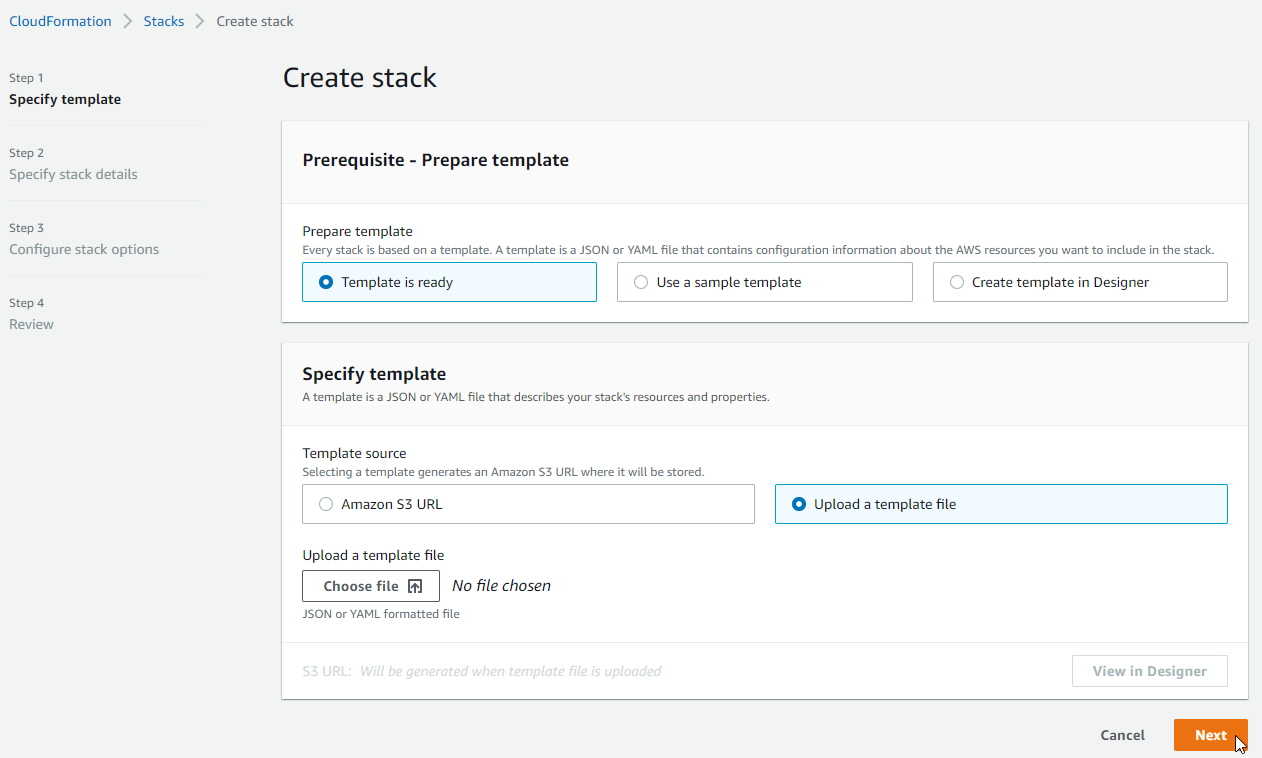
There are three forms of doing it:
-
Uploading a template, either to an S3 bucket or chosing a file from your system.
-
Using a Sample template.
-
Using Designer to create your infrastructure: It is a drag and drop tool where you can add different AWS Services and configure them as you wish.
Knowing how your changes will effect currently running resources before implementing them might help you update stacks with confidence. AWS CloudFormation only modifies your stack when you decide to execute the change set, allowing you to choose whether to move forward with your proposed changes or explore other changes by creating another change set.
You can basically apply a template, see what changed and confirm changes or cancel them if the results are not what you expect. Change sets allow you to preview how proposed changes to a stack might impact your running resources, for example, whether your changes will delete or replace any critical resources.

This documentation is licensed under the Creative Commons License (Attribution-NoDerivatives 4.0 International).
