-
Notifications
You must be signed in to change notification settings - Fork 22
doc node regrain
A set of nodes for automating regrain workflows.
- Analyze grain intensity over a range of input values
- Regrain final comp using original plate grain, and adapted grain plate where difference of comp is beyond threshold.
- Normalize plate grain: Use a clean portion of the image to generate a grain plate.
- Use a Voronoi Texture Splat algorithm for randomly scattering a clean section of normalized plate grain.
- (Note this isn't really my work, it's pretty much a direct rip-off of the node in DasGrain: full credit to Fabian Holtz here...)
Note: I'm using the term "grain" pretty loosely here, as is common in VFX. Technically speaking, digitally captured images do not have grain, they have sensor noise.
I have wasted a lot of time over the years manually fine-tuning curves to match grain intensity. Your first thought when discovering this toolset is probably that the excellent DasGrain already does this! This is true. It works but it takes time and is not immune to variances in shots across a sequence. When Fabian Holtz released DasGrain it was pretty revolutionary. I used it for quite a while and it worked great. But...
I always found DasGrain difficult to explain to people. I found the node to be a bit over-engineered, and I found the workflow for using pre-rendered grain plates was overly confusing and convoluted. And... it always bothers me when I don't completely understand how something works, so I decided to rebuild it.
My first rule of building nuke tools is that a single node should be as simple as possible. It should do a single thing and do it well. If a single node does more than one thing, it should probably be two nodes.
DasGrain does 2 things: tiling for grain plate generation, and regrain. For most sequence-based grain workflows, a lead would create a grain plate, which would be used across the sequence by a regrain setup. Separating the functionality for grain plate generation makes a lot of sense, because it can be removed from the regrain template. So I made it into 2 nodes.
Here's a rundown on how to use the nodes.
First things first we need a good solid degrain. The gold standard used across the vfx industry is Neat Video Reduce Noise. It is the best degrain tool I have seen.
If your color pipeline for plate ingest does not offset black levels of plates to compensate for lenscap black subtraction, add a small offset to your linear plate before degrain. Somewhere between a 0.005 to a 0.01 add will work nicely. Just enough to lift negative grain values above 0.
As you can see there neat video fails to remove shadow grain without an offset. And with an offset, shadow grain is removed:
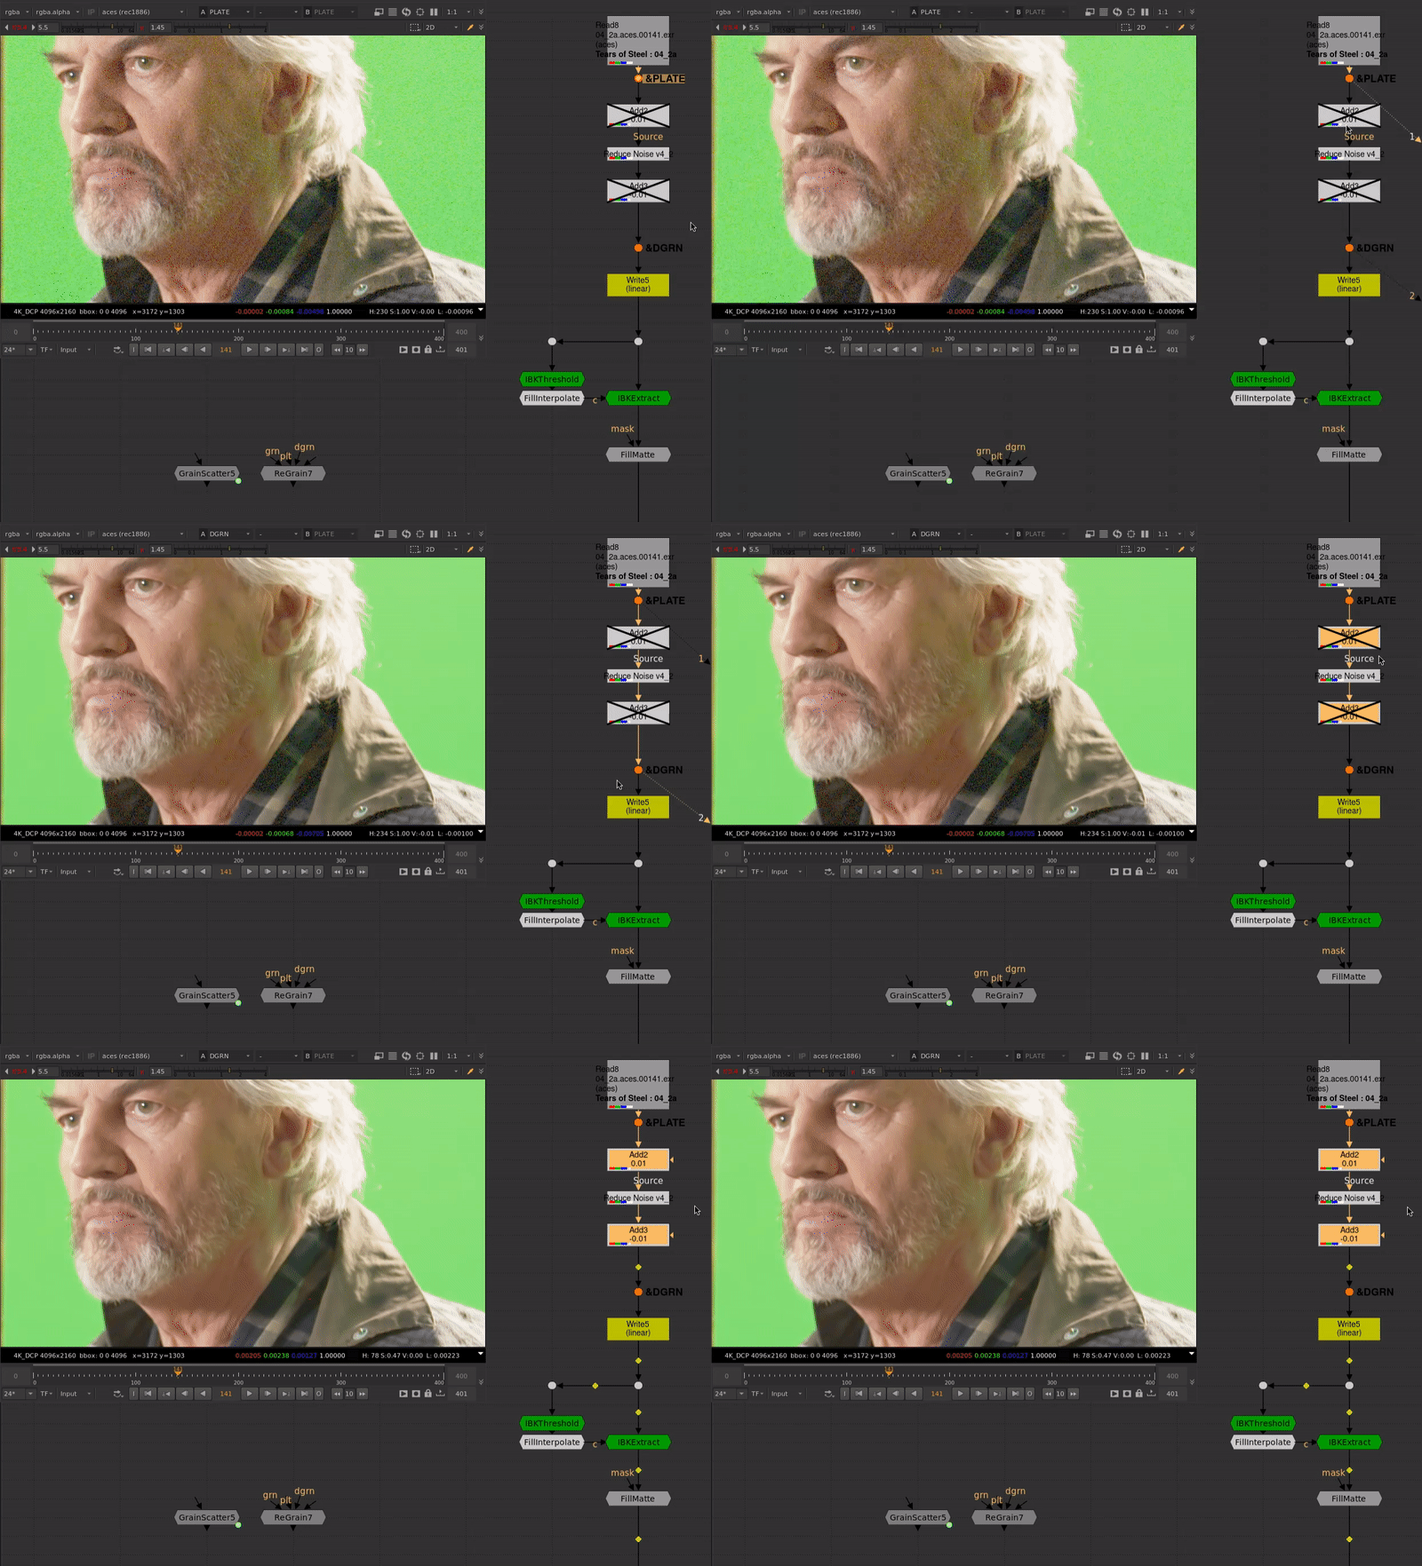
Don't forget to invert the offset after. In most cases this degrain process will also remove negative values from the image, which helps with common compositing operations. (Negative values will come back after the regrain).
Neat Video Settings
- Get a good grain sample:
- Sample a clean area of the image with as little image detail as possible.
- Fine tune (Ctrl+T) in as many areas of varied brightness as you can.
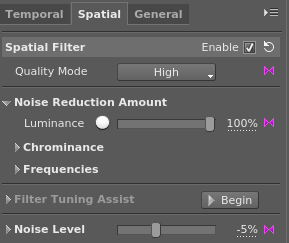
- Set Temporal and Spatial quality to High
-
Important!! In Spatial settings, set Luminance Noise Reduction Amount to 100%. This removes all grain.
First we will create a grain plate. (Skip this if you already have a grain plate created for your the sequence you are working on.)
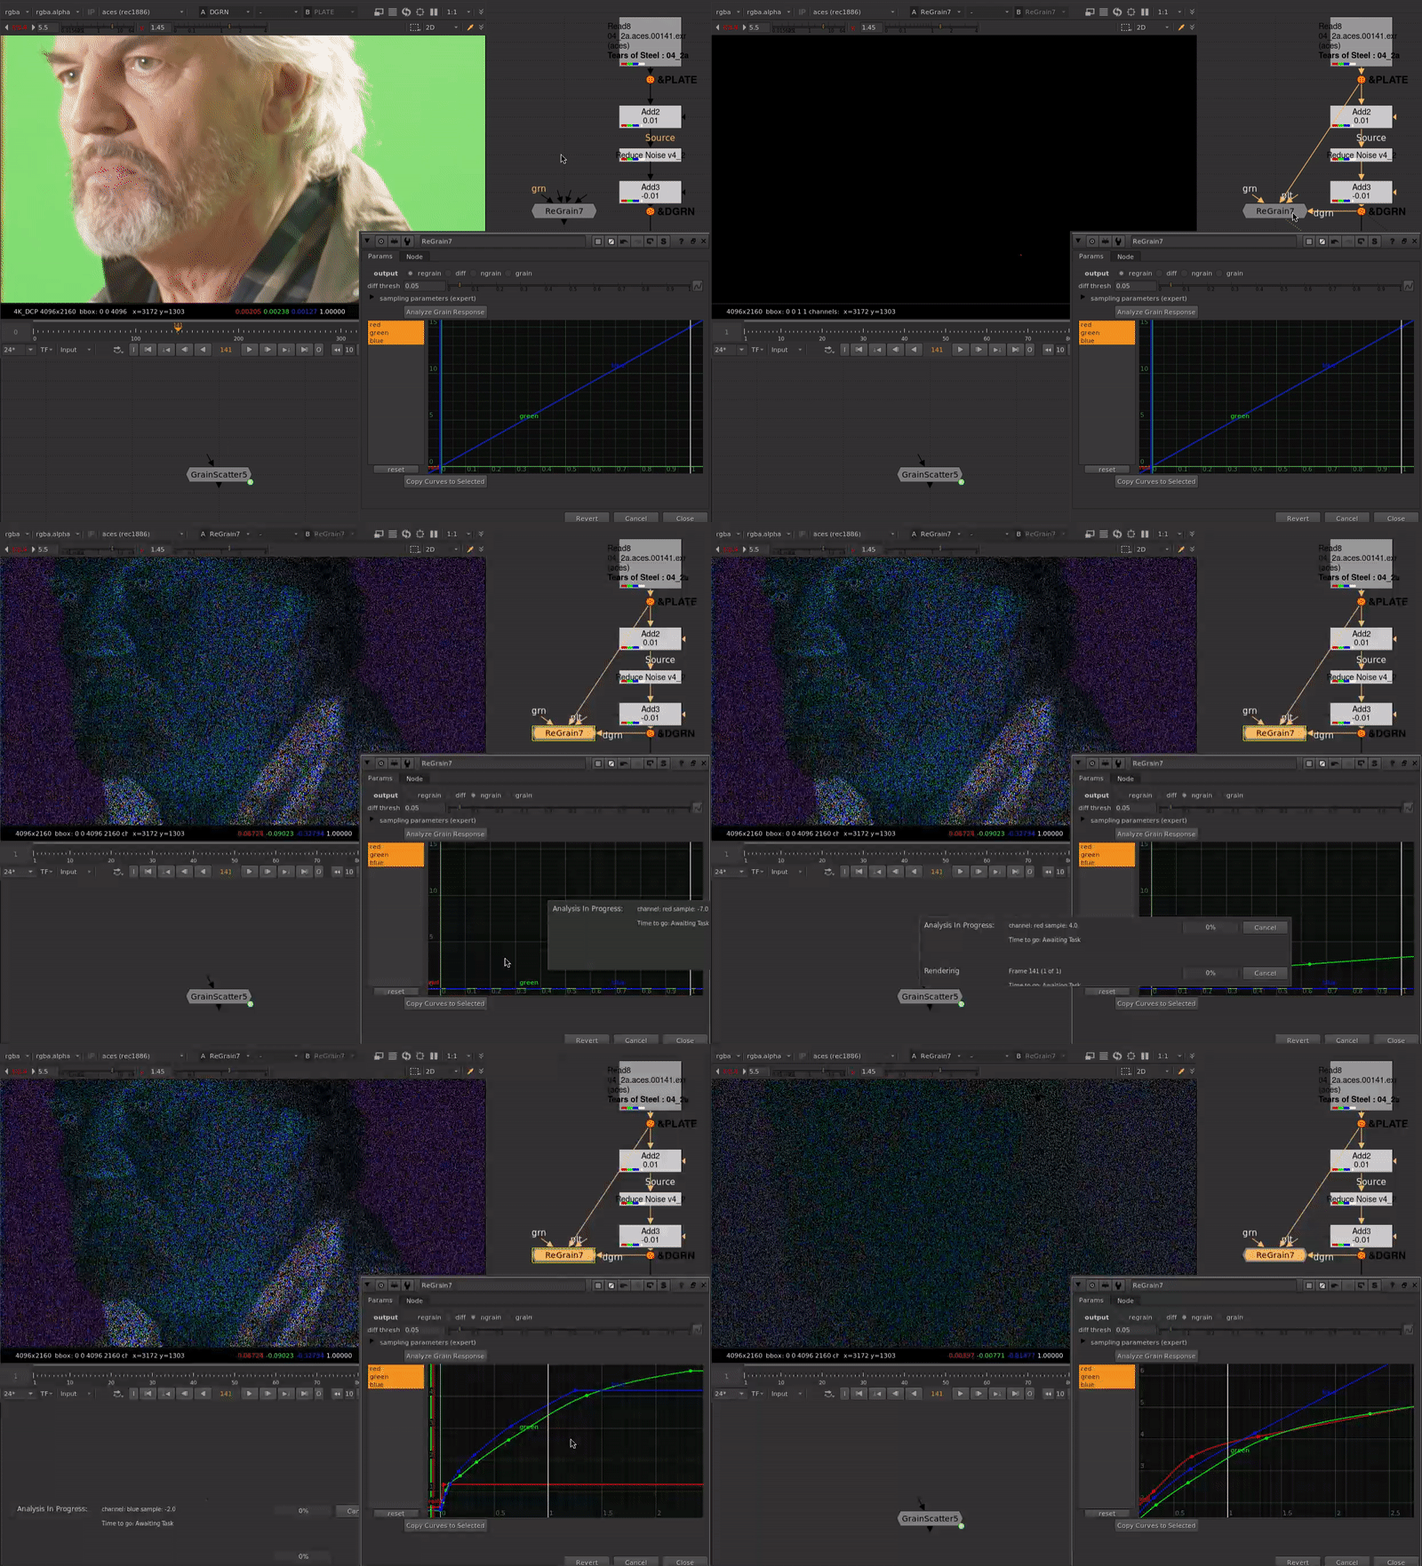
- Create a Regrain node.
- Connect plt input to your original plate.
- Connect dgrn input to your degrain.
- Connect main input to a black image the same resolution as your comp, or leave it disconnected.
- Set output to ngrain. This outputs the normalized grain.
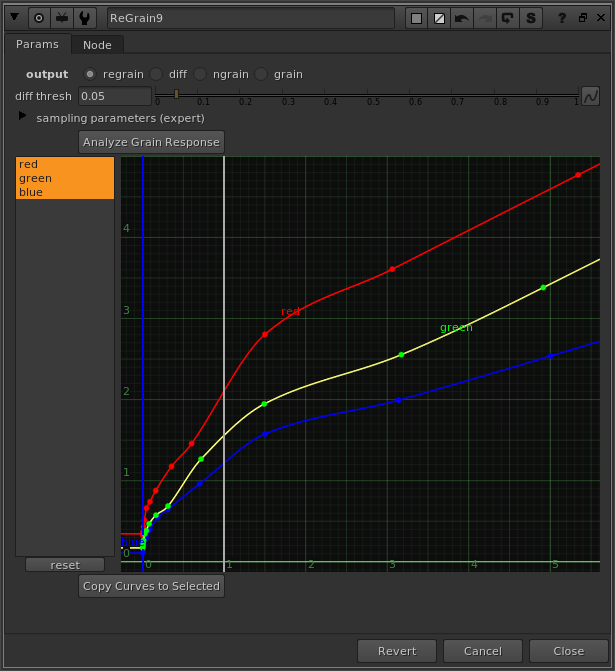
- Click Analyze Grain Response.
- This sweeps over a range of exposure, comparing normalized intensity between grain plate and degrain plate.
- It outputs this data into the lut. You should see the grain become more even in intensity over the image.
Create a GrainScatter node:
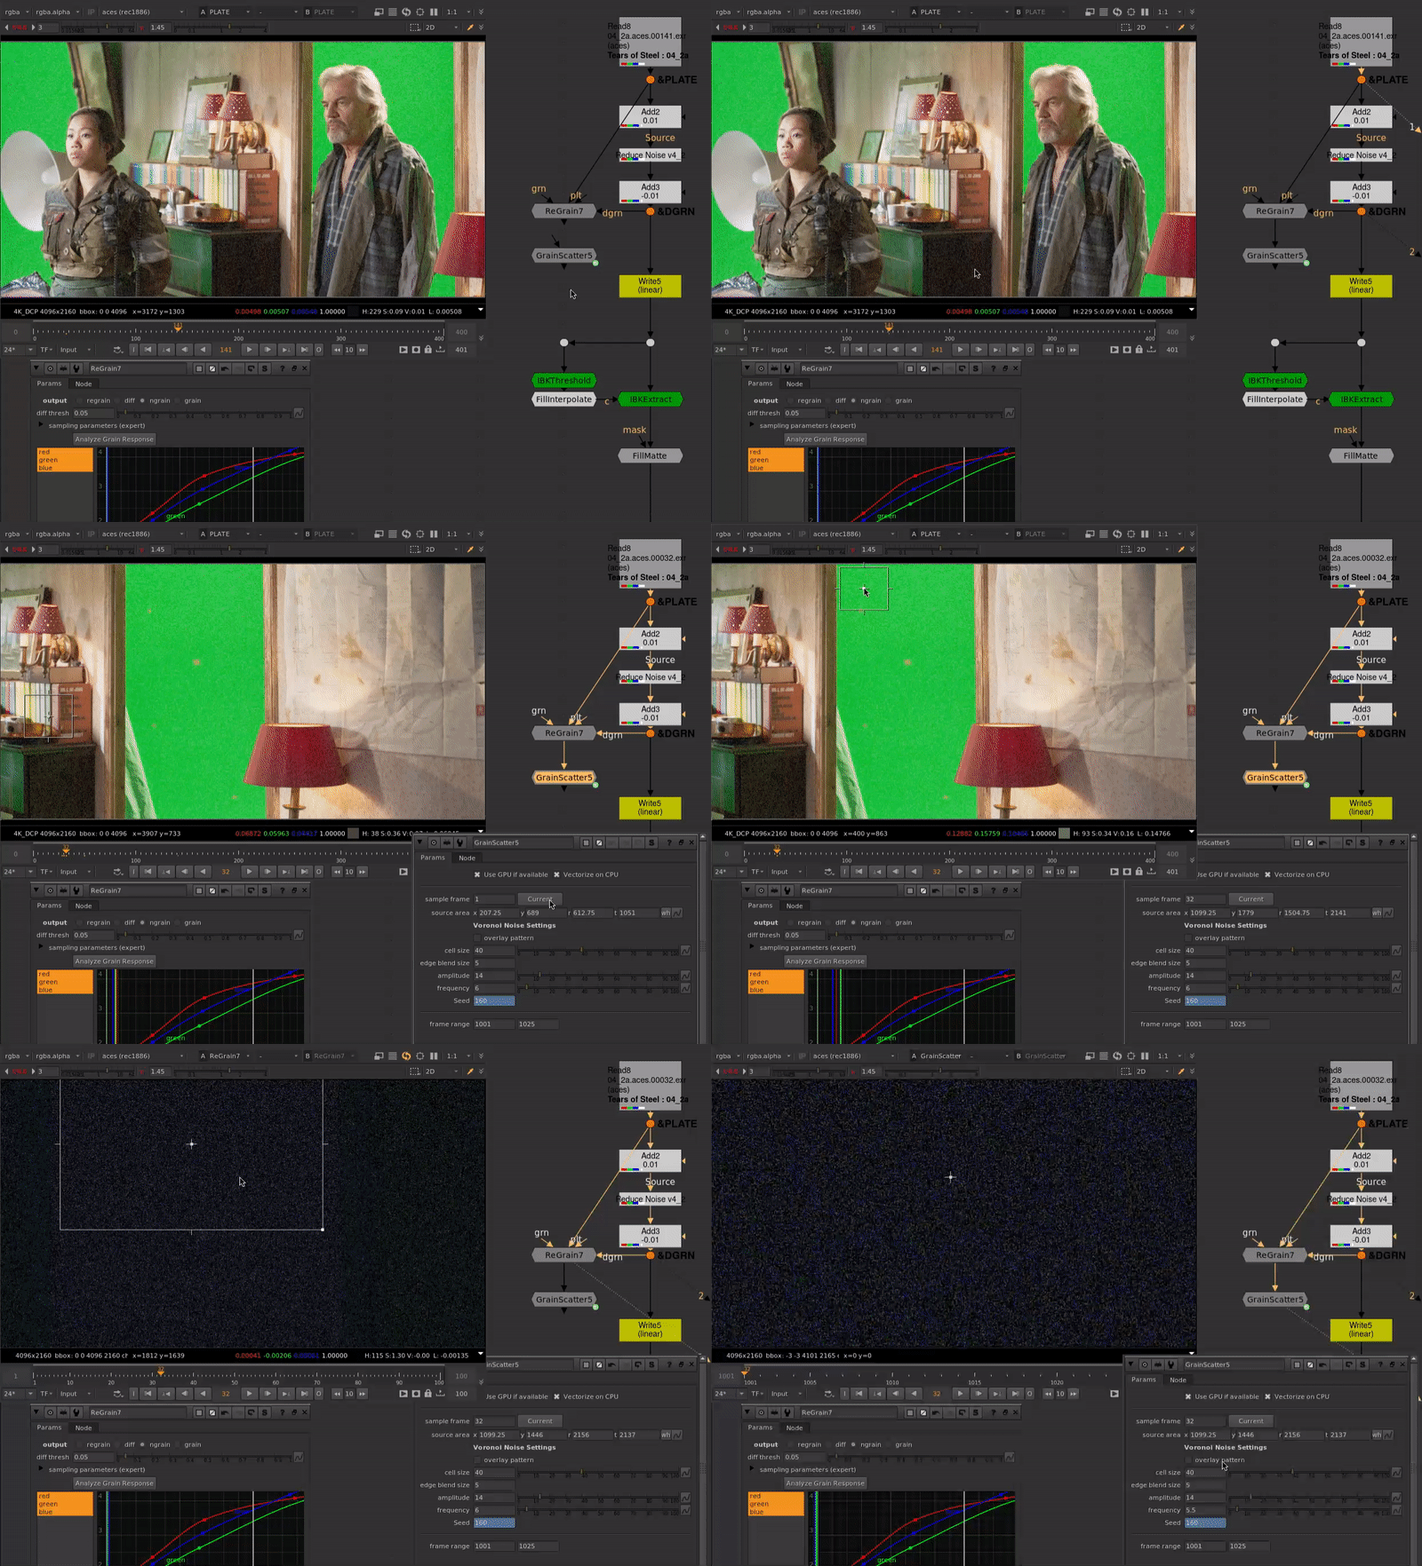
- Next let's find a good frame to tile into a grain plate.
- We need an area with as little image detail as possible, like a defocused greenscreen, or a clear blue sky without clouds.
- On the GrainScatter node:
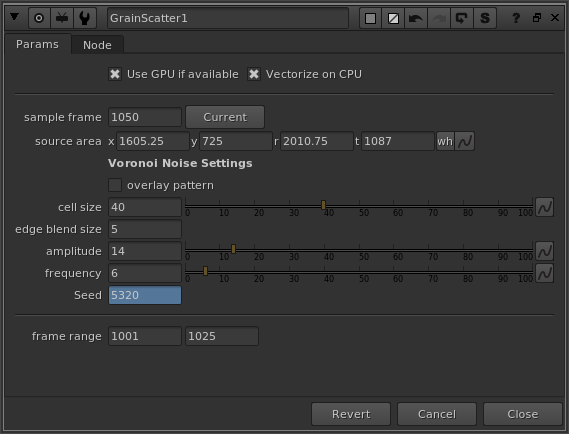
- Set the sample frame to the frame you found
- Set the box to sample the clean image area.
- Tweak the voronoi scatter settings with "overlay" enabled, if needed.
- Render out your grain plate. 1 second (24 frames) is usually plenty.
- The regrain node uses a random frame of the input grain plate for each frame.
Next we'll apply our regrain using our grain plate. Maybe this is a different shot in the same sequence.
First a quick tour of this simple comp I put together from a Tears of Steel plate.
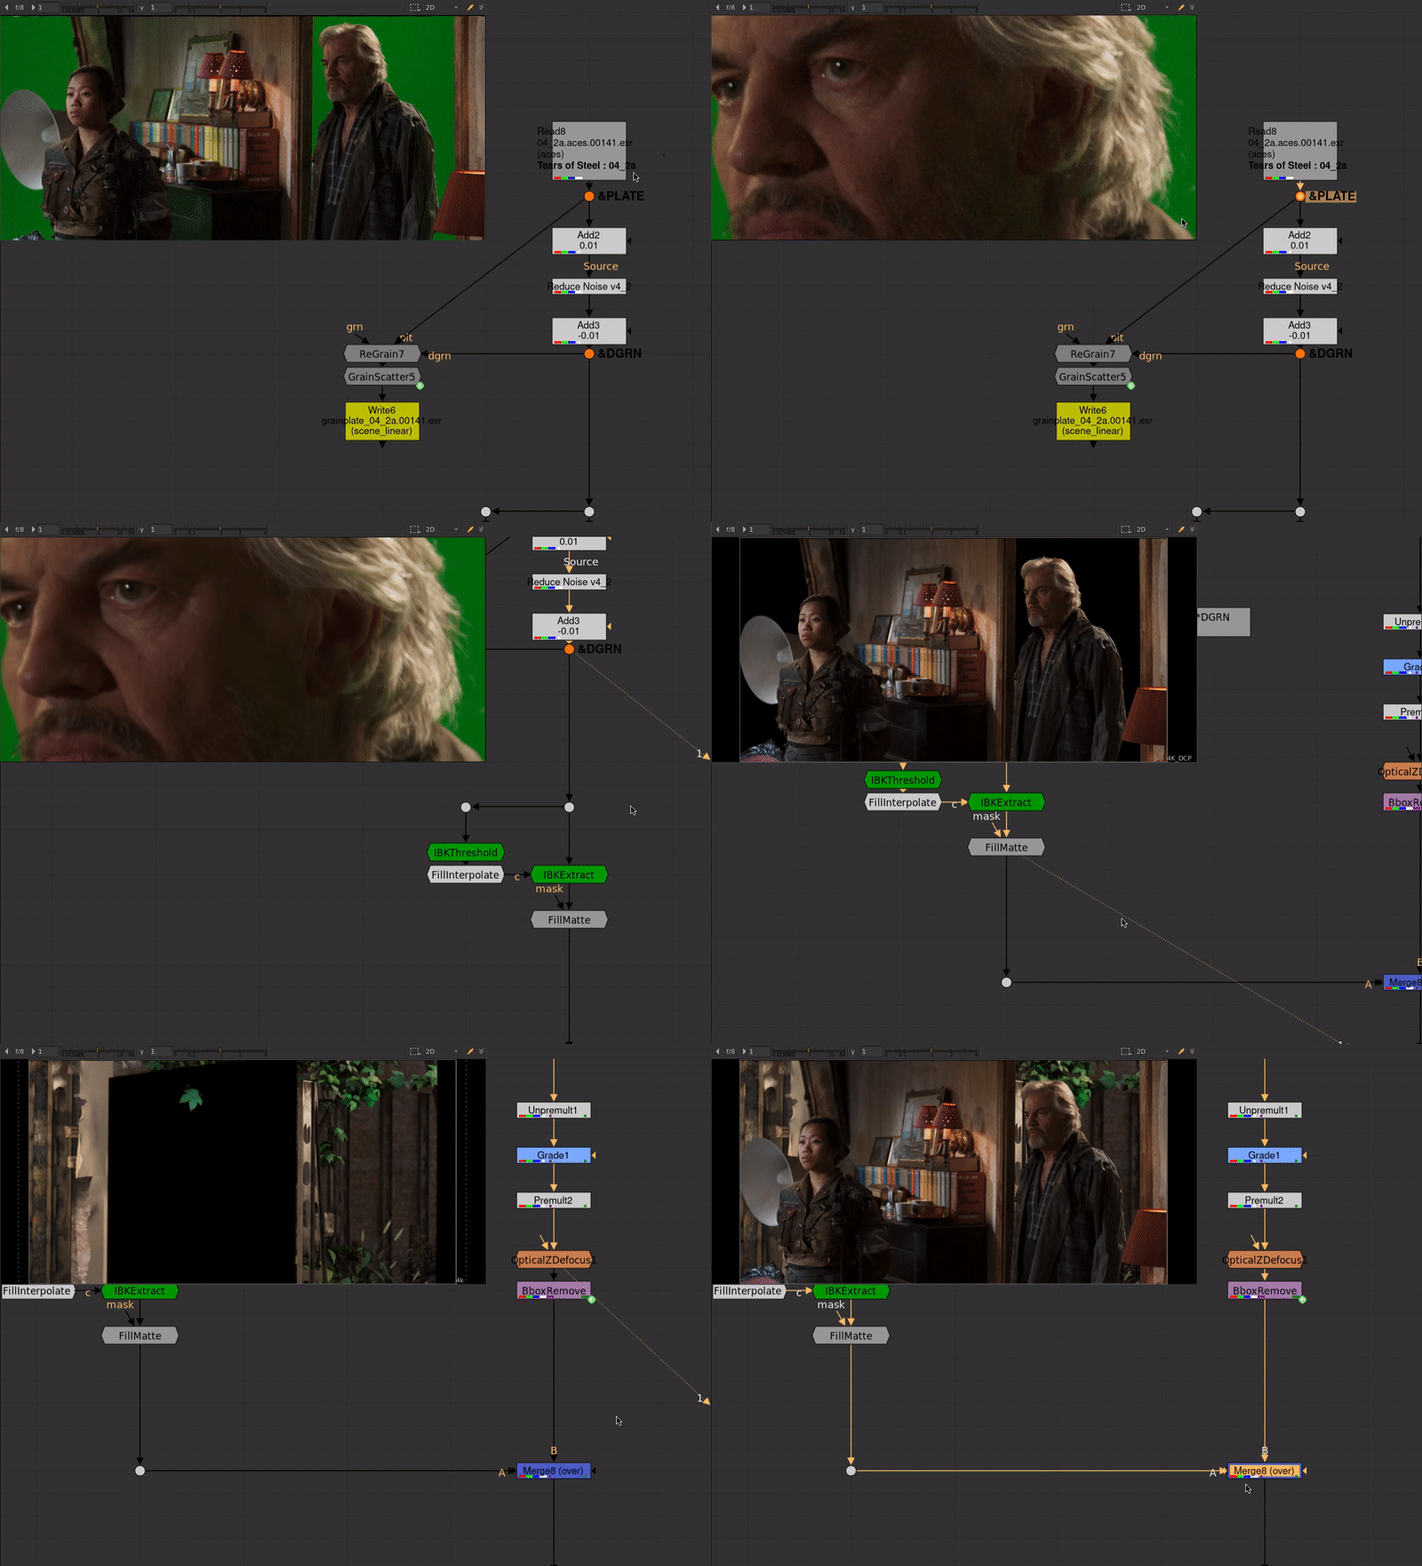
- It's a very simple foreground plate over greenscreen, with a cg background.
- We do the comp on the degrain, and apply the regrain at the end.
- We keep the original plate grain where the original plate is (relatively) unchanged.
- We use our grain plate to regrain areas which have changed significantly.
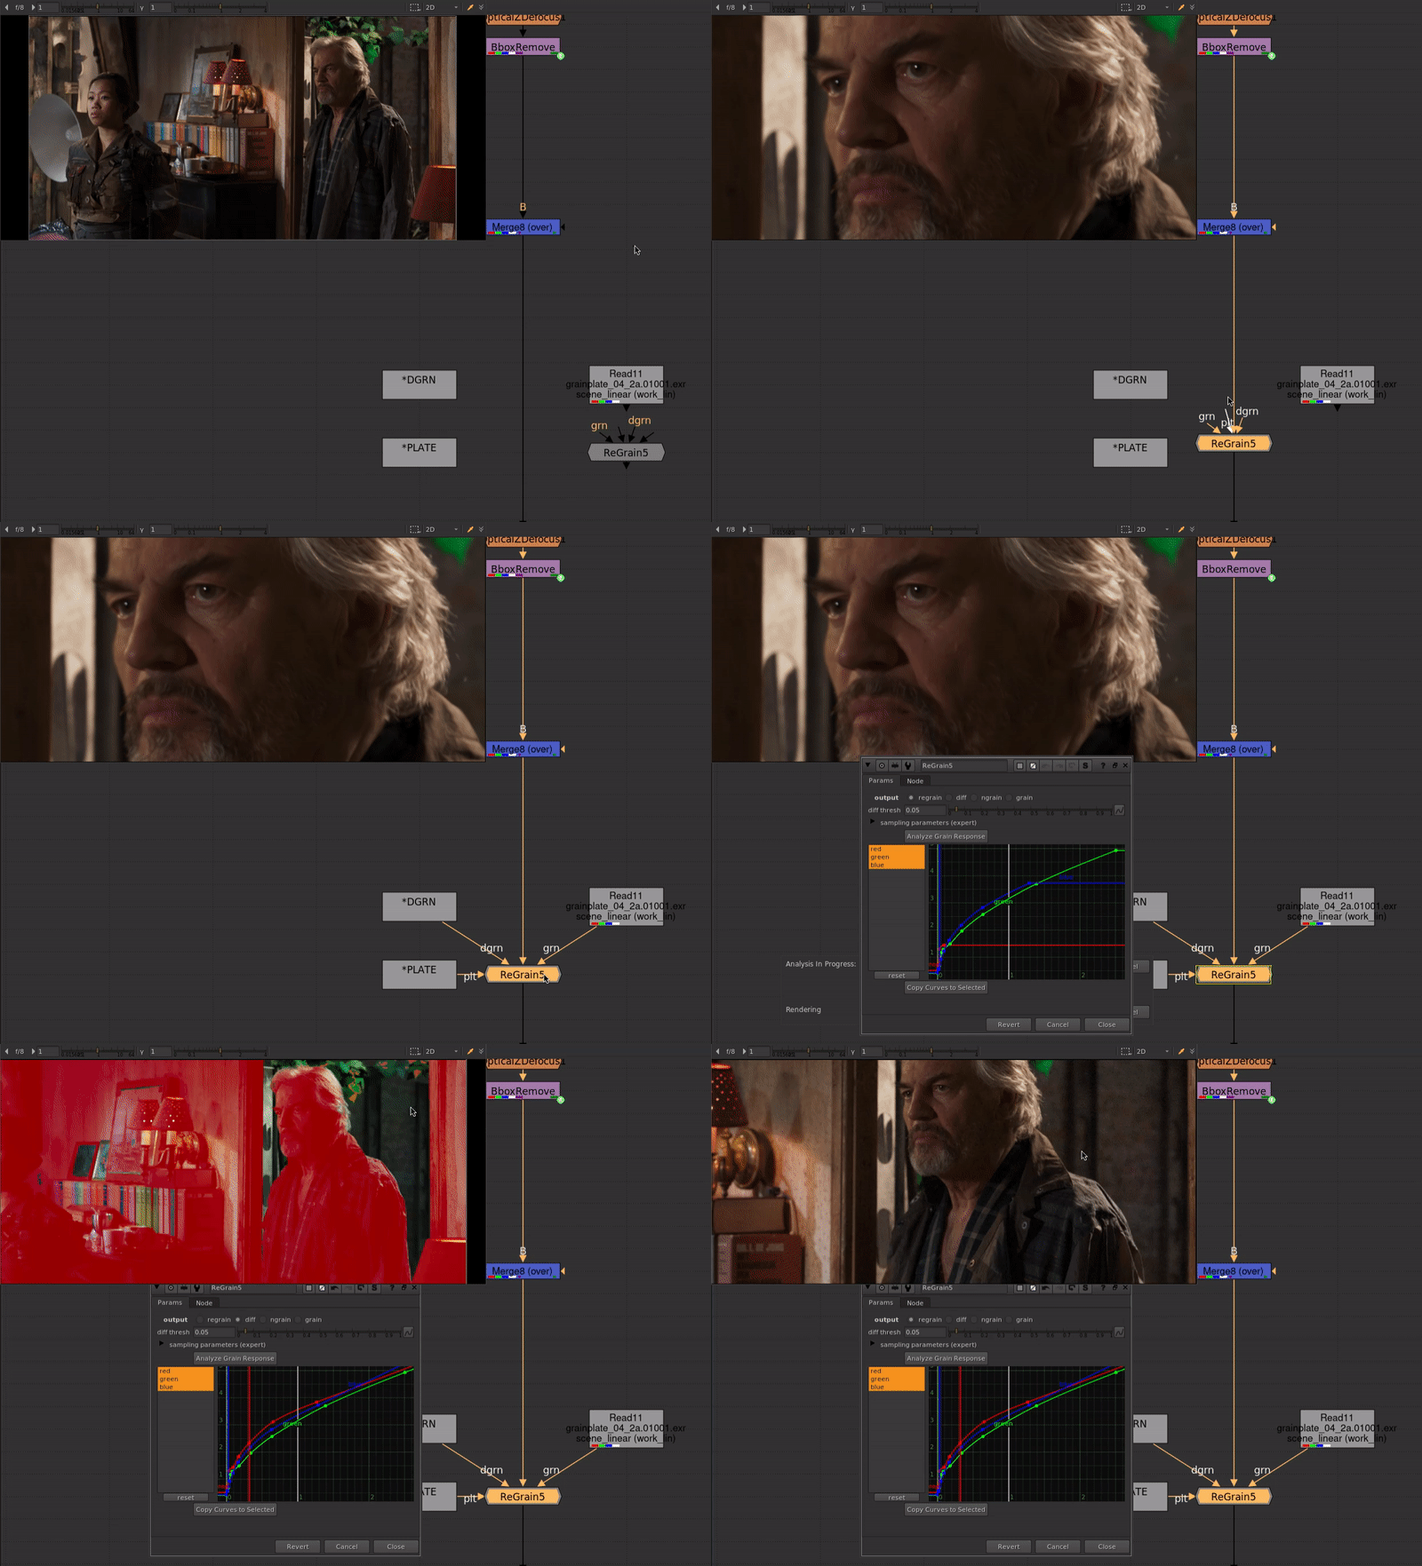
- First we connect up our ReGrain node. (Note: I'm using the Pointer node here.)
- main input to the end of the comp.
- plt input to the original plate.
- dgrn input to the degrained plate.
- grn input to our grain plate that we made earlier.
- Analyze Grain
- Sets up the grain intensity for this specific shot.
- Switch output to diff to check the difference matte
- Adjust the diff thresh parameter to adjust the threshold, while checking the alpha or the red overlay.
- In red areas, we use the plate grain.
- If needed you can also check the grain output. This shows the final grain that is added back to your comp.
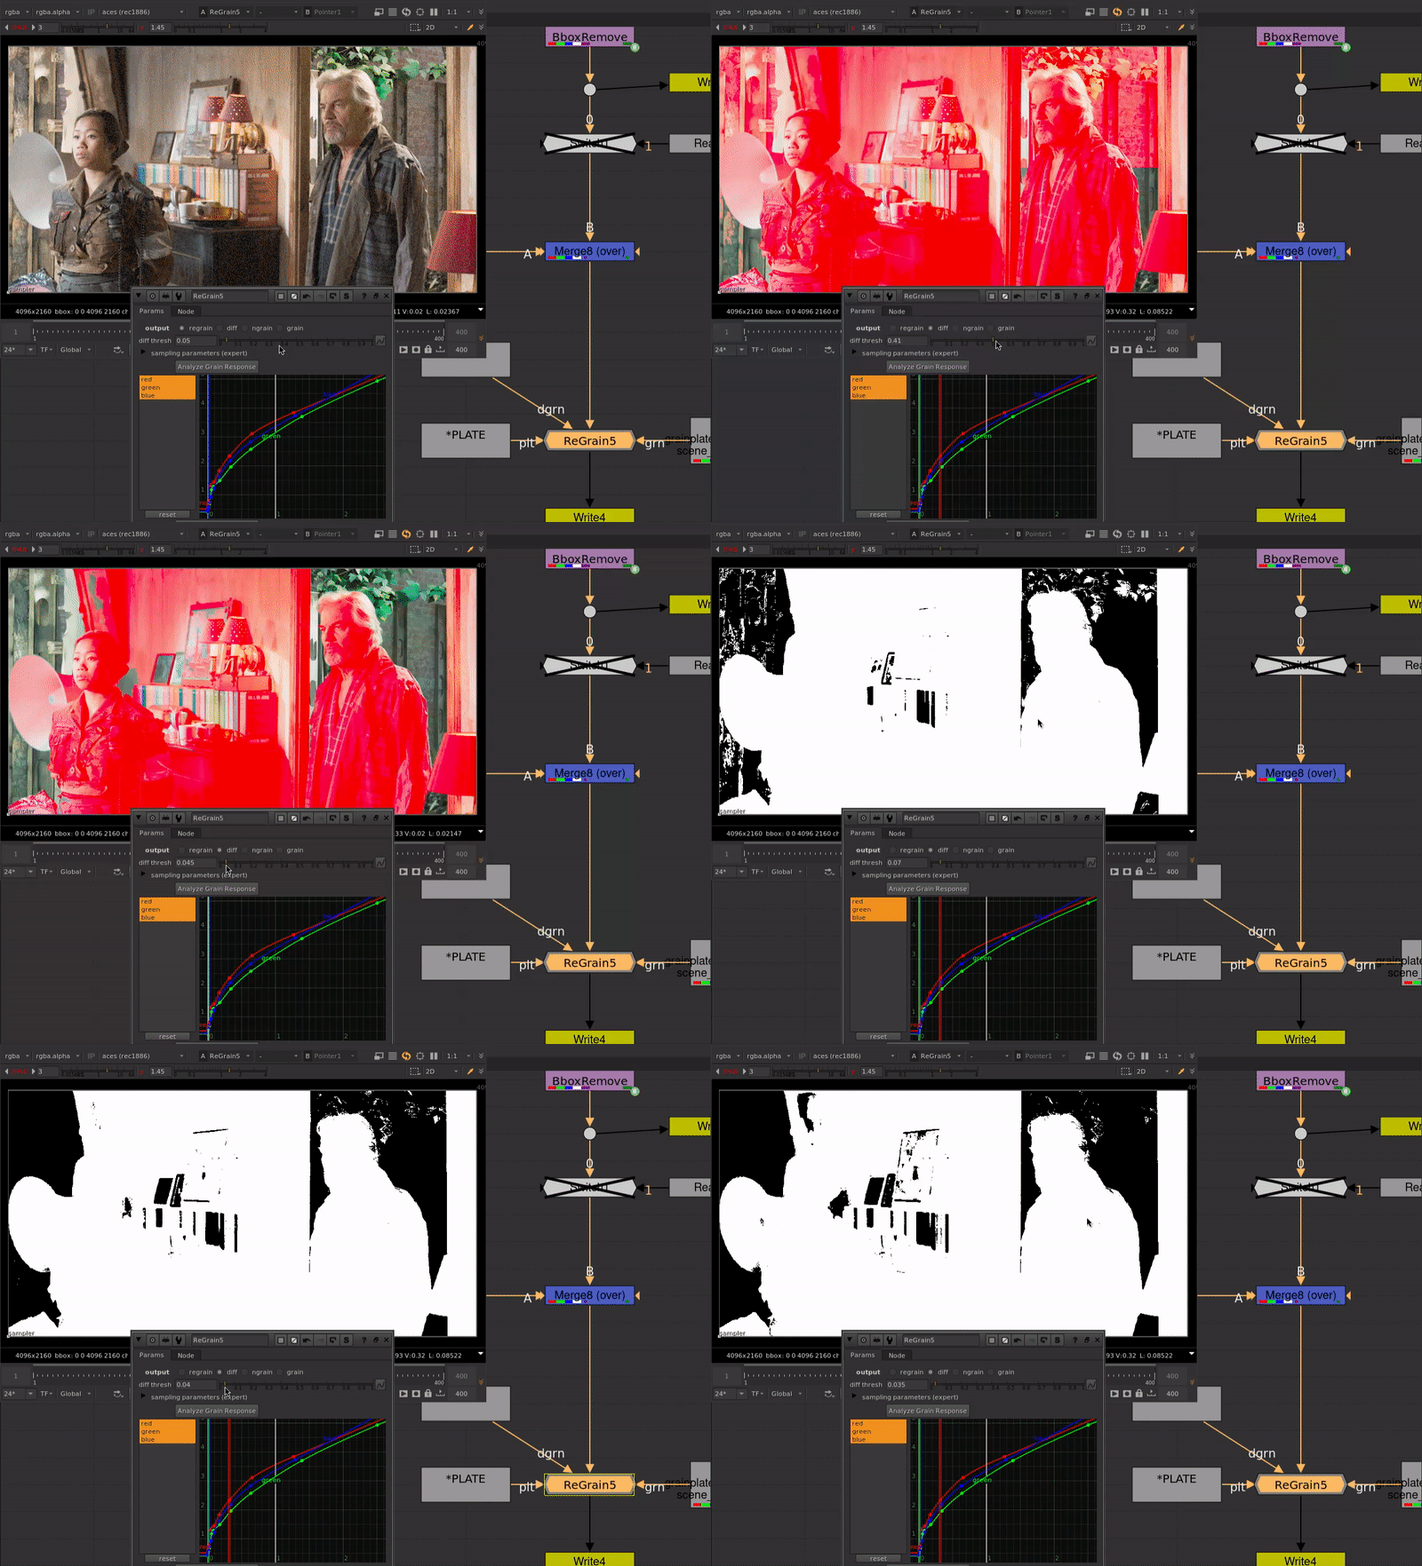
- Double-check the result
- Do a wipe or compare between the original plate and the result.
- Plate grain should be preserved where the diff is 1.
- Grain intensity should be a good match in areas that are regrained with the grain plate.
- Manual Tweaking
- If for some reason the automatic analysis does not get you a good match to the plate, you can tweak the curve manually.
- Switch the ReGrain output to ngrain to display the normalized grain.
- Gain up and look at the grain. All grain should be about the same intensity.
- If you spot an area of grain that is more intense or less intense: find that region in the curve. Adjust the curve up to reduce the grain intensity, or adjust it down to increase the grain intensity.
-
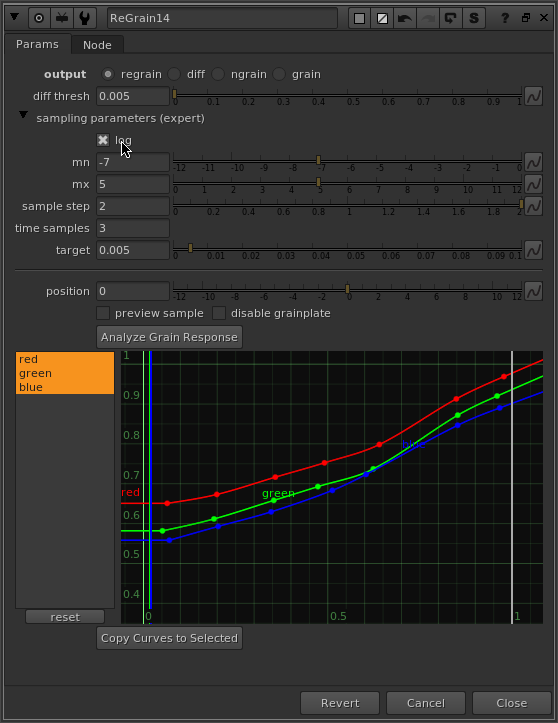
Log analysis curve
If you have a tricky shot and need to tweak the grain intensity manually, there is also an option for remapping the grain intensity curve using a log function so that the points fall evenly in the 0-1 range. If you boost the sample steps to 2 or 3, fewer points will be created, so you'll have an easier time making adjustments.
-
No Plate Grain
Sometimes you don't need to preserve plate grain in a shot. Maybe your shot has a big retime or scale-up. Maybe it's a full-cg shot. For these cases you don't need the complexity of the difference calculation.
Create a ReGrainSimple node. Select it, then on your ReGrain node, click Copy Curves to Selected. This will copy over your settings to the simpler regrain node. Keeps your comp light!
In case you are curious how the analysis works, you can view the intensity slices if you expand the sampling parameters.

The analysis works like this. Sampling is done over a range of stops from middle grey. Sample step controls the interval of the sample. By default it's set to 1 stop. Time samples allows multiple frames of the input framerange to be sampled, in case there is a section of the shot that is super bright or super dark. The preview sample knob lets you see the slices of the image as it will be analyzed.
