-
Notifications
You must be signed in to change notification settings - Fork 20
JPL Conforming Respirators
![]() Download STL files
Download STL files
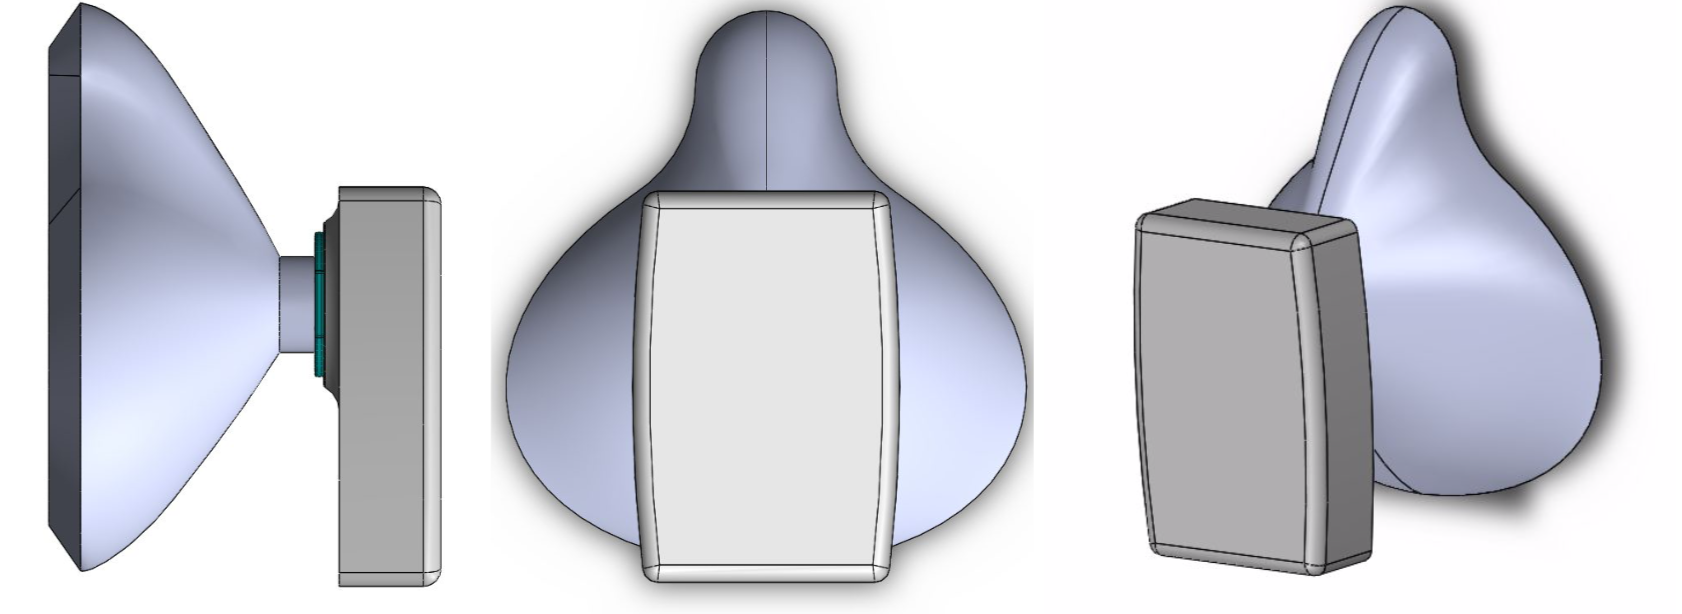
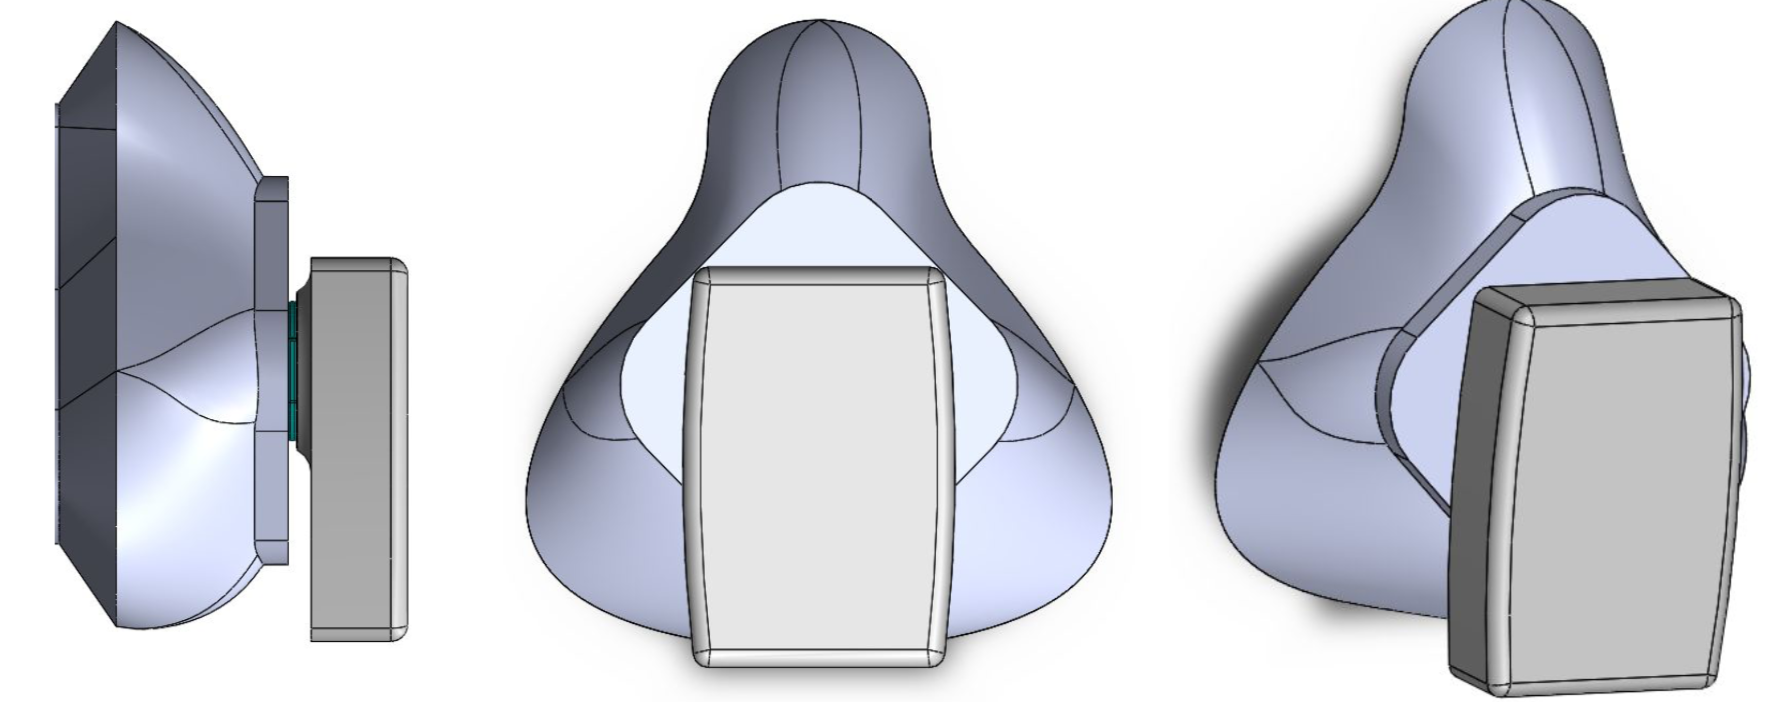
Using flexible filament this design is focused on conforming to a wide range of faces and fast printing. This means fewer sizes are needed to comfortably seal to the range of human face dimensions.
This comes in two styles, Fast Vase and Low Profile Vase variations shown below. Each of these can use a single or double filter adapter is shown below. Depending on size these prints range from 30 minutes with a 1.2 mm nozzle and up to 4.5 hours with a traditional 0.4 mm nozzle.


- FDM 3D Printer (direct drive preferred, larger nozzle size preferred)
- Scissors / Small cutters
- Facial Interface: 3D printer filament (Ninjatek Cheetah TPU, Polymaker Polyflex, Matterhackers Pro TPU)
- Adapter: 3 D printer filament (PETG, PLA or ABS or other rigid filament.)
- Straps: 3⁄8”-1⁄2” Elastic Bands (sewing elastic, rubber bands or string can also be used)
- Component seals: Contact solid grip shelf liner, dense foam or rubber sheet.
| Component | Qty | Manufacturing method |
|---|---|---|
| Facial Interface | 1 | 3D printed |
| Cartridge Adapter | 1 | 3D printed |
| Seals | 1-2 | Hand-cut |
| Straps | 1 | Hand-cut |
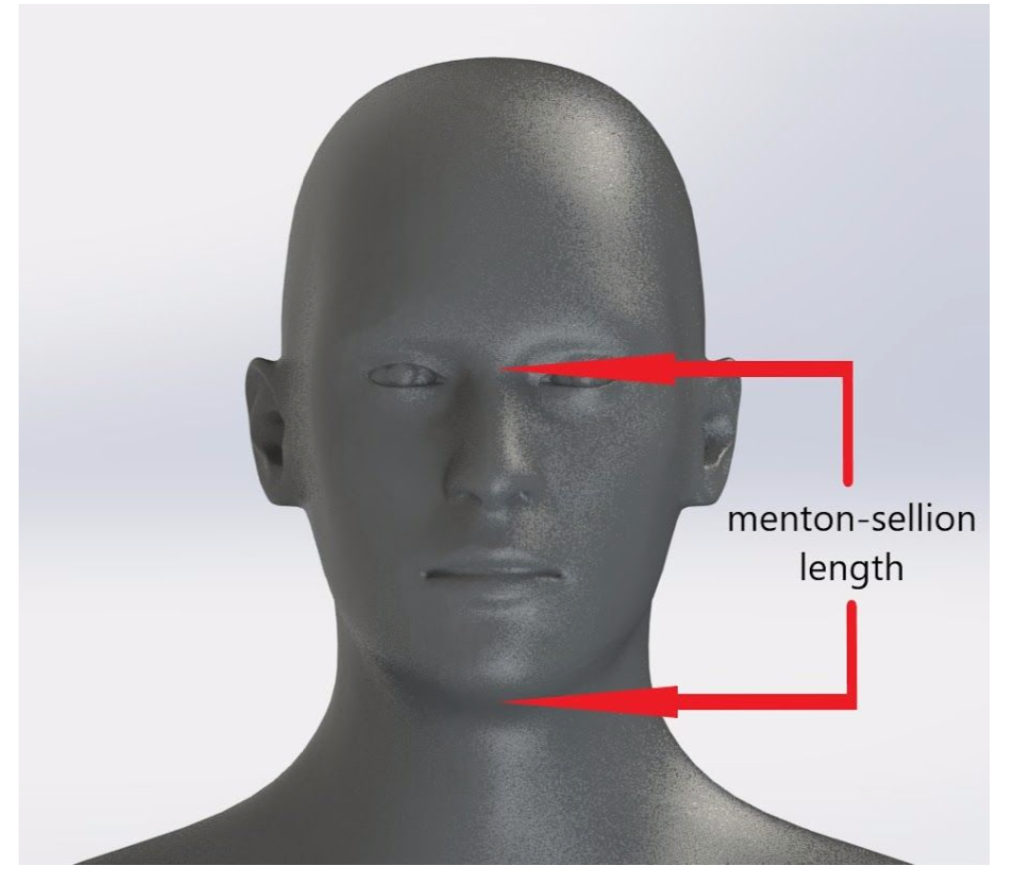
- If using existing files measure your menton-sellion (m) length.

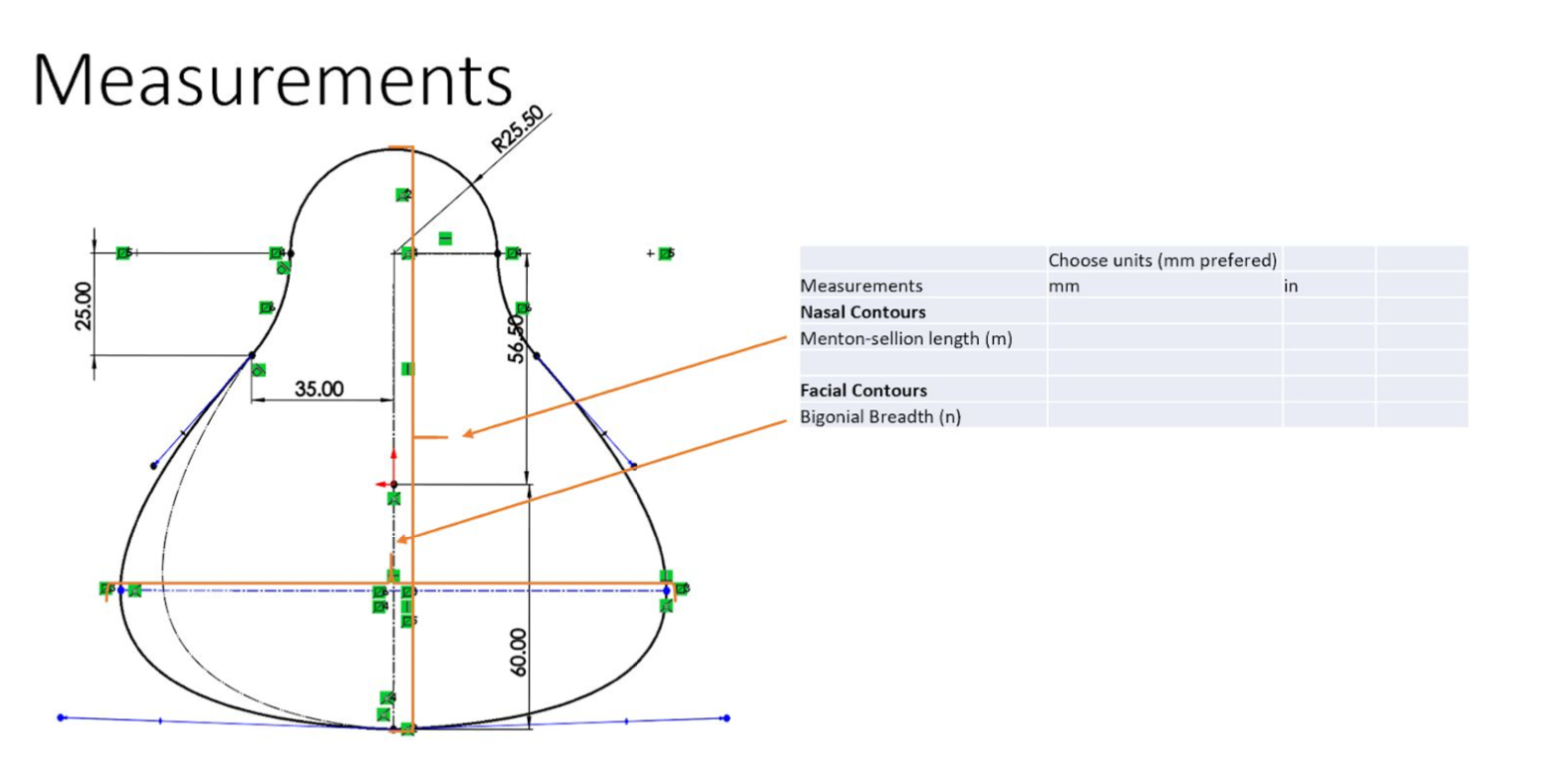
If you would like to design a custom fit take the measurements of your face per the illustration and fill in the table below.
| Choose units (mm preferred) | |||
| Measurements | |||
| Nasal Contour | |||
| Menton-sellion length(m) | |||
| Bigonial breadth(n) | |||
- Choose an existing STL based off of menton-sellion length:
| Size | STL |
| 9-10cm | Invert S.stl |
| 10-12 cm | Invert M.stl |
| 12-13 cm | Invert L.stl |
Or modify cad appropriately:

- 3D Print respirator If there is a flat bottom to the design always orient that to the print bed. To avoid layer gaps and stringing it is recommended that you print a single part with no other parts on the printer bed. If using a Taz 6 with the Moarstruder use the profile below and click the spirilize option in special modes. If using a traditional 0.4 printer use the profiles below or these guidelines. Recommended print settings; 5 perimeters,5 top and 5 bottom layers @ 0.20mm layer height with a 0.40mm nozzle. If available use “Extra perimeters if needed”,”Cross perimeter avoidance”,”Thin wall detection” on slicer application. Then follow filament manufacturer guidelines for material print setting. Faster print times may be achieved with a larger nozzle but this design and settings are intended for most common 3D printer configuration. For ease of printing here are the print profiles for Cheetah TPU filament on the TAZ 6 with Moarstruder and the Prusa. More profiles and materials to come.
| Printer | Nozzle Size | Material | Profile File Name | Comments |
| Taz 6 | 1.2 | Cheetah | Cheetah Moar Vase Profile.curaprofile | In special modes click spiralize outer contour |
| Taz 6 | 1.2 | Matterhackers Pro TPU | Pro TPU Moar Vase Profile.curaprofile | In special modes click spiralize outer contour. Use Tune on the printer |
| Prusa | 0.4 | Cheetah | Cheetah - TPU.ini | |
| Prusa | 0.8 | Cheetah | Cheetah 0.8 - TPU.ini |
- 3D Print cartridge adapter and accessories
| STL | QTY | File Name |
| Single Cartridge Adapter | 1x | Low Profile Filter Adapter |
| Double Cartridge Adaptor | 1x | Wide Double Filter Adaptor 3.stl |
These can be printed out of your favorite rigid filament.
- Cut seals and headbands Cut circular seals for your adapter as shown: Foam or shelf liner material works well as a seal.
Foam or shelf liner material works well as a seal. This is available on Amazon or at your local home improvement store. A good technique is to cut out a slightly oversize square, fold two corners together then cut a half circle out of the doubled over material that is slightly larger than the printed outer diameter of the adapter. Fold the circle in half and repeat this operation slightly undersized to the inner ring diameter. Stretch the newly made seal over the inner ring and flatten. Modify if necessary.
Cut sewing elastic and tie as shown:
Measure a length of elastic one and a half times the circumference of your head and cut. Thread the elastic through the outer loops making a full closed loop as shown and tie the ends together.
- Assemble pieces and test:
Align the small tooth on the adapter to face the top of the mask and press through the hole in the mask pushing until the adapter is flush to the mask face.
The pegs of the adapter only take the cartridge in one orientation, align the pieces as shown and twist to seal together.
Place the bottom loop over your head and settle down on the back of your neck as shown. Place the mask on your face and pull elastic directly away from you until you feel a firm but not tight pull from the bottom loop. Move the top loop over your head until it rests securely as shown. If necessary tie a new knot to make the elastic loop shorter tightening the fit. Ensure as you breath in the mask tightens against your face and the incoming air only comes through the filter. Also make sure the air does not escape out the edges when you breath out. If air is transferring any way except through the filter try tightening the strap and/or reorienting the mask on your face. If this remains an issue try a different size.
- Design: The JPL designer of the 3D printable COVID-19 Conforming Respirator describes the design and the journey that led to the current design. https://youtu.be/HgvieKNDlfU