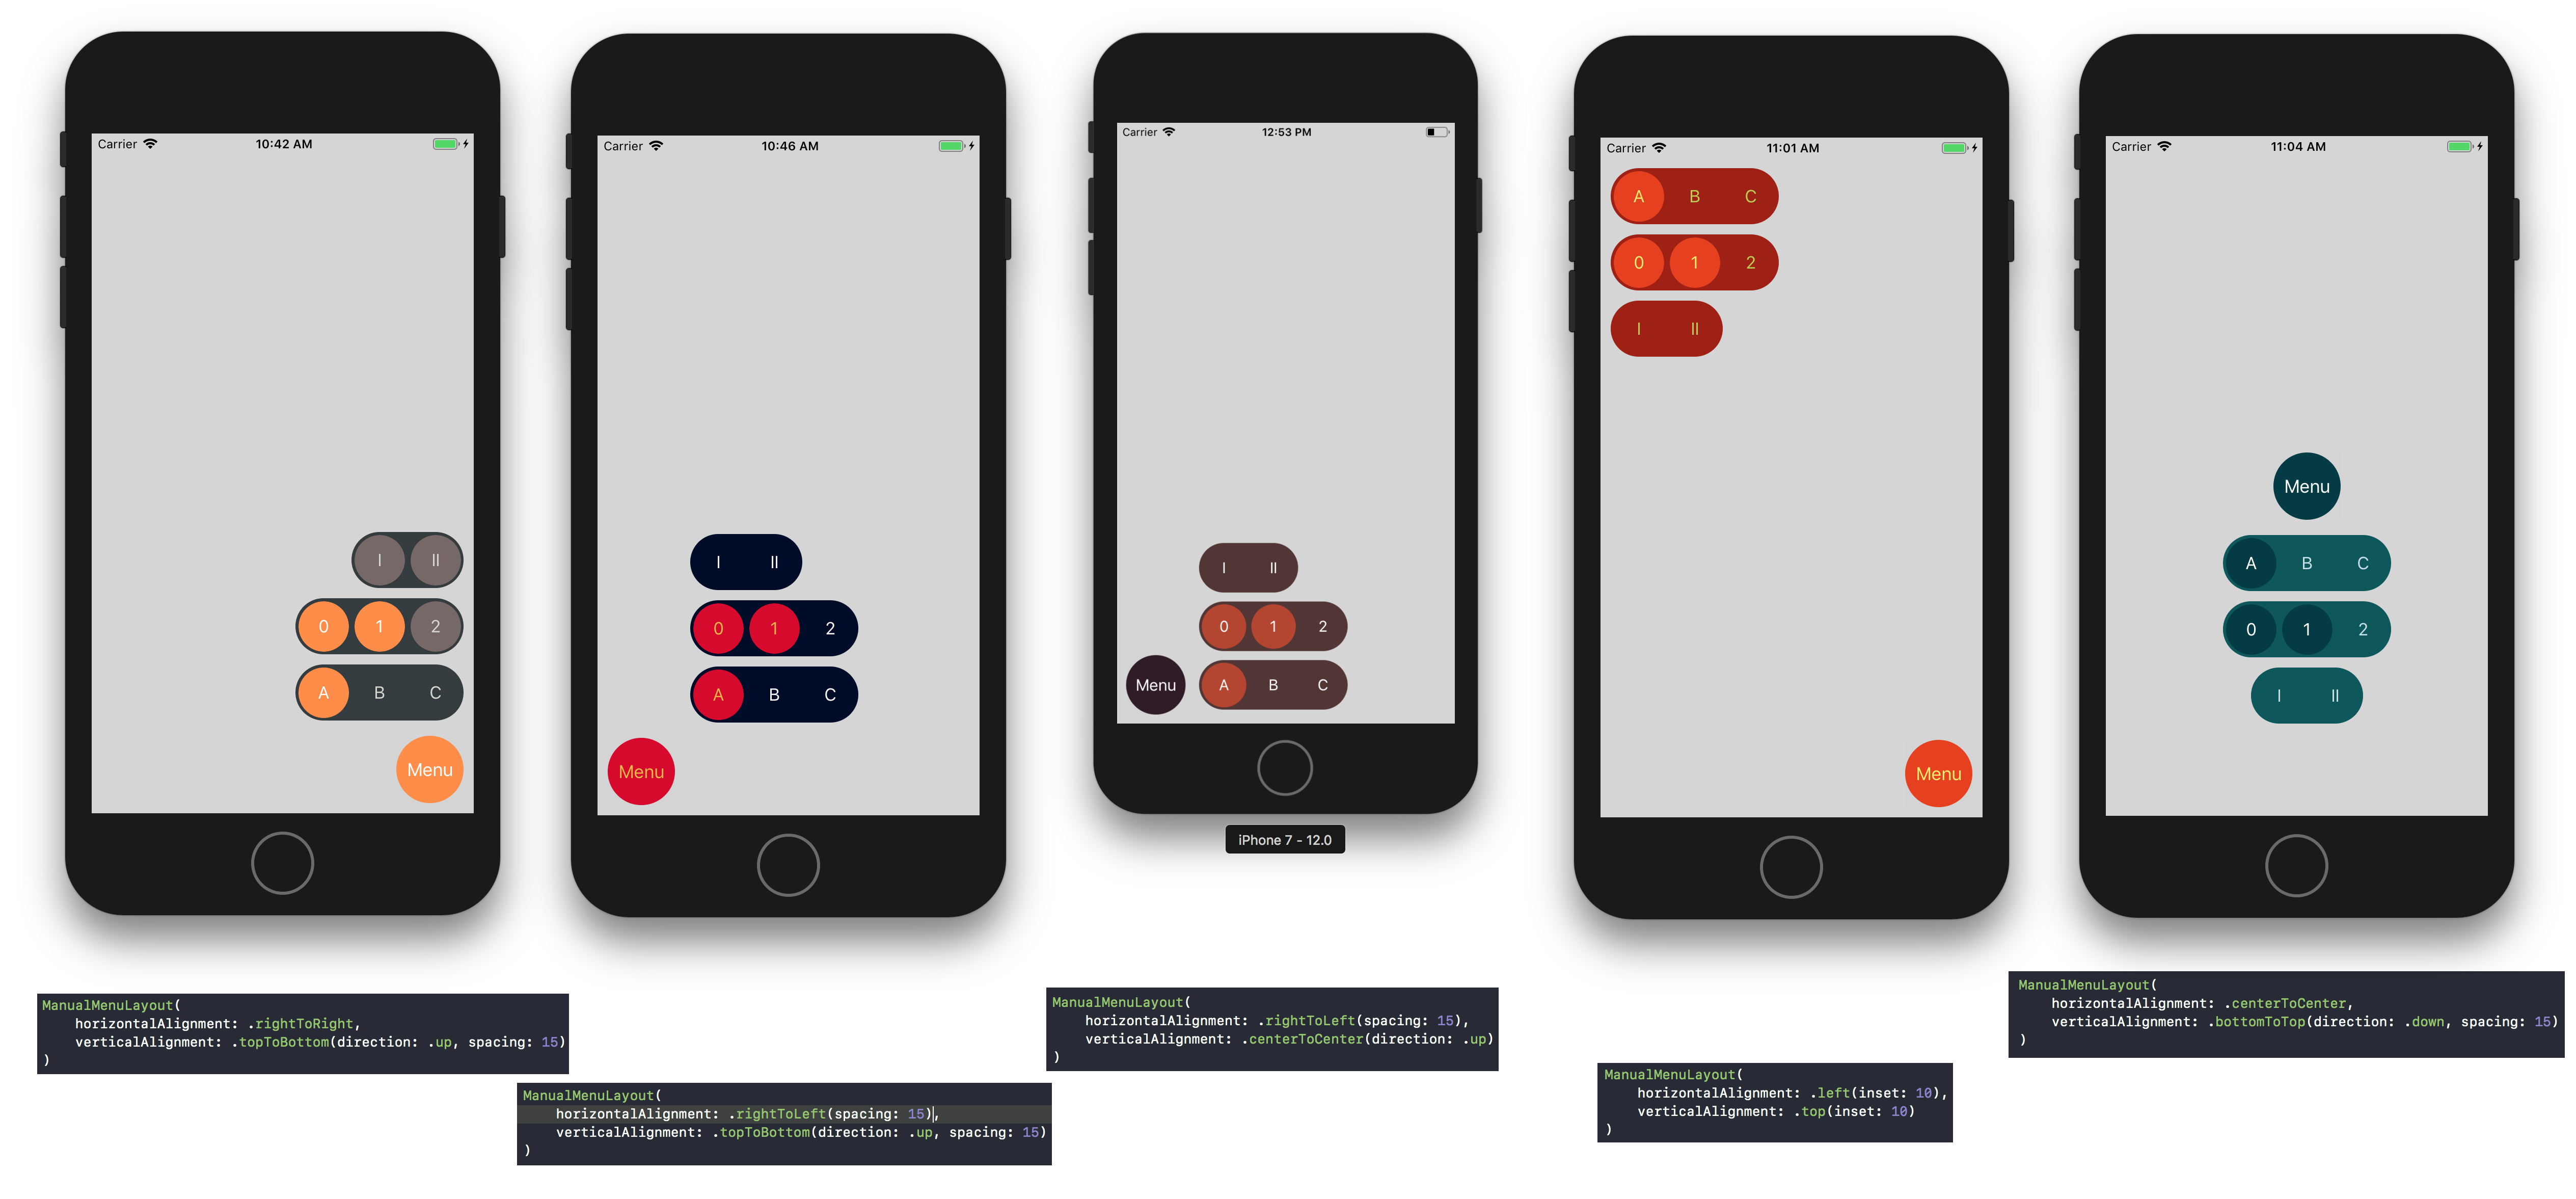
To run the example project, clone the repo, and run pod install from the Example directory first.
- iOS 11.0+
- Xcode 9.0+
- Swift 4.0+
CocoaPods is a dependency manager for Cocoa projects. You can install it with the following command:
gem install cocoapodsTo integrate SelectionMenu into your Xcode project using CocoaPods, specify it in your Podfile:
source 'https://github.com/CocoaPods/Specs.git'
platform :ios, '11.0'
use_frameworks!

target '<Your Target Name>' do
    pod 'SelectionMenu'
end
Then, run the following command:
$ pod installIt is useful to specify also dependency version like pod 'SelectionMenu', '~> 0.2.0', but before first major release the API will be unstable anyway.
Carthage is now unsupported.
Swift Package Manager is now unsupported.
To add SelectionMenu to your view just create any view implementing protocol MenuButton. There are already few implemented for you: LabelMenuButton, UIButton.
override func loadView() {
	super.loadView()

	let button = LabelMenuButton(text: "Menu")
	// Here you can do styling of the menu button

	let selectionMenu = SelectionMenu(menuButton: button)
	view.addSubview(selectionMenu)
	self.selectionMenu = selectionMenu

	// Setup selectionMenu layout as you would for the button
	// Selection menu inserts platform beneath itself
	// and presents its content there
	// Therefore it needs to be on top
}As for setting up the menu content I suggest creating new object implementing protocol SelectionMenuDataSource and protocol SelectionMenuDelegate. Then you can define your own protocol to communicate with containing UIViewController.
But on the other hand there is already prepared StaticMenuDataSource, which can get you up and kicking in no time.
// You cannot assign the datasource directly, because it is weak reference and data source would get released immidietaly
// So you have to store it into strong referencing property
self.menuDataSource = StaticMenuDataSource(sections:
            (type: .singleSelection(selected: 0), [.text("A"), .text("B"), .text("C"), .text("D")]),
            (type: .multiSelection(selected: [1, 3]), [.text("I"), .text("II"), .text("III")]),
            (type: .buttonSelection, [.text("😀"), .text("🙂"), .text("😐"), .text("🙁"), .text("😞")])
        )

self.selectionMenu.dataSource = self.menuDataSource
Or you can use predefined SelectionMenu which also creates the button for you:
let menu = SelectionMenu.orangeAccent
view.addSubview(expandableMenu)
self.menu = menu
You can change the appearance of whole collection or single elements using two protocols SelectionCollectionStyling and SelectionElementStyling.
Both of these protocols contain single method which gets called in appropriate times to apply necessary styles.
You can implement your own styles or use already implemented. Some of them conform to both protocols and thus can be used for both properties at once.
selectionMenu.elementStyle = SelectionElementStyle(
	circular: true,
	selectedFgColor: DayAndNight.darkNavy,
	selectedBgColor: DayAndNight.tangerine,
	deselectedFgColor: DayAndNight.daffodil,
	// I suggest clear background color to be able to differentiate selected elements easier
	deselectedBgColor: .clear)


selectionMenu.collectionStyle = SelectionCollectionStyle(
	circular: true,
	foregroundColor: .black,
	backgroundColor: .white)
You can even use more styles at once using CompositeStyle.
selectionMenu.collectionStyle = CompositeStyle(collectionStyles: [collectionStyle, ShadowStyle.dark])In case of layout you have plenty of options, but first you have to decide between two options. Those mean automatic layout which looks for most available space and manual layout that just follows what it was told to.
- If you want to use
AutomaticMenuLayoutyou do not have to do anything as this is already used. - If you want to use
ManualMenuLayoutyou have to instantiate it first.
menu.collectionsLayout = ManualMenuLayout(
	// Center of the menu button to center of first collection
	horizontalAlignment: .centerToCenter,
	// Top of the menu button to bottom of first collection
	verticalAlignment: .topToBottom(direction: .up)
)SelectionMenu is available under the MIT license. See the LICENSE file for more info.


