-
Notifications
You must be signed in to change notification settings - Fork 1
Setting up Kaltura as a Docker image to work with openEQUELLA
This wiki page aims to provide guidance to set up a Kaltura Server within a Docker image, which can then be integrated with openEQUELLA via the openEQUELLA-Kaltura plugin.
- Pull down this Docker image. This is the official Kaltura Server image. As of writing this wiki, it creates an instance of Centos 6, and from within that creates a MySQL database and an instance of Kaltura. You can pull it down by running this command from the terminal.
docker pull kaltura/server- Now we need to spin up the server by running the docker image.
docker run -d --name=kaltura -p 80:80 -p 443:443 -p 1935:1935 -p 88:88 -p 8443:8443 kaltura/server- Now we need to run /root/install/install.sh from inside the docker image and provide some details for the installation.
MYSQL_ROOT_PASSWD_HEREcan be whatever you'd like, as this image creates its own database. It will be used again during the next step.
docker exec -it kaltura /root/install/install.sh MYSQL_ROOT_PASSWD_HERE- Once this command has been run, the process will ask for user input for a number of configuration options. Helpfully, default suggestions are highlighted by
install.shin brackets. If just creating a Kaltura for testing purposes, a lot (but not all) of these are fine kept as the default.
CDN hostname: localhost (or computer name, or whatever you wish so long as it is accessible as a host)
Apache virtual hostname: Same as CDN hostname.
Vhost port to listen on: Default [80]
DB hostname: Default [127.0.0.1]
Range of ip addresses belonging to internal Kaltura servers: The range is used when checking service actions permissions and allowing to access certain services without Kaltura Server from the internal servers. The default is only good for testing, on a production environment you should adjust according to your network. Default [0.0.0.0-255.255.255.255]
DB port: Default [3306].
MYSQL super user (only used for install): Default [root]
MYSQL super user password (only used for install): Same as MYSQL_ROOT_PASSWD_HERE from above.
Analytics DB port: Default [3306].
Sphinx hostname: Default [127.0.0.1]
Media Streaming Server host: Default, Same as CDN hostname.
Media Streaming Server Secondary host: default, same as CDN hostname.
Secondary Sphinx hostname (leave empty if none): Left blank.
Your Kaltura Service URL: (Base URL where the Kaltura API and Apps will be accessed from - this would be your Load Balancer URL on a cluster or same as your virtual host in an all-in-one Kaltura server - Must be accessible from both inside the machine and from any clients / browsers that will use Kaltura): http://{CDN Hostname} if not using SSL or https://{CDN hostname} if using SSL.
VOD packager hostname: Default. Same as CDN hostname.
VOD packer port to listen to: Default [80].
Kaltura admin user email address: Your email address.
Admin user login password (must be minimum 8 chars and include at least one of each: upper-case, lower-case, number and a special character):  whatever you decide, so long as it suits the requirements. Obviously you should remember this. Eg for testing: P455W0rd!
Your time zone [see http://php.net/date.timezone] or press Enter for [Etc/UTC]: Australia/Hobart
Your Kaltura install name (this name will show as the From field in emails sent by the system): Entirely up to you.
Your website Contact Us URL: If none provided, the default is Kaltura's Contact Us URL [http://corp.kaltura.com/company/contact-us]
Your Contact Us phone number. If none provided, the default is Kaltura's Contact Us Number [+1 800 871 5224]
Do you agree for Kaltura to collect data about this installation? This data will be used for analysis and ongoing improvement of the Kaltura platform and services: Entirely up to you.
Is your Apache working with SSL? [y/n]
Please input path to your SSL certificate: "</path/to/my/ssl/certificate>"
Please input path to your SSL key: "</path/to/my/ssl/key>"
Please input path to your SSL chain file or leave empty in case you have none: "</path/to/my/ssl/chainfile>"
Please select one of the following options:
    0. All web interfaces
    1. Kaltura Management Console [KMC], Hosted Apps, HTML5 lib and ClipApp
    2. KAC - Kaltura Admin Console
We need all of the interfaces, so select 0.
Kaltura API host and port (without the protocol): Left default, same as CDN hostname appended with the port 80. [localhost:80]
Nginx server name:  same as CDN hostname.
Nginx port to listen on: Default [88]
RTMP port to listen on: Default [1935]
Would you like to configure Nginx with SSL? [y/n} As above if you say yes you will need to provide a key and a cert.
Once all is filled out installation should be complete. An answer file will be generated which may be used to install silently and the installer should point you to where this is. Save it if you would like to re-install with the same configs.
========================================================================================================================
Kaltura install answer file written to /tmp/kaltura_05_01_06_16.ans  -  Please save it!
This answers file can be used to silently-install re-install this machine or deploy other hosts in your cluster.
========================================================================================================================
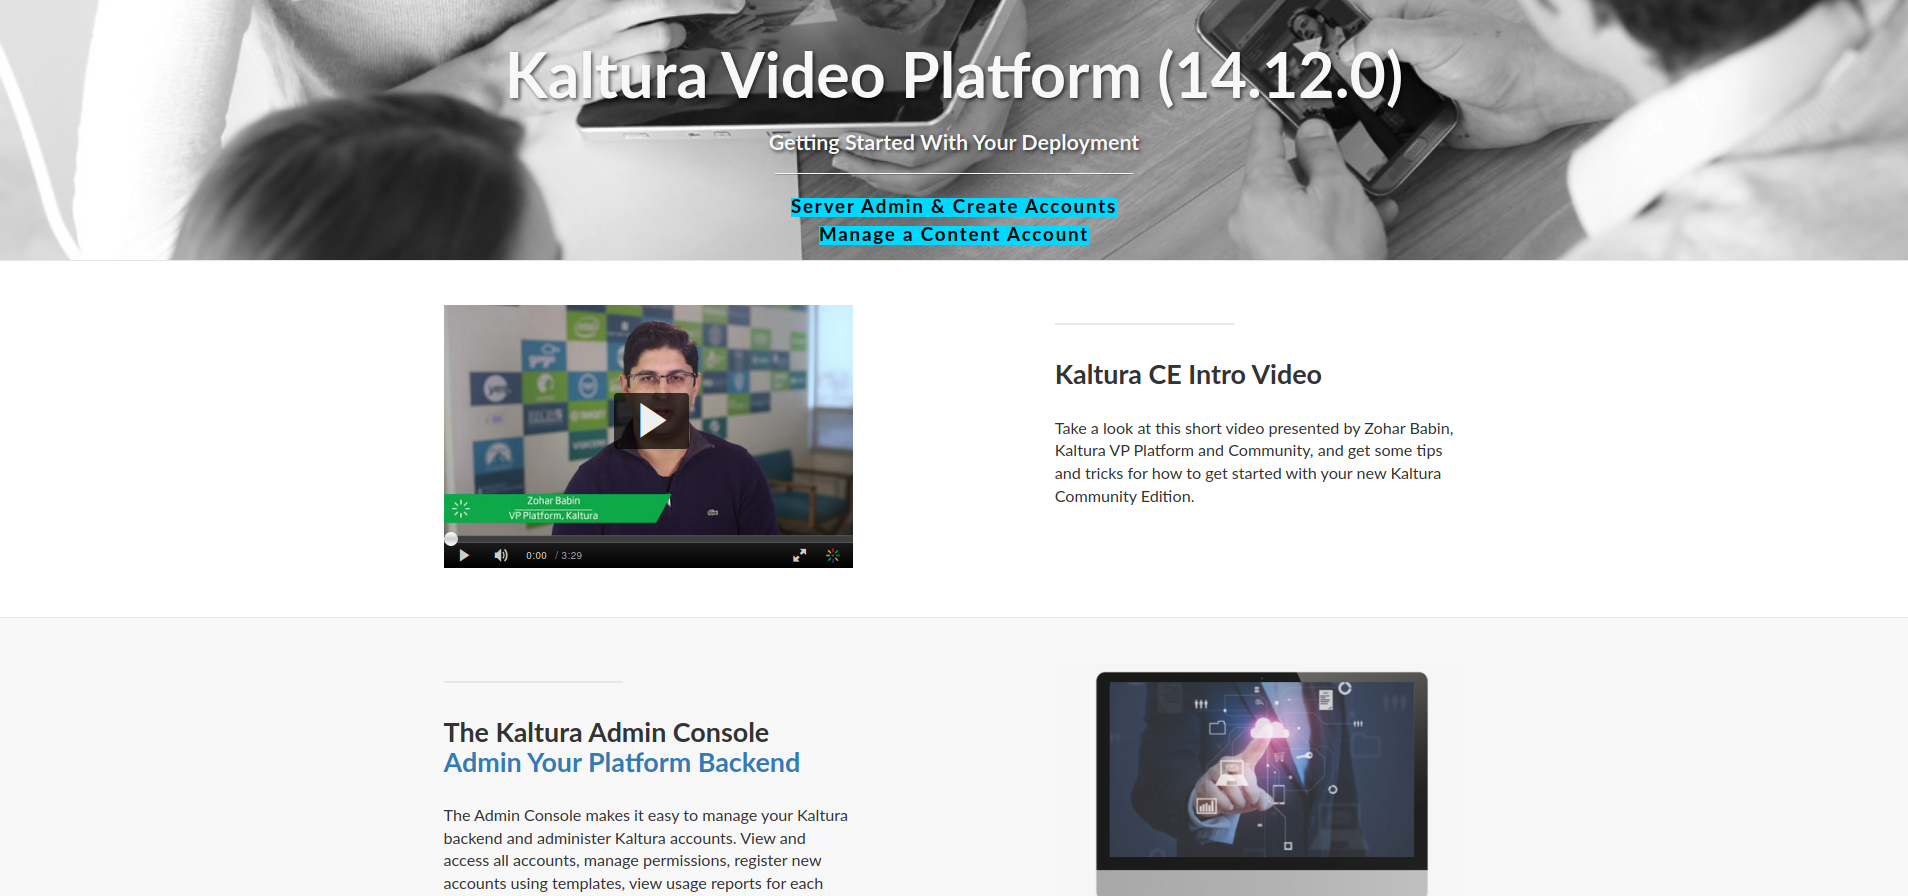
5 . Kaltura should be installed successfully. If so, go to your host in a browser (http://localhost if you used localhost as a hostname). It should look like this.
Now we need to configure Kaltura with a publisher user, and give it a test through openEQUELLA.
In order to integrate with openEQUELLA, or just to upload and view content, a Kaltura Publisher account is required. This is not the same as the Backend Administrator account.
To create this account, we need to access the Kaltura Admin Console. This can be found on the homepage from step 5 above.
-
Scroll down the page slightly until you see "The Kaltura Admin Console - Admin Your Platform Backend". Click on the "Admin Your Platform Backend" link.
-
This will take you to a login screen. We are going to use the Kaltura Admin Email Address and Admin User Login Password from the install.sh to log in. The authenticator code field can be skipped.

-
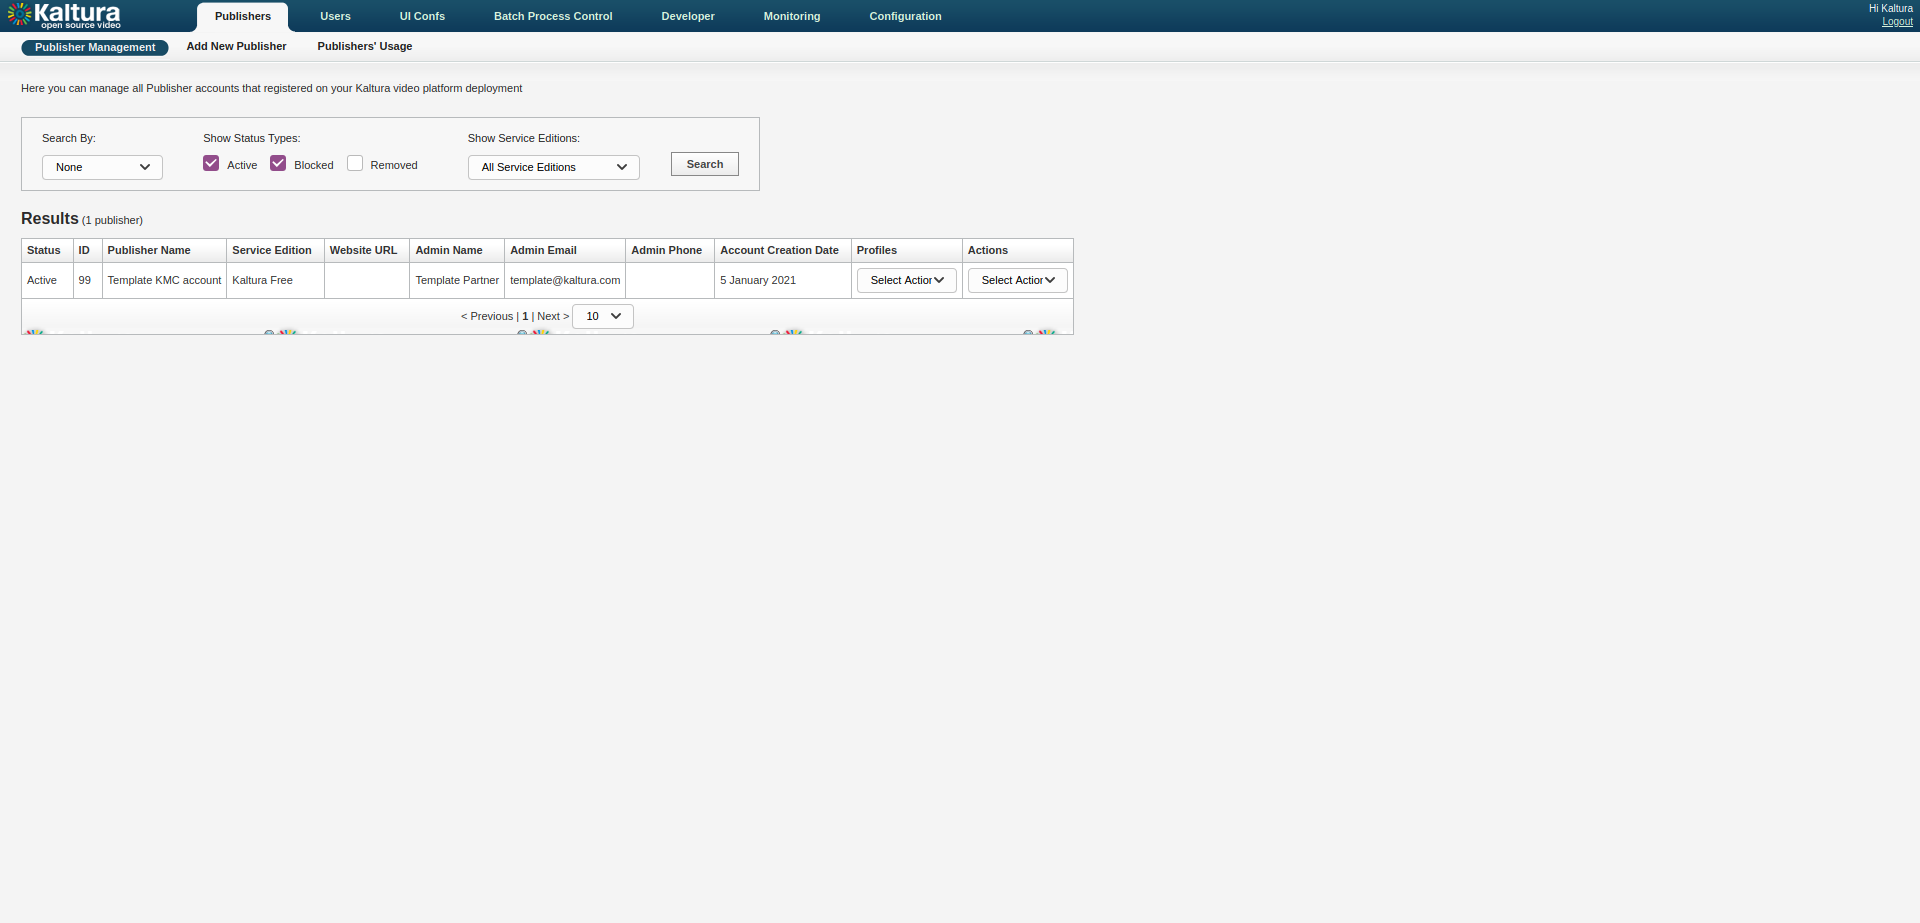
Once logged in, we see the publishers list. Currently all that should exist in the Results list is the Template KMC account. This account should not be used as a publisher, this is simply the account that will be cloned when creating a new publisher.
-
At the top of the screen, click "Add New Publisher". Fill in the Name, Company, Administrator Email and phone number. For Service Edition Type, select "Kaltura Free". Leave Class of Service and Vertical Classification as N/A. Website URL may be omitted if you wish. A registration email will automatically be sent to the Administrator Email you provide and this is how you set your password, so it's important that that field is valid. Once the form is filled out, click Create.

-
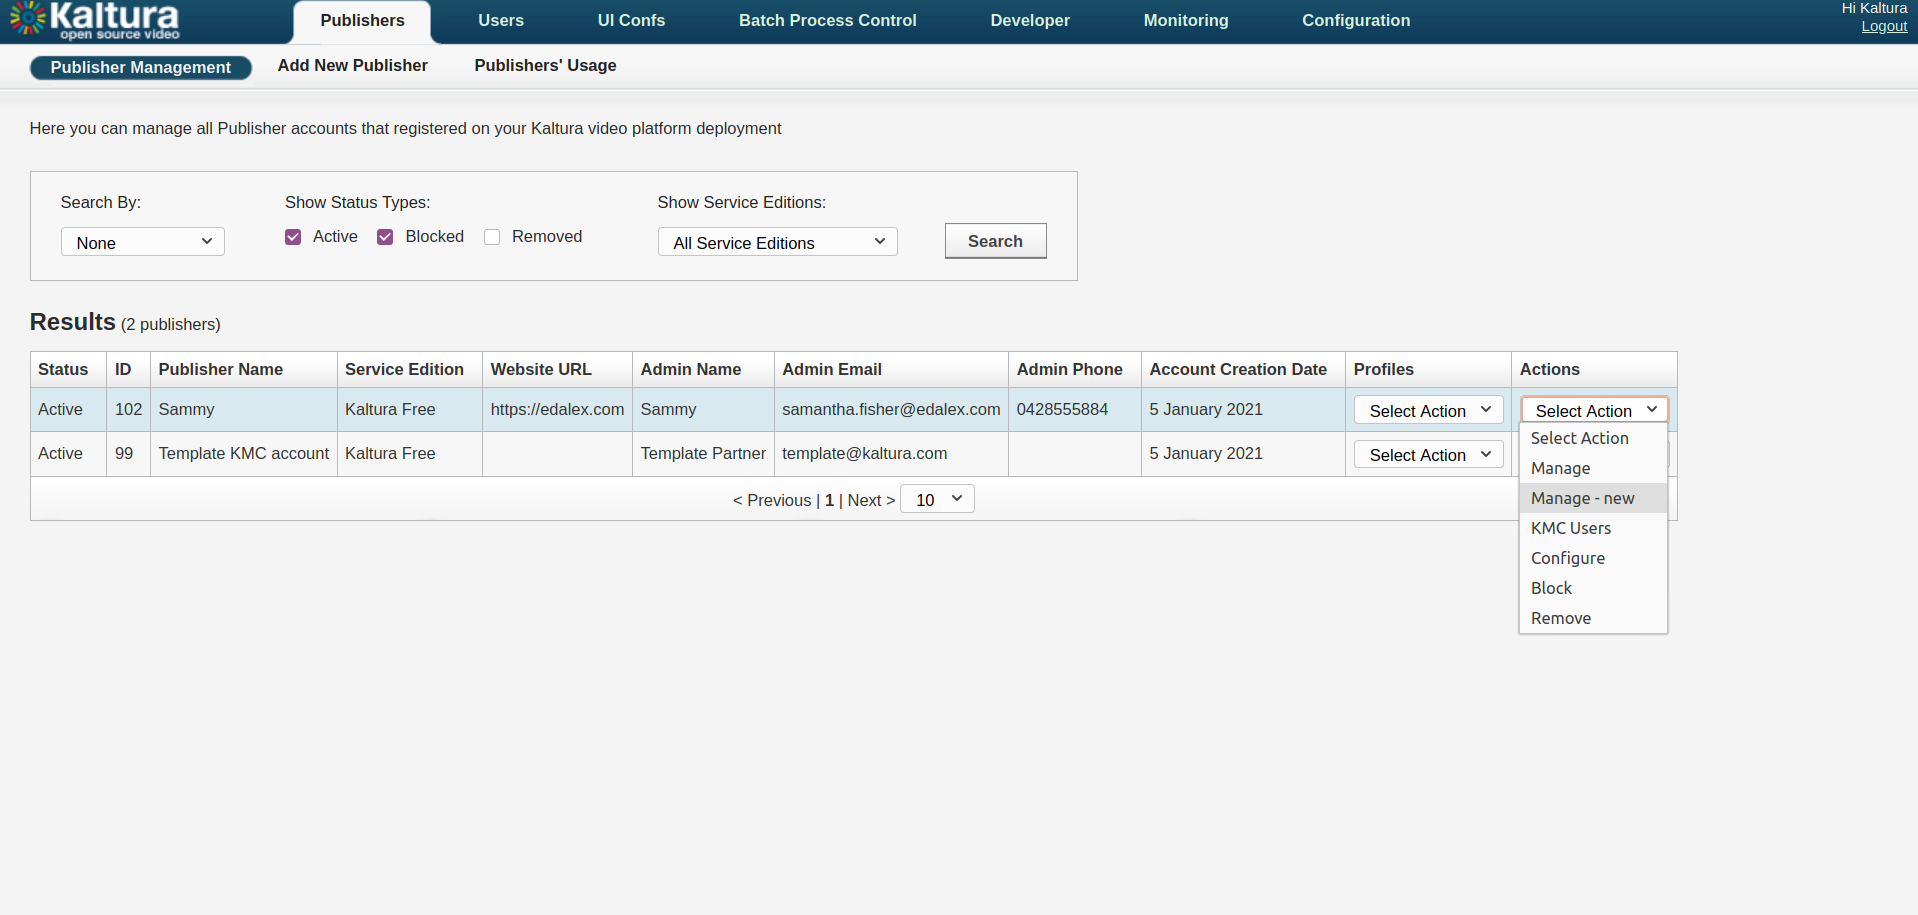
So now we have two publisher accounts in the list, our template and our new account. Go ahead and open up the email sent to the new account and get your new password. Alternately the Kaltura Backend Admin (the first account we created) can log into this account directly from the Publishers list without a username or password by selecting the Actions drop down and clicking "Manage - New".
-
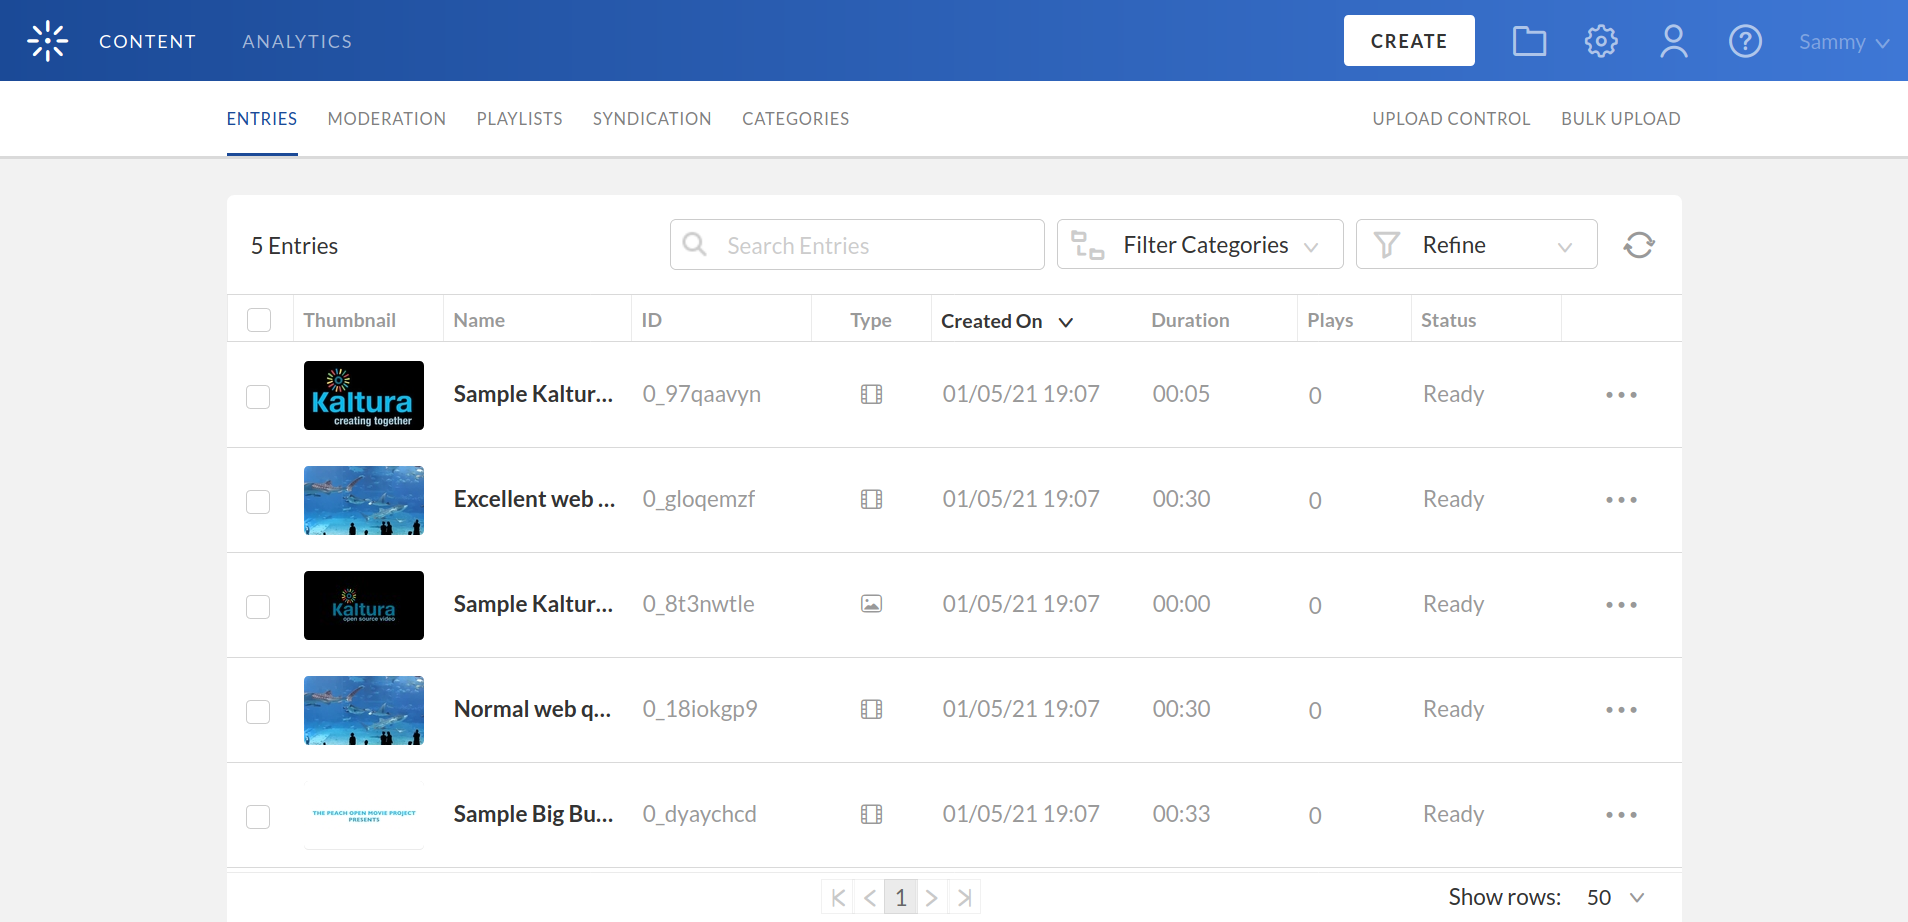
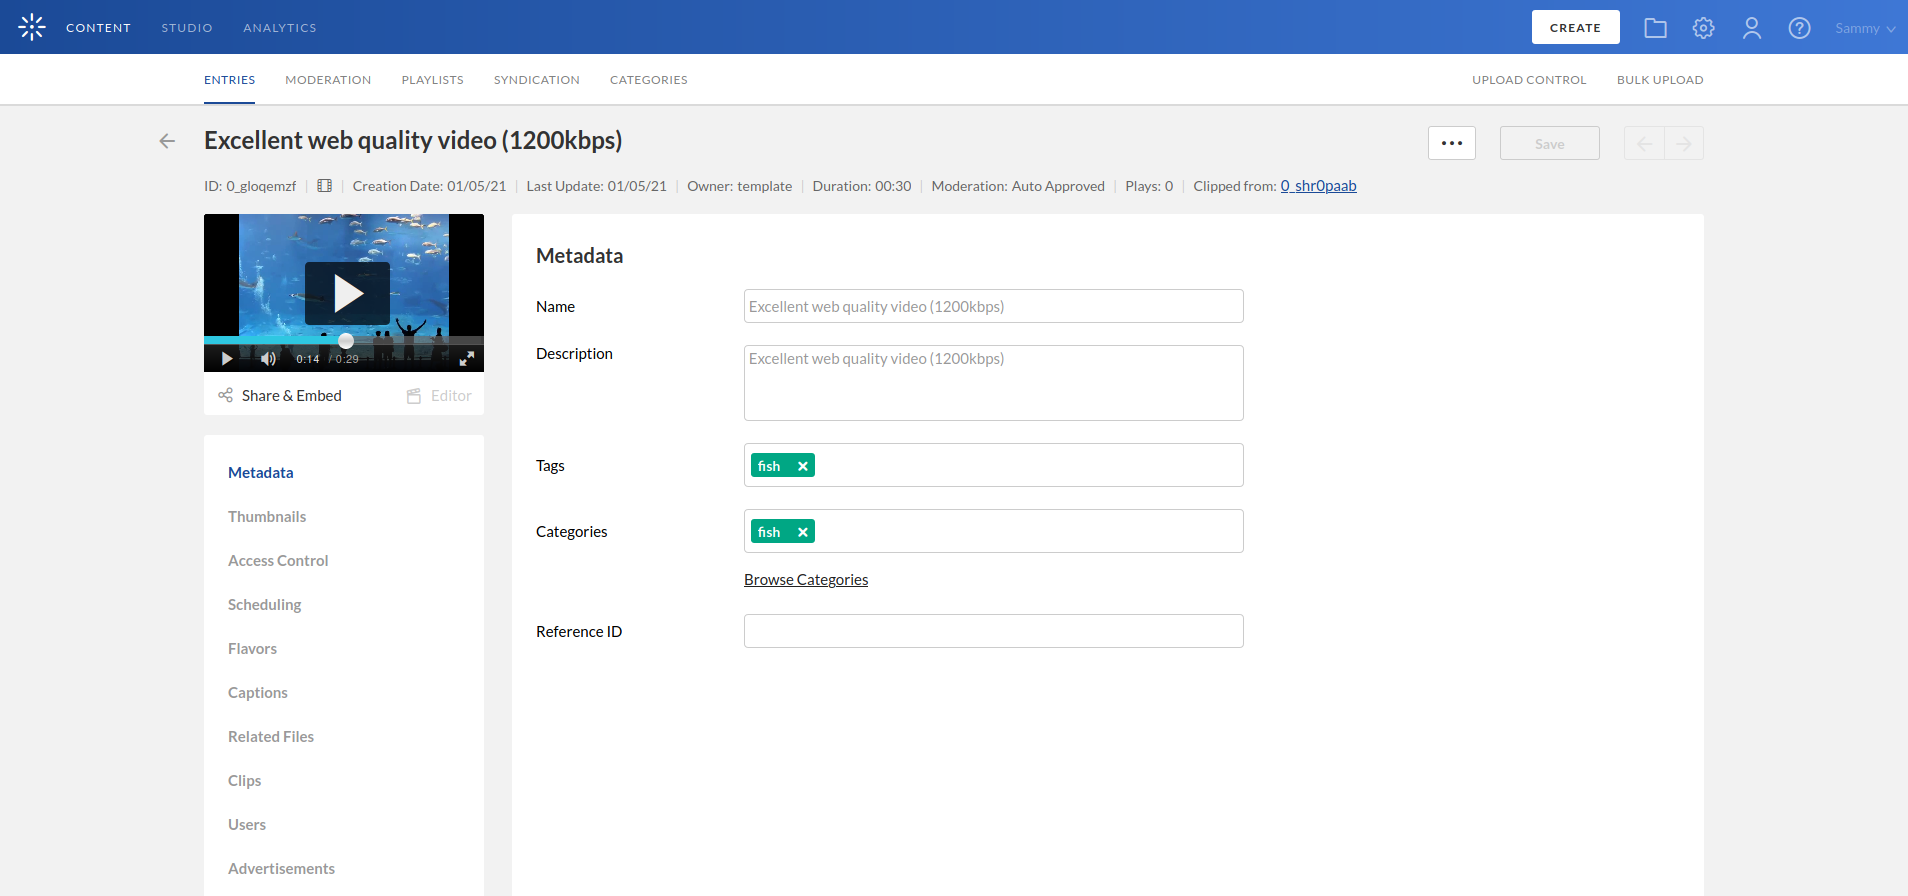
Either way you login, you will be presented with the Content list page. There should be some sample content already provided. Feel free to browse these and preview or download them if you want to. If previews are not working, see the Final Steps section.
-
From the Publisher account created above, click the cog icon in the top right of the screen and click "Integration Settings" from the tabs at the top. The information in the Account Info panel is what we need to integrate with openEQUELLA. We need the Partner ID, Sub Partner ID, Administrator Secret and User Secret.
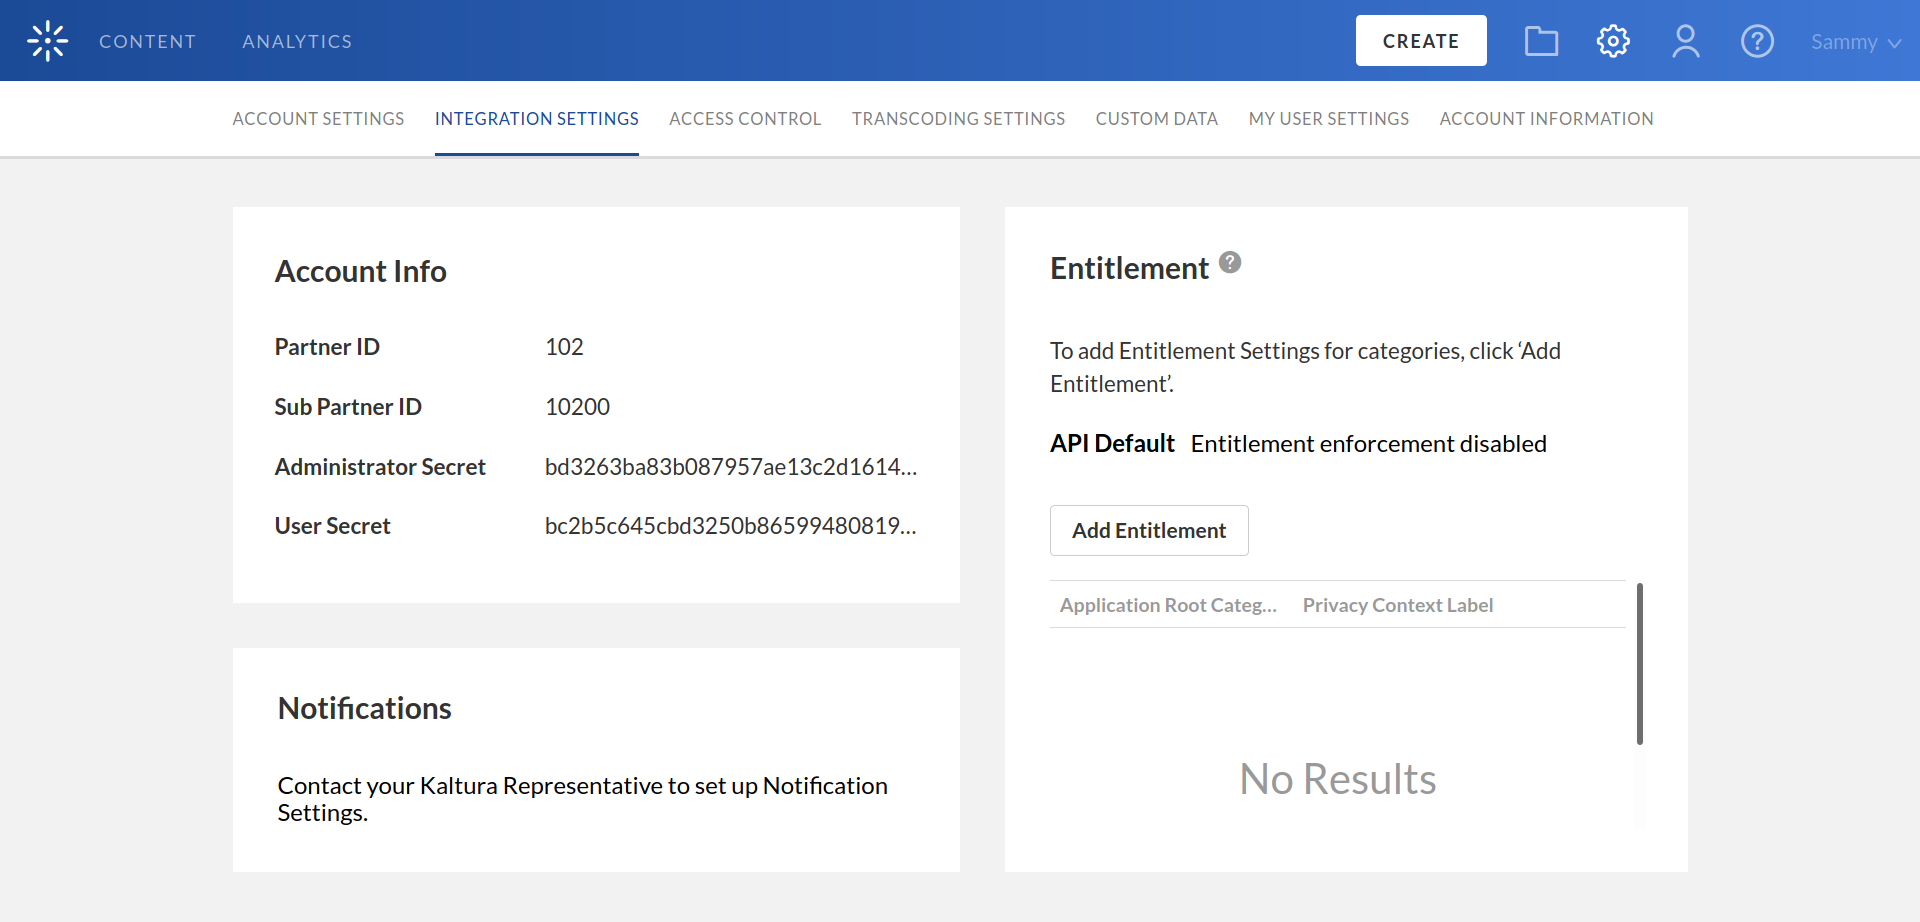
-
Log into your openEQUELLA with Kaltura Plugin installed as an administrator.
-
Go to Settings -> General -> Kaltura. From the page that opens up, click "Add Kaltura server".

-
Fill out the details. The value of name and description don't matter. The endpoint will simply be your Kaltura homepage URL, and then into the four fields below that will go the four pieces of information from Account Info in the Kaltura Publisher account.
-
Once filled out, Click "Test Connection". If all is well you will receive a "Successfully connected to Kaltura" message. Click Save.
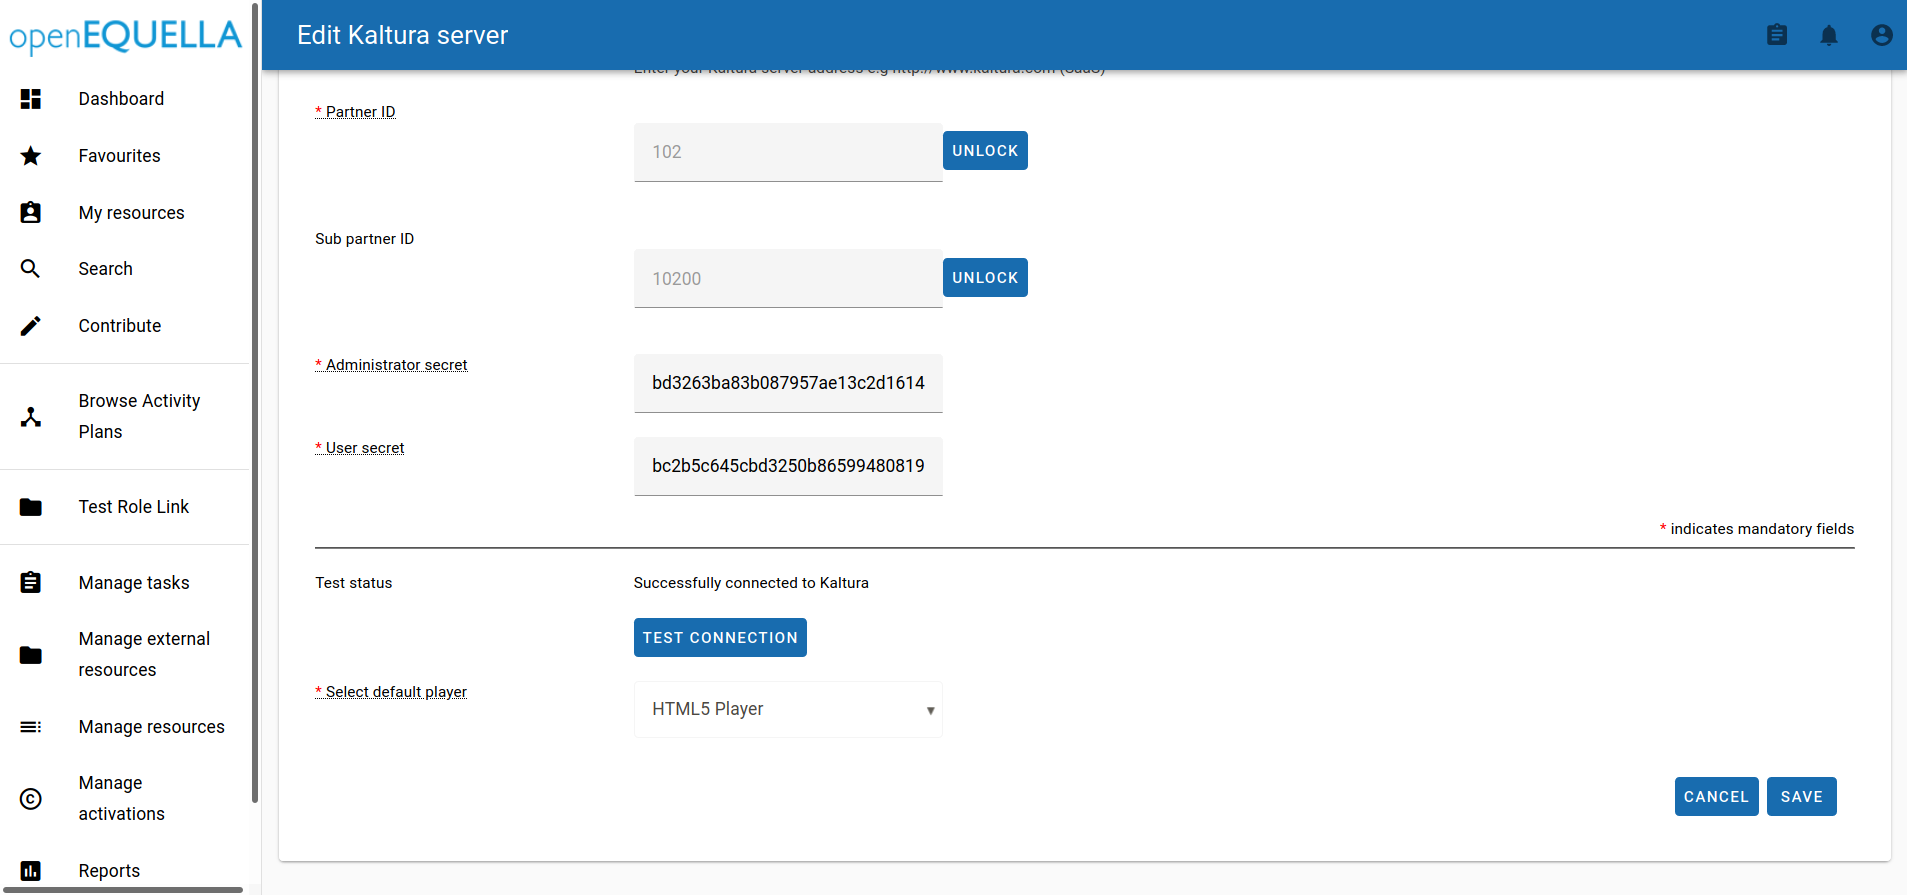 Your Kaltura Server docker image is now integrated with openEQUELLA.
One problem that occurred each time I installed was that the HTML5 player would show up as "Not Found".
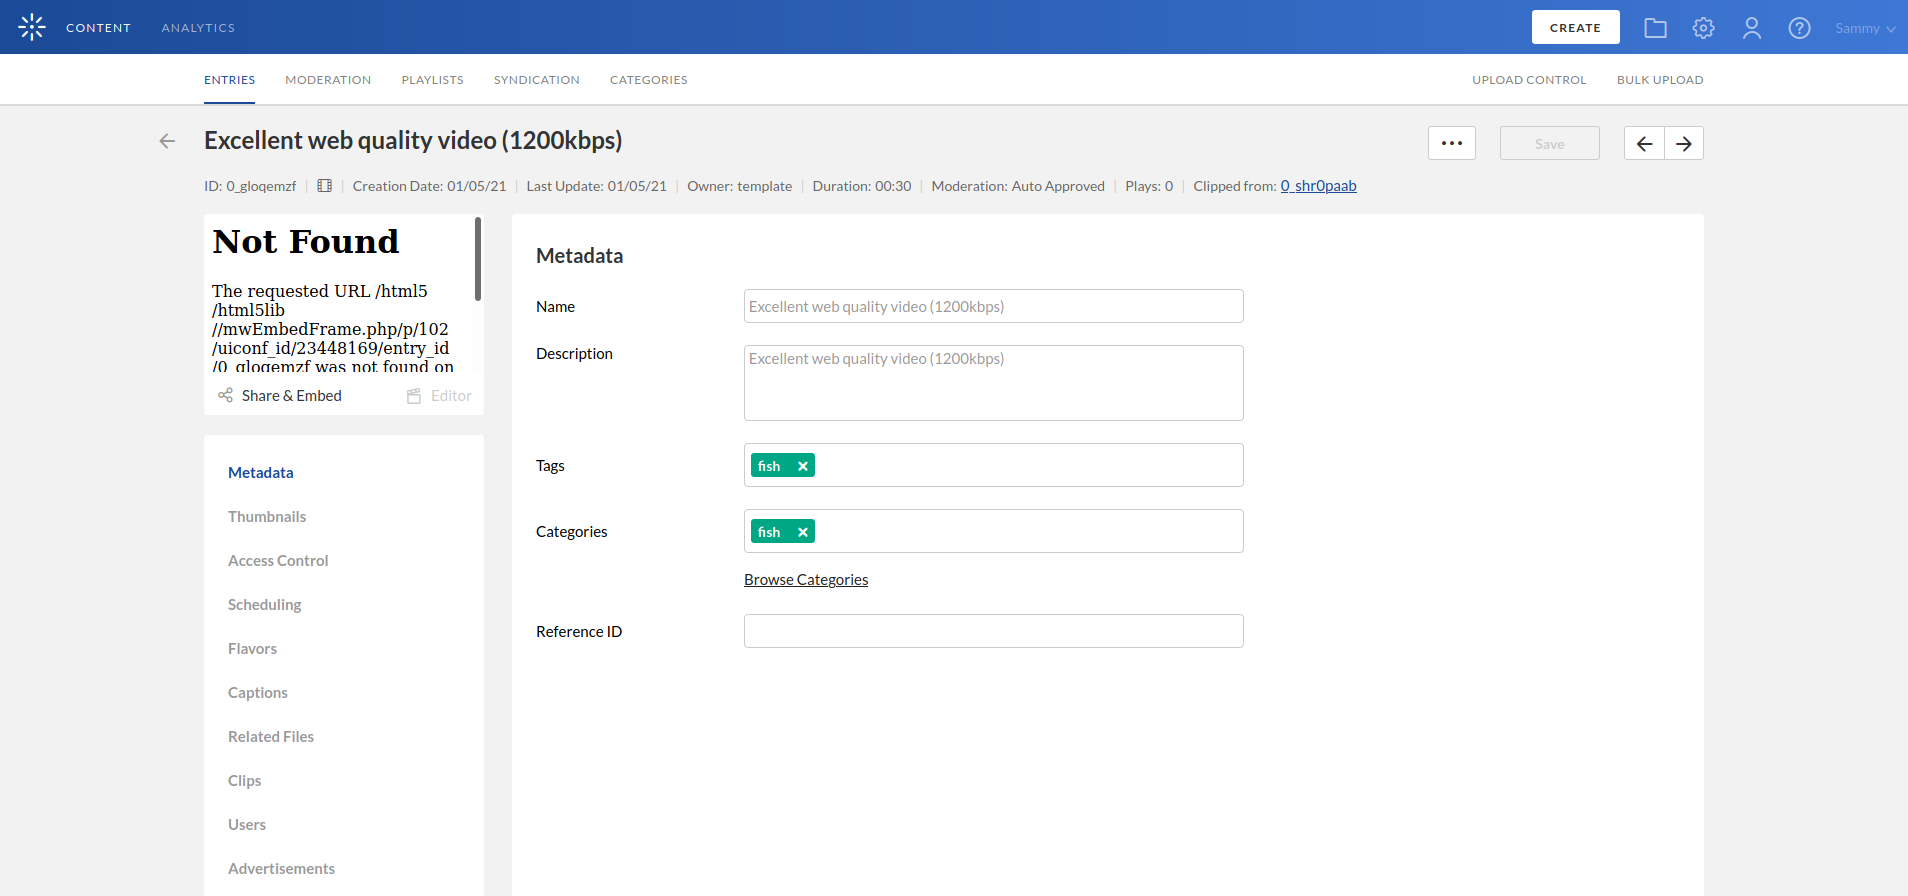
This also means that opening Kaltura attachments from openEQUELLA using the HTML 5 Player doesn't work.
I believe this is an issue with the Kaltura repo that the Dockerfile pulls down, but as of writing this wiki I am unsure exactly why this happens. This is caused by a configuration file within the installation, local.ini, which is overriding the HTML 5 Version to be blank.
To fix this, I ran this command to open the terminal from within the Docker image.
docker exec -it kaltura bashFrom there, I found the file and opened it in a text editor:
vi opt/kaltura/app/configurations/local.iniWe are looking for a line that says:
html5_version = 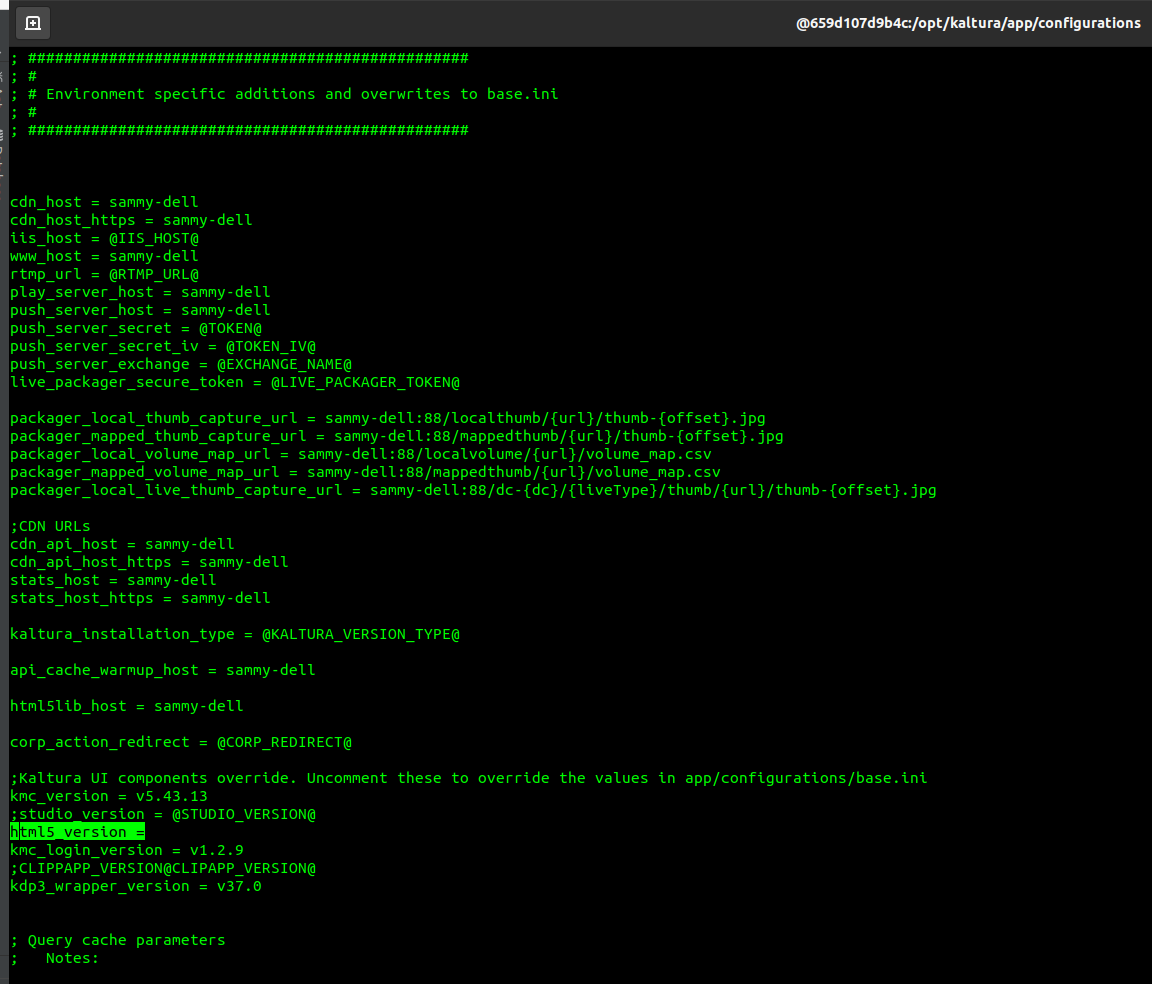
Either remove this line or comment it out by starting it with a semicolon. This is overriding the correct version within app/configurations/base.ini. Once saved, exit out of the Docker image terminal.
Restart the server by simply restarting the Kaltura Docker image.
docker restart kalturaThe HTML5 player should now work, from both openEQUELLA and Kaltura.
If you are stuck with your installation and you are unsure what is wrong with it, it might be worth running the Kaltura sanity check test suite. This covers quite a lot of bases and could potentially point you to problems in your configuration.
docker exec -it kaltura /opt/kaltura/bin/kaltura-sanity.sh