SourceKitten
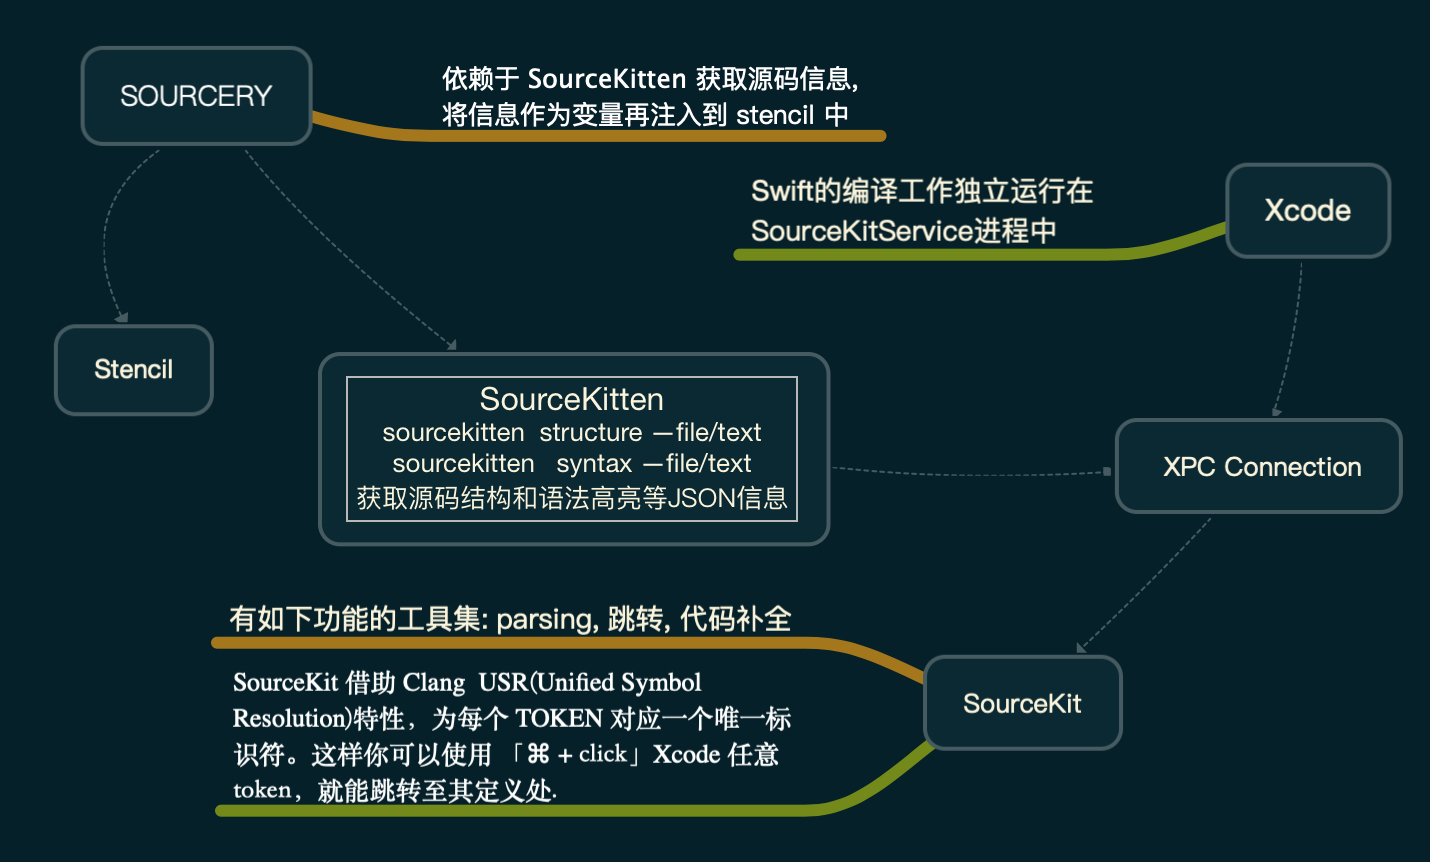
SourceKitten links and communicates with sourcekitd.framework to parse the Swift AST, extract comment docs for Swift or Objective-C projects, get syntax data for a Swift file and lots more
JSON array of syntax highlighting information:
[
  {
    "offset" : 0,
    "length" : 6,
    "type" : "source.lang.swift.syntaxtype.keyword"
  },
  {
    "offset" : 7,
    "length" : 10,
    "type" : "source.lang.swift.syntaxtype.identifier"
  },
  {
    "offset" : 18,
    "length" : 14,
    "type" : "source.lang.swift.syntaxtype.comment"
  }
]
Projects Built With SourceKitten:
- jazzy: docs for Swift & Objective-C.
- SwiftyMocky: As Swift doesn't support reflections well enough to allow building mocks in runtime, library depends on Sourcery.
- Sourcery: Meta-programming for Swift, stop writing boilerplate code.
Sourcery 这样的手法我们可以在 JSX 上实践一下.
- babel-preset-react 通过
/** @jsx h */的方式将 JSX 转换成h(nodeName, attributes, ...args)这样的结构, 相当于 SourceKit .
let vdom = (
  <div id="foo">
    <p>Happy Hacking!</p>
    <ul>{ foo(ITEMS) }</ul>
  </div>
);
var vdom = h(
'div',
{ id: 'foo' },
h(
'p',
null,
'Happy Hacking!'
),
h(
'ul',
null,
foo(ITEMS)
)
);- 将 h 函数转成 vdom , 再 JSON.stringify 转 json 字符串, 实现 'SourceKitten' .
function h(nodeName, attributes, ...args) {
  let children = args.length ? [].concat(...args) : null;
  return { nodeName, attributes, children };  //返回的是一个 vdom
}
let jsonString = JSON.stringify(vdom, null, ' ');{
"nodeName": "div",
"attributes": {
"id": "foo"
},
"children": [
{
"nodeName": "p",
"attributes": null,
"children": [
"Happy Hacking!"
]
},
{
"nodeName": "ul",
"attributes": null,
"children": [
{
"nodeName": "li",
"attributes": null,
"children": [
" ",
"Vue",
" "
]
},
... ...
]
}
]
}- 接下来将 vdom 转成 dom , 实现 'Sourcery'.
function render(vnode) {
  if (typeof vnode==='string') return document.createTextNode(vnode);
  let n = document.createElement(vnode.nodeName);
  Object.keys(vnode.attributes || {}).forEach( k => n.setAttribute(k, vnode.attributes[k]) );
  (vnode.children || []).forEach( c => n.appendChild(render(c)) );
  return n;
}
let dom = render(vdom);
document.body.appendChild(dom);最终呈现的效果:
第二部分, 我们尝试直接修改 AST 的语法结构来进一步扩展编程语言的表达能力:
- 把源码转换为 AST (esprima)
- 遍历并更新 AST (estraverse)
- 将 AST 重新生成源码 (escodegen)
let code = 'var a = 1';
const ast = esprima.parseScript(code);
estraverse.traverse(ast, {
    enter: function (node) {
        node.kind = "let";
    }
});
const transformCode = escodegen.generate(ast)
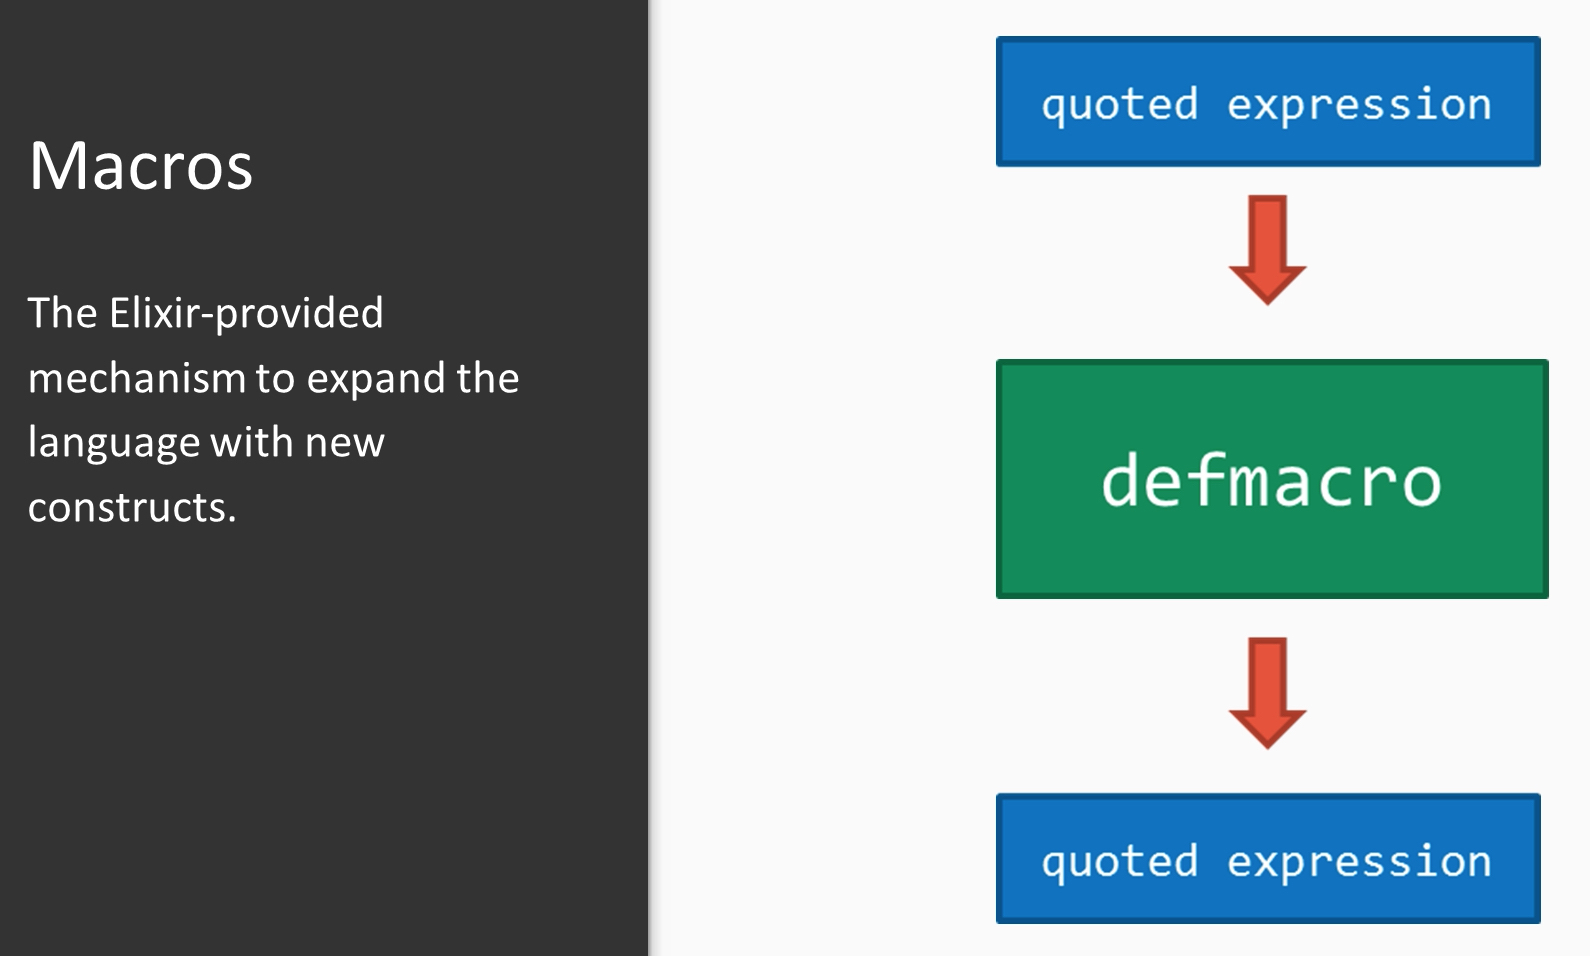
// result: let a = 1Elixir 通过 quote 和 unquote 构建起的宏系统也可以提供我们操作 AST 的环境, 并直接影响编译的结果. 对比上张图你可能会猜出 quote 的作用
quote:
iex(2)> expr = quote do: Sample.hello("tiyo", 500)
{{:., [], [{:__aliases__, [alias: false], [:Sample]}, :hello]}, [],
 ["tiyo", 500]}
unquote:
iex> number = 13
iex> Macro.to_string(quote do: 11 + number)
"11 + number"
iex> Macro.to_string(quote do: 11 + unquote(number))
"11 + 13"
下面我们想实现:
-
当 @async 为 true 时异步执行 hello() ;
-
@async 为 false 时同步执行, 如果 sleep 超过 @timeout 返回 @timeout_response
defmodule Sample do
  import AsyncTask
  @async true
  @timeout 1000
  @timeout_response "no response"      // 以上都是 header; sample(header, do: body)是宏; sample 之后是 do: body
  sample hello(name, timer \\ 10_000) do    // \\ 代表默认值
    :timer.sleep(timer)      // 延迟返回
    "hello, #{name}"         // 这里代表返回值
  end
end
defmodule AsyncTask do
defmacro sample(header, do: body) do
quote do
def unquote(header) do
case @async do
true -> spawn(fn -> unquote(body) end) // 模式匹配: 如果 @async true 另开一个 process
_ -> // 模式匹配: 如果 @async 不为 true
caller = self()
spawn(fn -> send(caller, unquote(body)) end) // 将消息传递给自己所在的 process
receive do
message -> message // 收到消息并返回
after
@timeout -> @timeout_response // 超时返回 @timeout_response 的值
end
end
end
end
end
end第三部分: [解析 如何构建一个自制的 Webpack ]
自制 Webpack 最终生成的自调函数可以直接在浏览器中执行出结果.
(function(modules) {

  function require(id) {
    const [fn, mapping] = modules[id];
    function localRequire(name) {
      return require(mapping[name]);
    }
    const module = { exports : {} };
    fn(localRequire, module, module.exports);
    return module.exports;
  }
  require(0);

})({0: [
    function (require, module, exports) {
      // 下面是 babel-core 通过 transformFromAst 方法生成的可在浏览器上运行的代码
      "use strict";

      var _message = require("./message.js");
      var _message2 = _interopRequireDefault(_message);
      function _interopRequireDefault(obj) { return obj && obj.__esModule ? obj : { default: obj }; }
      console.log(_message2.default); },

    {"./message.js":1},

  ],1: [
    function (require, module, exports) {
      "use strict";

      Object.defineProperty(exports, "__esModule", {
        value: true
      });
      var _name = require("./name.js");
      exports.default = "hello " + _name.name + "!"; },

    {"./name.js":2},

  ], ... })
自调函数参数 modules
// mod 是由所有模块的依赖关系图遍历得到的.
// 而模块的依赖关系是借助 AST 的 ImportDeclaration 找到的.
modules += `${mod.id}: [
  // 执行函数中的 mod.code 是由 transformFromAst(ast, null,{presets: ['env'],}) 生成的.
  function (require, module, exports) { ${mod.code} },
  // mod.mapping 方便 mod 通过执行函数中 require 依赖的模块查找到它们的 id .
  ${JSON.stringify(mod.mapping)},
],`;
依据 babel-core 生成的代码 var _message = require("./message.js"); , require 需要在依赖模块的执行函数中获得该模块的
exports 并将其作为返回值传递回来. 这个实现和我在另一篇文章中提到的 Golang 的 netpoll 函数 类似.
// netpoll 函数
var gp guintptr
pd := *(**pollDesc)(unsafe.Pointer(&ev.data))
netpollready(&gp, pd, mode)
return gp.ptr()
// require 函数
const [fn, mapping] = modules[id];
function localRequire(name) {
return require(mapping[name]);
}
const module = { exports : {} };
fn(localRequire, module, module.exports);
return module.exports;


