![]()
This device is intended to track the time spans during which an E-nable device is worn by its owner.
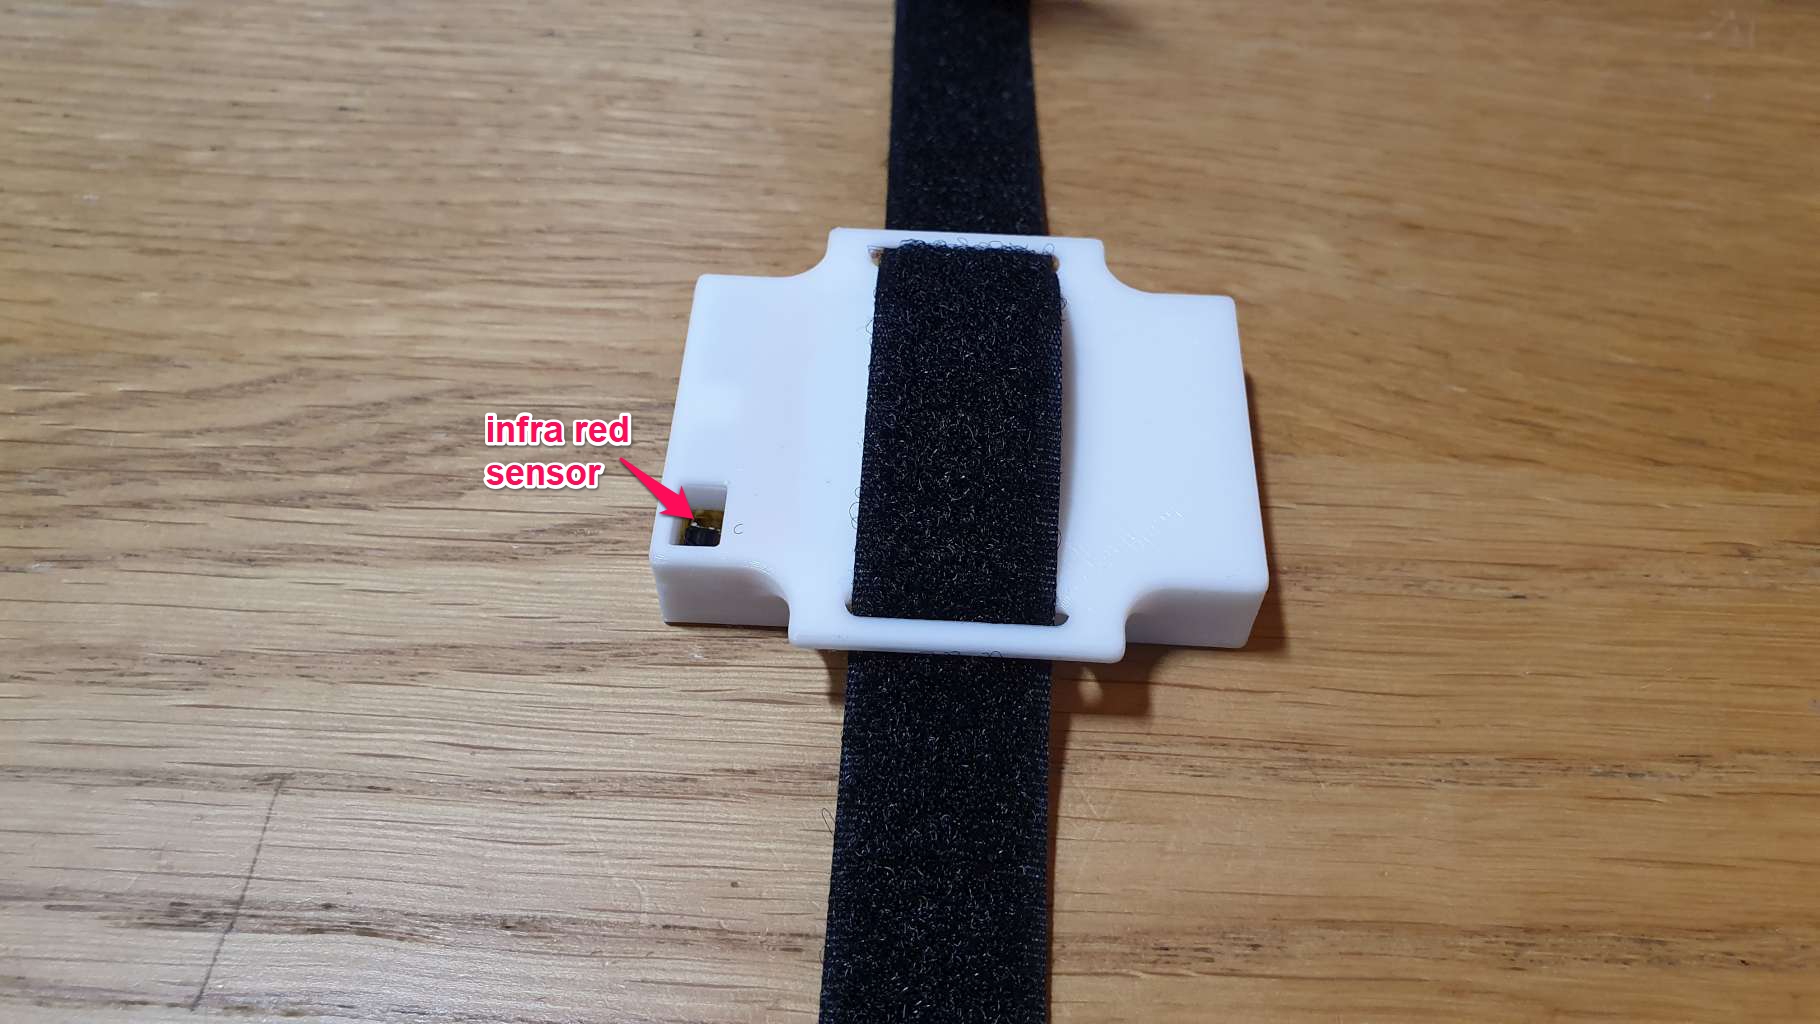
It uses a sensor to detect that the device is worn. Two types of sensors are supported: either a pair of metallic contacts that should be in contact with the skin when the device is worn, or an infrared sensor, that does not need any contact with the skin, which avoids the risk of allergies.
The device has two modes: "recording" and "charging".
In "recording mode" which is as long as the battery lasts, and not plugged into an usb charger, the Esp8266 wakes up at a period that can be set and saved in permanent memory (default is every 5 seconds), checks the presence sensor, and compares its state to the previous time it was checked.
If there is a difference, and for the third time in a row, it records the date and time in a file, in the Esp flash memory, saves the new state, and goes back to deep sleep until it automatically wakes up again.
The "third time in a row" condition insures to not record transient changes that may be due to handling the device while strapping it on, or whatever.
If there is no difference, it just goes back to deep sleep without recording anything.
This allows to save battery life (from 1 to 3 weeks depending on model).
In "charging mode", which is when an usb charger is plugged in, it keeps doing the check but every 2 seconds, won't record any changes, and won't sleep.
Instead it opens up a wifi access point, and the blue led blinks every 2 seconds to indicate the wifi is activated. When the device has not been set up (or as been reset to factory defaults), the default wifi network SSID is "HandMonitor", and password is the same.
IMPORTANT: The password should be modified while setting up the device.
By connecting your phone to this network, you can access the module pages at http://192.168.4.1.
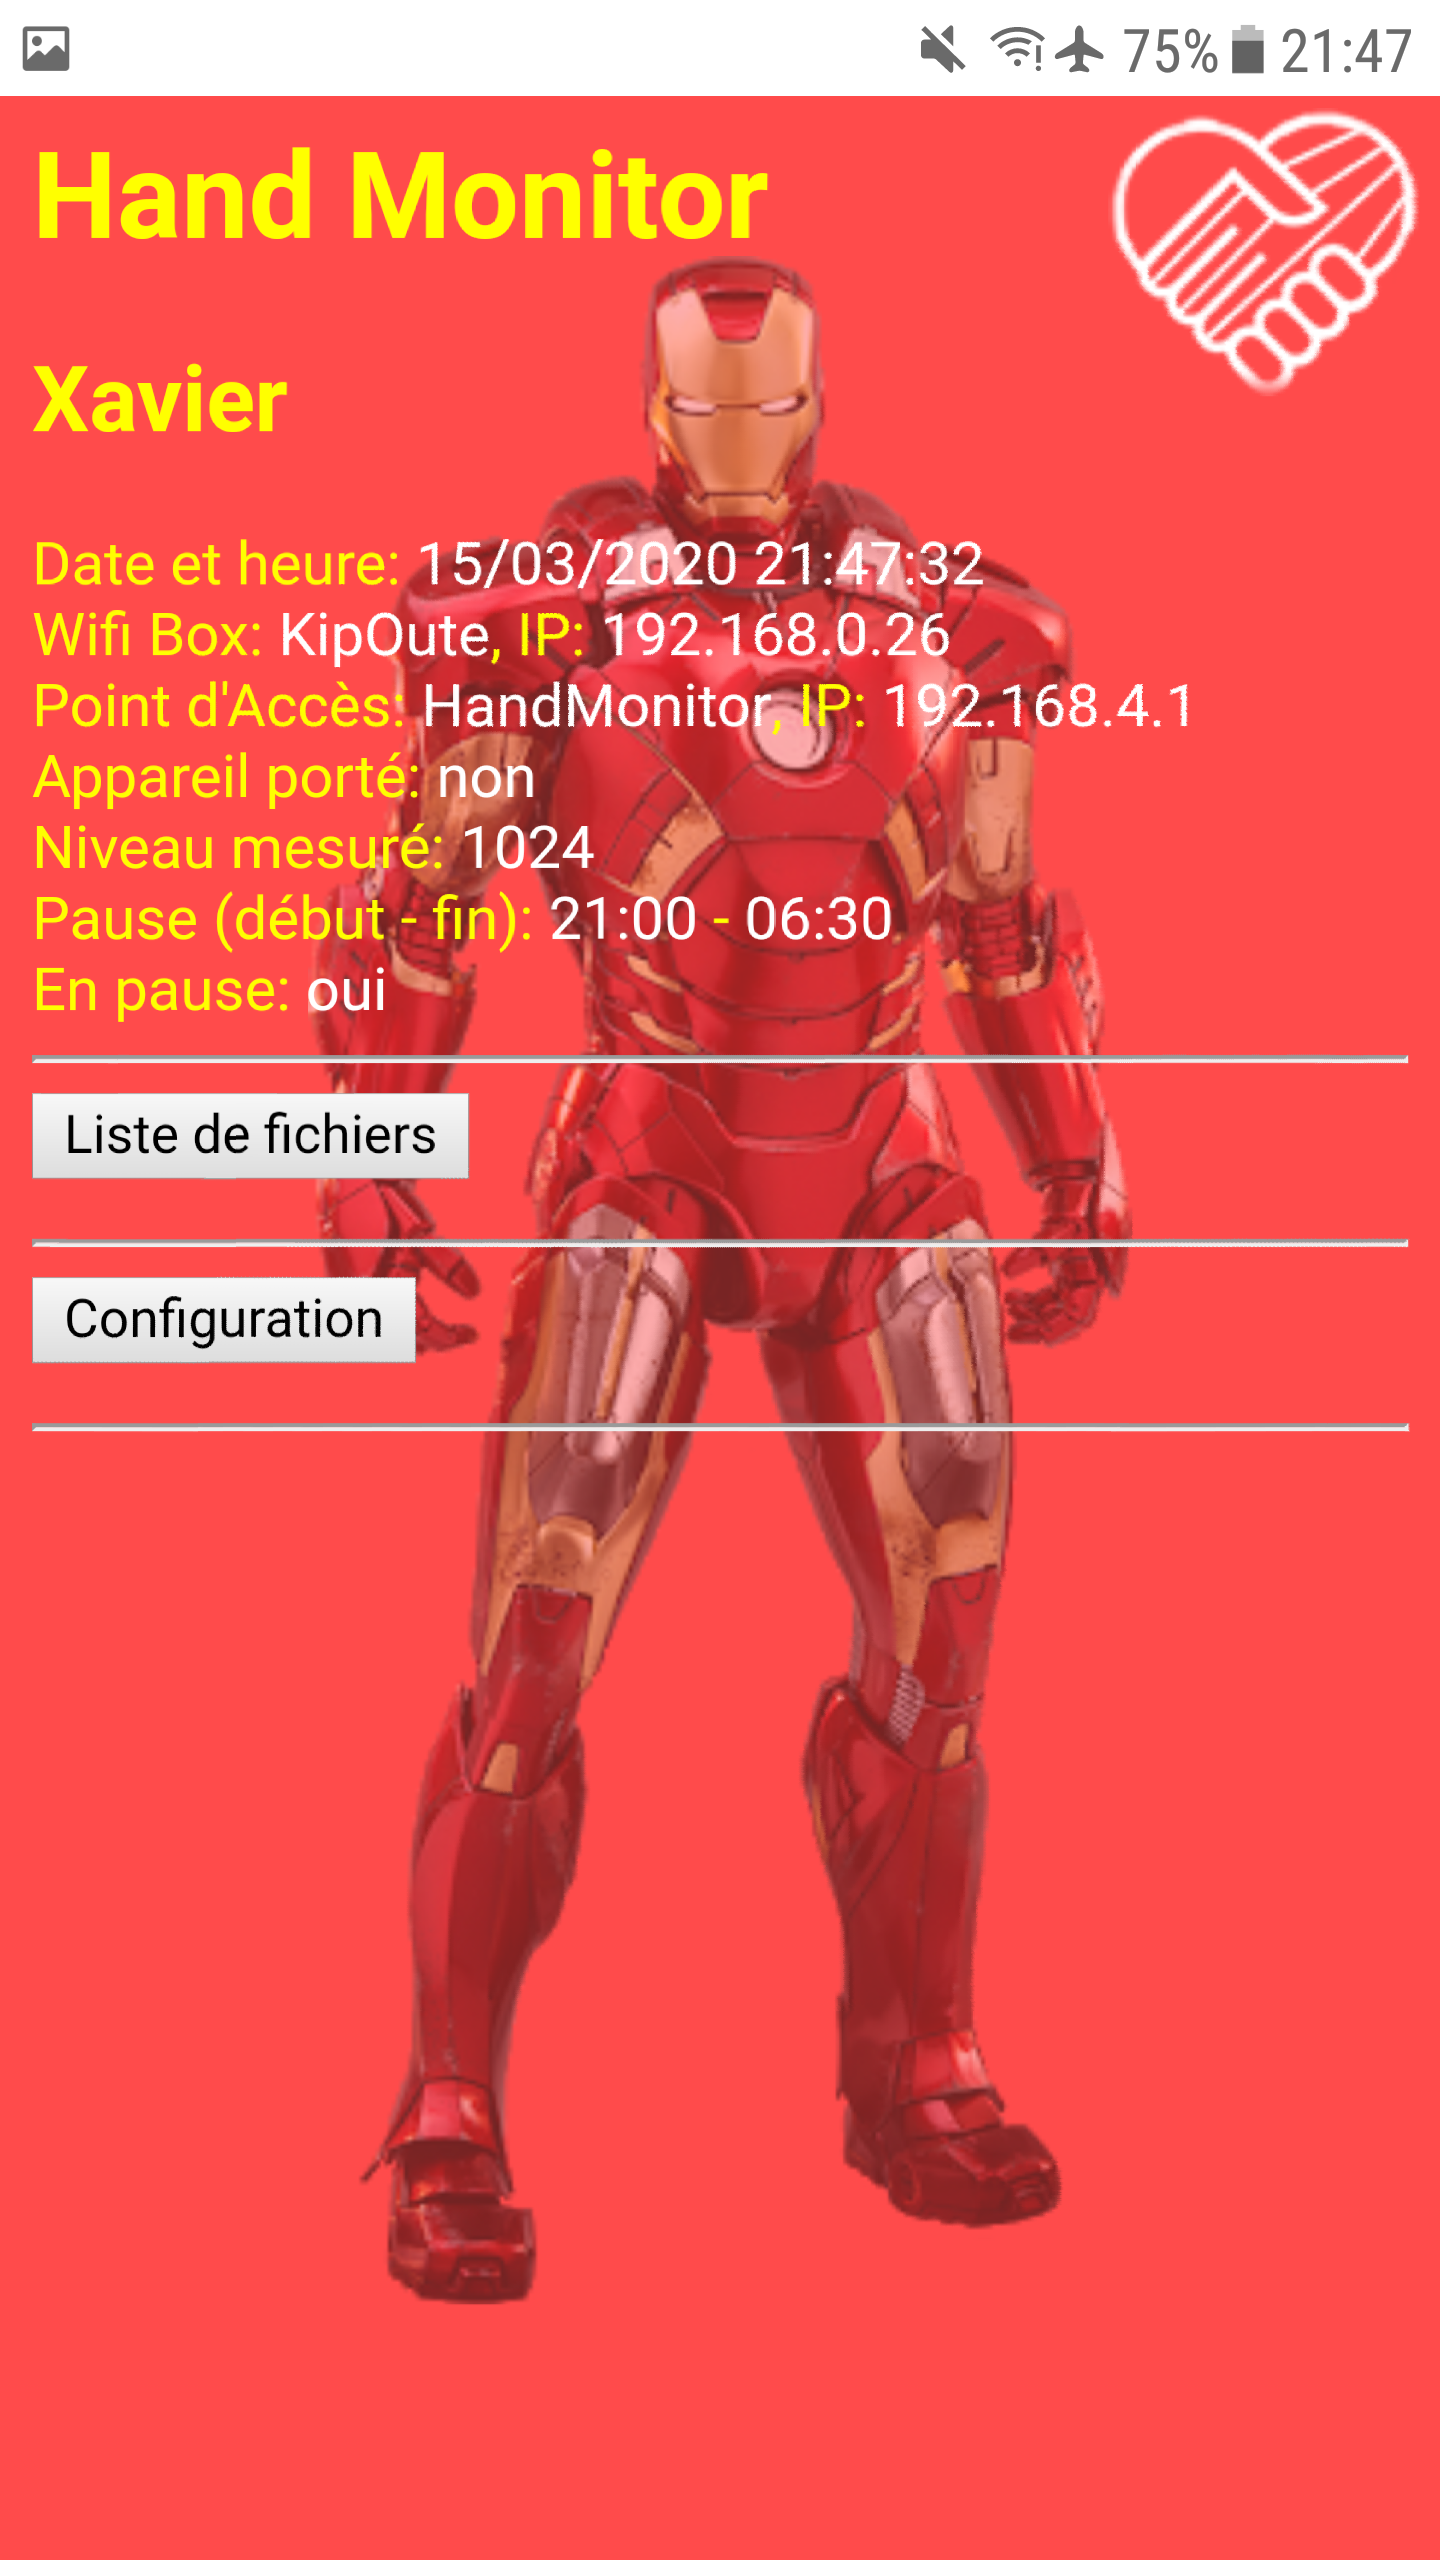
If some settings were already saved at least once, the home page will be displayed.
If the device has never been set up, the settings page will be displayed.
Here is what the setup settings looks like with a custom skin (more on that later):
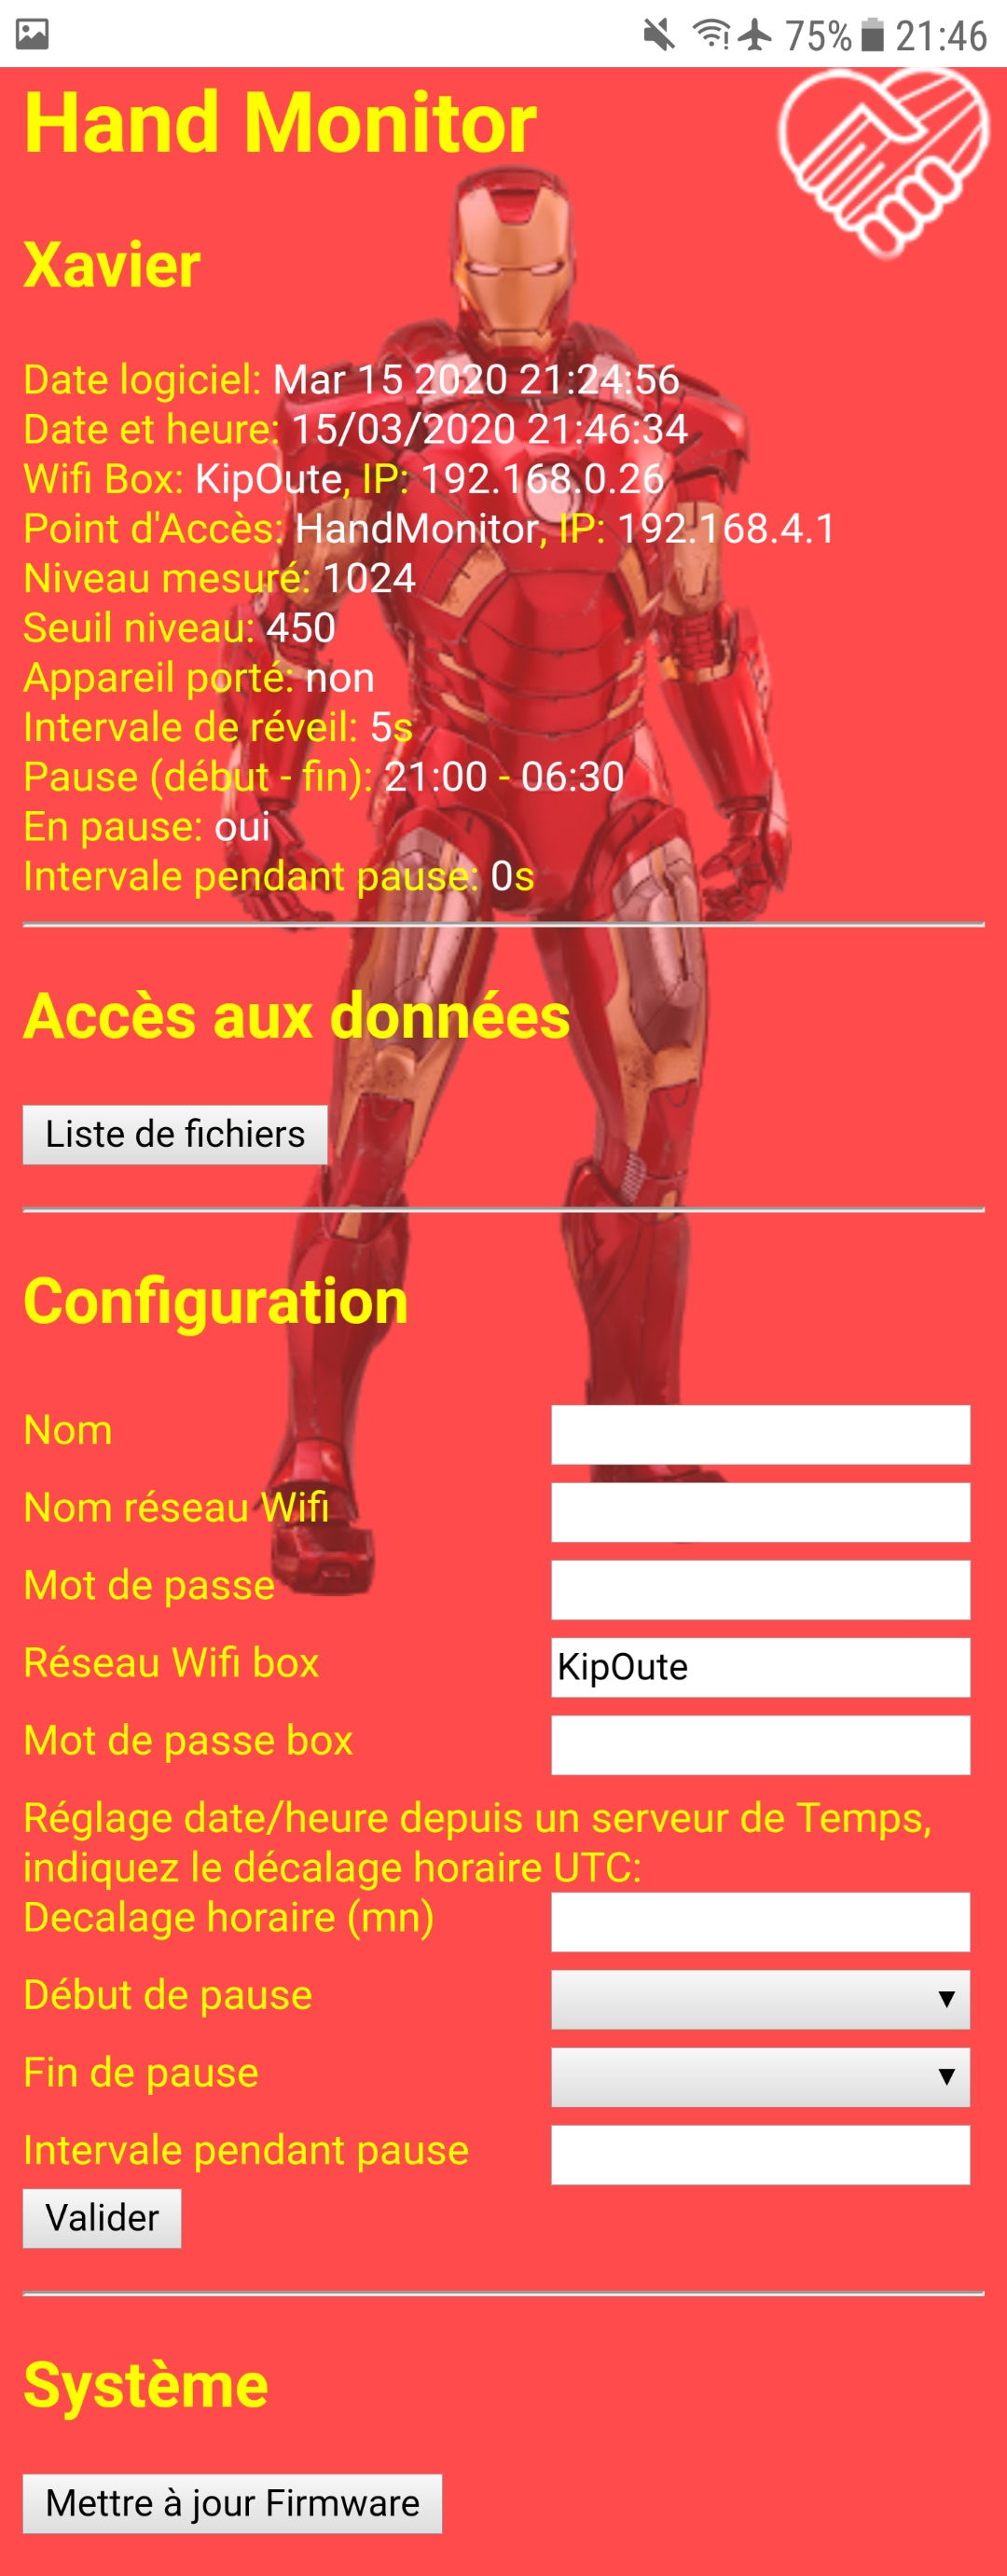
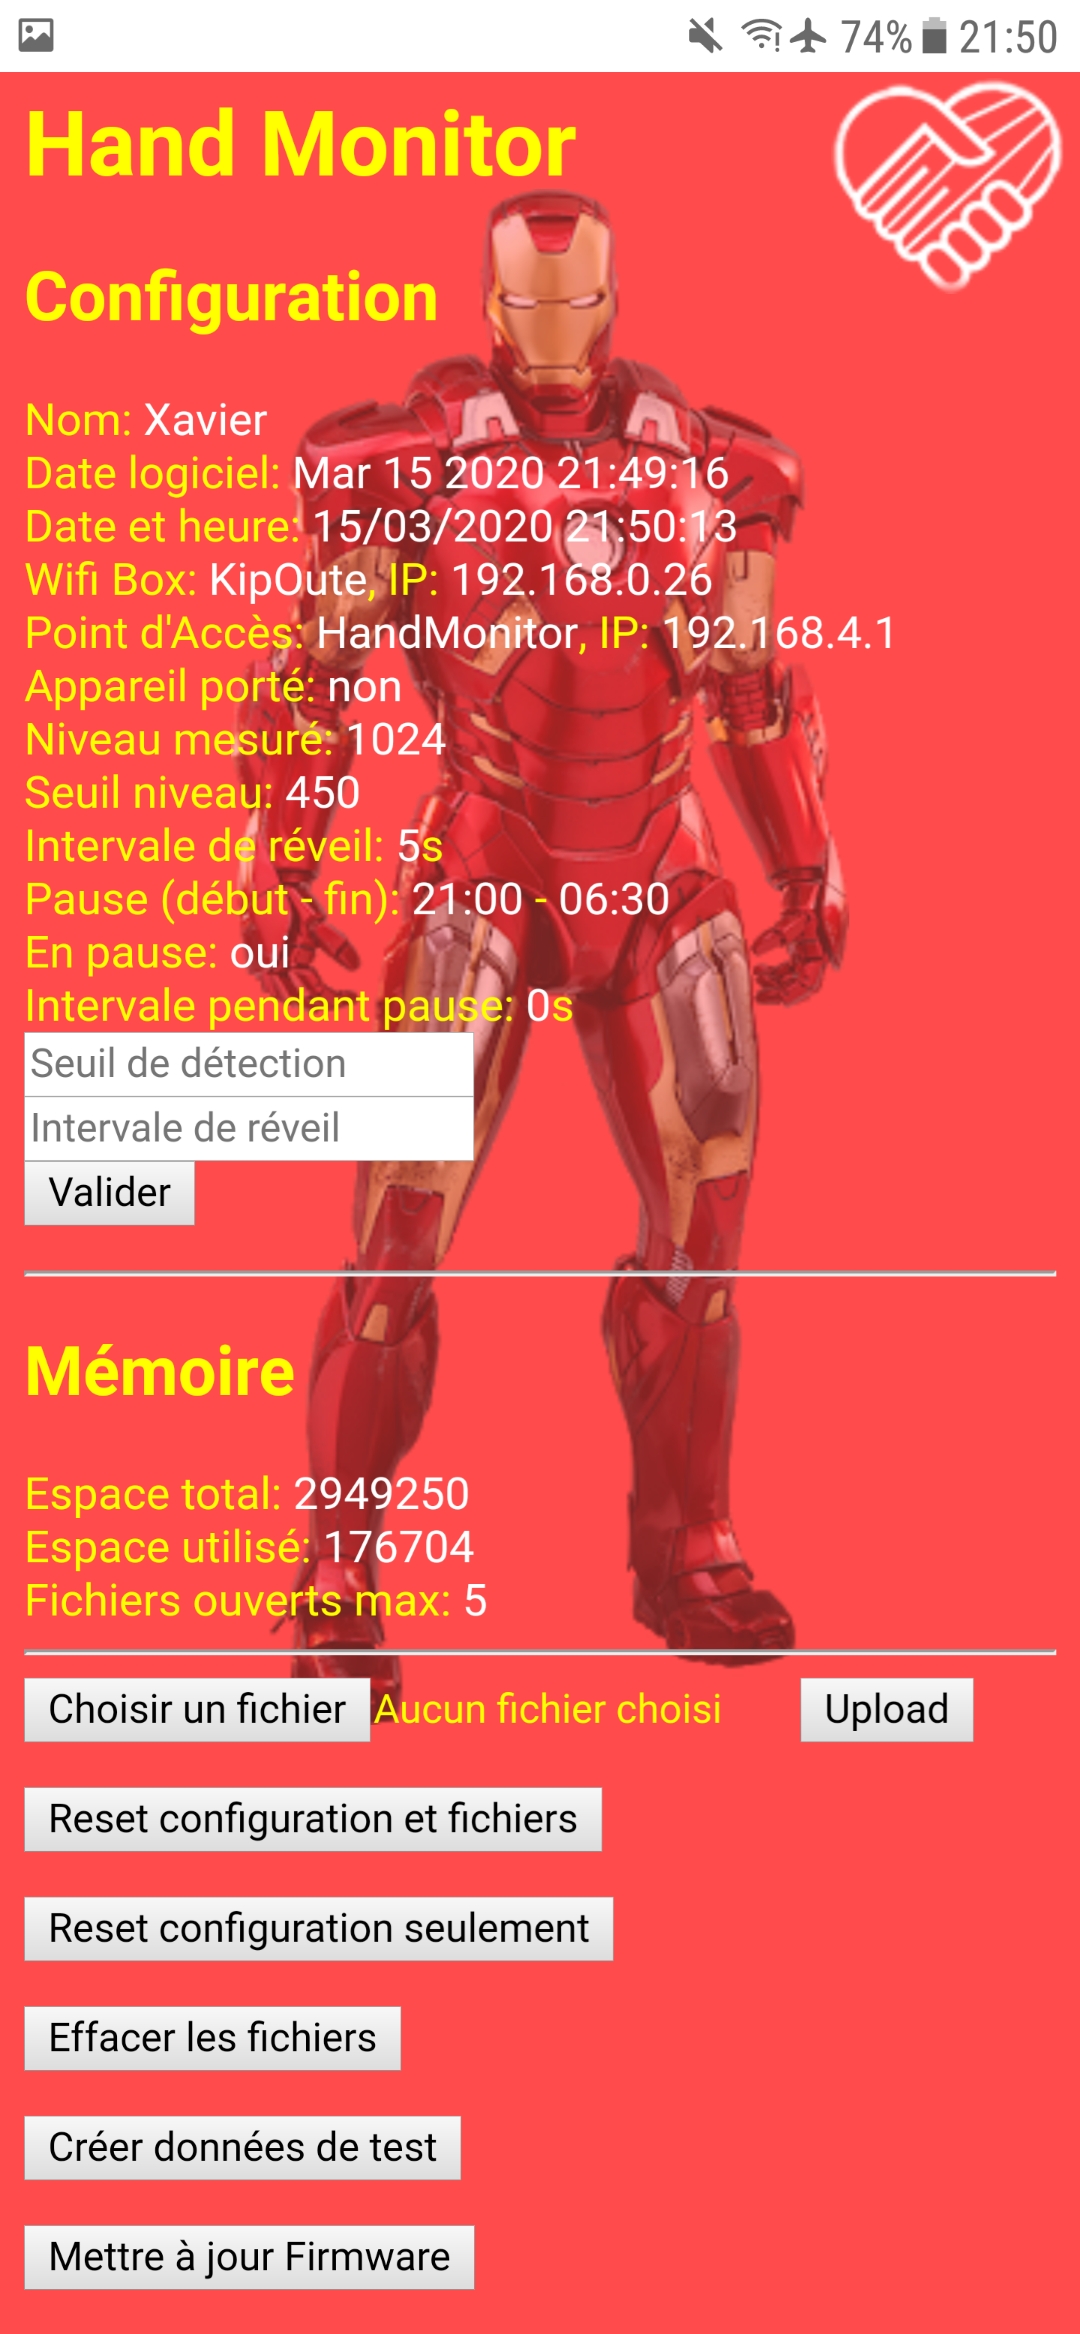
You should provide a name for the device, for instance its owner first name.
You can change the default ssid/pwd (please change at least the password) for the access point wifi network, and, optionally, provide your home wifi ssid and pwd. These are stored locally in the device memory, and never sent anywhere.
Providing your home wifi connection information will allow to automatically setup the date and time in the device, and will allow you to download the data files listing each period the E-nable hand was worn to your computer, and upload file to customize the apparence.
If you don't provide your home wifi connection information you will be able to setup the time manually (work in progress), and download the data files to your computer or phone.
The setup page also displays an "Update firmware" button. When you click on it the device will toggle to OTA (Over the Air) mode, and wait for a new firmware to be uploaded. The blue led will blink twice per second in this mode.
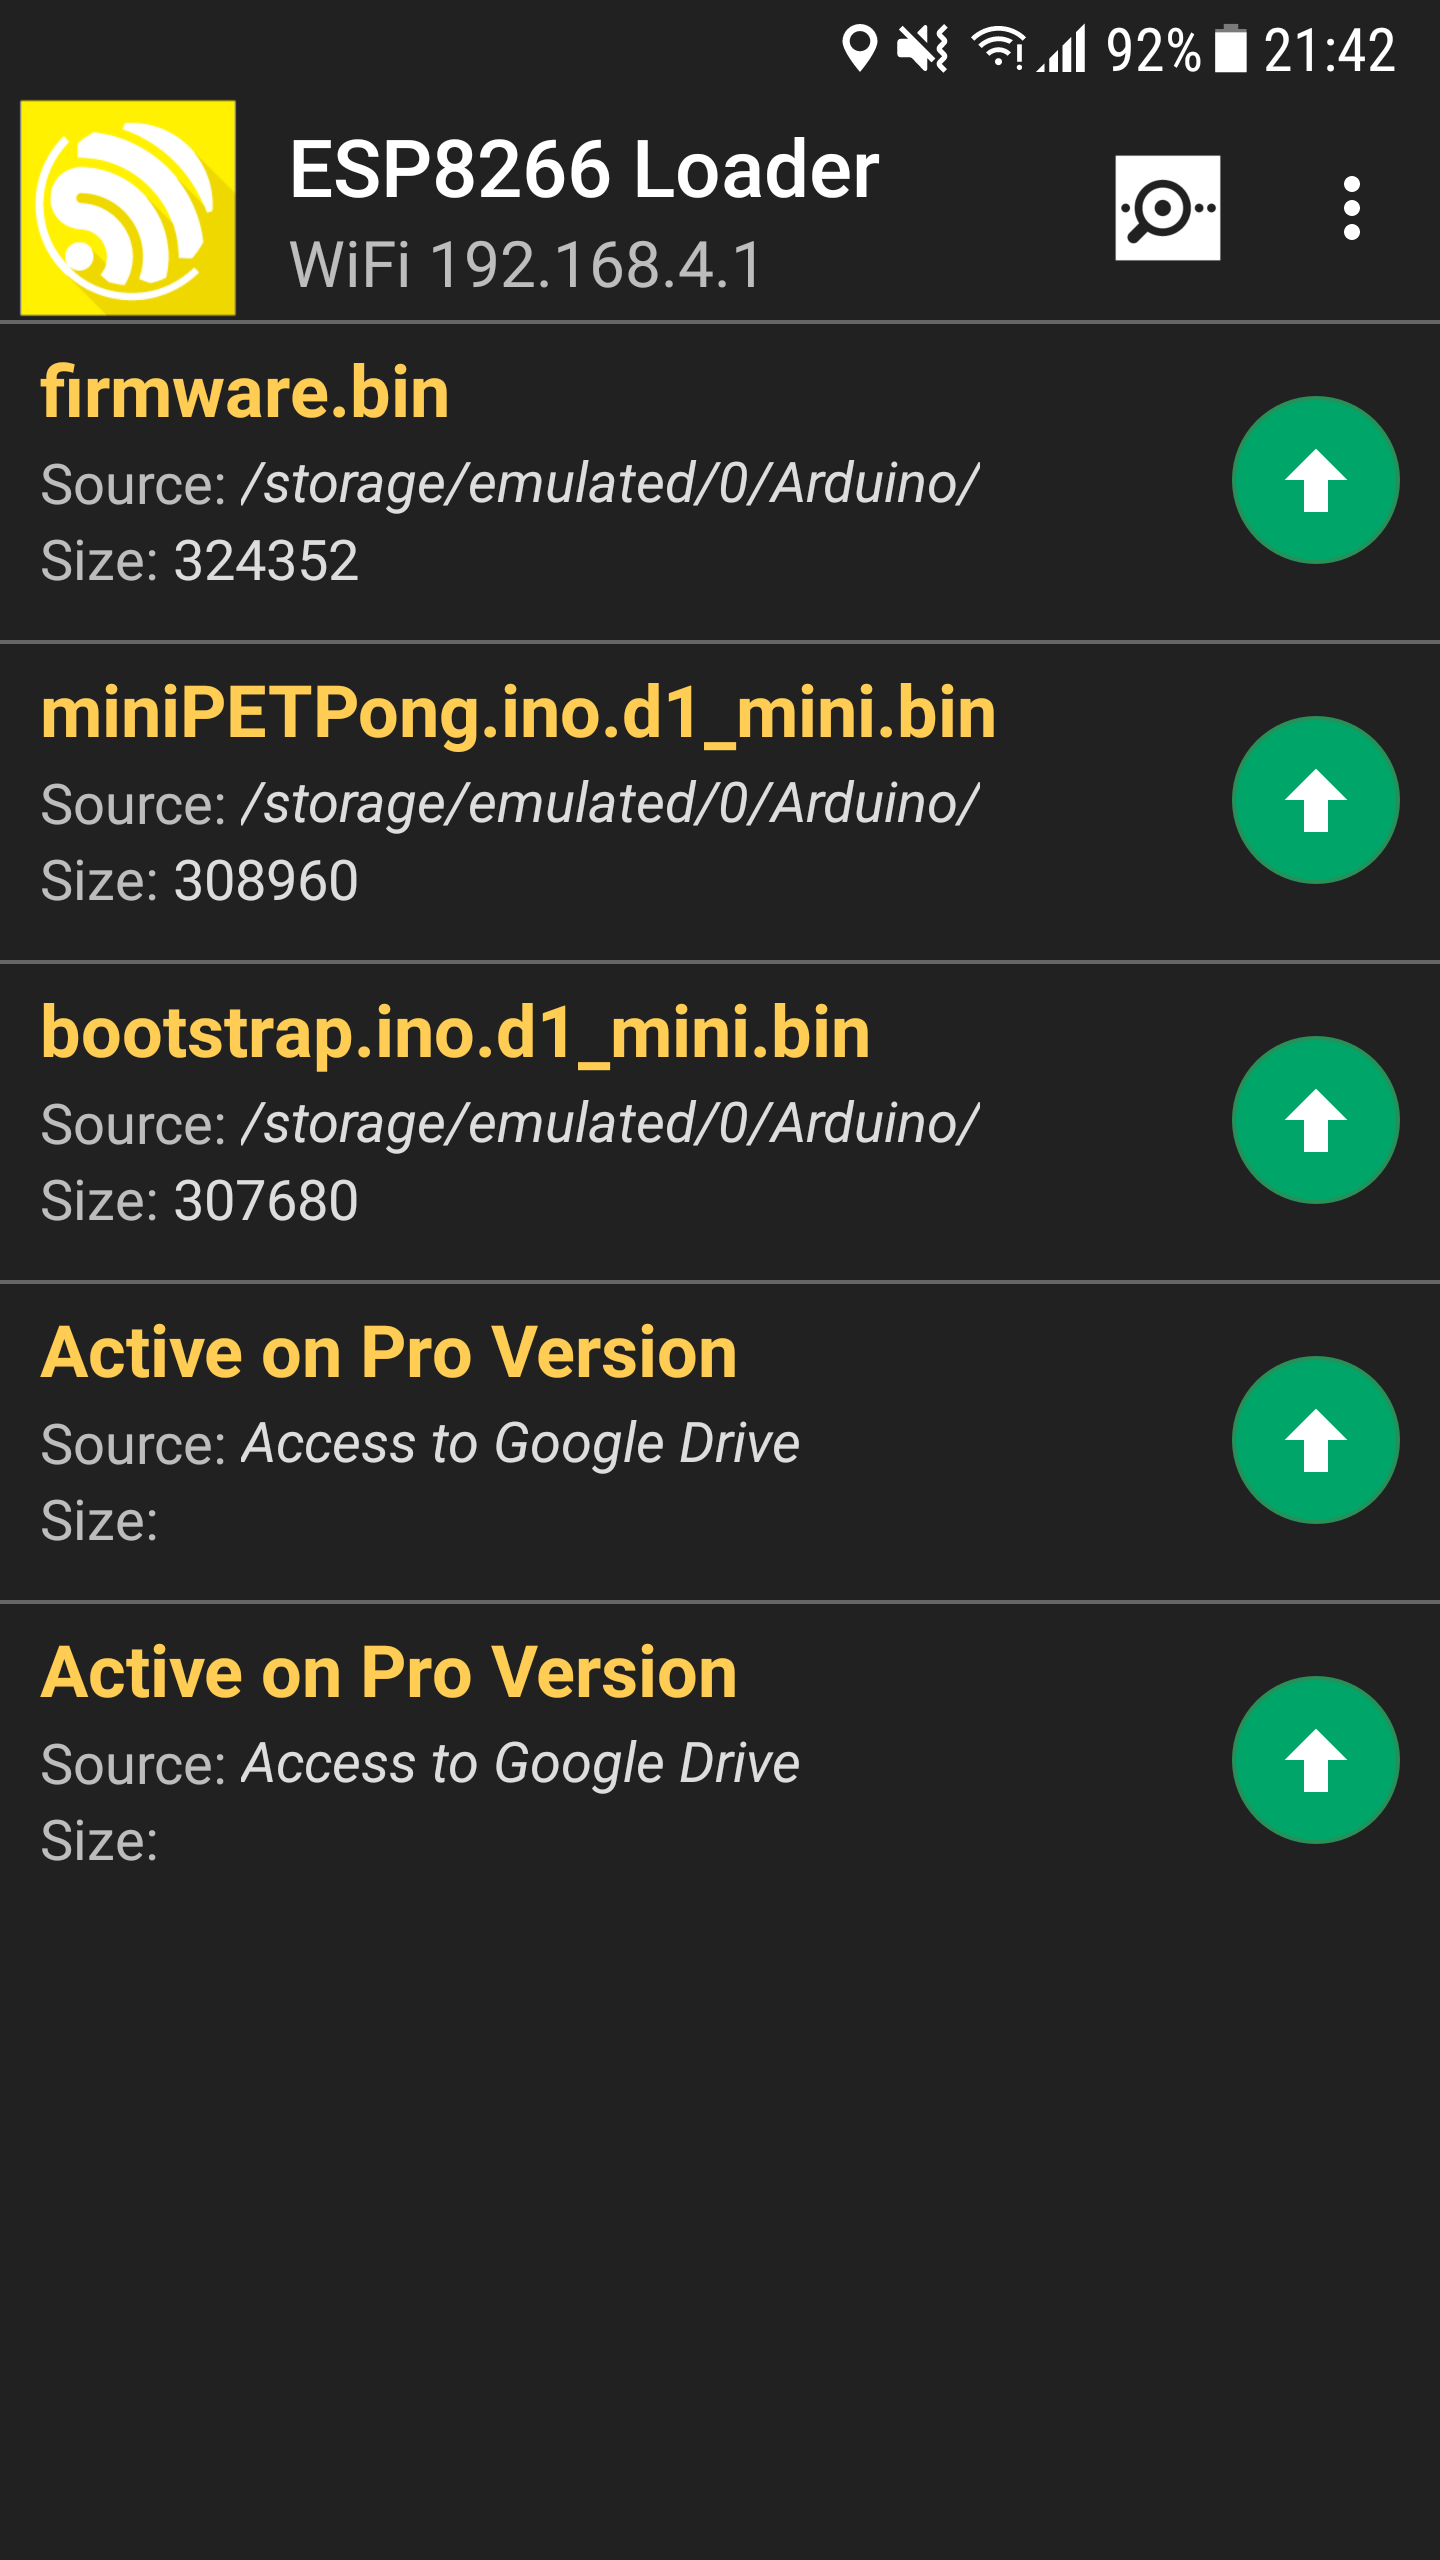
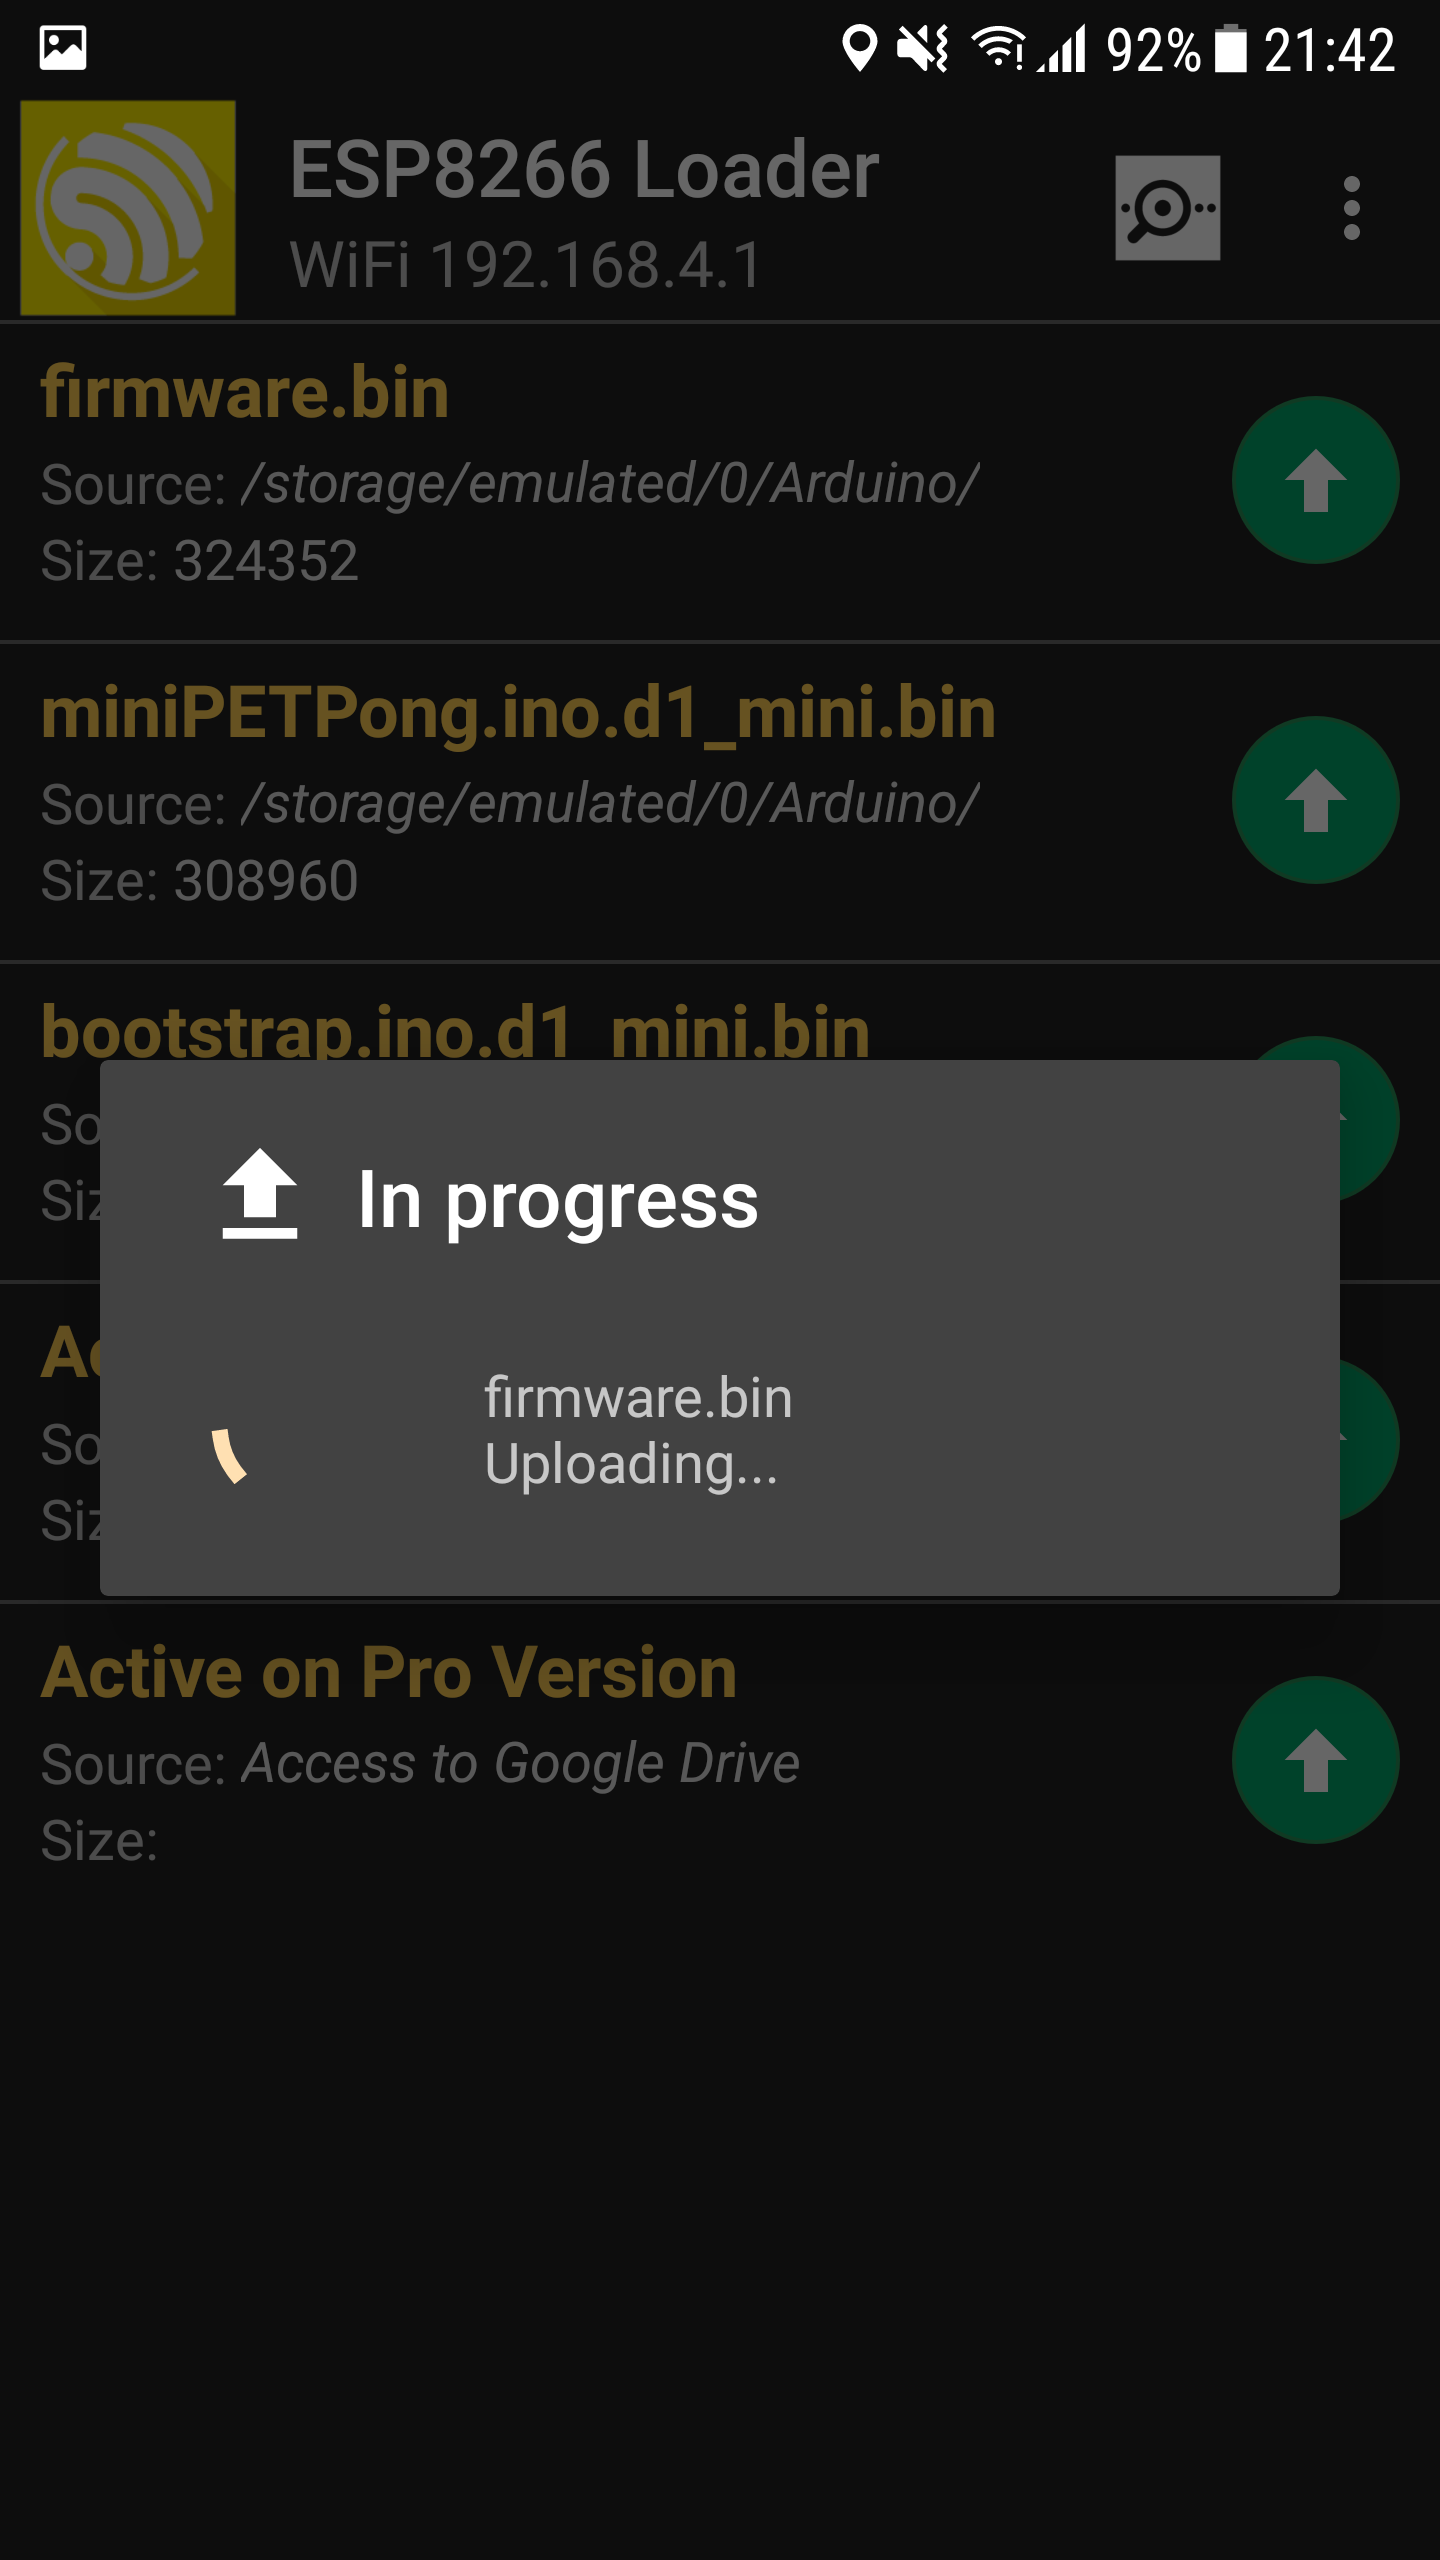
You can then use an android app like "ESP8266 Loader" to upload the new binary from your phone connected to its wifi network, using the device default IP 192.168.4.1
If you provided your home wifi connection information, the update can also be made using the device IP on this network.
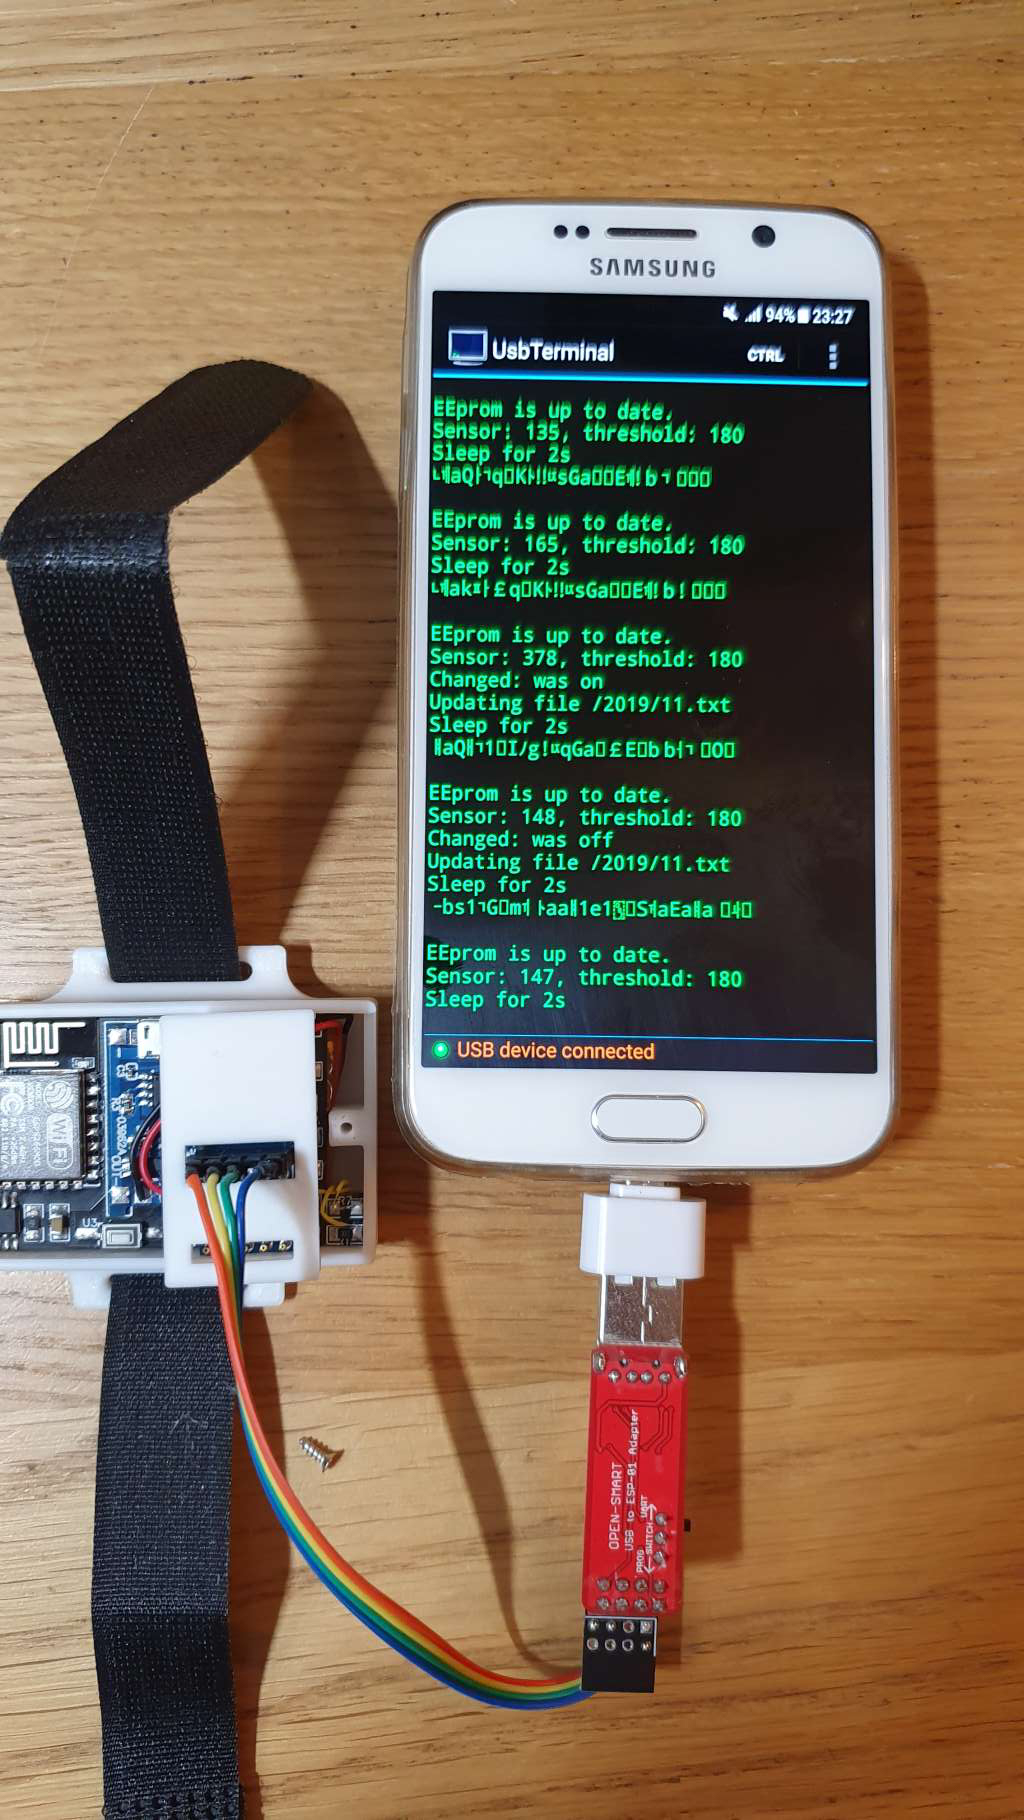
In case a bug breaks the OTA feature in a firmware build, it can still be updated by opening the lid and using the 5 pad solderless connector with a special device to upload a fix through USB connection.
Whatever the upgrade method chosen (OTA or USB), the blue led on the esp will flash frantically while the firmware is uploading.
After the upload is done (and verified) the esp will reboot, updated, and reopen the wifi networks depending on the settings provided.
The "File list" button will display a page listing all the files in the esp memory. One new file is created each month.
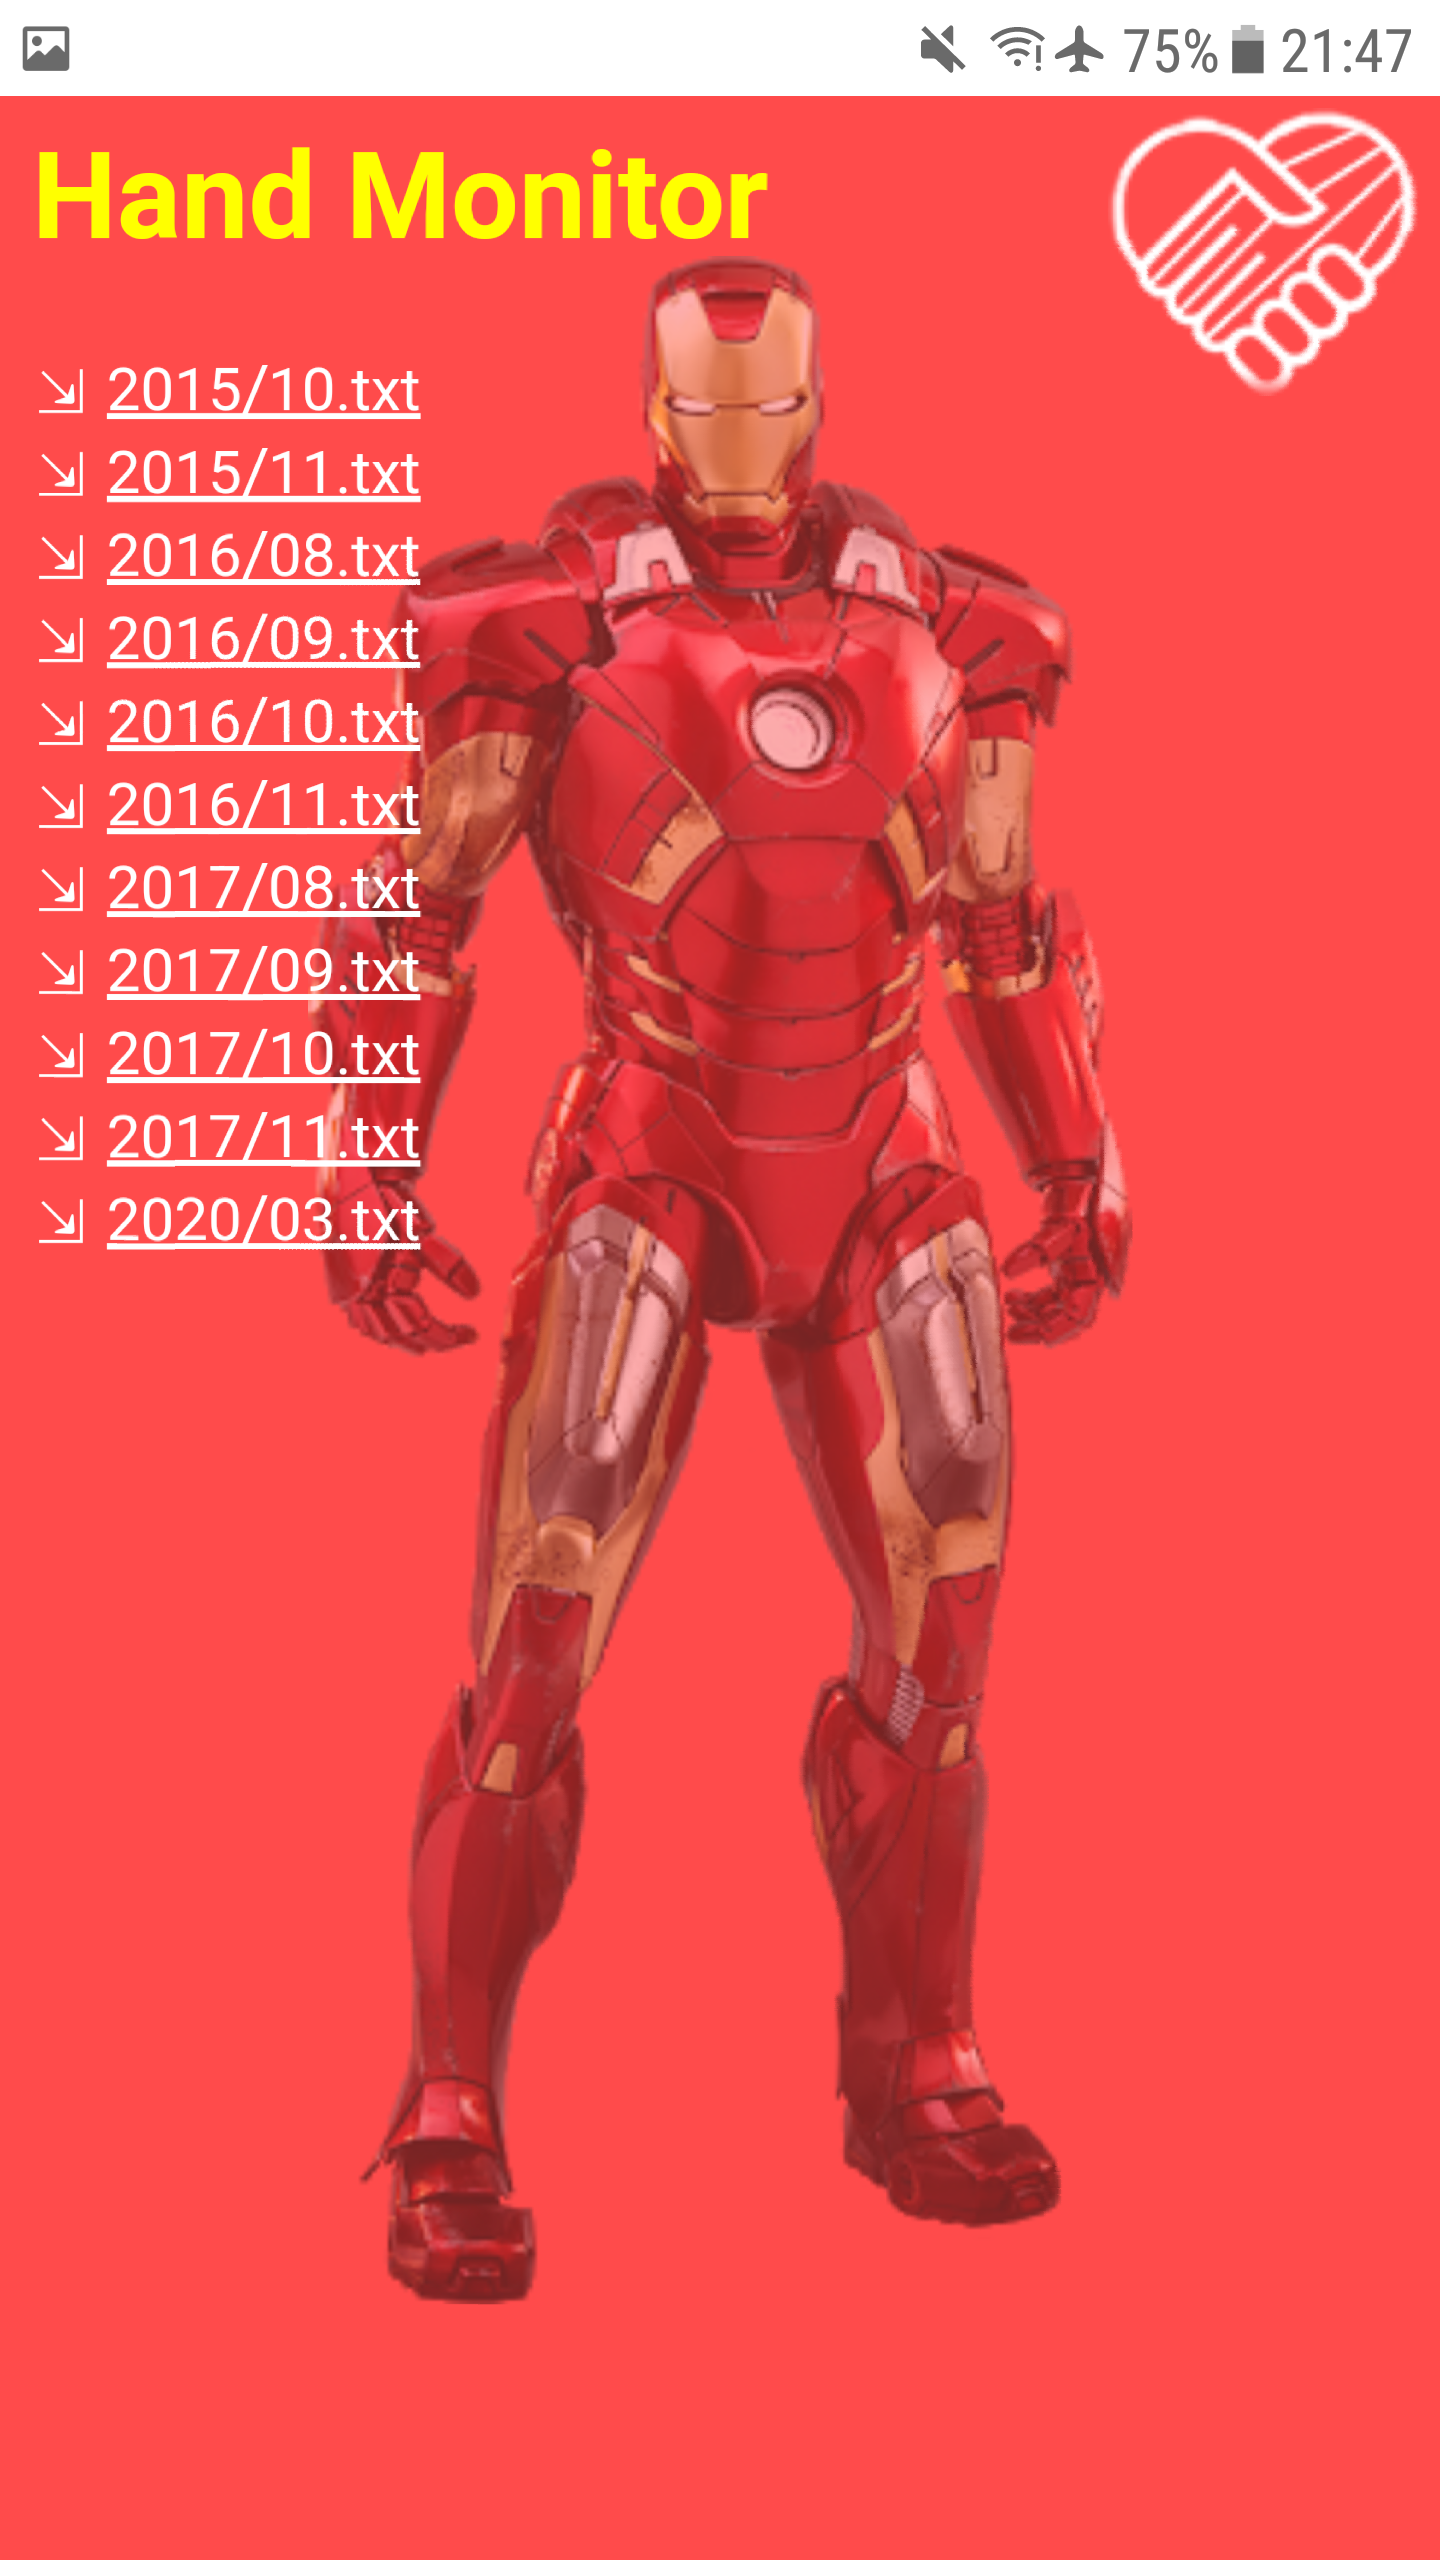
You can click on a file name to view its content, or on the arrow in front of it to download it.
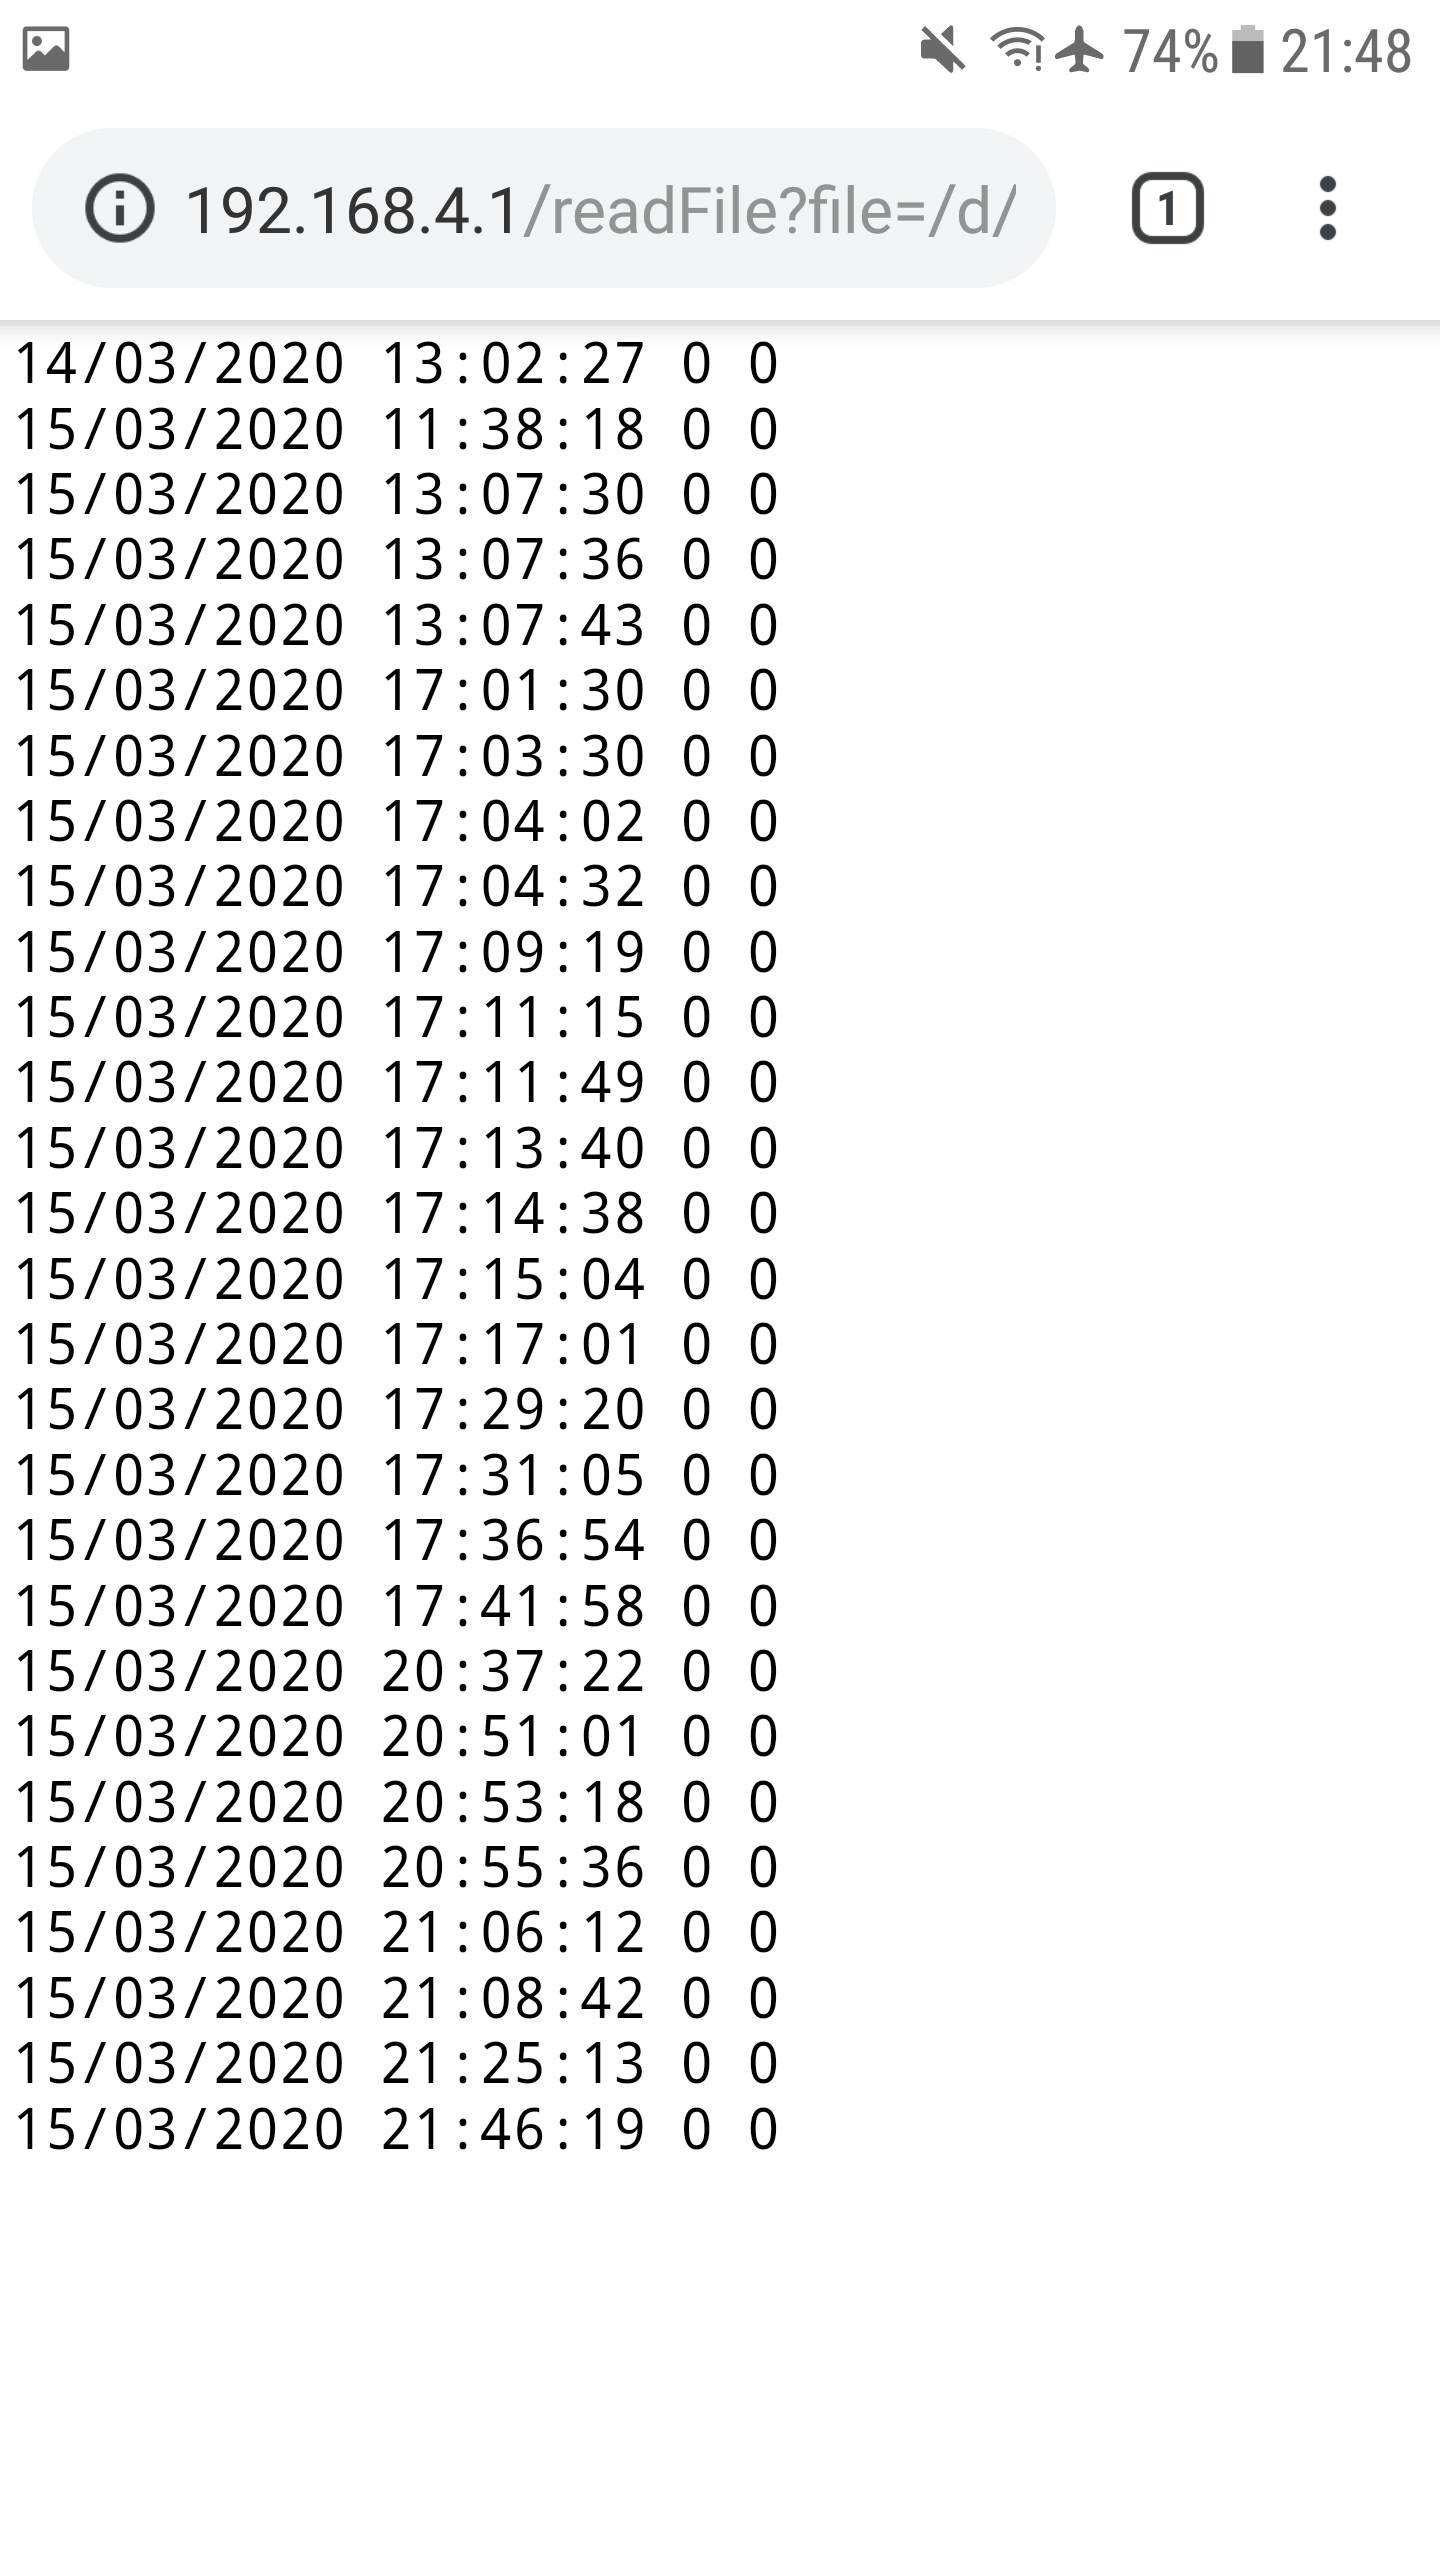
I had no issue recording 15695 lines, in a 223K file (at the time, only the day was saved instead of the full date).
Each entry is composed of the date, then the hour, minute, second, then the state: 0 means device not worn, 1 means device worn. The actual level of the sensor is then added to the line, to help troubleshoot, if necessary.
A graphical representation of this data can be obtained by dropping one such file on this webpage
Data is not uploaded anywhere, and this visualisation tool can be installed locally on any computer without needing a webserver

It's a page where some more configuration data as well as "dangerous" features are available: reset the full device (configuration and data files), erase all data files, create test data files...
On this page you can update the wake up period as well as the sensor level threshold that is used to decide if the device is being worn (by detecting skin proximity) or not.
There is also some information on the SPIFFS memory usage, and more will be added if needed.
The "upload file" feature allows you to change the look of the pages if you upload a "custom.css" file. You can also upload images referenced in the css file. Check out the data/w directory for an example featuring an ironman skin.
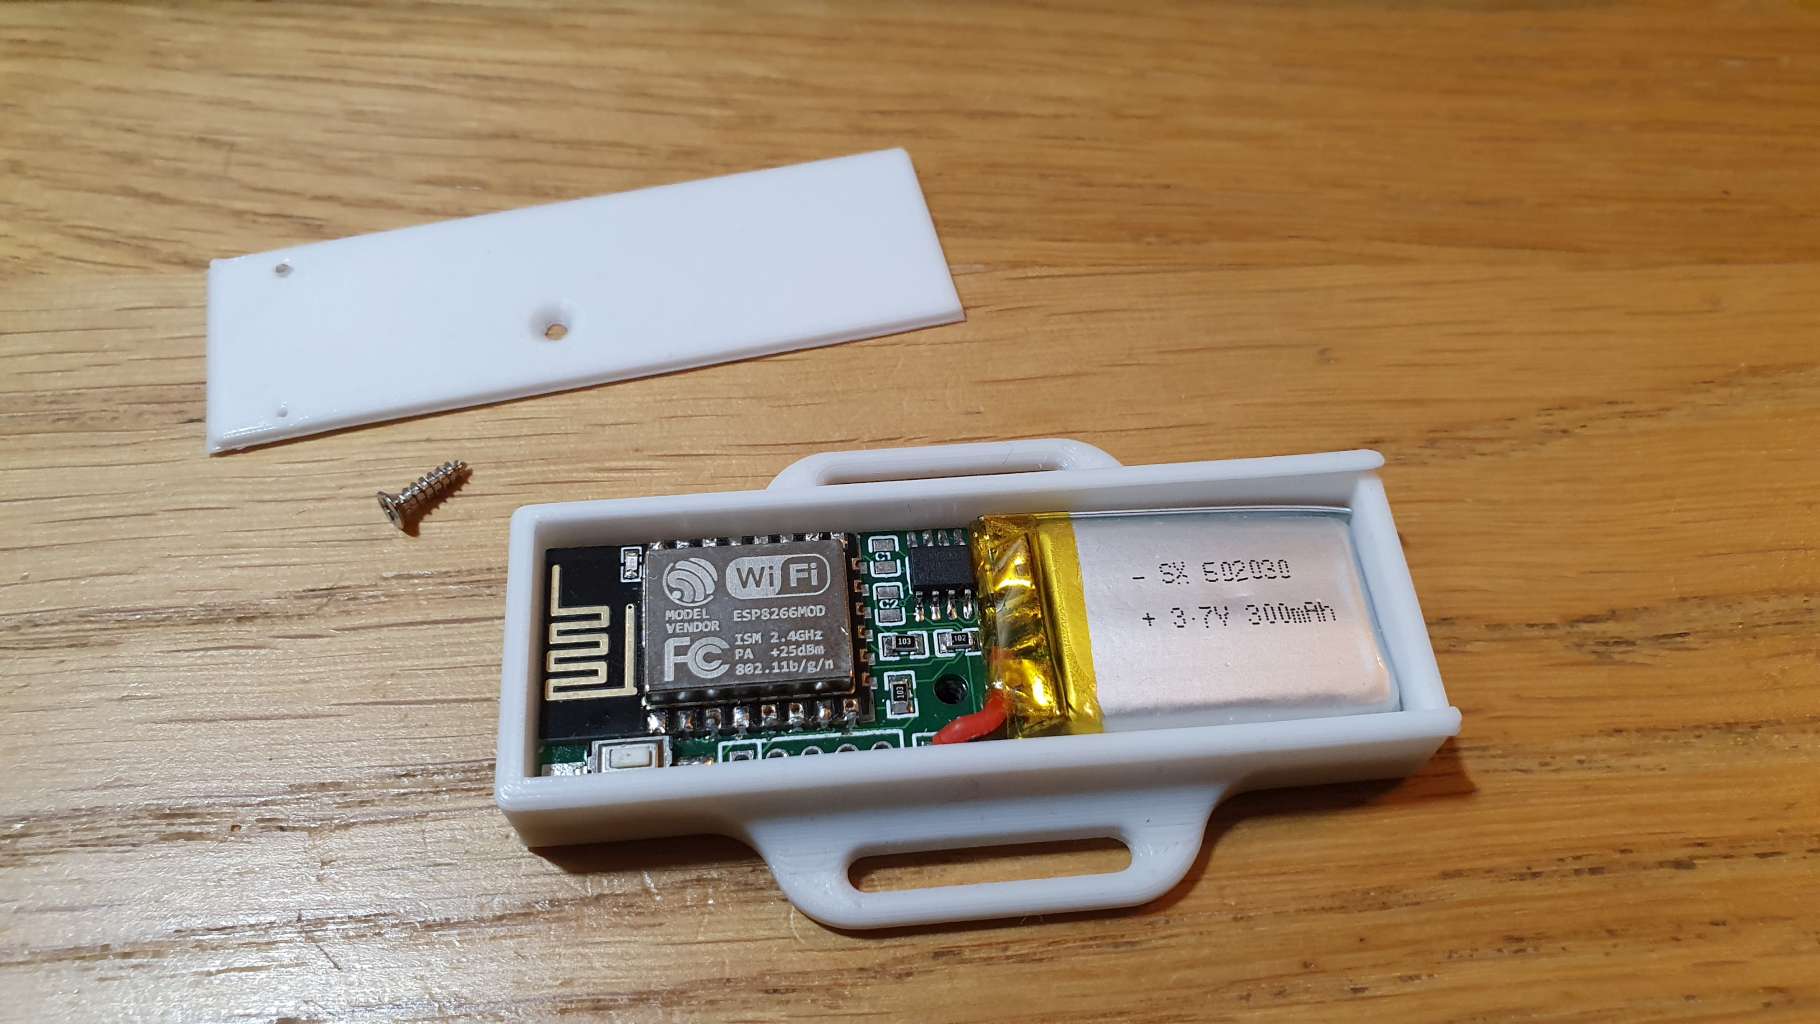
The prototype shown was built using a 1000mAh battery, which provides an autonomy of more than two weeks.
It is not using the definitive PCB, some wires will be removed, some layout improved to ease assembly.
Here are pictures of this device in its 3D printed case with a slide-in lid:
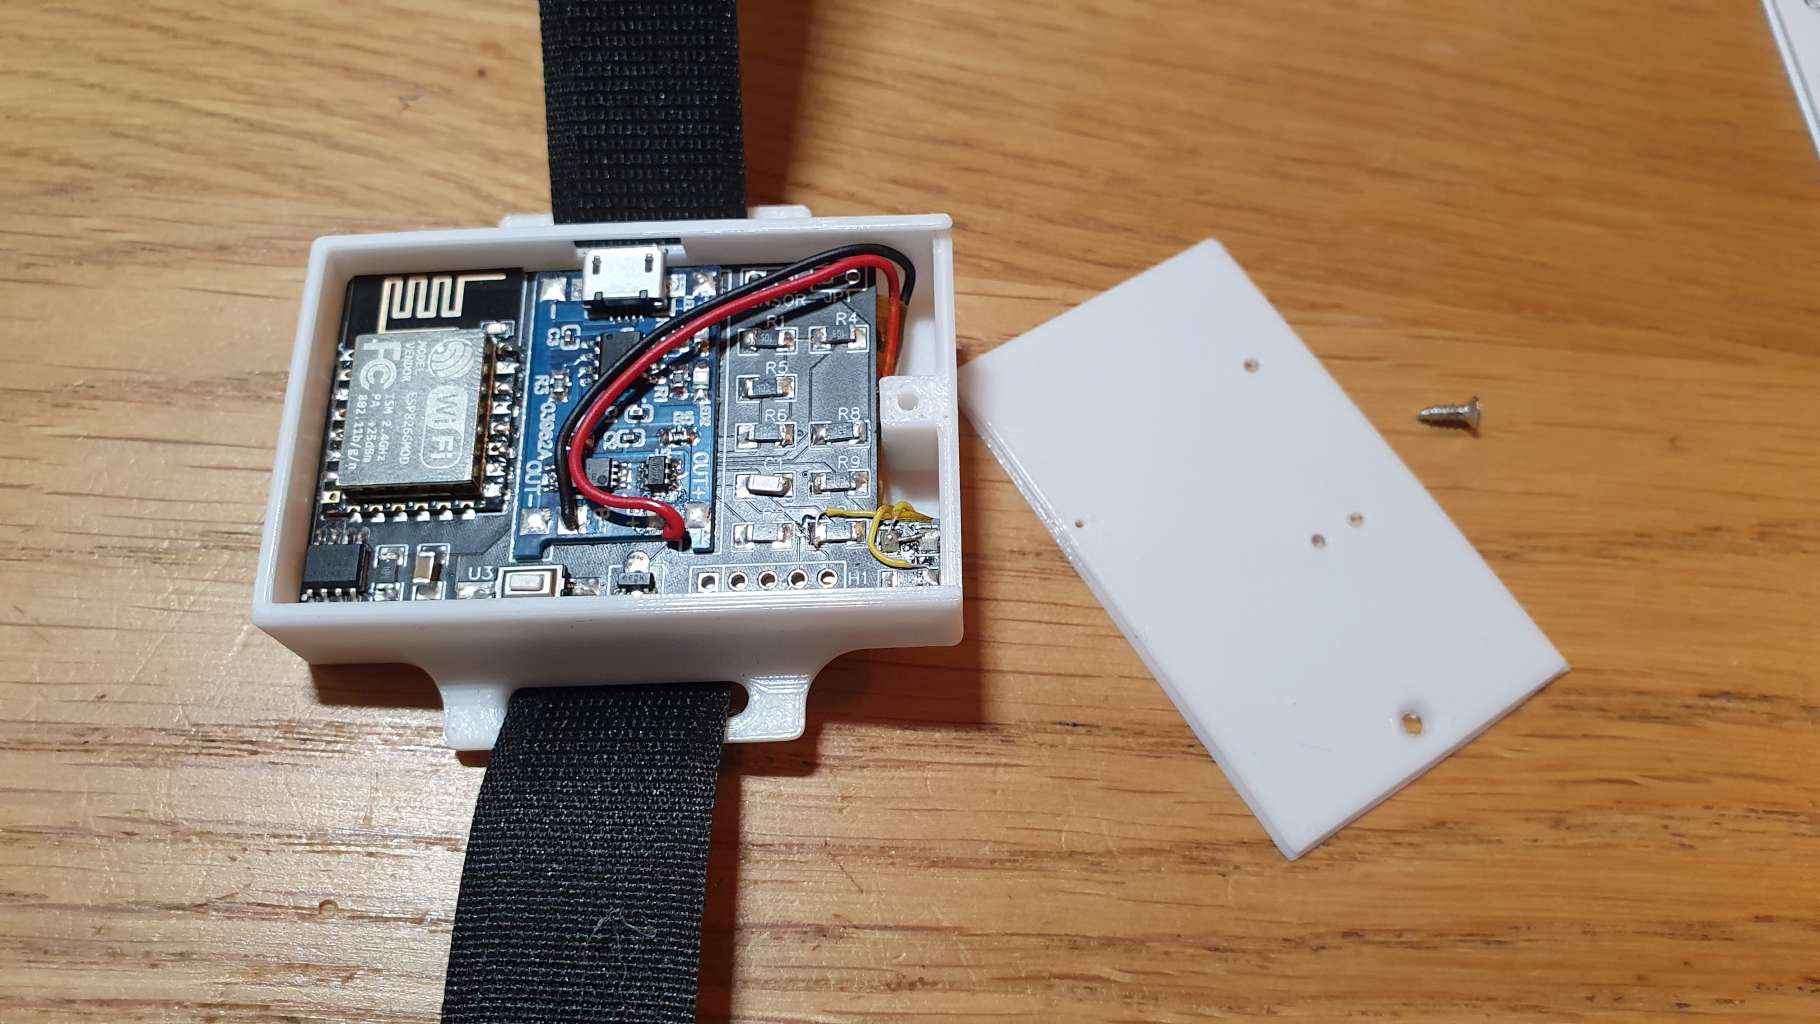
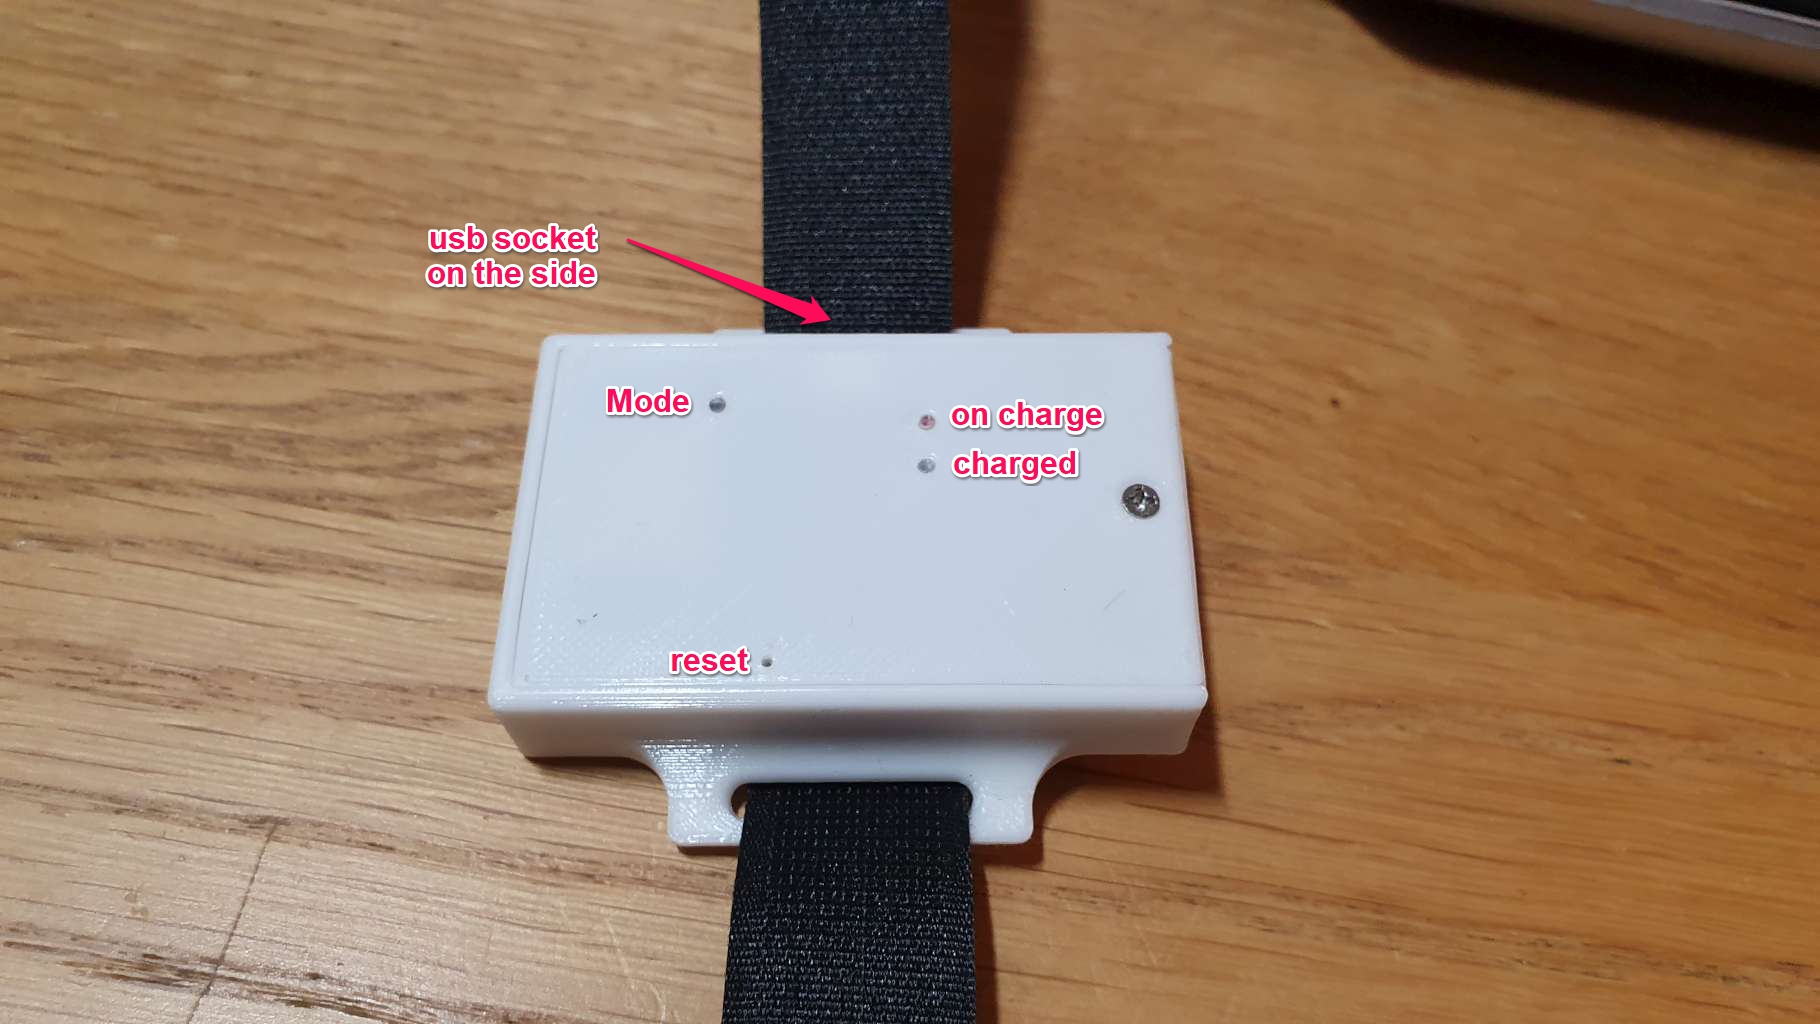
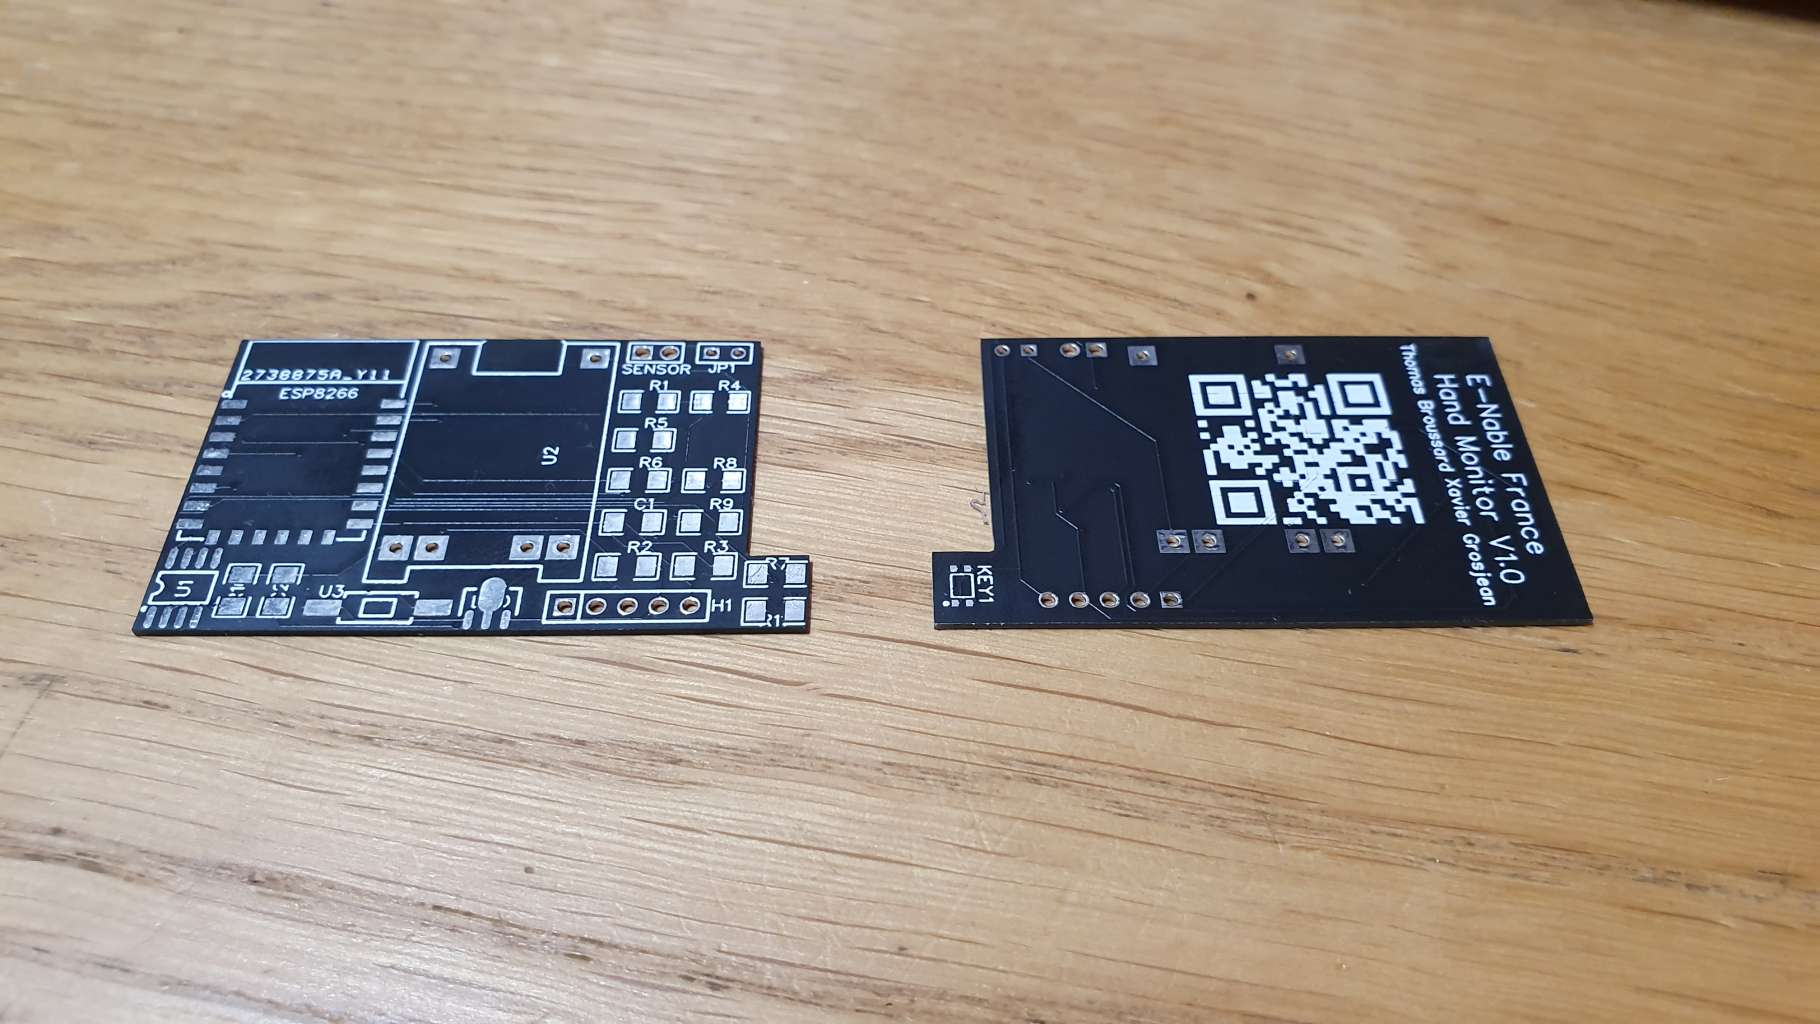
Solderless connections available on the PCB allow to monitor the serial port for debug messages, as well as flash a new release of the firmware in case OTA feature is broken.
Using a custom tool that clips in the lid rails:
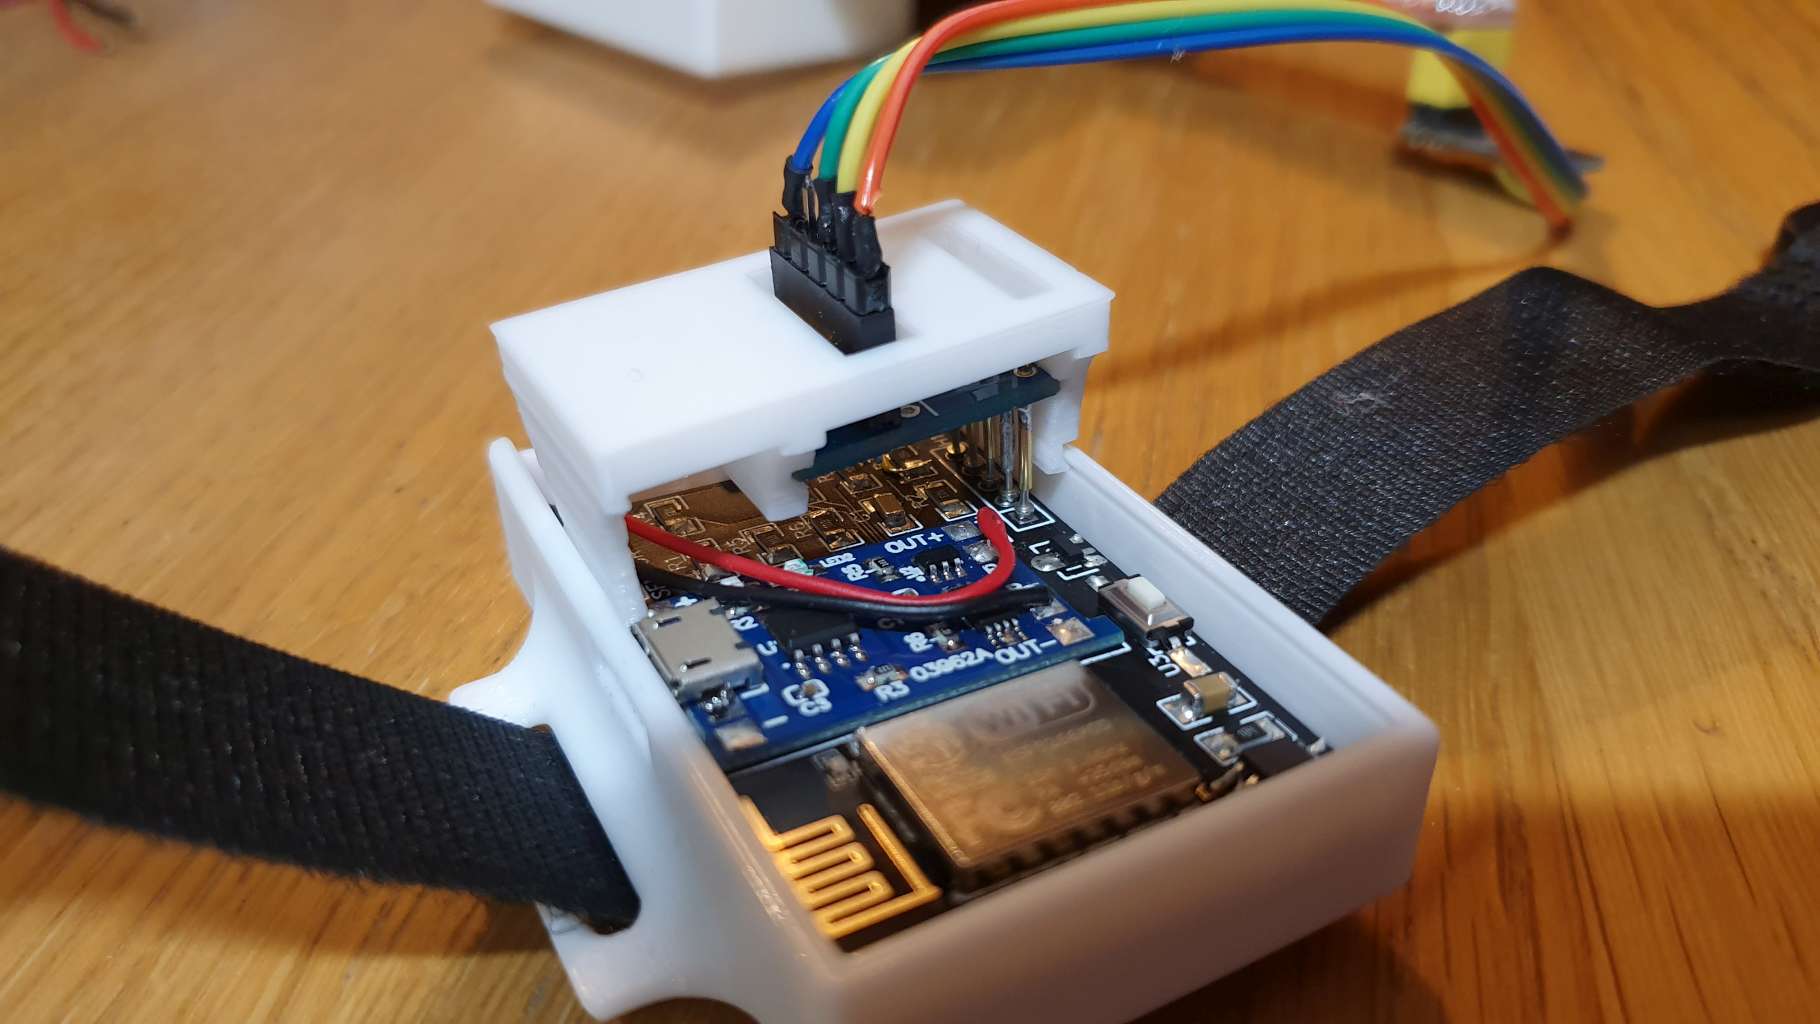
The PCB is very thin to minimize weight and volume. This prototype PCB has a faulty IR sensor package layout and incorrect battery connection to charger, fixed for next version.
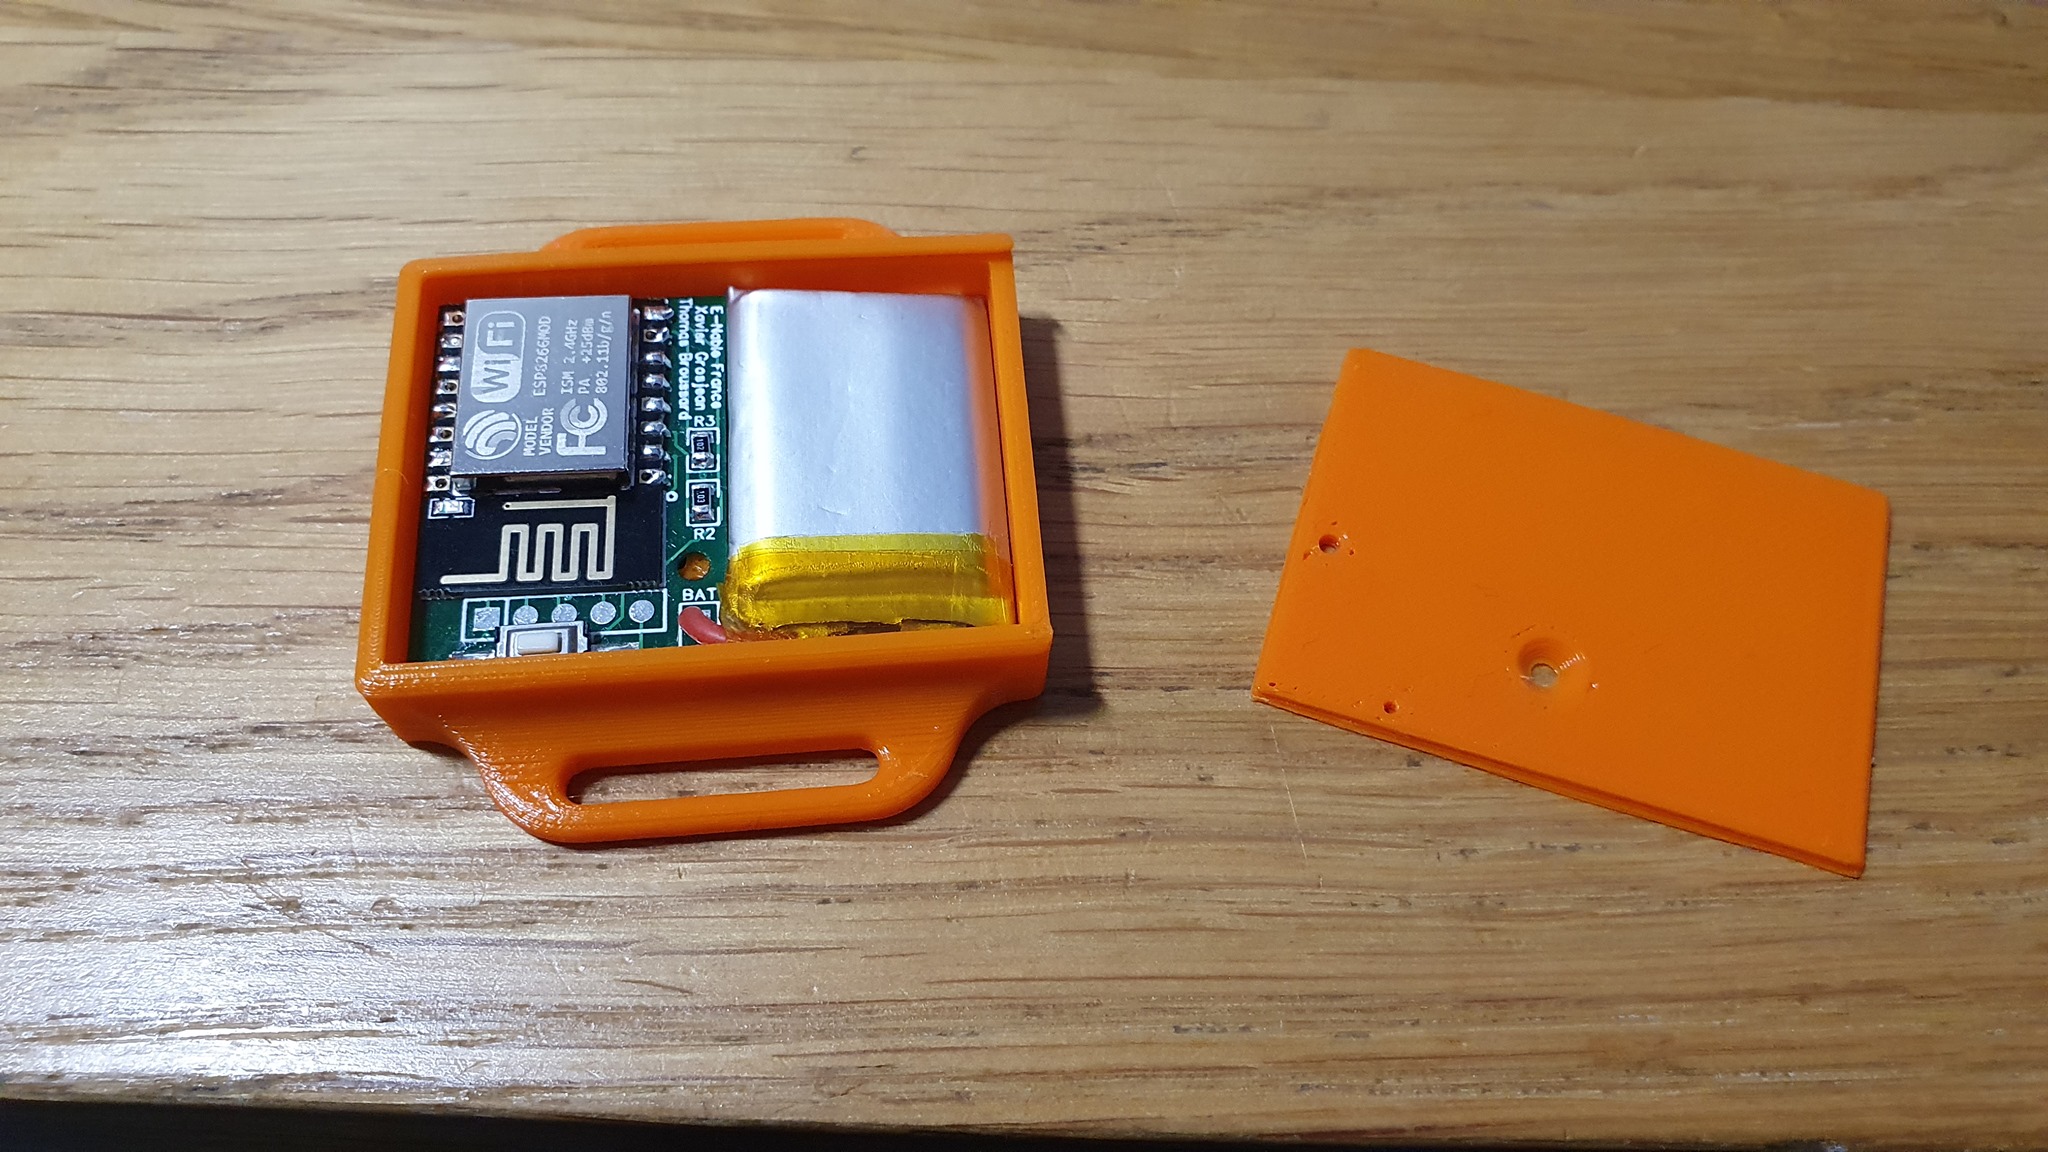
The model above is a bit too big and too heavy for young kids, so I built another one, much smaller, using a 300mAh battery, which still gives it a little over one week of autonomy.
This is the first prototype.
Since its shape is a bit long, it is not convenient for a small hand (printed at 100% scale), which is why I designed this third layout:
All PCB's are (or will be made) available in the repository, as well as 3D designs to 3D-print the cases and the clip-on device to access serial connection for debuging or flashing firmware.