WARNING: Esper is not in a working state right now for anyone but the maintainers of the repository. Do not attempt to use it until further notice.
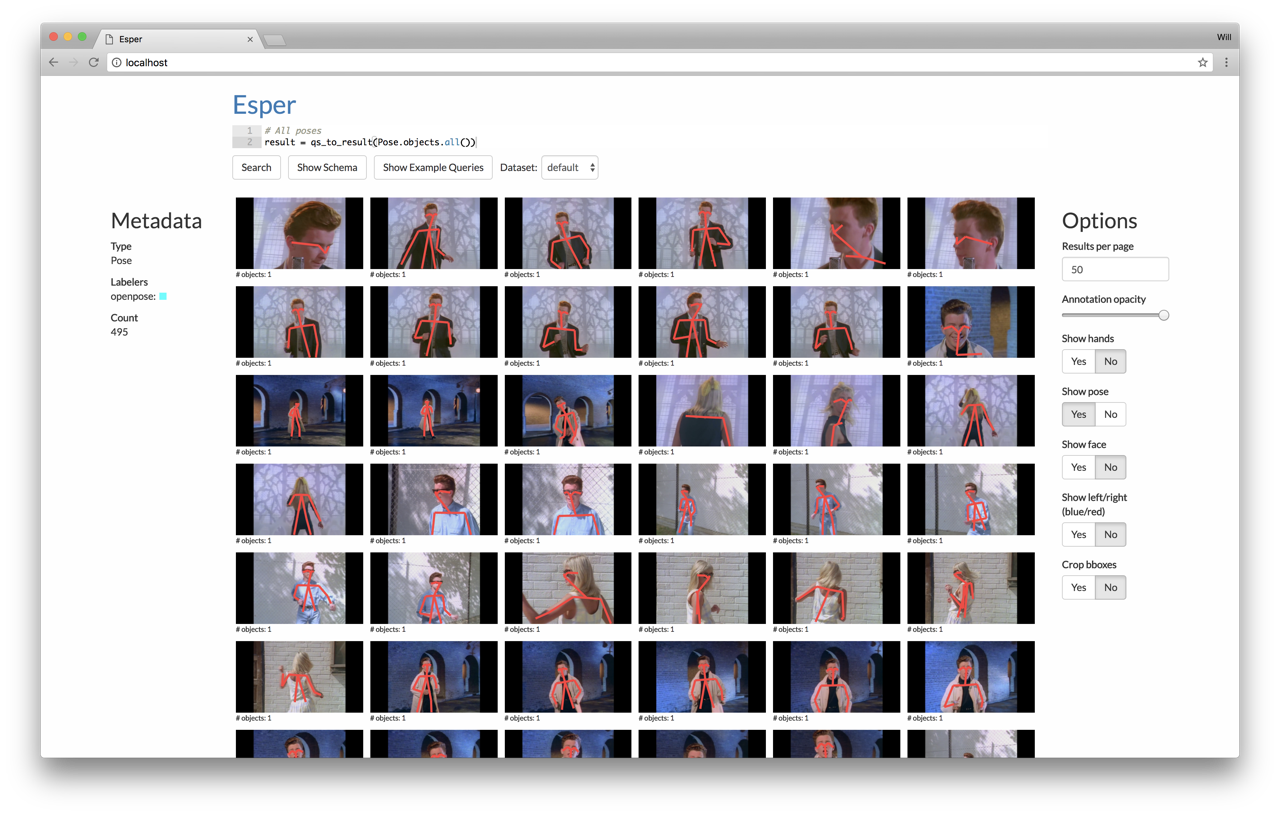
Esper is a framework for exploratory analysis of large video collections. Esper takes as input set of videos and a database of metadata about the videos (e.g. bounding boxes, poses, tracks). Esper provides a web UI (shown below) and a programmatic interface (Jupyter notebook) for visualizing and analyzing this metadata. Computer vision researchers may find Esper a useful tool for understanding and debugging the accuracy of their trained models.
First, install Docker CE, Python 3.5, jq, and pip. If you're on Ubuntu, you can install Python/pip/jq as follows:
sudo apt-get install python3 python3-pip jq
Ensure that you have Docker version >= 17.12, which you can check by running:
$ docker --version
Docker version 17.12.0-ce, build c97c6d6
Note: If you have a GPU and are running on Linux, then install nvidia-docker2.. Set
gpu = trueinconfig/local.toml.
Next, you will need to configure your Esper installation. If you are using Google Cloud, follow the instructions in Getting started with Google Cloud and replace local.toml with google.toml below. Otherwise, edit any relevant configuration values in config/local.toml. Then run:
$ git clone --recursive https://github.com/scanner-research/esper
$ cd esper
$ pip3 install -r requirements.txt
$ python3 configure.py --config config/local.toml
$ docker-compose up -d
$ docker-compose exec app ./deps/install-rust.sh
$ docker-compose exec app bash -c "source /root/.cargo/env && ./deps/install.sh"
$ docker-compose exec app bash -c "npm install && npm run build"
If you run into an error Directory '.' is not installable. File 'setup.py' not found., then you did not clone with the --recursive flag. You need to run:
$ git submodule init
$ git submodule update
Now you have successfully setup Esper! Visit http://localhost (or whatever server you're running this on) to see the frontend. You will see a query interface, but we can't do anything with it until we get some data. Go through the Demo below to visualize some sample videos and metadata we have provided.
-
Cannot connect to the Docker daemon: make sure that Docker is actually running (e.g.
docker psshould not fail). On Linux, make sure you have non-sudo permissions (runsudo adduser $USER docker). On OS X, make sure the Docker application is open (should see a whale in your icon tray). -
Permissions errors with pip: either run pip with
sudoor consider using a virtualenv. -
sh: 0: getcwd() failed: No such file or directory: please file an issue w/ reproducible steps if this happens. Should only occur on OS X.
We have premade a sample database of frames and annotations (faces and poses) for this video. This demo will have you load this database into your local copy of Esper and run a few example queries against it.
First, enter the Esper application container with docker-compose exec app bash. Then run:
$ wget https://storage.googleapis.com/esper/example-dataset.tar.gz
$ tar -xf example-dataset.tar.gz
$ esper-run query/datasets/default/import.py
Then visit http://localhost to see the web UI. A query has been pre-filled in the search box at the top--click "Search" to see the results, in this case to show all the detected faces in the video. Click "Show example queries" to see and run more examples.
Next, check out the Jupyter programming environment by visiting http://localhost:8888/notebooks/notebooks/example.ipynb. To log into the Jupyter notebook, get the token by running ./scripts/jupyter-token.sh outside the container.
TODO(wcrichto): getting started with your own dataset
TODO(wcrichto): more details here
Install jq. Then run this:
git config --local include.path ../.gitconfig
To add new test suites to the build, add a script running the test suite to scripts and add a line to run the script in the script section of .travis.yml. Right now the only testing that happens is in esper/app/test.
