-
Notifications
You must be signed in to change notification settings - Fork 45
Skywire Package Installation
Using a package of skywire allows the package manager to handle the installation and updates.
This guide will always reflect the latest / current procedure for package installation and updating.
Skywire is available to install as a package on .deb based linux distros from the apt repo at https://deb.skywire.skycoin.com using the apt command on .deb based linux distros
Pre-release and release candidate packages are made available from the apt repo at https://deb.skywire.dev
Configuring the package repository in the software sources allows packages provided by the APT repo to be updated with the rest of the system software as new versions become available or revisions to packaging and scripts are made (i.e. minor release).
the skycoin/AUR contains builds for both the debian and archlinux packages.
This repo is a collection of AUR repositories.
Several types of build for skywire are maintained there.
The skywire or skywire-bin package can be built and installed from the AUR with tools such as yay
curl https://deb.skywire.skycoin.com/archive/skybian-$(dpkg --print-architecture).deb -o skybian-$(dpkg --print-architecture).deb
sudo dpkg -i skybian-*.deb
rm skybian-*.deb
curl https://deb.skywire.skycoin.com/archive/skybian-$(dpkg --print-architecture).deb -o skybian-$(dpkg --print-architecture).deb
sudo dpkg -i skybian-*.deb
rm skybian-*.deb
Installing the skybian package will allow skywire to be installed or updated with apt
This has already been done in the skybian images (>v1.0.0)
Important note about previous configuations
This is no longer recommended; as the skybian package provides both the repository configuration and the signing key.
If you have previously configured the skycoin APT repo in /etc/apt/sources.list, installing the skybian package will cause an updating conflict, as the repository will seem to be configured twice.
It's recommended to remove the configuration from /etc/apt/sources.list and use the skybian package to accomplish this configuration.
Testing repository configuration
curl https://deb.skywire.dev/archive/skybian-$(dpkg --print-architecture).deb -o skybian-$(dpkg --print-architecture).deb
sudo dpkg -i skybian-*.deb
rm skybian-*.deb
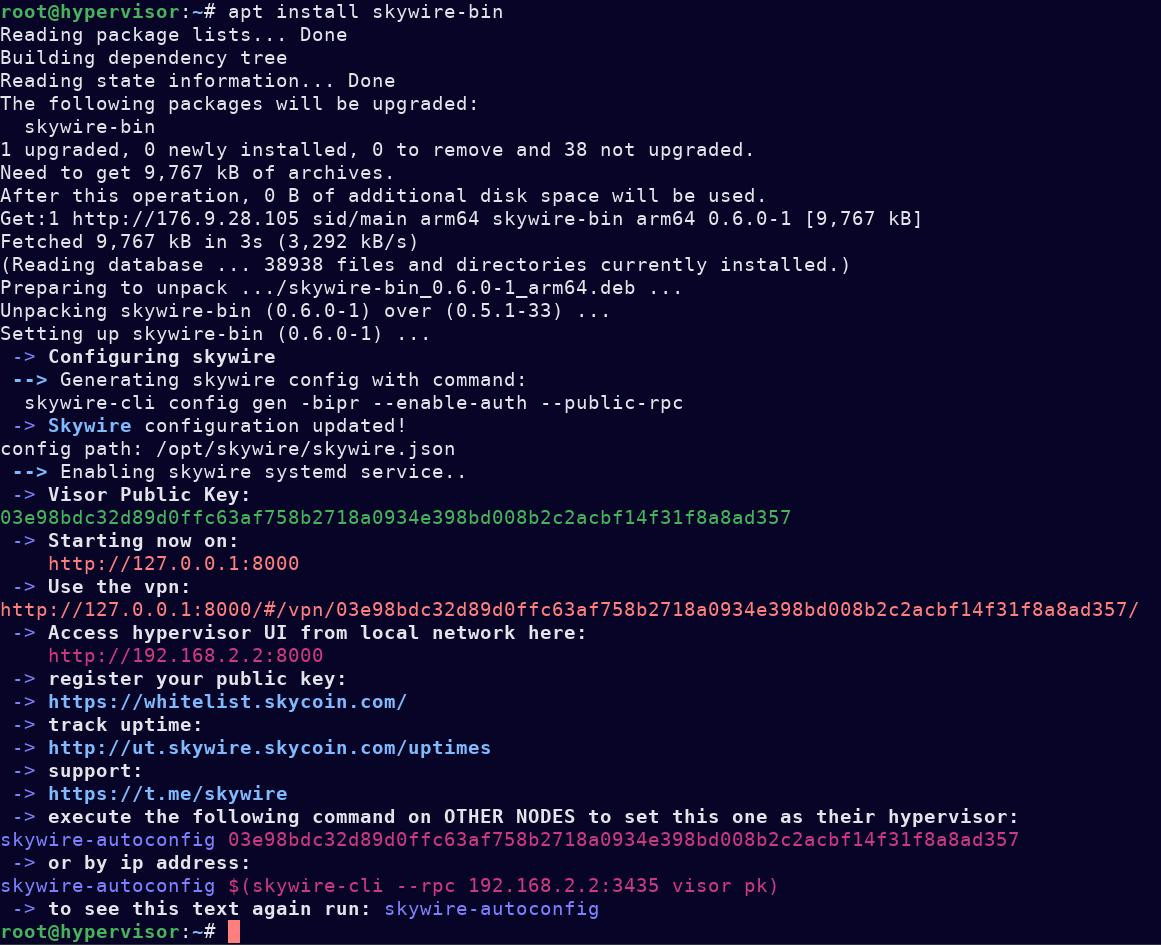
sudo apt install skywire-bin

sudo apt install skywire-bin
sudo apt install skywire-bin

Note: The default config from skybian was used automatically if it existed
To use keys from a previous config:
- place the config file at
/etc/skywire-config.json - remove any existing config which was generated by installing the package:
rm /opt/skywire/skywire.json - then run:
skywire-autoconfig
Skywire is now installed and a hypervisor configuration is generated by default.
Controlling skywire with systemd services
Until recently, skywire.service was started by default upon installation of the skywire package.
This was an atypical behavior, for a package to start it's own service.
If you have installed skywire and it isn't running; start the skywire systemd service
sudo systemctl start skywire
one may simultaneously start and enable the service to start on boot:
sudo systemctl enable --now skywire
updating skywire from this point (outside of the skyminer) will not change the running state of any service; except to restart it.
The previous behavior, starting the service on installation or updates, has been maintained for the skybian installation by use of the environmental variable SKYBIAN=true
Navigate to the hypervisor UI via one of the links which printed out in the terminal to ensure it worked as expected.
All additional configuration is optional
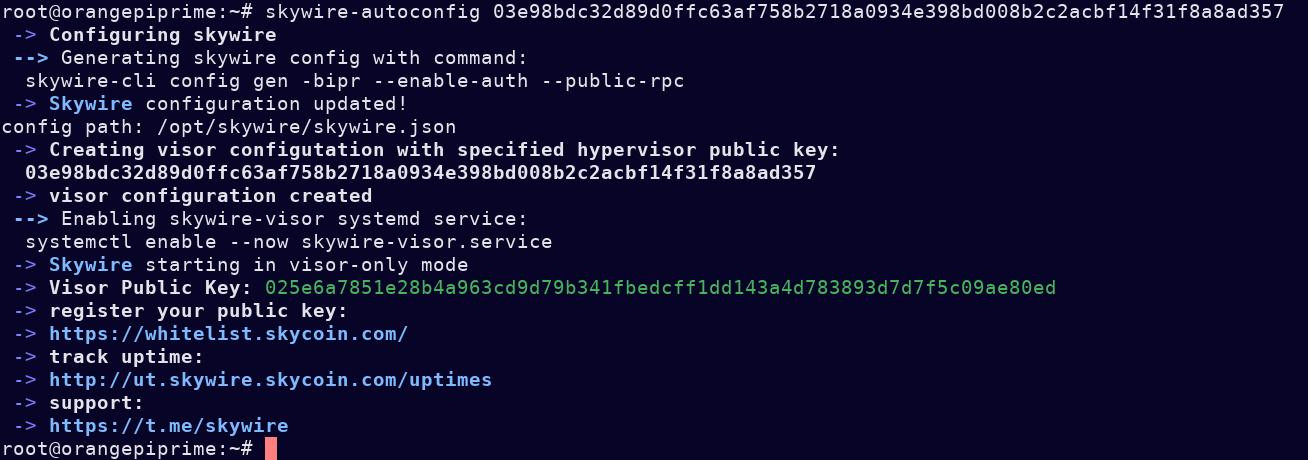
Assuming the previous steps have been completed on more than one machine, provide the public key of the hypervisor as an argument to the skywire-autoconfig command
skywire-autoconfig 924b125136a9eeac0ceb079005846e02500d26129e073ef0d913bcd364795e8377

Assuming the previous steps have been completed on more than one machine, provide the public key of the hypervisor as an argument to the skywire-autoconfig command
skywire-autoconfig 924b125136a9eeac0ceb079005846e02500d26129e073ef0d913bcd364795e8377
skywire-autoconfig commandskywire-autoconfig 924b125136a9eeac0ceb079005846e02500d26129e073ef0d913bcd364795e8377

To subsequently reset to a local hypervisor configuration and remove any remote hypervisors
skywire-autoconfig 0
To reset both local and remote hypervisor configurations
skywire-autoconfig 1
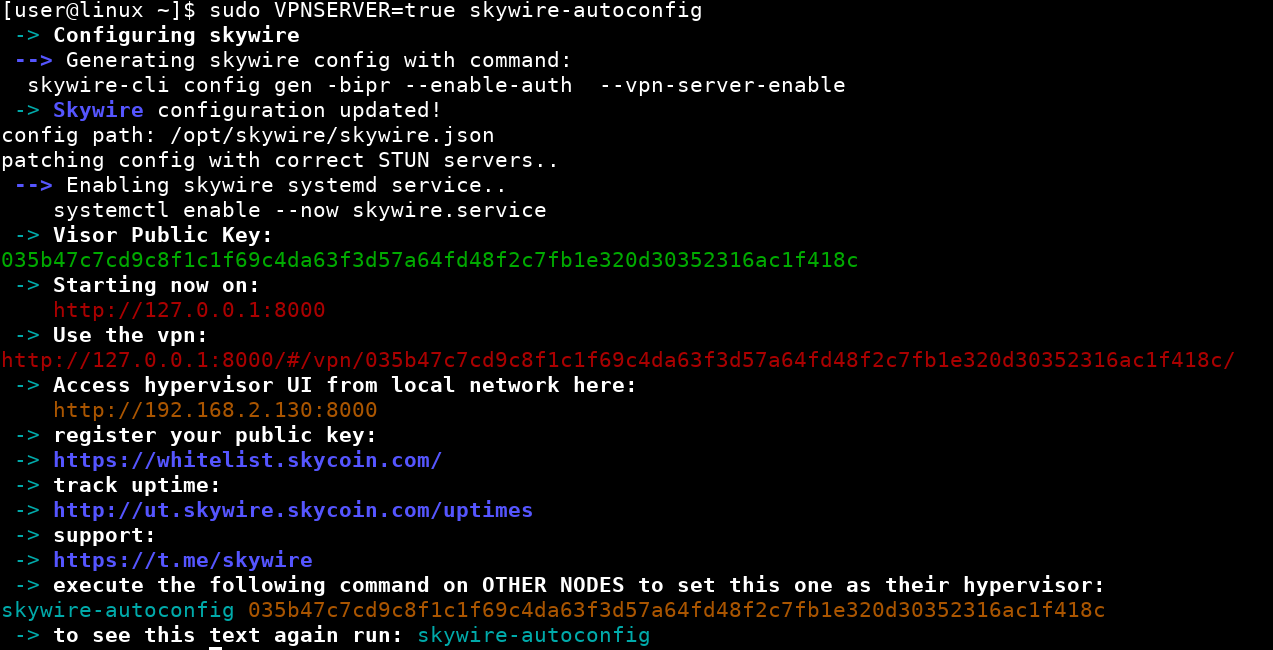
sudo VPNSERVER=1 skywire-autoconfig

sudo VPNSERVER=1 skywire-autoconfig
sudo VPNSERVER=1 skywire-autoconfig

Note: the VPN server is enabled in this way for the new skybian images
The VPN server will be enabled by the skywire-autocofig script if VPNSERVER=1
To enable the VPN server persistently via skywire-autoconfig, execute the following commands:
echo "export VPNSERVER=1" | sudo tee -a /etc/profile.d/skyenv.sh
sudo skywire-autoconfig
In this way, the VPN server will not be disabled by updating skywire or re-running sudo skywire-autoconfig as it would have been
sudo VISORISPUBLIC=1 skywire-autoconfig
sudo VISORISPUBLIC=1 skywire-autoconfig
The visor will be configured as "public" by the skywire-autocofig script if VISORISPUBLIC=1
To enable the VPN server persistently via skywire-autoconfig, execute the following commands:
echo "export VISORISPUBLIC=1" | sudo tee -a /etc/profile.d/skyenv.sh
sudo skywire-autoconfig
In this way, the VPN server will not be disabled by updating skywire or re-running sudo skywire-autoconfig as it would have been
Skywire will be updated along with the rest of the software on the system with apt
apt update
apt upgrade
apt update
apt upgrade
Skywire alone can be explicitly updated with
apt update
apt install skywire
Almost any issue with configuration may be solved by running:
skywire-autoconfig
skywire-autoconfig
The visor or hypervisor will be enabled appropriately with this command. Missing configs will be regenerated.
Helpful text is printed with links to access the hypervisor UI, VPN, as well as links to the uptime tracker and whitelist.
Any errors with the underlying skywire-cli commands encountered by the script will be printed to the terminal.
It is safe to re-run this command at any time.
If the above troubleshooting procedure does not work, it may be necessary to uninstall and re-install the package.
Uninstalling can be done with APT:
sudo apt remove skywire-bin
In the instance that the packages fail to download with apt, it is possible to install the package with dpkg
The packages can be manually downloaded from https://176.9.28.105/archive.
Copy the URL of the latest versioned release into the curl command:
sudo curl -L http://176.9.28.105/archive/skywire-bin.deb > skywire-bin.deb
and install with dpkg
sudo dpkg -i skywire-bin.deb
remove or uninstall a package with dpkg
sudo dpkg -r skywire-bin
By default, many deb-based linux distros now include the unattended-upgrades package, which can be enabled for use with the apt repository configured in the first step.
If you do not have this package installed, first install unattended-upgrades
apt install unattended-upgrades
Edit the file at /etc/apt/apt.conf.d/50unattended-upgrades
nano /etc/apt/apt.conf.d/50unattended-upgrades
Add the following line at the first blank line (around line 33)
"origin=skycoin,codename=sid,label=skycoin";
You may wish to uncomment some lines above it as well, this is left to the discretion of the user.
Save and exit the file (ctrl+x type y press return)
Run the following commands as root to enable the automatic updates
echo unattended-upgrades unattended-upgrades/enable_auto_updates boolean true | debconf-set-selections
dpkg-reconfigure -f noninteractive unattended-upgrades
Issues related to the packaging should be reported in the skycoin/AUR repository
If you need immediate help, please describe the issue you are having in skywire telegram
When updating the official skyminer it is recommended to always update the visors first.
The following commands can be copy / pasted into the terminal in order to update. Provided for expediency:
rm skybian-*.deb
curl https://deb.skywire.skycoin.com/archive/skybian-$(dpkg --print-architecture).deb -o skybian-$(dpkg --print-architecture).deb
sudo dpkg -i skybian-*.deb
rm skybian-*.deb
apt update
apt install skywire-bin
systemctl reboot
In case of errors, reach the board via ssh and run skywire-autoconfig or re-install the package
Note: you will need to set the hypervisor password again before logging in to the hypervisor if the previous installation was not provided by a package
Skywire is available to install from the Arch User Repos (AUR) with tools such as yay or pamac
for the binary release:
yay -S skywire-bin
using the latest source archive:
yay -S skywire
or manually, with makepkg
git clone https://aur.archlinux.org/skywire
cd skywire
makepkg -sif
#or build from cloned git sources
makepkg -sif -p git.PKGBUILD
please contact support via telegram @skywire
for rewards and technical support
