-
Notifications
You must be signed in to change notification settings - Fork 30
Upgrading from tcWebHooks 0.9.x.x to 1.1.x.x
The tcWebHooks 1.1 version adds many new features. Upgrading should be seamless and is well unit tested. See Installing for more information on how to install the plugin.
If you want to take a backup before upgrading, all webhook configuration is stored in the plugin-settings.xml files on the server. Either backup all these files (there is one in each project folder inside BuildServer/config/*), or simply zip up or copy the whole BuildServer/config/ folder itself.
From 1.1, the plugin is formed of two zip files:
-
tcWebhooks-1.1.x.x.zip- The base plugin. -
tcWebHooks-REST-API-1.1.x.x.zip- The REST API for template editing.
The second plugin is only required when editing templates.
The webhook formats in 0.9 contain a lot of data, most of which is probably not necessary to be sent to your webhook endpoint. Templates allow the creation of specific payloads, which can then be re-used across multiple webhooks.
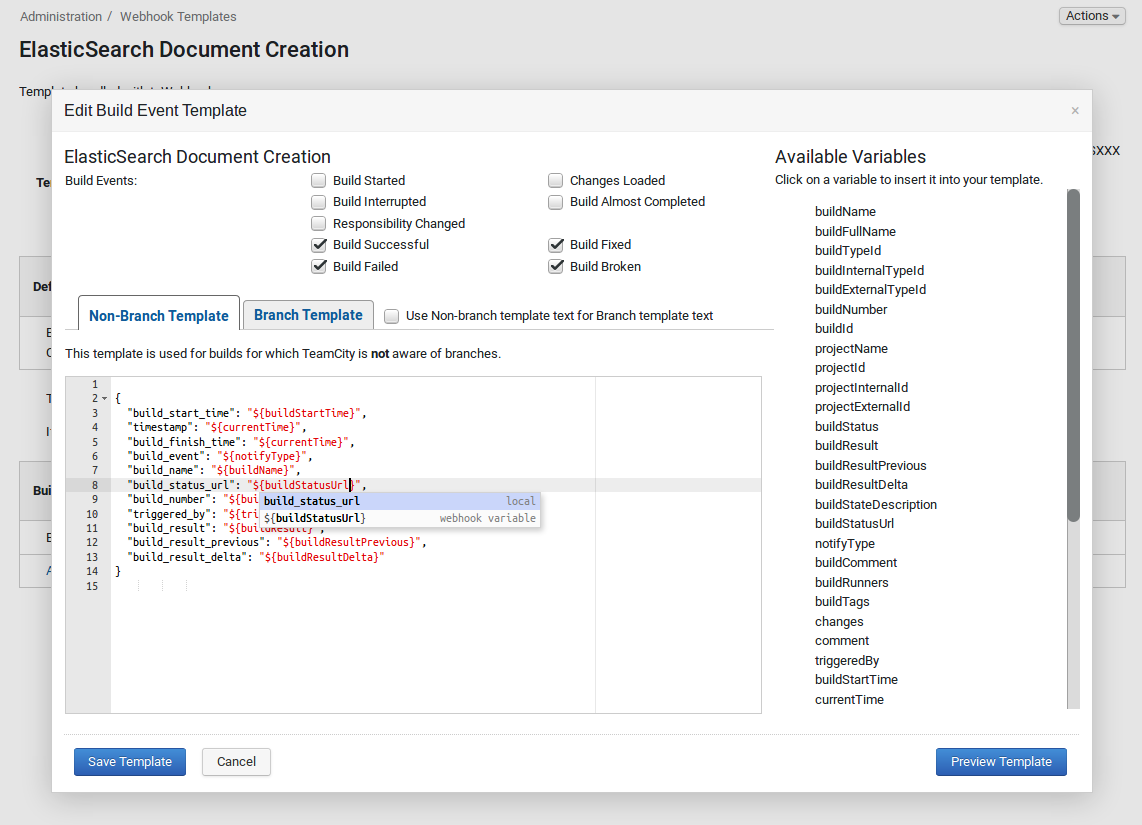
There are also some templates bundled with the 1.1 release. The old webhook 0.9 payload formats are still available and are labelled as Legacy WebHook formats. Any webhooks configured in 0.9 will be automatically converted to use the equivalent legacy format.
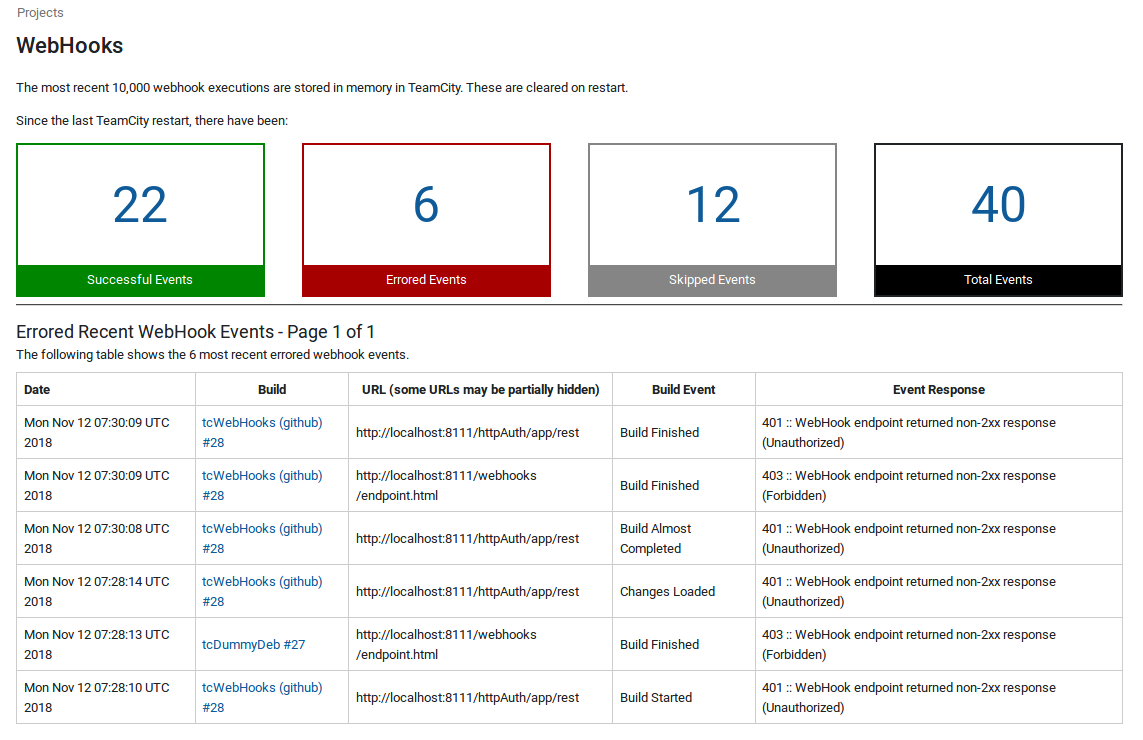
The WebHooks tab on the Project Overview and Build Overview pages show configured webhooks and now also show recent webhook execution events.
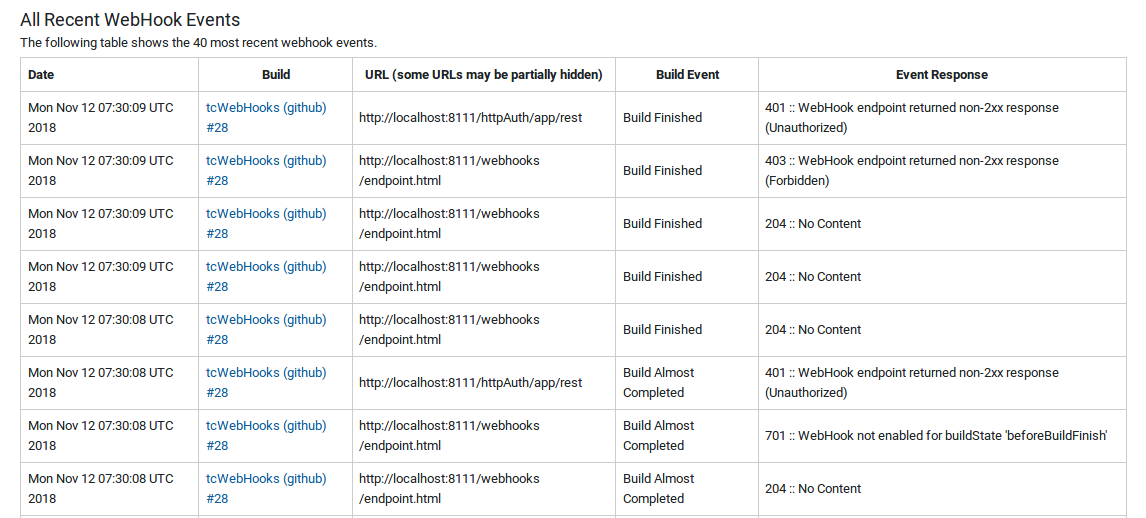 There is also a history page showing all webhook events, which can be accessed from the WebHooks tab in the TeamCity Administration section.
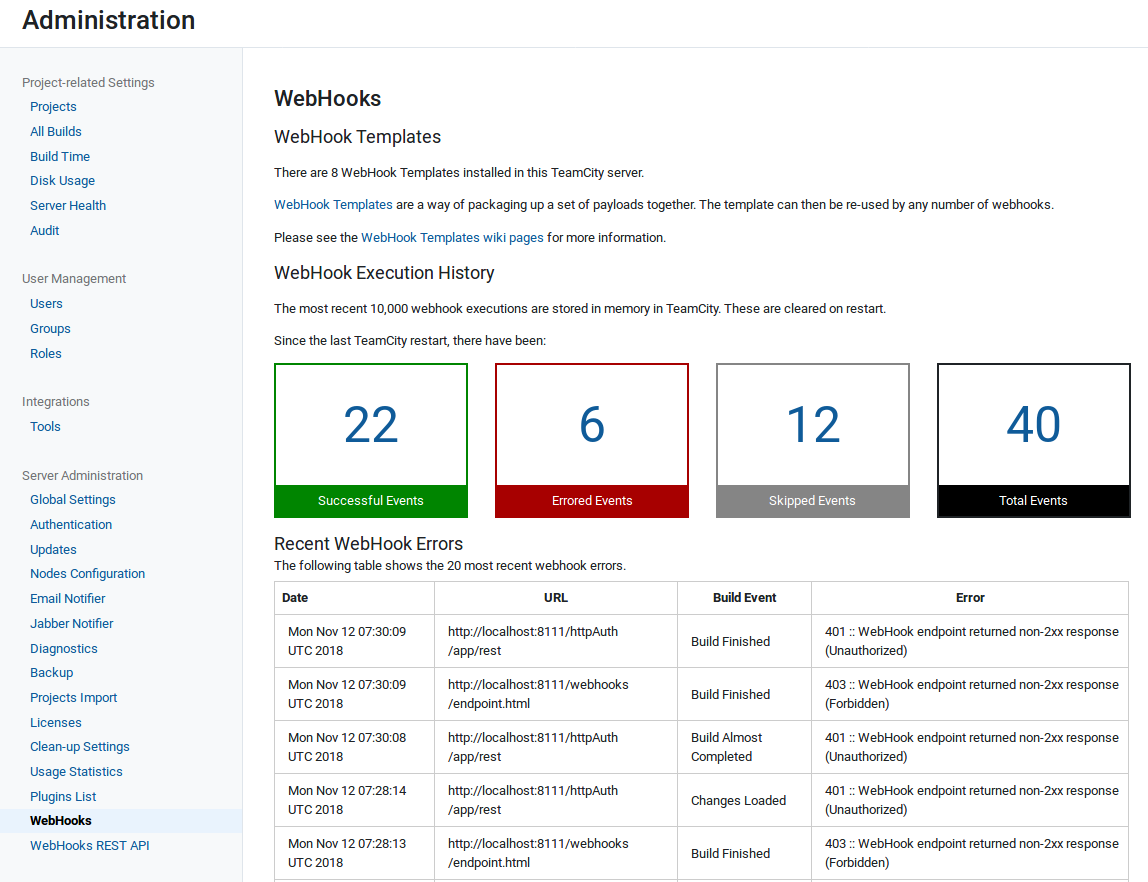
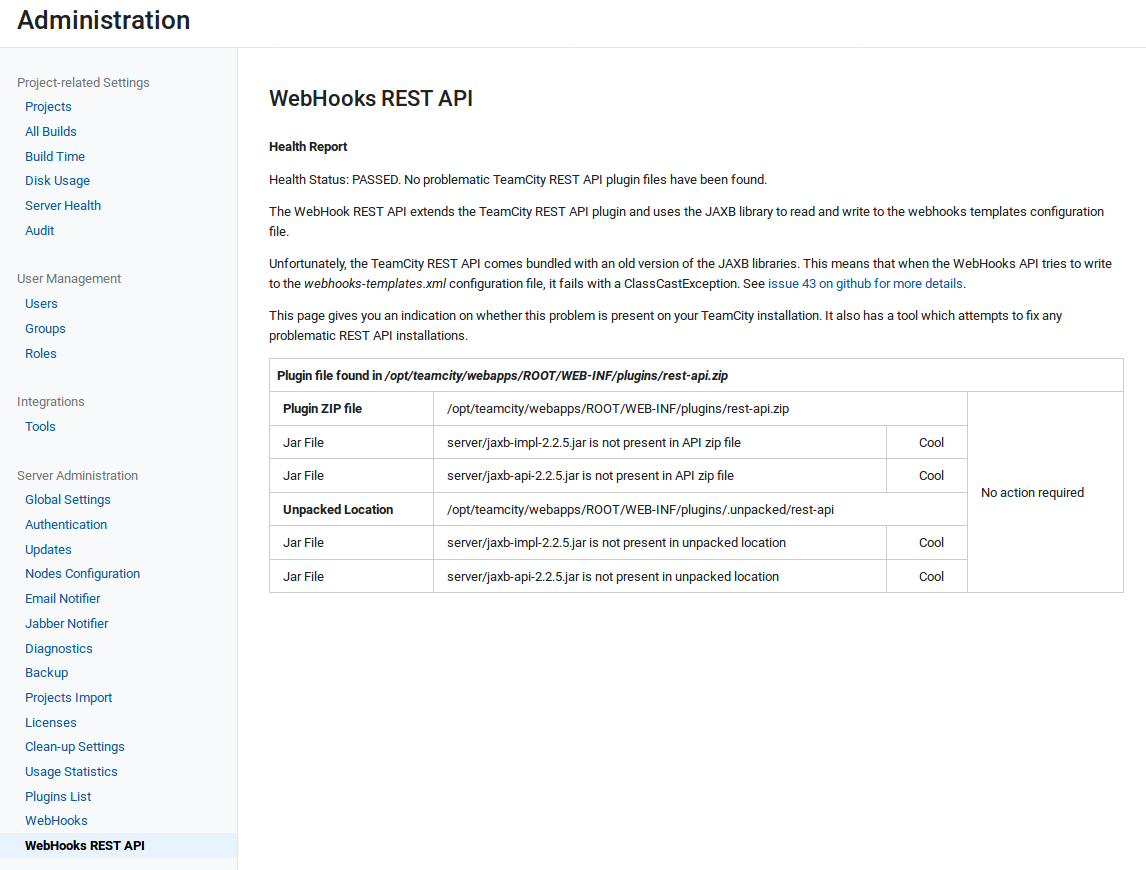
Both WebHooks and WebHooks REST API have entries in the Server Administation area of TeamCity. These pages confirm that plugins are installed correctly, and also provide links to the WebHook Templates and WebHook History pages.
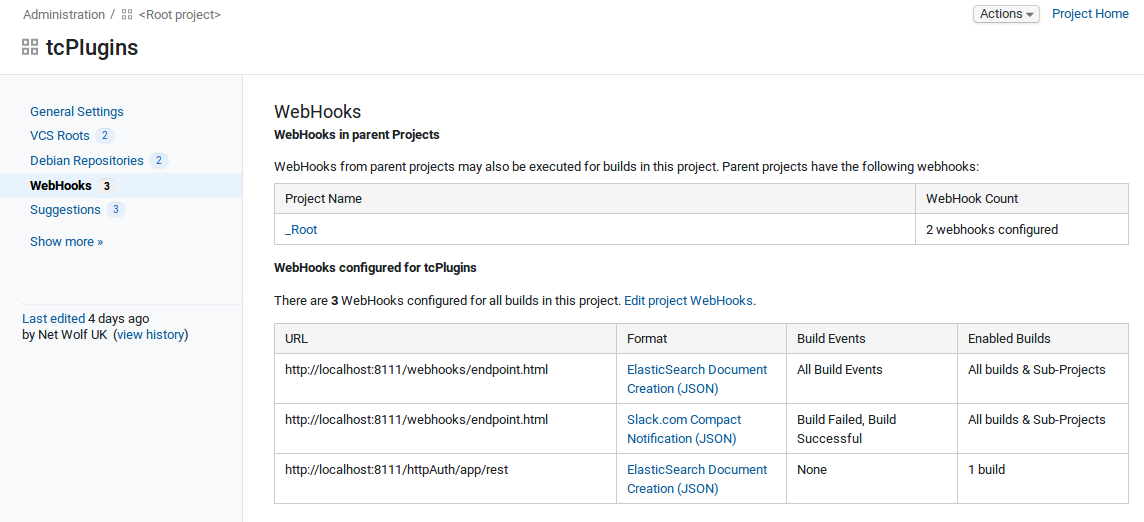
In addition to viewing webhooks on a tab on the Build Overview and Project Overview pages, webhooks are also shown in the Project Settings pages. All these show an overview of the configured webhooks and provide links to the WebHooks Editing screen.
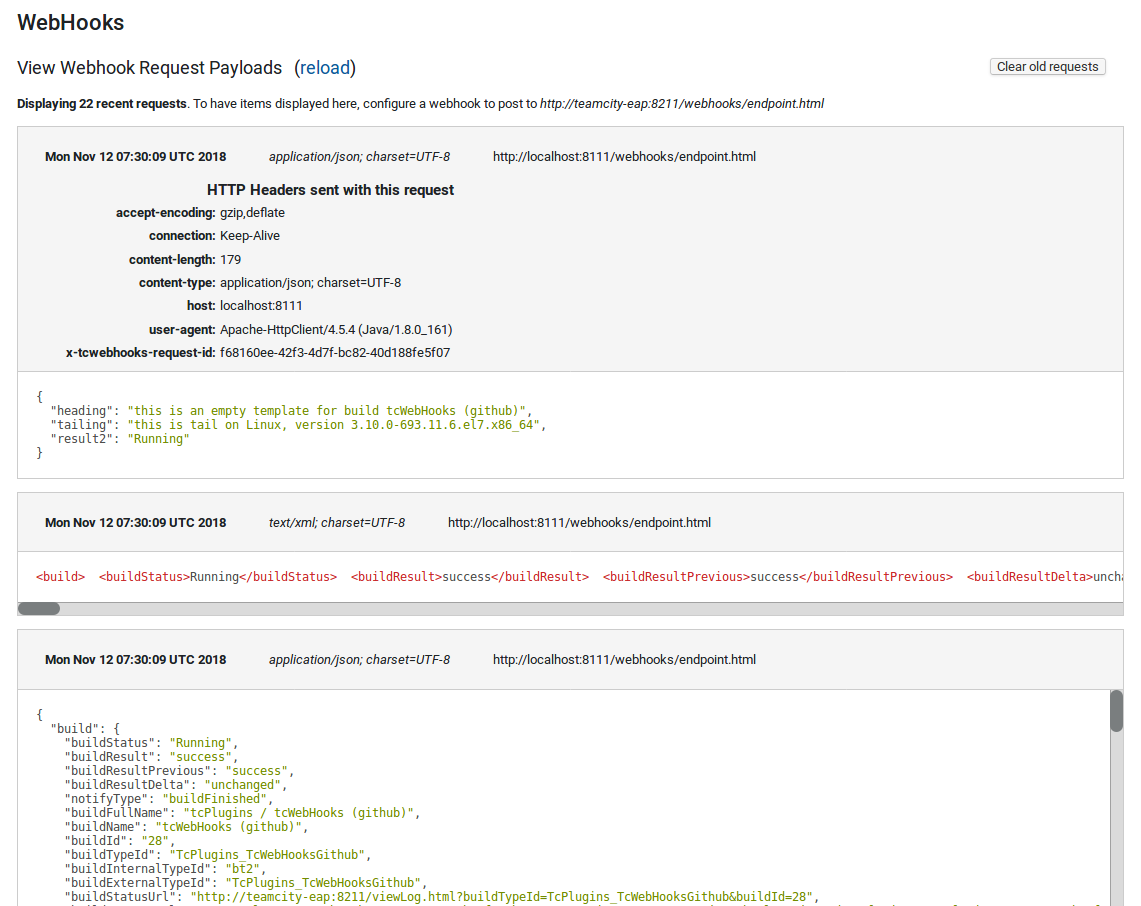
Create a webhook and point it at http://your_teamcity_server/webhooks/endpoint.html
This shows you the headers and body sent by your webhook.
Testing webhooks (without running a build)
It is possible to test a webhook configuration without having to run a build, and even possible to test changes to a webhook before it is saved.
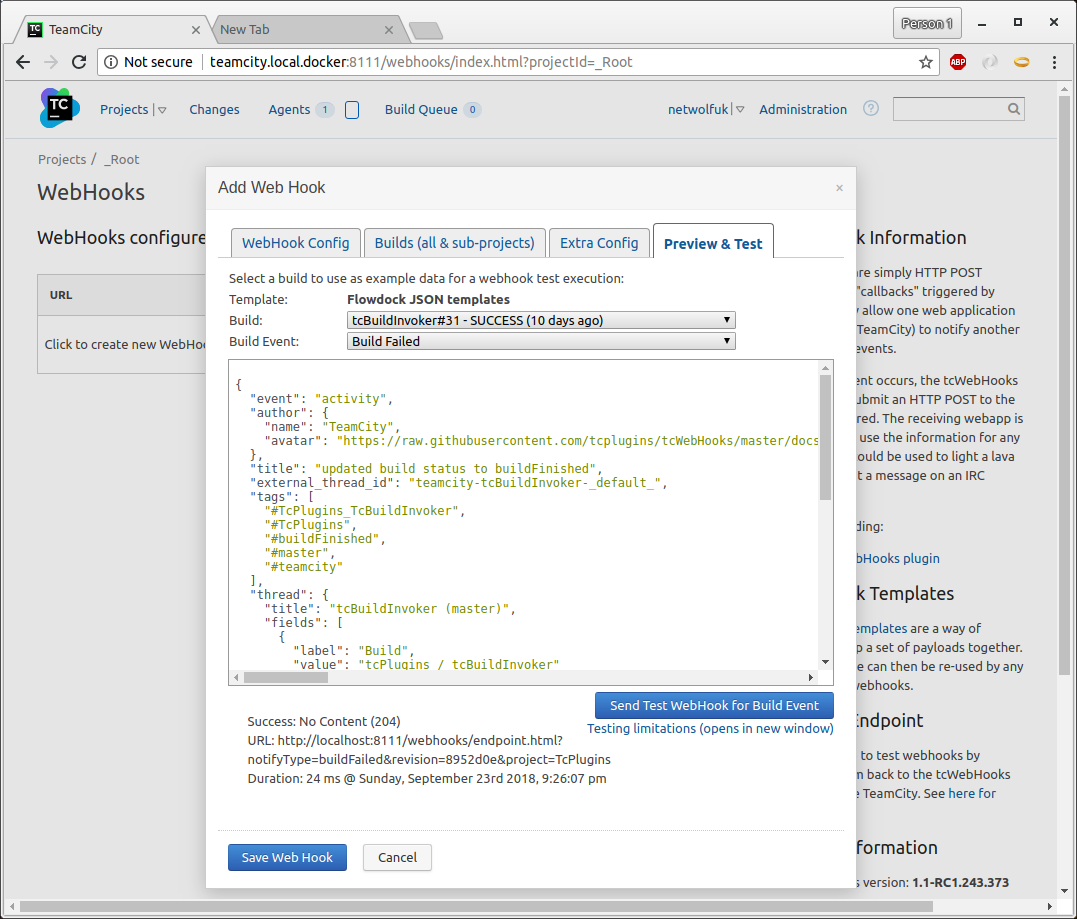
It's also possible to test a template during editing
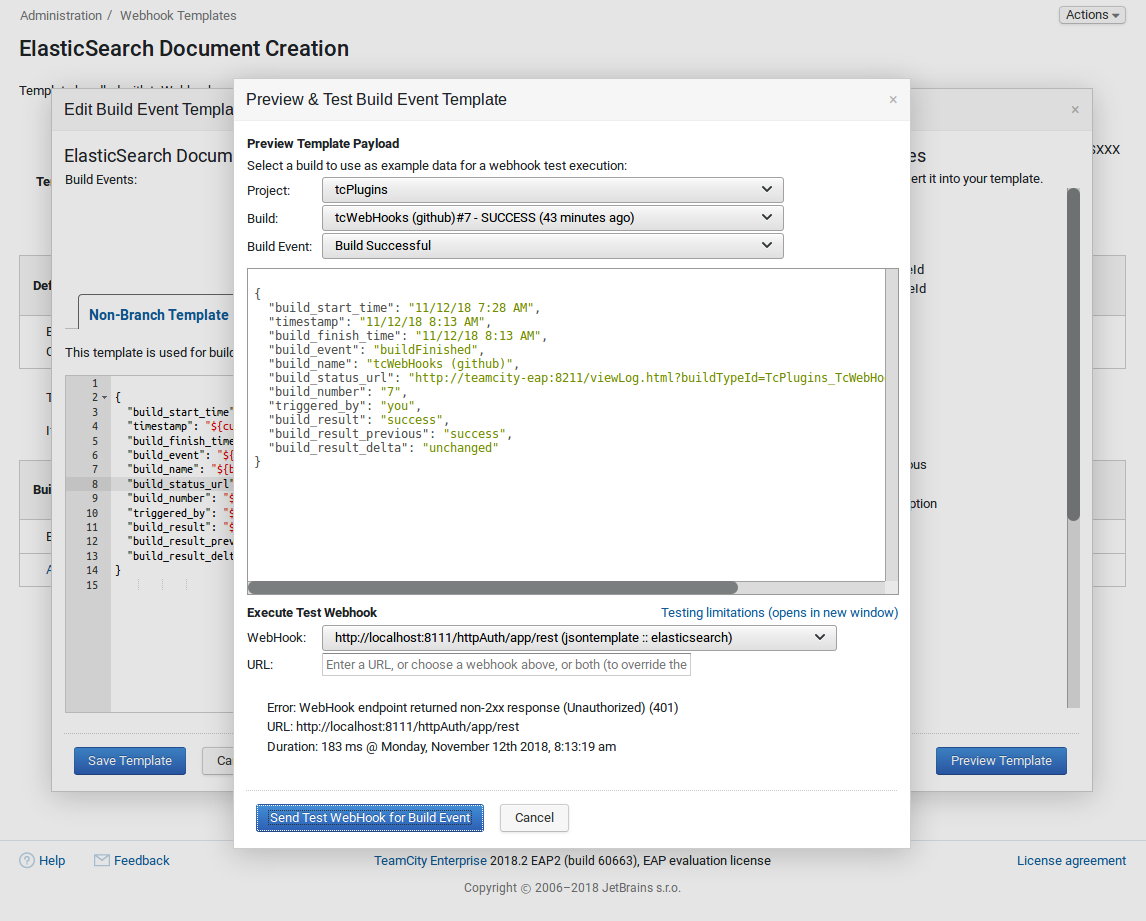
Trigger Filtering applies a regular expression (regex) match before executing a webhook. Filters are defined by editing the plugin-settings.xml file on the server like the following example:
	  <trigger-filters>
	  	<filter value="${branchDisplayName}" regex="^master$" enabled="true"/>
	  	<filter value="${buildInternalTypeId}" regex="^bt\d$" enabled="true"/>
</trigger-filters>Add custom headers to a webhook request by adding a <headers> element to the plugin-settings.xml file.
An example configuration:
      <headers>
        <header name="my-header-showing-build-name" value="${buildName}" />
</headers>Version 1.1.x.x adds a UI for editing authentication settings, and support for both Basic Authentication and Bearer Authentication methods.
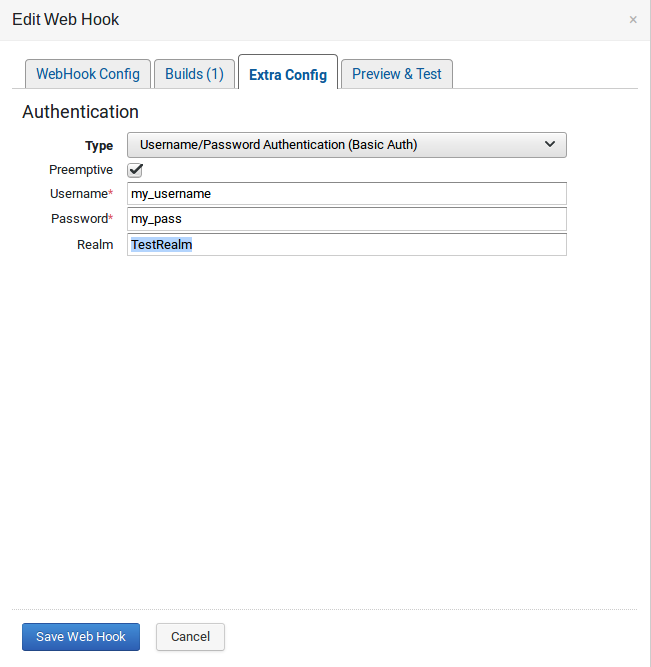
- Home
- Installing
- Configuration
- Templates
- Parameters (aka Variables)
- Example Webhook output
- WebHooks REST API