Quest Lines
Once you open the quest book in editing mode, you will see a gear in the top left corner. You can find out more details about those options in Advanced Editing. Let's get started writing a quest.
- Click on QUESTS - this will show you the list of current quest lines. You must create a quest line before you can add quests.
- Click on EDIT - this will allow you to edit the quest lines. You will see an empty list of quest lines on the left and some editing options on the right. You will notice that many of the options are grayed out except one. The beautiful thing about this mod is there are multiple ways to create content.
- Click on ADD NEW - You will see a new quest line added to the list on the left. To the right of the questline's name, you will see a trash can, for deleting it, and an arrow for reorganizing your chapters.
- Click on NEW QUESTLINE - You will notice the editing options to the right are now available. Let's name this questline, "Getting Started" and give a brief description. You can also select the Text Editor to give it a more flavorful text.
Choose an icon to represent your chapter in the chapter list. This will be shown to the right of the chapter's name. You can see an example on The Legend.
This is the TRIGGER which determines when the chapter will be available or visible. However, the quest line's availability and visibility is evaluated based on the quests in the quest line. For example, if you set the quest line to UNLOCK, it won't become visible until the first quest in the quest line is available.
This allows you to add quests from the quest database or remove quests from the quest line. This allows you to move quests between chapters without having to remake them.
This takes you to a visual interface where you can create quests and organize your quest line. If you click on this button you will see the screen below and that's where the majority of your quest line writing will take place.
This section of the quest book is very well documented. The tool-tips do a great job of telling you exactly how those tools work.
You can click and drag to select multiple quests, but only using the Grab tool. You are not able to mass edit quests, but you can mass Manual Complete and mass Reset Quest
The top right button that looks like a calculator is the Edit Raw button which gives you access to other customization options for the quest line. To get to the editing portion follow these steps:
- Click on Edit Raw
- Click on properties:Object...
- Click on betterquesting:Object... and you should see:
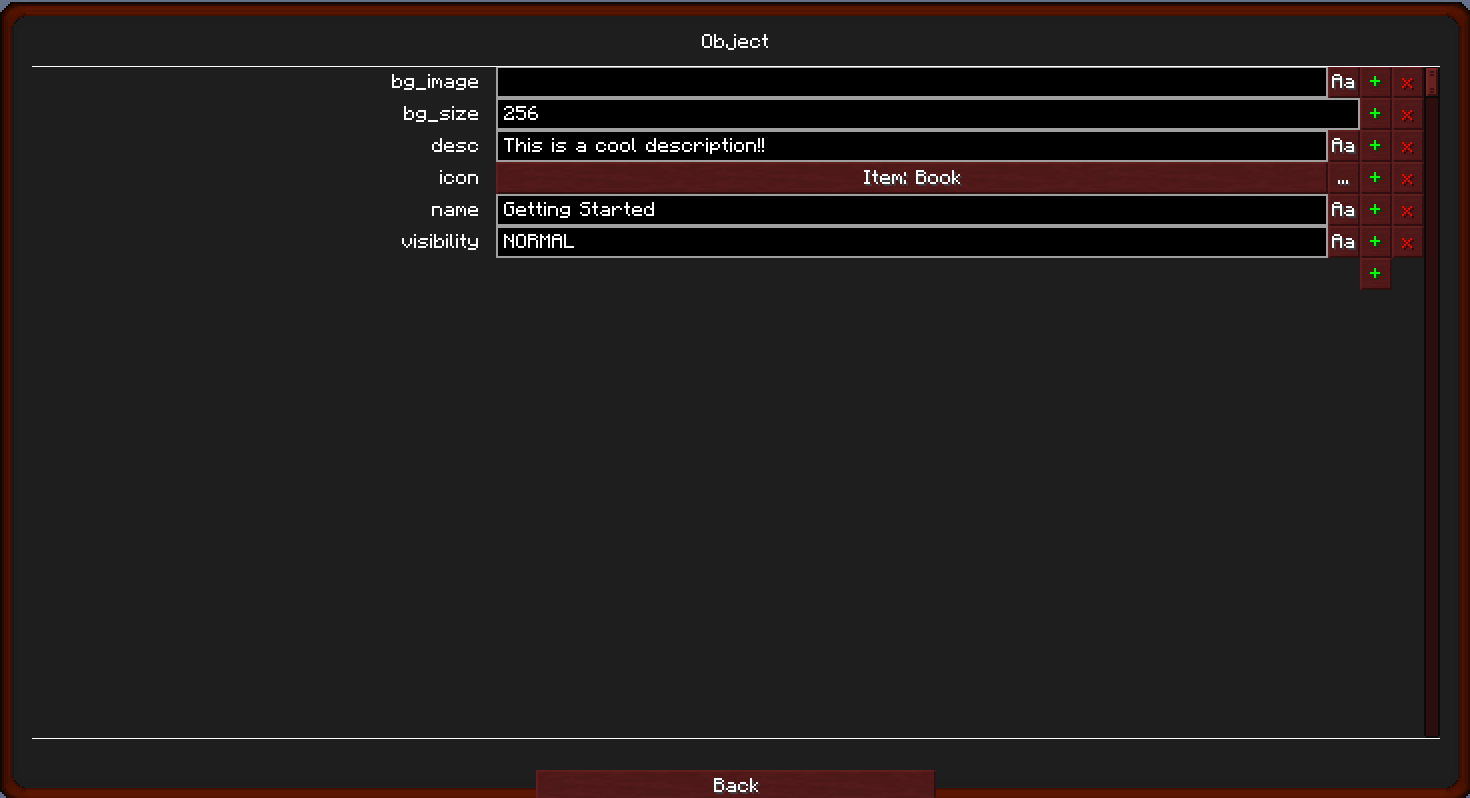
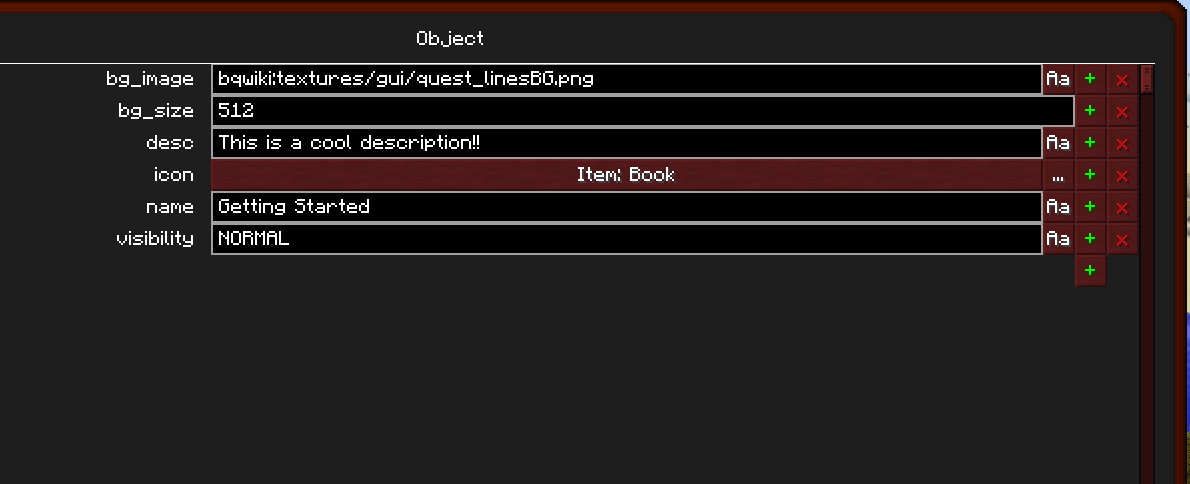
The first step to getting a background image is to get the .png in the right place. Notice that MC only accepts .png. Visit Resources for more information. There is more this little gem can do!! (say goodbye to Resource Loader).
The following is the folder structure you want to create and the image below demonstrates how to retrieve the image. The '+' next to a folder denotes that you will have to create this folder.
|───config
│ │ └───betterquesting
│ │ └───resources
│ │ └──+bqwiki <-this can be anything you want, but should represent your pack
│ │ └──+textures
│ │ └──+gui <- in this folder goes your image
The rest of the options on this page are the same as those on the "New Quest Line" page.