Quality Requirements Generation
⏪ User Guide >> 4. Quality Requirements Generation
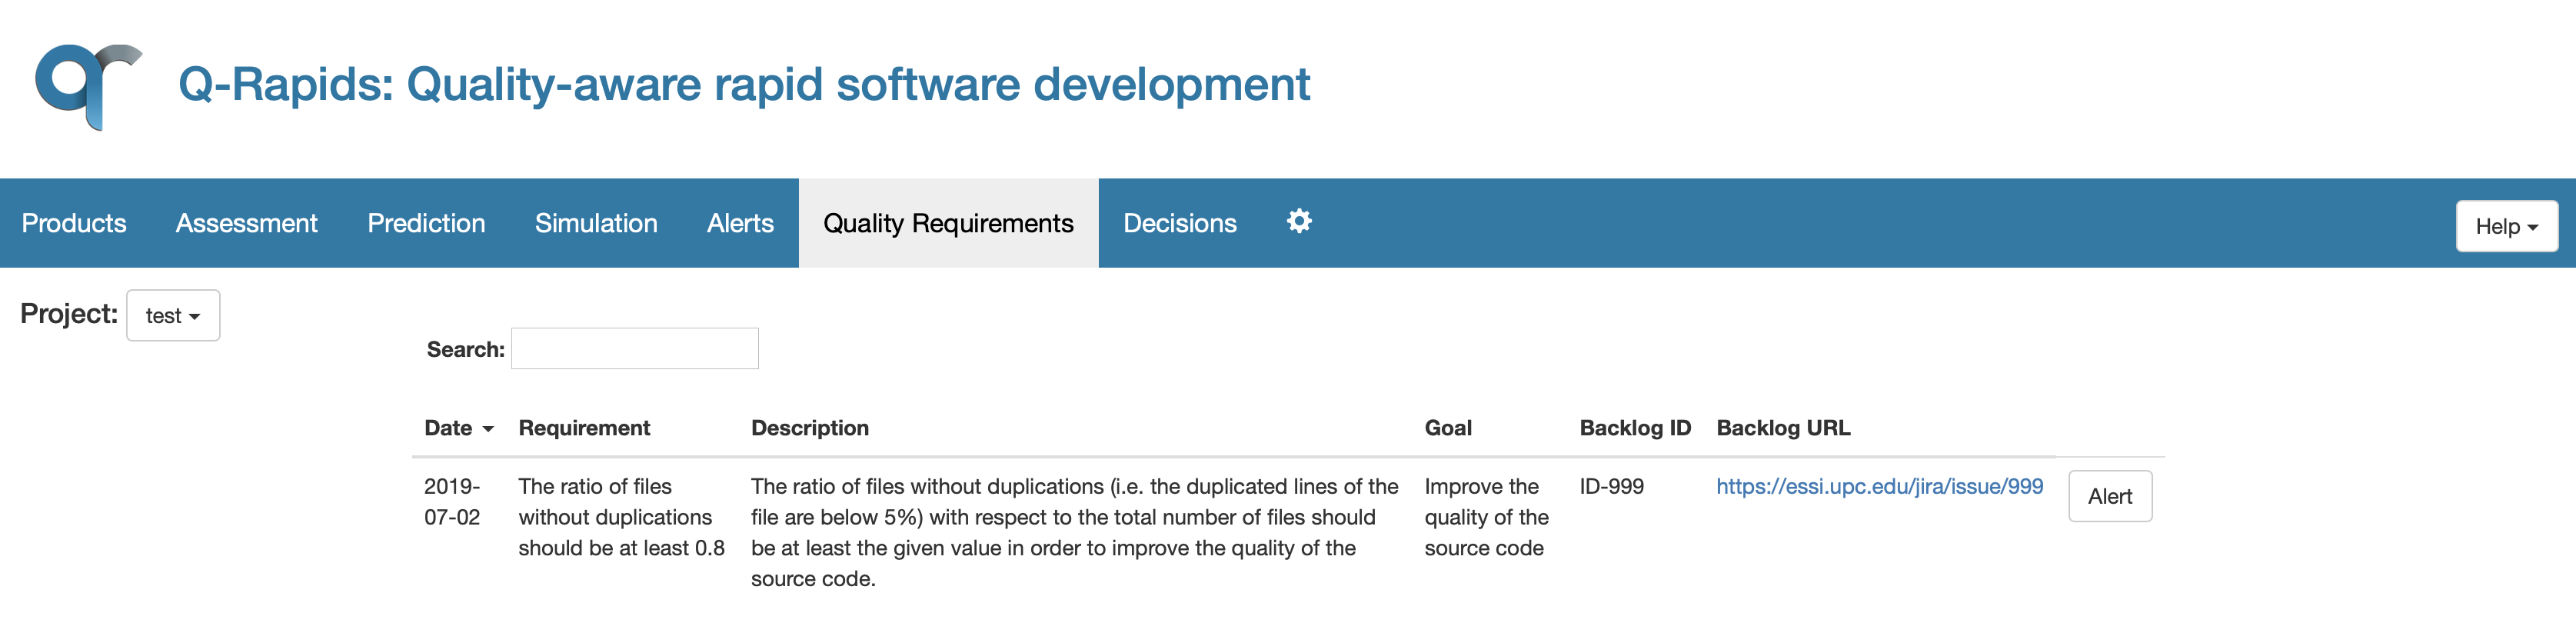
In order to initiate improvements, based on a certain assessment, the tool provides quality requirements that can be added to the product backlog.
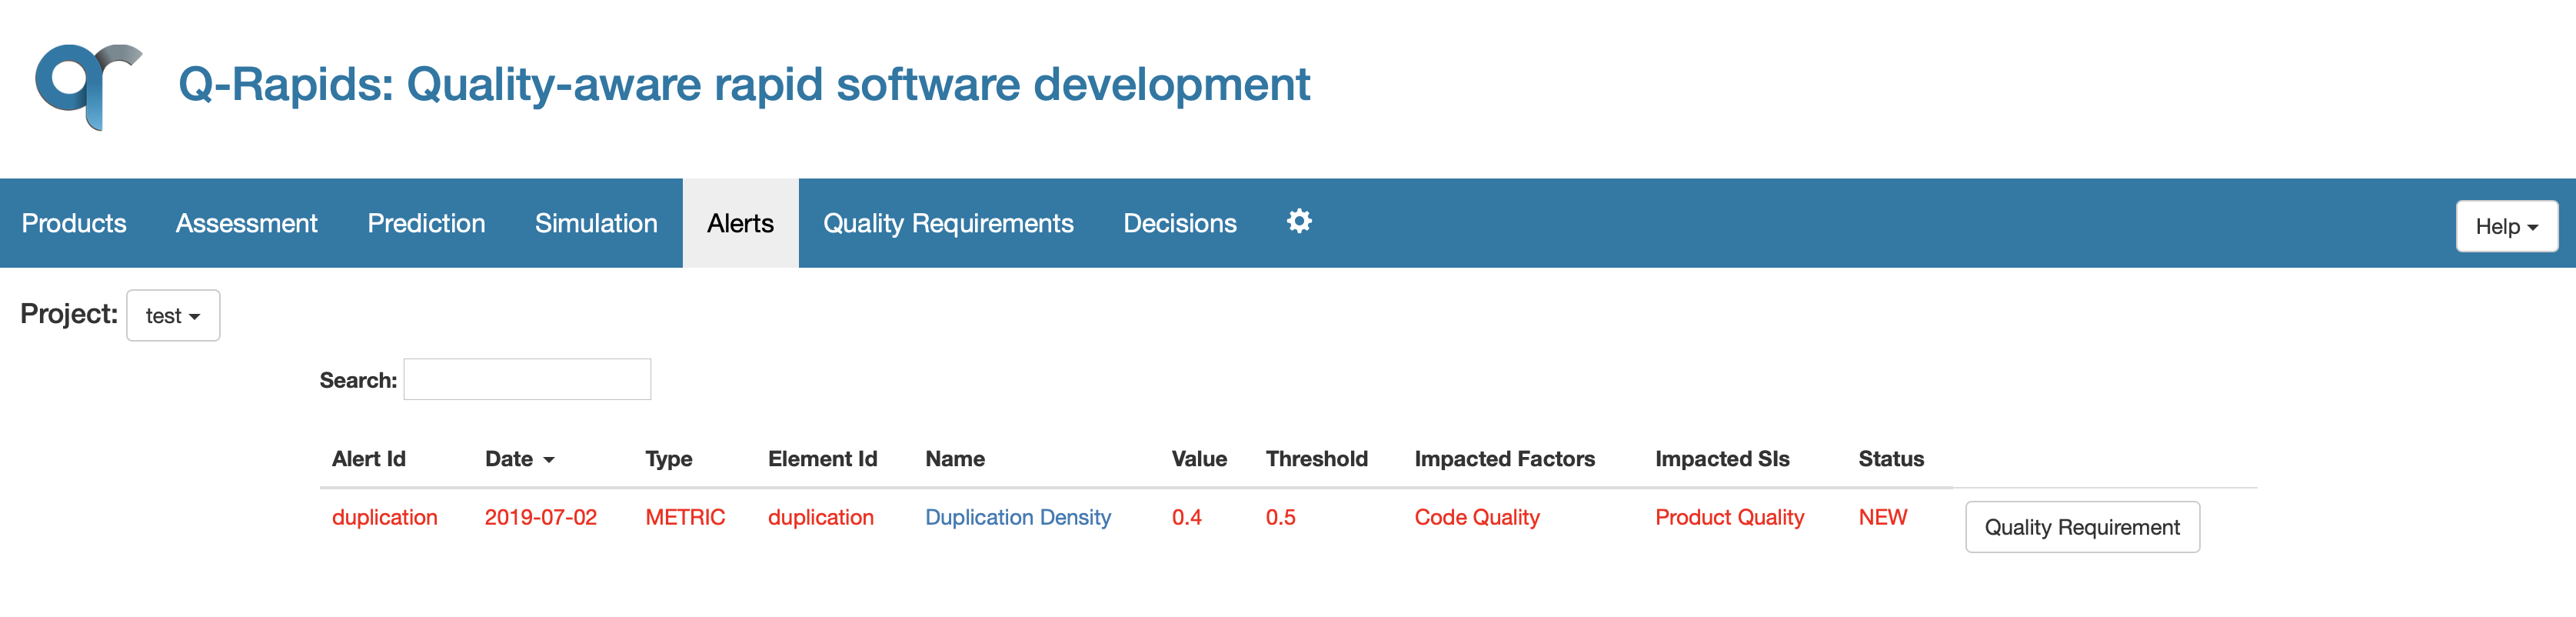
When an assessment value is below a given threshold, the user receives an alert warning her/him about this situation. In order to inform the user about this alert, a message is shown in the upper right corner of the dashboard, indicating how many new alerts are available and how many of them contain associated quality requirements.

When the user clicks this message, the Alerts view is shown (details in Section 4.1Quality Alerts). This view informs about all the alerts that have been received, highlighting the new ones in red. If the user wants to analyze the evolution of the element that caused the alert, the Name field can be clicked in order to see the historic assessment of the element.
If there is an available quality requirement associated, a button “Quality Requirement” appears next to it.
Once the user clicks on that button, he/she can see the content of the quality requirement candidate. In case that the alert has more than one candidate, the system allows to choose which one the user wants to see. A quality requirement candidate is composed of the goal, the requirement itself and the description of the quality requirement. These two last elements are editable.
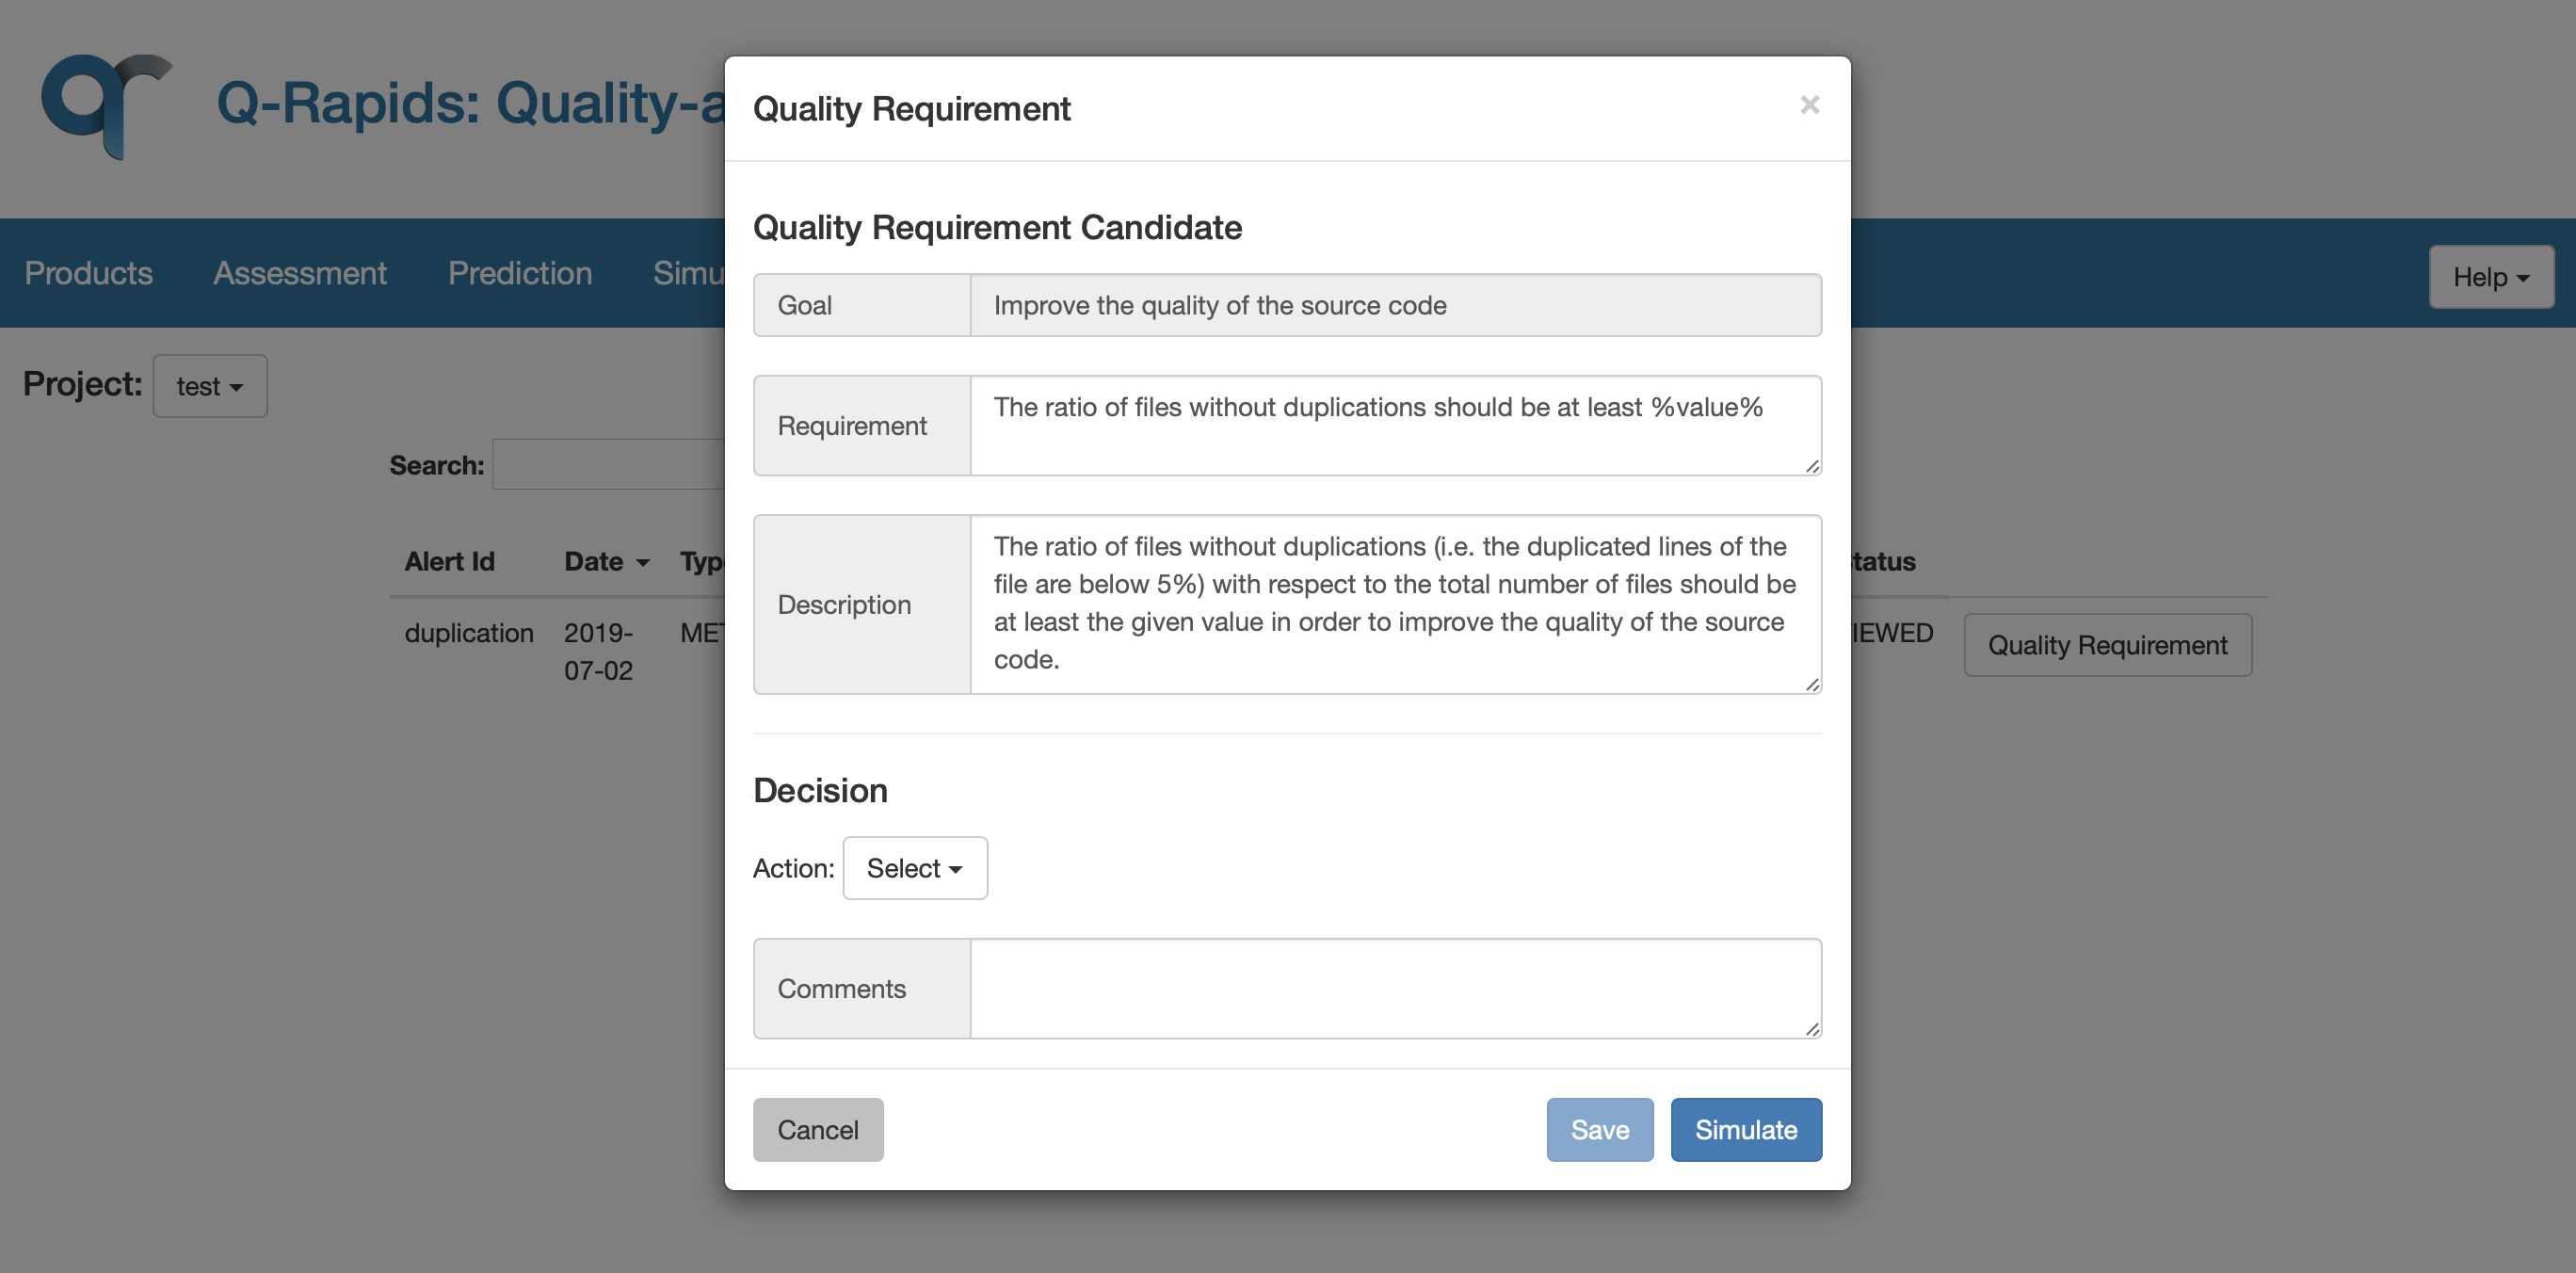
Then, the user can decide what to do with this quality requirement. In the Decision section, the user can set the action dropdown to Add Quality Requirement in order to accept it, or to Ignore Quality Requirement in order to ignore it. In the comments section, the user can write the rationale behind the decision. In order to save the decision, the user must click on the Save button. If the user does not want to decide at this moment, the Cancel button will close the view and no decision will be taken.
Before taking the decision, the user can gain insight on the effects of it by performing a simulation. If the user clicks in the Simulate button (at the bottom right of the suggested Quality Requirement view), the dashboard shows the Quality Requirements Simulation view with the Quality Requirement already loaded with its corresponding metric, ready to be changed by the user in order to simulate it as explained in Simulation from Quality Requirements to Strategic Indicators.
Once the decision is taken, it can be visualised in Decisions view (details in 4.3Decisions)
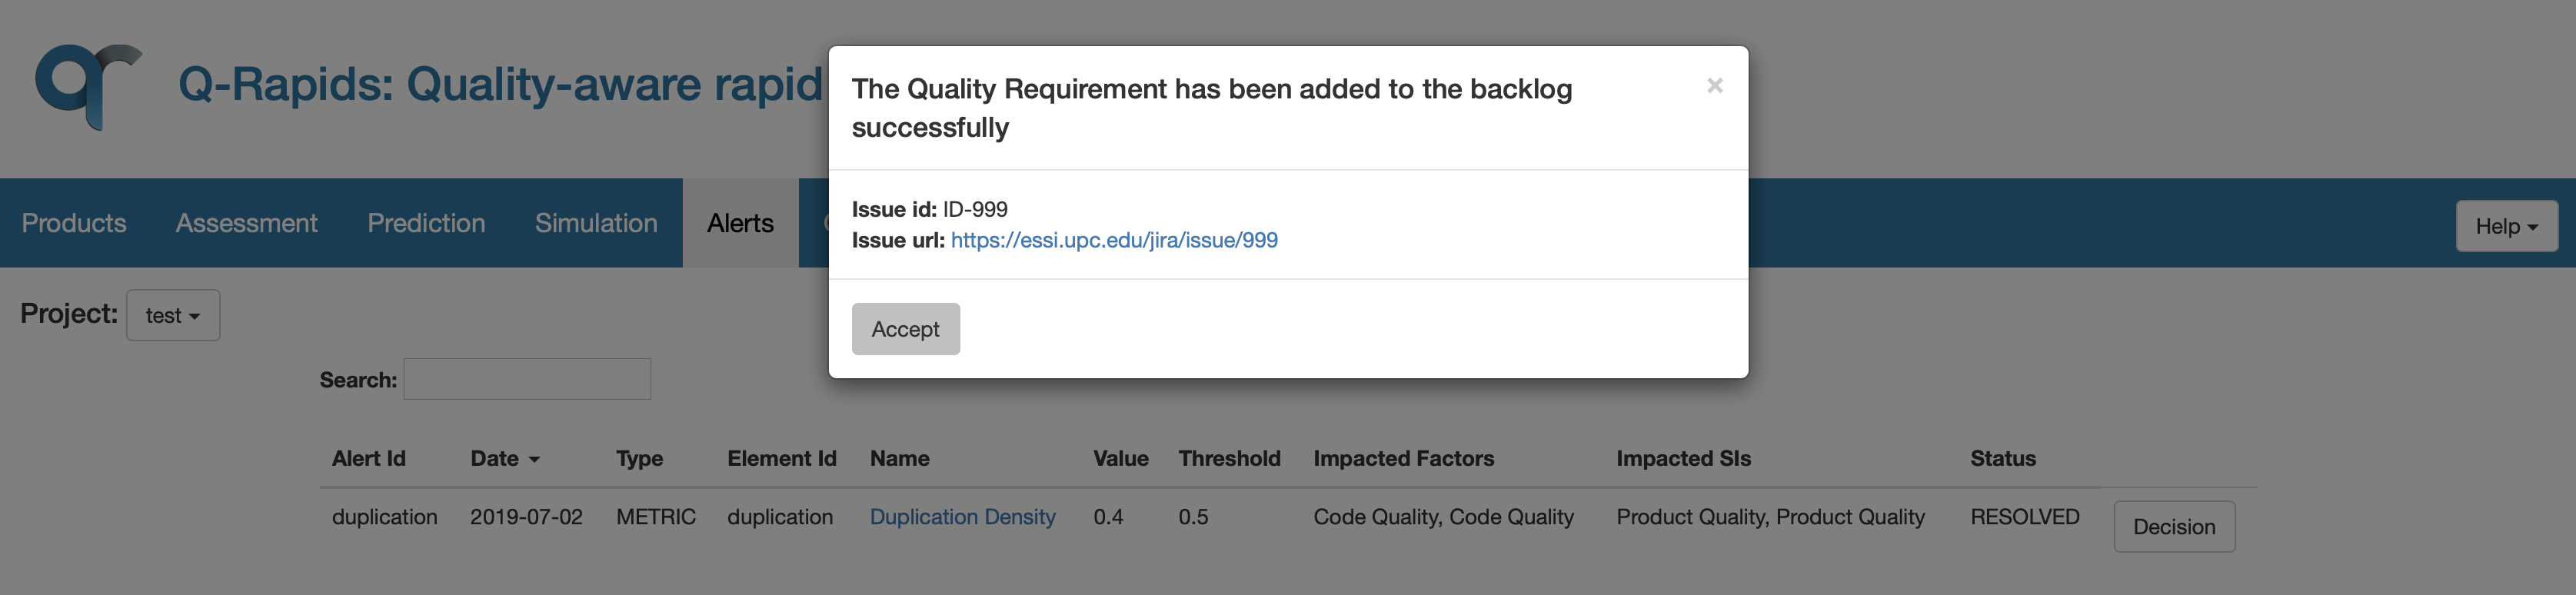
In case that the system is configured with the location of the product backlog, a new decision with an Add Quality Requirement action will create a new quality requirement on it automatically, with the Requirement and Description fields. Afterwards, the identifier and the URL of the new quality requirement are shown.
Finally, the dashboard provides a list that shows all the Quality Requirements that have been added as a result of a decision taken by a user (details in Section 4.2 Quality Requirements).